Step-by-step Guide: How to Back Up PC to WD My Cloud Home
What Is WD My Cloud Home?
WD My Cloud Home is a cloud storage tool that allows users to store personal files such as videos, music, photos, documents, and office 365 data. Developed by Western Digital Corporation, this service helps back up and protect data stored on a PC, comprising a hard drive section and a cloud service section.
A cloud backup solution allows you to remotely upload and share files with a reliable internet connection, and also enables you to back up data on the cloud service by directly inserting the hard drive into your Wi-Fi router. You can also create personal accounts and access passwords for friends or family members if desired.
WD My Cloud Home allows seamless sharing of information and collaboration at any time, and also enables cloud-to-cloud backup services using OneDrive, Dropbox, and Google Drive.
Setting Up WD My Cloud Home
To get started with this device, you'll need to connect it to an Ethernet network, configure software access, and register the product via the provided steps.
Step 1. Connect the power adaptor to the DC connector on the back of your My Cloud Home device, then plug the other end of the power adaptor into an AC power outlet.
Step 2. Wait until the device automatically powers on.
Step 3. Download and install the My Cloud Home mobile app using a mobile phone or tablet with an internet connection.
Step 4. Agree to the WD end user license agreement.
Step 5. Allow the app to find your WD My Cloud Home device.
Step 6. Once the device is detected automatically, press the Connect button. You'll then see a WD My Cloud Home picture on your phone alongside its security code.
Step 7. Tap on "Create Account."
Step 8. Input your valid email address and press Continue.
Step 9. Re-enter the same email address and press Continue.
Step 10. Enter a password that you'll easily remember and press Continue.
Step 11. To create an account, simply type your first and last names and press Create Account. The mobile app will then search for your device.
Step 12. After establishing a connection, the My Cloud Home mobile app will display the available wireless networks. Simply pick the preferred network for your device.
Step 13. Once you've set up the network, you'll see the "Allow Analytics" screen displayed, where you can select either Allow or Don't Allow.
Step 14. To enable the auto backup feature on your My Cloud Home mobile app, follow these steps: Go to the My Cloud Home app, tap on the three horizontal lines on the top left corner, and then tap on "Settings". Scroll down to the "Backup" section and toggle the switch next to "Auto Backup" to the "On" position.
Step 15. The WD My Cloud Home device is now fully set up and ready for use.
Backing Up Your PC to WD My Cloud Home
To back up your PC to a WD My Cloud Home, use the Backup and Restore tool on Windows. Connect your My Cloud Home to your PC via USB, then go to Control Panel > System and Security > Backup and Restore (Windows 10) or Control Panel > System and Security > Backup and Restore (Windows 7/8). Select "Set up a new backup" and choose the My Cloud Home drive as the destination.
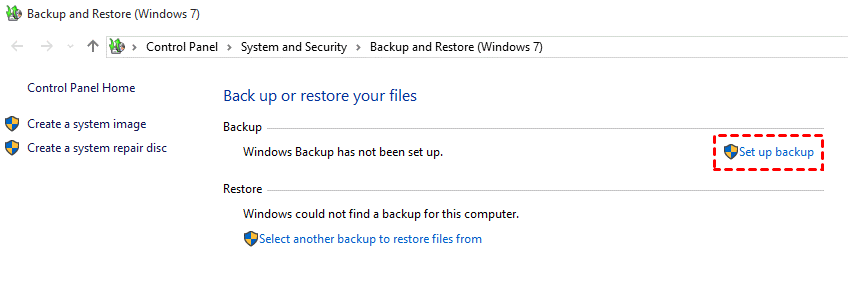
Step 1. To back up your files, go to your search bar, type "backup", and select the corresponding result. This will allow you to access the backup feature and initiate a backup of your files.
Step 2. To set up a Windows backup, click on the "Set up backup" button at the top right of the screen. Wait for a few seconds until the "Start Windows Backup" pop-up appears.
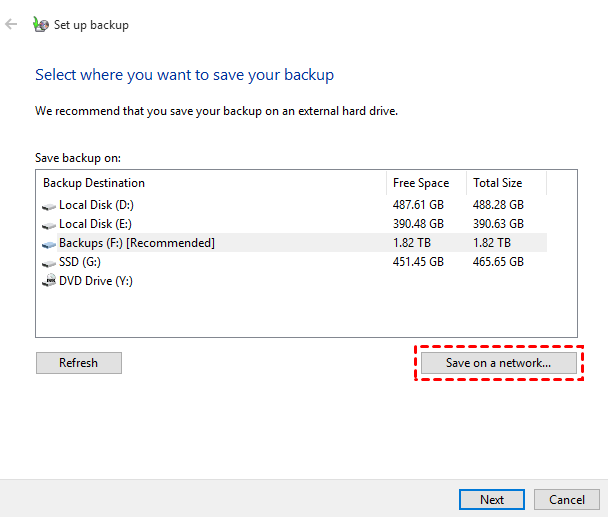
Step 3. Next, click "Save on a network."
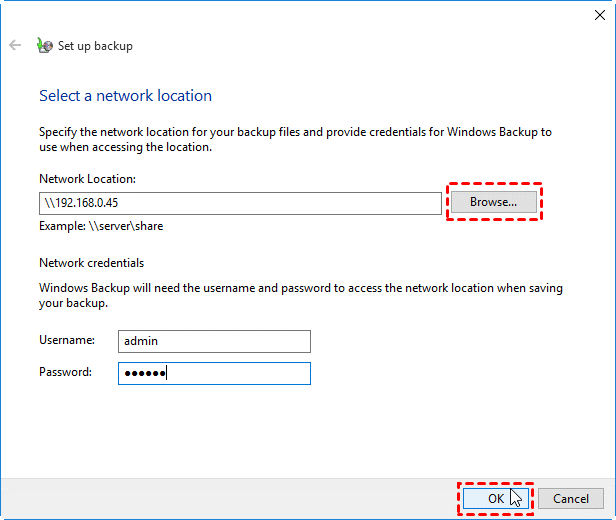
Step 4. Click on Browse to locate the WD NAS, or alternatively, type its IP address. Then, enter your username and password and click OK.
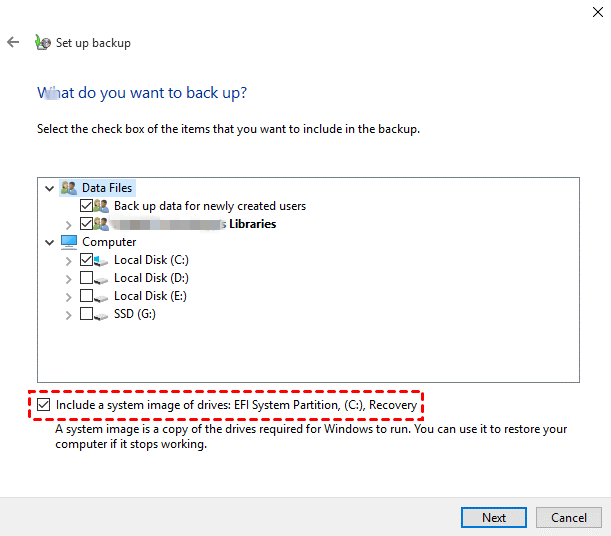
Step 5. To add a network location, select it and click Next. Then, choose "Let Windows choose (recommended)" to let Windows automatically select the files to back up by default, and click Next.
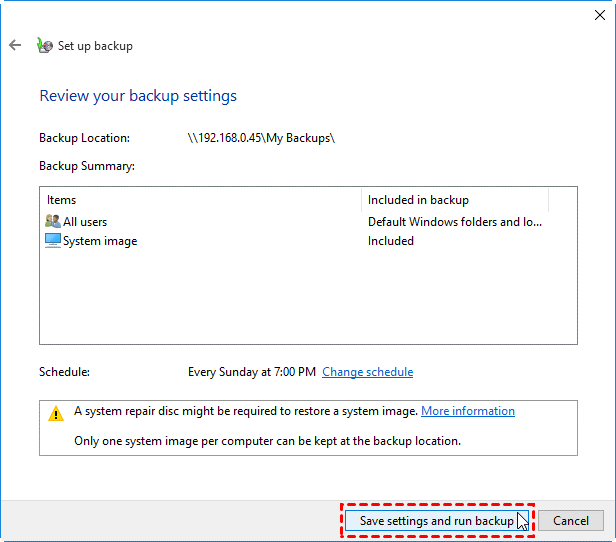
Step 6. To schedule a backup on the WD My Cloud NAS, open the Backup and Restore window, click on "Change schedule", select the desired backup frequency, and then click on "Save settings and run the backup".
Note: To use the Windows Backup and Restore feature to back up your PC to a WD My Cloud device, your device must run on Windows 7, 8, 10, or 11 Pro or Enterprise editions.
Restoring from a Backup on WD My Cloud Home
To restore backups granularly, you'll need to use the WD SmartWare software, which allows you to retrieve data that was backed up or lost data on your device and transfer it to either the original location or another destination.
- A selected retrieve content folder
- Their original location on your source device
You can achieve this through the following steps:
Step 1. The WD My Cloud Home desktop app needs to be downloaded and installed on the computer.
Step 2. Establish a connection between your computer and the My Cloud device.
Step 3. To retrieve the destination and source devices on the Home screen of your desktop app, select both "Retrieve destination device" and "Retrieve source device."
Step 4. To restore files from a device, select the backup volume that contains the files you want to retrieve. This volume is typically the one that was used to store the data you're trying to recover.
Step 5. Choose the destination where you want to copy the files that were retrieved from their original locations.
Step 6. Specify the files and folders to retrieve.
Step 7. Next, retrieve the files.
Advantages of Using WD My Cloud Home for Backup and Storage
My Cloud Home offers several advantages when it comes to back up and storage. It has the ability to automatically back up all devices connected to it, ensuring that important files are always safe and up-to-date.
- Unlimited storage space of up to 8TB.
- Supports a variety of devices, including Mac, Windows, and iOS.
- Allows connection through USB.
- You can use it on mobile phones.
- It is more affordable compared to other NAS devices.
Bonus Tip: How to Back Up Any Hard Drive to Cloud
The best third-Qiling Backup free is a party backup tool that allows you to back up your entire PC hard drive, OS, and system files to cloud storage platforms like Dropbox, Google Drive, OneDrive, and Qiling cloud.
It also gives you access to advanced backup options like:
- Scheduled backup
- Encrypted backup
- Incremental and differential backup
- Enable image reserve strategy, etc.
To use this software to back up your hard drive to the cloud, simply follow the steps below.
Step 1. Open Qiling Backup and choose "Disk/partition Backup" on the home page.

Step 2. It is available to back up a whole disk or a certain partition. Choose the one you need.
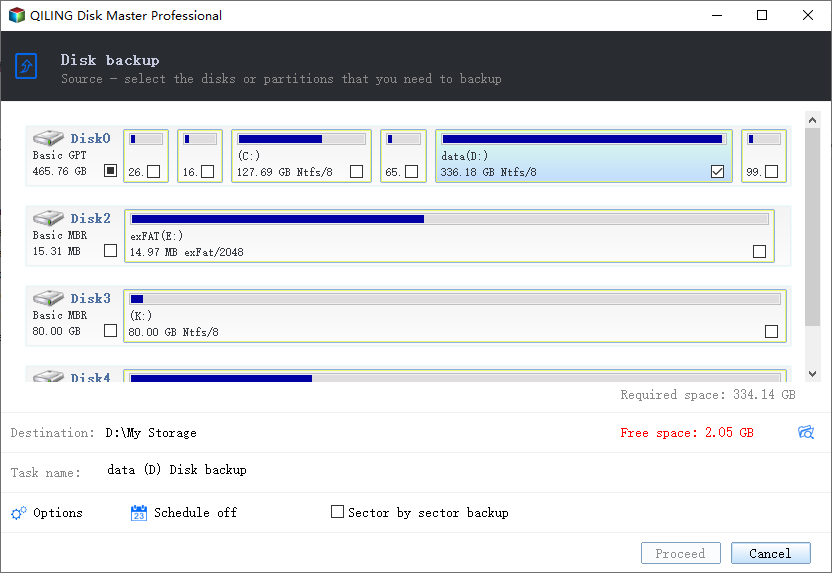
Step 3. Select the destination where you want to save the backup.

Step 4. For disk/partition backup, you can choose to save the backup to a local drive or a Network-Attached Storage (NAS) device.

Step 5. After the backup process is completed, the task will be displayed at the left. From there, you can manage your backup further by clicking on it, which will allow you to recover it, create incremental backups, and more.

Qiling Backup allows you to restore critical data saved on the cloud whenever possible, with a quick process that lets you restore a backup to its original location or replace existing files, which is significant for recovering data following a data loss. The cloud backup feature provided by Qiling is secure, flexible, and cost-effective, offering a free storage space of 250GB.
Other Features of Qiling Backup Free
- Bootable backup and recovery following the accidental deletion of files
- Password-enabled backups for data protection
- Enhanced backup efficiency
- Simple backup management
- Restore system backup image to dissimilar hardware
If you're looking for a convenient way to back up your Windows PC, consider trying Qiling Backup today. This software offers a free trial version that you can use to get started, and you can download and install it on your computer right away.
Related Articles
- Top 10 Best Free Open Source Backup Software | 2022 Selections
- Suggestions for SD Card Backup Devices [Hot in 2022]
- Install & Pair Bluetooth on Windows 10/11
- Ransomware Prevention: Protect Your Data with Backup Strategies
- Can I Transfer My Netflix Downloads to Another Device?
If you're switching devices or don't want to re-download Netflix videos, this guide can help you transfer your Netflix downloads to another device, including mobile devices. - How Do I Transfer My Netflix from One Device to Another?
If you're switching devices or PCs, you can easily transfer your Netflix videos to the new device without having to download them again. Follow a simple guide to move the files, which involves using tools and methods that will make the process easy and hassle-free.