How to Back Up Raspberry Pi SD Card on Windows, Linux and Mac
Backing up your Raspberry Pi SD card is a must, as it stores your operating system and important files, without which your device can't function properly. Fortunately, there are many ways to back up your SD card.
This guide explains how to back up your Raspberry Pi SD card on various devices, including Windows, Linux, and Mac, highlighting the importance of backing up your SD card and utilizing a free tool called Qiling Backup Free.
Why It's Important to Backup Your Raspberry Pi SD Card
To ensure the safety of your Raspberry Pi SD card data, it's crucial to back it up regularly. This will prevent data loss in case of accidental deletion, damage, or file corruption, allowing you to revert to a working baseline configuration when needed.
To avoid losing vital information and freeing up space, it is recommended to back up your Raspberry Pi SD card regularly, especially after a few days of testing and exercise, to ensure that your data is safe and you can run new projects without space issues.
If your device has limited storage or the new project will take up a lot of space, transferring your data to another SD card or storage device helps to free up space without losing important configurations and settings. This way, you can still have access to your data and settings, but with more available storage space.
How to Back Up Your Raspberry Pi SD Card in Windows
To back up your SD card in Windows, you can use either Qiling Backup Free or Win32 Disk Imager. Qiling Backup Free is a tool that allows you to create a backup of your SD card, while Win32 Disk Imager is another option that can be used for the same purpose. Both tools can be used to create a backup of your SD card, making it easy to recover your data in case something goes wrong.
Using Qiling Backup Free
Qiling Backup Free allows you to back up your SD card on Windows 10/8/7, clone your Raspberry Pi SD card to a larger or smaller one, and backup to Google Drive, external hard drive, One Drive, or NAS.
To back up your Raspberry Pi SD card, you can use Qiling Backup to restore saved files if your SD card gets corrupted. This process involves backing up your SD card on another hard drive, and the steps to get started with Qiling Backup are outlined below.
Step 1. Click "Disk backup" to initiate the backup process for the entire disk or a specific partition.

Step 2. You can back up a whole disk or a specific partition. Simply select the disk or partition you want to back up and the software will create a backup of it. This allows you to restore your system to a previous state if something goes wrong.
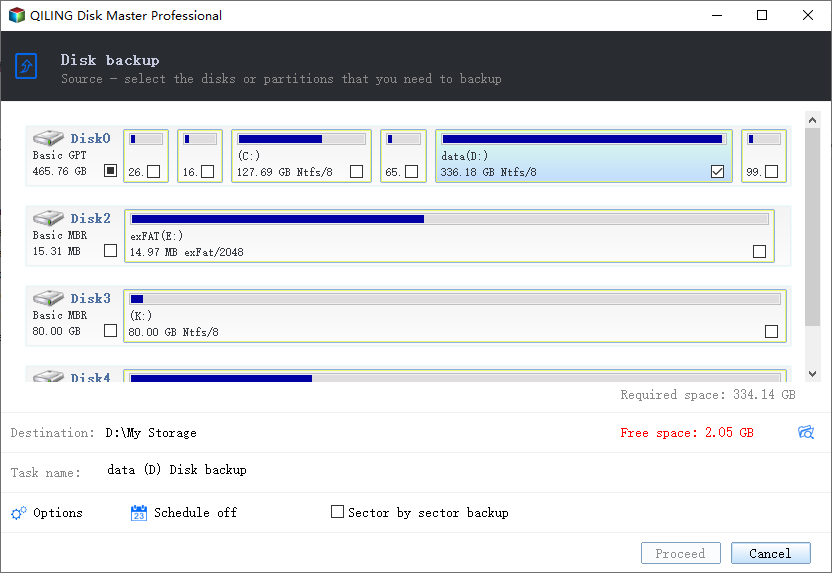
Step 3. Select the destination where you want to save the backup.

Step 4. For disk/partition backup, you can choose to save the backup to a local drive or to a Network-Attached Storage (NAS).

Step 5. After completing the backup process, your task will be displayed on the left side. You can manage your backup further by clicking on any task, which allows you to recover it, create incremental backups, and more.

See also:
Using Win32 Disk Imager
1. Insert the SD card into your PC.
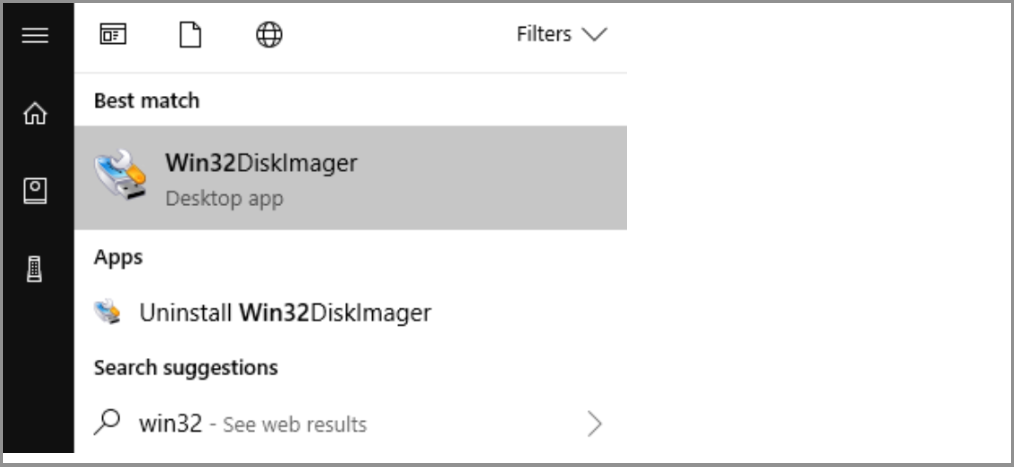
2. Download Win32 Disk Imager, a free tool that won't incur any charges, to use for your needs.
3. To start, install and launch the Win32 Disk Imager tool with administrator privileges.
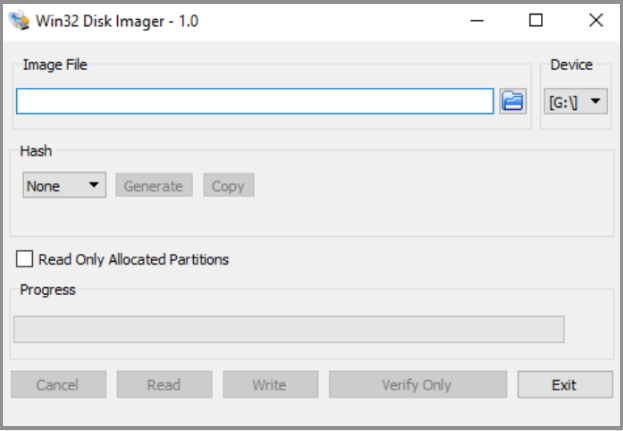
4. Save your backup files in a designated location, making sure the file name ends with a .img extension.
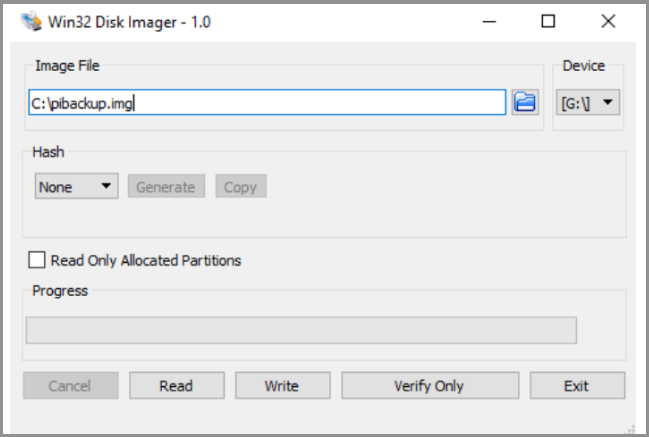
5. To start the backup process, click on the "Read" option. The backup progress can be tracked using the loading bar, and the duration will depend on the size of the files being backed up.
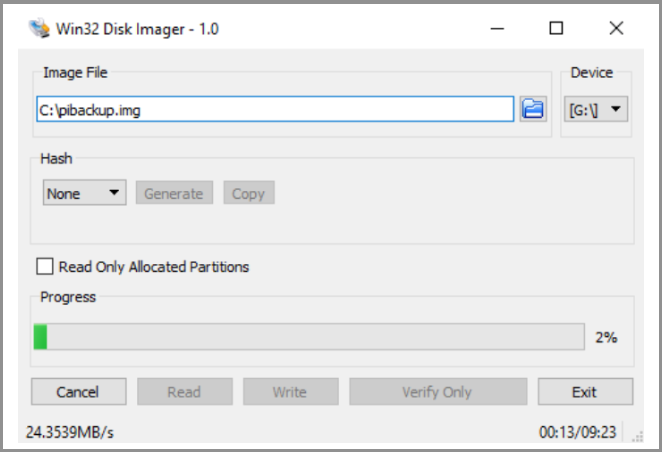
6. Once the file backup process is complete, the Win32 Disk Imager tool displays a pop-up alert to confirm whether the read was successful.

7. To confirm that your file image has been saved to the selected location, click OK . This ensures that your SD card data has been backed up safely.
How to Back Up Your Raspberry Pi SD Card in Linux
1. Insert the Raspberry Pi SD card into your computer via a built-in card reader or USB.
2. To list the file system, open the terminal window and enter the command "sudo fdisk -l". This will display the file system present.
3. To find the device name allocated to your SD card, you can use the `df` command in your terminal. The `df` command displays the disk space usage.
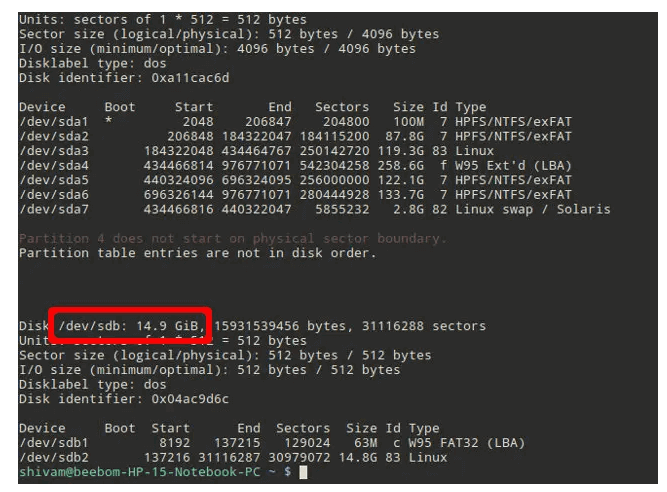
4. To copy the file image to your hard disk, use the `dd` command, specifying the source file (`if=/dev/SDcardname`) and the destination file (`of=~/raspbian_backup.img`). This ensures the correct data is copied from the SD card to the backup file on your hard disk.
5. Once the backup process of your SD card is complete, the terminal will display the output below, indicating that the backup was successful. The output will show the path to the backed-up file.

6. Once you've finished using the SD card, you can remove it from the device to use it for something else. You can restore the data that was backed up at any time.
How to Back Up Your Raspberry Pi SD Card on Mac
1. Insert the Raspberry Pi SD card into your Mac device.
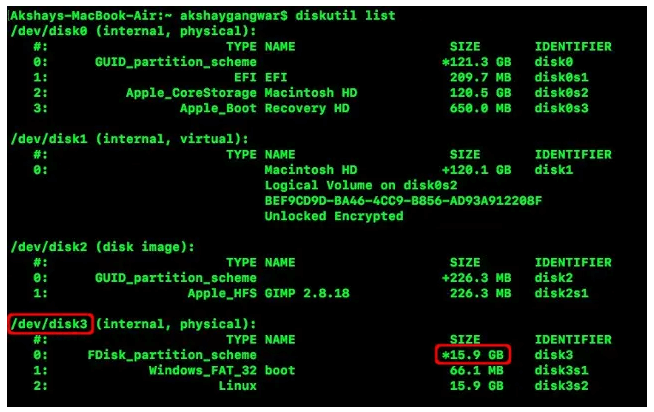
2. Open the terminal and type this command: diskutil list.
3. Check the listed device name for your SD card.
4. To unmount your SD card, use the command `diskutil unmount /dev/SDcardname` in the terminal, replacing "SDcardname" with the actual name of your SD card. This will safely disconnect the card from your computer.
5. The command to write the file image to your hard disk is: sudo dd if=/dev/SDcardname of=~rasbian_backup.img, where "/rasbian_backup.img" represents the file to write to.
6. Once the backup process is complete, an output command will be displayed.
7. You can now safely remove the SD card from your Mac as the data is now backed up and can be restored at any time.
Conclusion
To back up your Raspberry Pi SD card, you can use various tools on different operating systems, including Win32 Disk Imager or Qiling Backup Free on Windows, terminal commands on Linux, and diskutil list on Mac. This allows you to easily transfer your data and settings to a new SD card or device.
We recommend using Qiling Backup Free to back up your Raspberry Pi SD card, as it's a convenient tool that allows you to save and retrieve your files from the Qiling cloud, offering a free storage space of up to 250GB.
Get Qiling Backup Free to start backing up your SD card with ease.
Related Articles
- 5 Reasons to Download Qiling Free Backup Software
- What Does Qiling Backup Do | Here're the 5 Most Popular Functions
- Data Protection - How to Use OneDrive to Backup and Restore
- Top 8 Best Enterprise Backup Software in 2022
- How to Transfer System Settings in Windows 10
You can transfer installed applications and personal data in Windows 10 while keeping all your system settings using Qiling PC transfer software. This allows you to move your system settings to a new device. - Resolved: Transfer TeamViewer with License to a New Computer
If you're looking for a complete way to transfer Apex Legends to another PC or hard drive, we've got you covered. On this page, we'll show you how to easily transfer Apex Legends to a new computer or hard drive, providing a seamless gaming experience.