How to Play Windows Games on Chromebook [Latest Guide]
A Chromebook is a laptop developed by Google that runs on the Linux-based Chrome OS. The biggest advantage is that users can do nearly everything online via Google's Chrome browser, eliminating the need for large storage and a fast processor. This makes Chromebooks relatively cheap and ideal for tasks like word processing, note-taking, and data-processing, where files can be stored online.
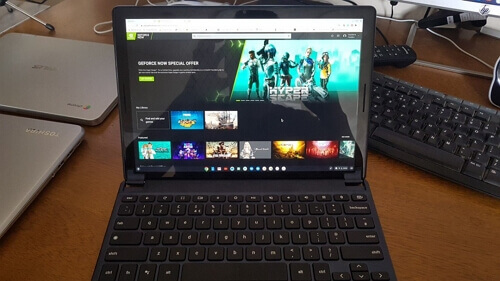
Can I Play PC Games on a Chromebook?
Chromebooks are a good option for gaming, according to Google, as they provide access to PC, console, and mobile games. However, their capabilities are limited to a few PC games due to the lack of large memory and fast processors, which are typically required for most PC games. On the other hand, Chromebooks can run most Android apps, making them suitable for playing mobile games.
How to Play Games on Chromebook - Create A Portable Windows USB
For Chromebook users who want to play Windows PC games, a portable Windows USB drive can be a quick solution. By creating a portable Windows USB drive, you can boot your Chromebook via the drive and have Windows OS on your device, allowing you to play Windows PC games.
To create a portable Windows USB drive, you can use a third-party tool like Qiling OS2Go, which is designed for novice users and requires no advanced computer knowledge. Simply prepare the necessary items, and Qiling OS2Go will handle the rest, making it easy to create a portable Windows USB drive.
Things You Need:
- A Windows computer with the game you want to play installed on it, where the game is installed on the system drive.
- To free up space on your Windows computer's C drive, you'll need a USB drive or external hard drive that's large enough to store all the files currently on the C drive. You can check the used space by going to Disk Management, selecting the C drive, and then looking at its properties. This will give you an idea of the total space needed to transfer all the files from the C drive to the external drive.
Download and install Qiling OS2Go on your Windows computer.
To create a portable Windows USB, start by preparing the necessary items and following the step-by-step guide. This will allow you to create a portable Windows USB that can be used on any computer.
Step 1. To start, install Qiling OS2Go on your Windows computer, which will show you how much space is being used on your system drive. Next, plug in a USB drive that is larger than the system drive's used space. Then, choose the target USB drive and click Next to continue.
Step 2. Qiling OS2Go will notify you that the following operation would delete all data on your drive. Make sure you have backed up all important data, then click Continue to proceed.
Step 3. Adjust the disk layout by selecting the target drive and choosing the same disk layout as the resource drive, or editing it to fit your needs. If using a Solid State Drive as the Windows bootable drive, tick the option and click Proceed.
Step 4. Qiling OS2Go will create a portable USB drive, which may take a while depending on your OS and network condition. Once the progress reaches 100%, the USB drive will be bootable.
Step 5. To start, insert a portable Windows USB into your computer and turn it on. Then, press the required key (usually F2, DEL, or F10) to access the BIOS settings. From there, select the option to boot from the USB drive. This will allow you to install Windows from the USB drive.
Note: To ensure a smooth boot process, it's essential to match the boot mode of your portable USB drive with that of your target computer. If they differ, you might encounter issues with booting.
Windows To Go vs VM
Windows To Go creates a portable Windows USB drive that can be used on any computer, but this feature was removed in Windows 10 2004 and later versions.
A virtual machine (VM) is a software-based computer that runs on a physical host computer, using dedicated amounts of CPU, memory, and storage. It is a self-contained computing environment that can run in a window, behaving like an actual computer, and is typically stored as a file, or image.
Unfortunately, if your Windows is later than Windows 10 2004, you won't have access to the Windows To Go feature. Additionally, the VM needs to be installed on a Chromebook or Mac computer, which can be a problem if your device doesn't have enough storage space.
For Mac Game Lover - How to Play Fortnite on Mac 2022
Fortnite fans on Mac, rejoice! We're here to help you play Fortnite on your Mac computer again, making it possible to enjoy the popular game on your Apple device.

Final Thoughts
If you're on a tight budget and want to play Windows games on your Chromebook, a cost-effective solution is to create a portable USB drive using Qiling OS2Go. This tool allows you to easily create a portable USB drive with just a few moments of preparation, eliminating the need to learn about its underlying principles. Simply prepare a large enough USB drive and you'll have a portable Windows gaming experience on your Chromebook. If you're interested, download Qiling OS2Go and give it a try!
Related Articles
- For Mac Game Lover - How to Play Fortnite on Mac 2021
- 2022 Best WinToUSB Alternative for Creating a Portable Windows 11/10/7 USB Drive
- Without Boot Camp | How to Play Valorant on Mac
- How to Play Car Mechanic Simulator on Mac?
- Delete the Windows.old Folder in Windows 10 [4 Ways]
To delete the Windows.old folder in Windows 10 safely after upgrading, simply follow these steps: Go to File Explorer, click on “This PC” or “Computer”, then click on the “C:” drive, and find the “Windows.old” folder. - How to Resolve Dell Boot Loop in Windows 10 Easily?
Have you encountered Dell boot loop in Windows 10? Learn how to resolve the problem easily from this page.