How Can You Put Windows 10 on A USB
You can put Windows 10 on a USB drive, also known as creating a portable Windows 10 USB drive, which allows you to install Windows 10 on any computer with a USB port. This is a convenient way to have a portable version of Windows 10, and it's useful for various purposes such as installing Windows 10 on a new computer or repairing a Windows 10 installation. To create a portable Windows 10 USB drive, you'll need to download the Windows 10 installation media, and then use a tool such as Rufus or the Media Creation Tool to create the USB drive. This process is explained in more detail in the rest of the post.
Why Put Windows Installation on a USB?
A portable Windows USB drive allows users to run Windows 10 on any computer, making it a convenient solution for accessing a computer with hardware issues. It can also be used to boot any computer with the same system and configuration, and even works on a Mac computer.
How to Put Windows 10 on USB?
There are two common ways to put Windows 10 on a USB drive: using the built-in Windows To Go feature or third-party software. The Windows To Go feature allows you to create a portable version of Windows 10 that can be booted from a USB drive, while third-party software provides an alternative method to achieve the same result. In the following parts, we will delve into the details of these two methods.
Method 1. How to Use Windows To Go
The Windows To Go is a built-Windows To Go is a feature that was first released in Windows 8, and it is only available in Windows Enterprise and Education editions. It allows users to create a portable version of Windows 10 on a USB drive, making it possible to boot and run Windows from the USB drive. This feature is useful for creating a portable Windows installation that can be used on different computers, but it requires the specific Windows edition to function.
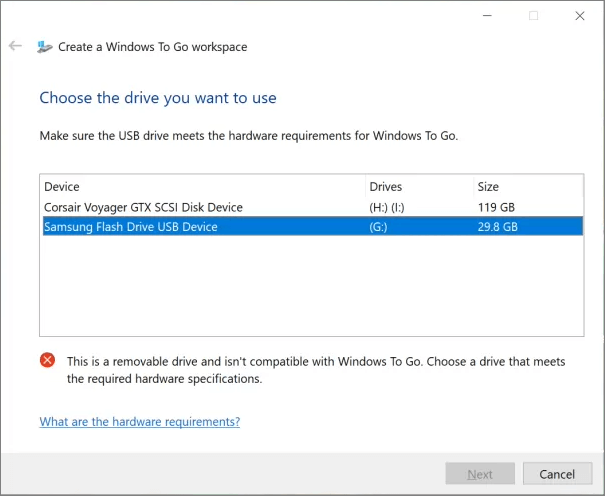
Step 1. Insert the certified USB drive you want to use as Windows To Go drive into your PC.
Step 2. Launch Windows To Go Workspace, choose the target USB drive as the destination.
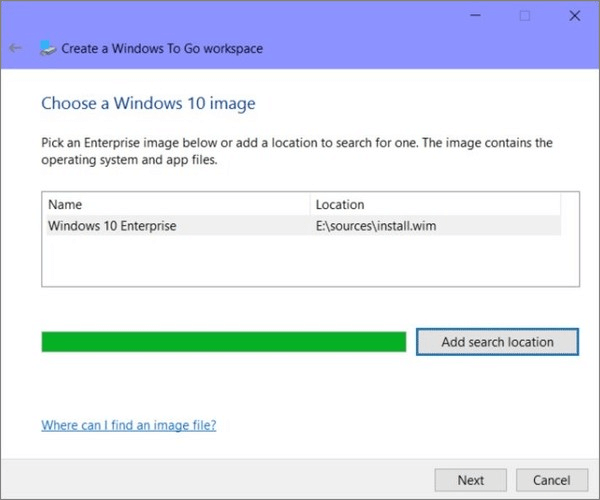
Step 3. To proceed, choose a Windows image page. You can also click Add Search Location and navigate to the .wim file folder, select the Windows 10 Enterprise or Education image, and click Next.
Step 4. To encrypt your Windows To Go drive, you can select to use BitLocker with your Windows To Go Workspace, or click Skip if you don't want to.
Step 5. After inserting the USB drive used for Windows To Go, verify it and click "Create" to begin the workspace creation process. This process may take around 20-30 minutes to complete, and once finished, a confirmation page will appear.
Method 2. Put Windows 10 on USB Using Qiling OS2Go
The latest Windows 10 version has discontinued the Windows To Go feature, making it inaccessible to users who are not part of the Enterprise or Education programs.
If you want to create a portable Windows environment, we recommend using Qiling OS2Go, which provides all features of Windows To Go with less technical requirements.
Step 1. To use Qiling OS2Go, install it on your Windows computer, which will display the used space on your system drive. Then, plug in a USB drive that is larger than the used space on your system drive. Next, choose the target USB drive and click Next to continue.
Step 2. Qiling OS2Go will notify you that deleting all data on your drive would be a permanent operation. Make sure you've backed up any important data before proceeding. Click Continue to proceed with the deletion.
Step 3. Adjust the disk layout to match the resource drive, or customize it as needed. If using a Solid State Drive as the Windows bootable drive, select the corresponding option and click Proceed.
Step 4. Qiling OS2Go will create a portable USB drive, which may take a while depending on the operating system and network conditions. Once the progress reaches 100%, the USB drive will be bootable.
Step 5. To boot from a portable Windows USB, start your computer with the USB inserted, press the required key (usually F2, DEL, F10, etc.) to access the BIOS, and select the option to boot from the USB disk.
Note: Ensure the boot mode of the portable USB and your target computer are the same, whether it's UEFI or Legacy, to avoid booting issues.
Bootable USB Drive Vs. Portable USB Drive
A bootable USB drive is a USB stick that can be used to start a computer, while a portable USB drive is a USB stick that can be used to transfer files between computers. In other words, a bootable USB drive is used to install an operating system or to repair a computer, while a portable USB drive is used to carry files from one computer to another. The key difference is that a bootable USB drive needs to be formatted with a specific operating system's file system, such as UEFI or BIOS, whereas a portable USB drive can be used with any operating system and does not require any specific formatting.
When using a Portable USB Drive, users can easily access Windows 10 on any hardware by simply connecting the drive to any system, allowing for quick and convenient access to their system on any hardware at any time.
Unlike traditional installation methods, bootable USB drives require users to install the entire Windows operating system, including all necessary files, to a new PC. This process involves following specific booting options to load the Windows 10 files onto the system, where users must then customize everything from scratch.
To create a Windows 11 portable USB drive, also known as Windows 11 to Go, you'll need a 64-bit Windows 11 installation media, a 64-bit compatible USB drive with at least 32GB of free space, and a PC with Windows 11 installed. You'll also need to enable the "Create a bootable device" option in the Windows 11 installation settings.
Qiling OS2Go is a clean and lightweight Windows to go creator for Windows 11, fully compatible with the operating system, allowing for a simple and fast creation of a bootable USB drive for Windows 11.
Conclusion
Here we have given you the two best options to put Windows 10 on USB. It would be best to try both of these methods to know which one is suitable for you. If you have any queries or facing any issues during the process, feel free to contact the support team: support@idiskhome.com.
Related Articles
- Download and Create Windows 10 To Go
- Windows 10 Boot Drive Size & How to Create a Windows 10/11 Bootable Drive
- How to Play Windows PC Games on Linux
- Windows Installation | How to Install Windows on Chromebook
- File Missing after Windows 10 Update (1809)? Let's Recover!
Losing important files can be a nightmare, but there are simple ways to recover them. One approach is to use file recovery software, which can scan your device for deleted files and restore them. Another option is to use cloud storage services, which automatically back up your files and allow you to access them from anywhere. - How to Ghost Windows 10 64-bit/32-bit Computer Easily
How to ghost Windows 10 64-bit or 32-bit to another computer easily? The best ghost program will help you create Windows 10 ghost image safely with just a few clicks.