3 Ways to Migrate Installed Games from C Drive to Another Disk in Windows 11
| Workable Solutions | Step-by-step Troubleshooting |
|---|---|
| Option 1. Qiling Disk Master | Step 1. Run Qiling Disk Master on your PC; Step 2. Select programs to move from C drive to another drive...Full steps |
| Option 2. Windows Setting | Step 1: Go into the Windows settings by pressing Windows key+I; Step 2: Now, on the bottom left, click on Apps...Full steps |
| Option 3. Registry | Step 1: Make a new folder with the name Program Files (86) in the drive where you want to migrate the game...Full steps |
3 Ways to Migrate Installed Games from C Drive to Another Disk Windows 11
When we install a game on our computer, it's often installed on the C drive by default. This is a problem because the C drive is the most vulnerable drive on our computer, as it contains all the system files, including Windows. If Windows gets corrupted, the entire C drive will be formatted, meaning all data on it will be lost.
To minimize the risk of taking up valuable space on your C drive, you can simply copy and paste the entire system folder of the game to a different drive. This can be a good option, especially since many modern games can take up to 10 GB of storage space.
Your computer might struggle to copy-paste files to other drives, especially if you're dealing with heavier games. To ensure a smooth migration and save your data in case of a Windows malfunction, consider alternative methods for transferring files.
In this article, we will discuss the top most effective methods.
How to Migrate Installed Games from C Drive to Another Disk in Windows 11
Here are three ways to migrate installed games from a C drive to another disk in Windows 11. You can use the built-in Windows feature called "Move" to relocate games installed through the Microsoft Store, or use a third-party program like GameSave Manager or GameMove to move games installed through other means.
1. Use Qiling Disk Master to Migrate Installed Games
Qiling Disk Master allows for easy migration of installed games from the C drive to any other drive, transferring even heavy files (over 50 GB) in a quick and automatic process.
If you're new to these migration tools, don't hesitate to reach out to Qiling's technical support team 24/7 for assistance. They're available to help whenever you need them, and you can contact them via email or phone call.
Qiling PCtrans offers a free trial period and is a cost-effective option compared to other transfer applications.
Step 1. Run Qiling Disk Master on your PC
To continue, go to the "Backup and recovery" section and click on "File sync".

Step 2. Select programs to move from C drive to another drive
1. Select the C drive and choose the programs (marked as "Yes") that you want to transfer.

2. Select another drive on your computer as the destination and click "Transfer" to start the process.

Step 3. Finish the transferring
Wait patiently until the transferring process finishes, then click "OK" to confirm.
After the process is complete, you can restart your PC if necessary, which will keep all changes on your PC and allow you to run programs from another hard drive without reinstalling them.
To free up more space on your C drive, consider moving Minecraft to another hard drive. This simple step can help you better manage your C drive and make the most of your available storage space. By relocating Minecraft to a different drive, you'll be able to enjoy more C drive space and a clutter-free system.
You can also learn how to find your Steam CD keys in this article.
2. Use Windows Setting to Migrate Installed Games
Moving PC games to another disk on your Windows computer is a straightforward process. If you have a laptop or PC with limited SSD storage, transferring games to a new destination is necessary. You can relocate PC games to another disk using Windows' internal settings, eliminating the need for third-party applications or programs.
Here's how to go about it:
Microsoft's Universal Windows Platform (MUWP) enables the same programs or games to be used across various devices, including tablets, computers, and mobile devices.
Step 1: Go into the Windows settings by pressing Windows key+I.
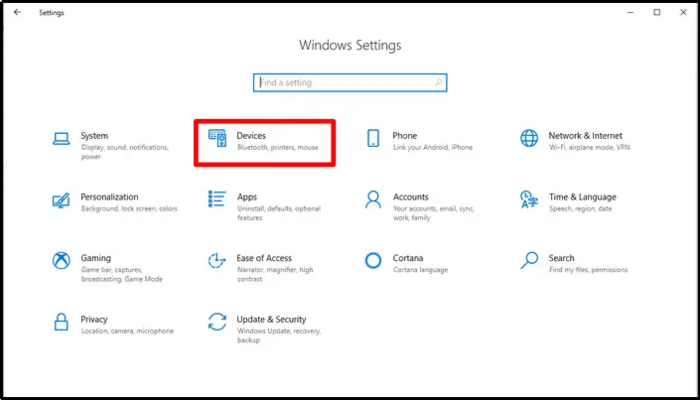
Step 2: Now, on the bottom left, click on Apps.
Step 3: To migrate a game, go to the Apps and features pane, click on the game you want to move, and select "Move" to transfer it to a different drive.
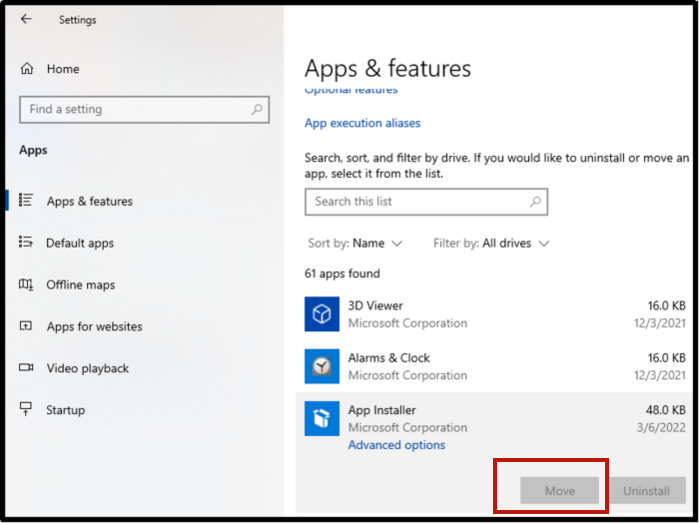
Step 4: To move a game to a different drive, select the drive where you want to move the game, and Windows will automatically start the transfer process.
Be patient, as the copying time will depend on the file size and your computer's processing speed.
Note: If you want to move substantial PC games downloaded by programs like Steam, Origin, Epic Games, and others, you can see an alternative in the launcher's options. This option may be hidden in the Settings Menu, so be sure to check there.
3. Use Registry to Migrate Installed Games
To transfer installed games from the C drive to another drive, follow these steps:
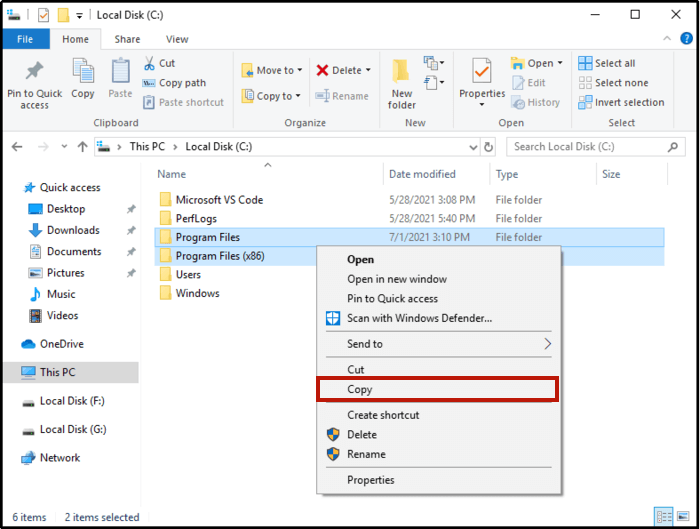
Step 1: Create a new folder named "Program Files (86)" in the drive where you want to move the game.

Step 2: Now, copy the whole program files and program files (x86) directories from the C drive to this folder.
Step 3: To open the Command Prompt, press the Windows key + R to open the Run dialog box, then type "CMD" and press Enter. This will open the Command Prompt window.

Step 4: Copy-paste the below-mentioned command in the CMD and press Enter.
Robocopy" C:\ Program Files" " X:\ Program Files" / mir
Robocopy" C:\ Program Files(x86)" " X:\ Program Files(x86)" / mir
Note: Replace the X in command with drive letter where you created the new folder
Step 5: Again press Win+R and now enter regedit.exe.
Step 6: Once you've located the folder, you can simply change the drive from C to another disk (e.g.
To disable the Windows 11 update, you need to create a registry key in the following location: HKEY_LOCAL_MACHINE \ SOFTWARE \ Wow6432Node \ Microsoft \ Windows \ CurrentVersion.
Your game has now been successfully migrated to the new Program Files (86) folder, which you created in your desired drive.
Conclusion
It's a good idea to move games from the C drive to another drive to avoid system crashes and improve game performance. This can help prevent data loss and keep games running smoothly.
The quickest and most convenient way to migrate is by using Qiling PCTrans, which offers a trial version to test its functionalities.
Related Articles
- How to Change Adobe Photoshop CC Install Location?
- Window 7 won't boot? Reliable Solutions Is Here
- How to Move Files from SSD to HDD in Windows 10
- How to View, Find, and Clear IE History [Full Guide]
- Files and Folders Backup with QILING disk master Software
QILING disk master provides a File Backup feature to backup files and folders by copying those files from a source folder to a destination image. - How to Use File Sync in QILING disk master Software
File Sync is an utility that has been designed to be easy to use and quick to update two folders in two different places.