Window 7 won't boot? Reliable Solutions Is Here
If your PC is stuck on the Windows starting screen or you're experiencing errors during boot-up, it's possible that the issue lies with your Windows system files, registry, or drivers. In such cases, a System File Checker (SFC) scan and a DISM (Deployment Image Servicing and Management) scan can help identify and fix corrupted system files. You can also try running a System Restore to revert your system to a previous point when it was working correctly.
When Windows 7 won't boot, it means your computer won't respond, which can be frustrating. In some cases, simply restarting your computer can resolve the issue, but this is not a long-term solution as it can cause data loss and security risks.
Before moving on to the fixes, it's essential to find the cause of these problems, which may include various factors.
- Corrupt system files
- Virus or malware attack
- Battery drained
- Incompatible hardware components
- Outdated drives
- Overlocking
- Overheating
List of Methods to Fix Windows 7 Failed to Start
If your Windows 7 won't boot, you can try troubleshooting by checking the boot order, running a System File Checker, and disabling any recently installed hardware or software. Additionally, you can try booting in Safe Mode, running a System Restore, or using a System Repair Disc to repair or reinstall Windows 7.
1. Apply Startup Repair
2. Repair MBR with Command Prompt
3. Run System Restore
4. Fix Boot Issue in Safe Mode
5. Check Your Hardware Connection
6. Rescue Data to New PC and Reset Old PC
Windows 11/10 Won't Boot? Try 6 Fixes
Don't worry, we have effective solutions to fix the issue without losing your data. Except for the boot repair solutions, we also provide a data migration tool to transfer your data to a safe place, ensuring it won't be lost.
1. Apply Startup Repair
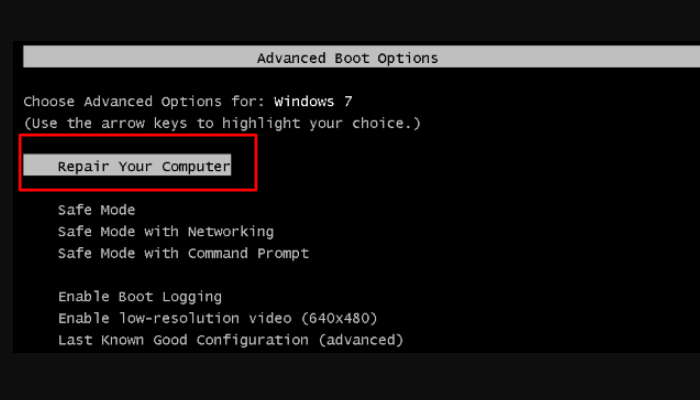
To run a startup repair on your Windows 7, there are three methods you can apply. Firstly, you can boot your computer from the Windows 7 installation media, then select the "Repair your computer" option. Alternatively, you can press the F8 key while booting up your computer to access the Advanced Boot Options menu, where you can select the "Repair your computer" option. Finally, you can also restart your computer and go to the Advanced Boot Options menu by pressing the F8 key, then select the "Repair your computer" option.
Step 1. After restarting your PC, press F8 to enter advanced mode. Select "Repair your computer" to open system recovery options, where you can check for errors by clicking on startup repair.
Step 2. To access the startup repair, your computer must fail to reboot three times, after which the repair process will open, allowing you to resolve any errors.
Step 3. To fix errors in your Windows installation, connect your Windows installation disk to your PC, boot into BIOS, and change the boot order to prioritize the disk. This will allow your PC to boot from the disk, and you can then select the "Repair PC" option to enable startup repair and begin fixing any issues.
2. Repair MBR with Command Prompt
MBR (Master Boot Record) has a feature that allows you to record information about the hard disk, specifically locating each partition on the hard disk.
If your MBR (Master Boot Record) is corrupt, it can prevent your Windows 7 from booting. To resolve this issue, follow these simple steps:
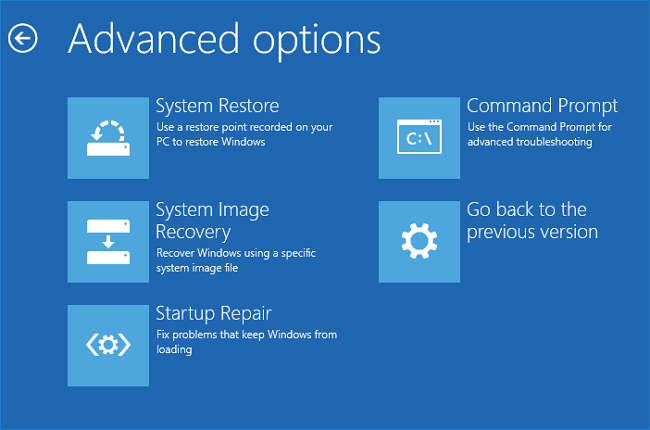
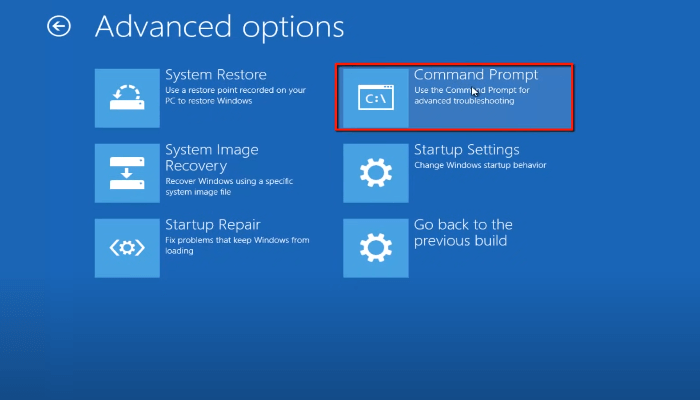
Step 1. Open your System Recovery Options screen and from the list of options provided, choose the "Command prompt" option.
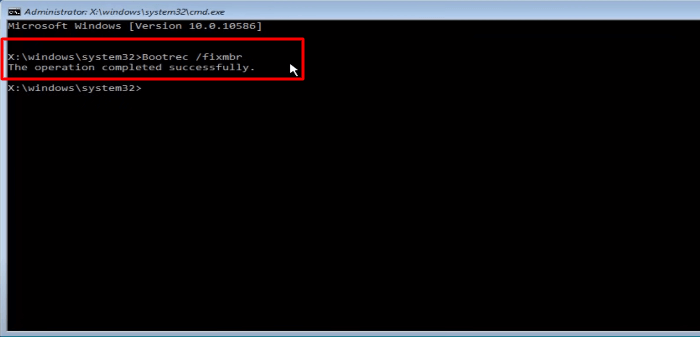
Step 2. Now, type "bootrec.exe/ FixMbr" and press enter.
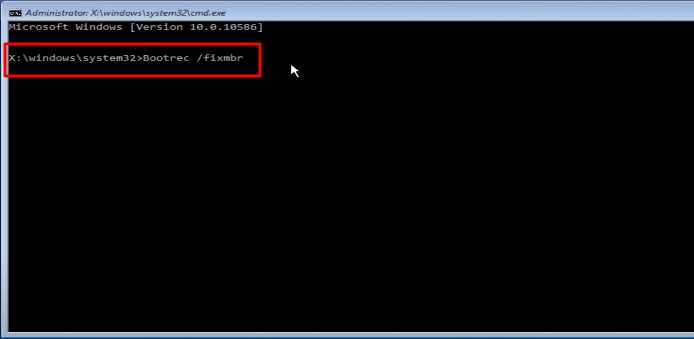
Step 3. If the MBR repair is successful, a notification will be displayed stating "operation completed successfully".
3. Run System Restore
To restore your system using the System Restore method, follow these steps:
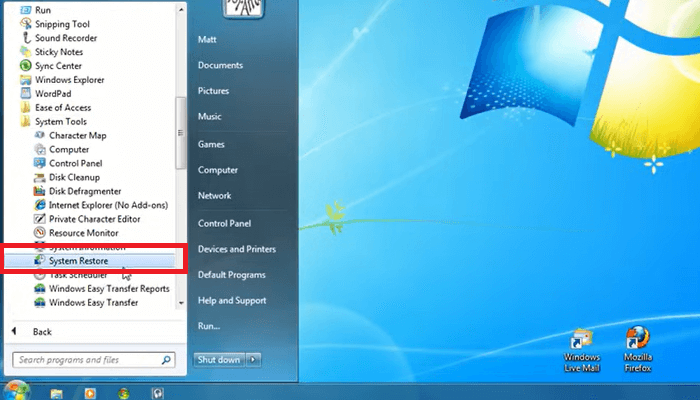
Step 1. To run the System Restore, turn on your Windows, click on the accessories, go to the system tools, and press System Restore.
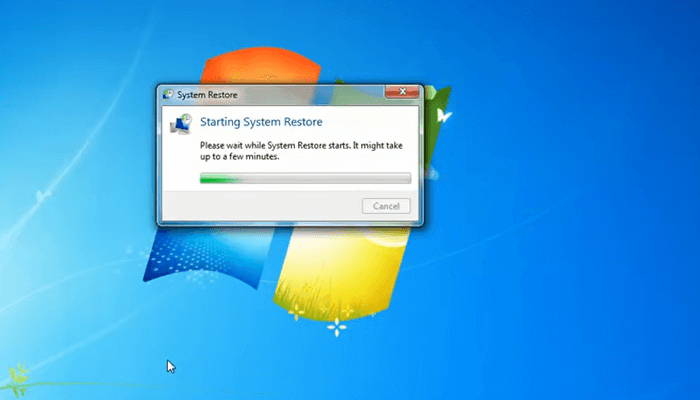
Step 2. A System Restore dialog box will open.
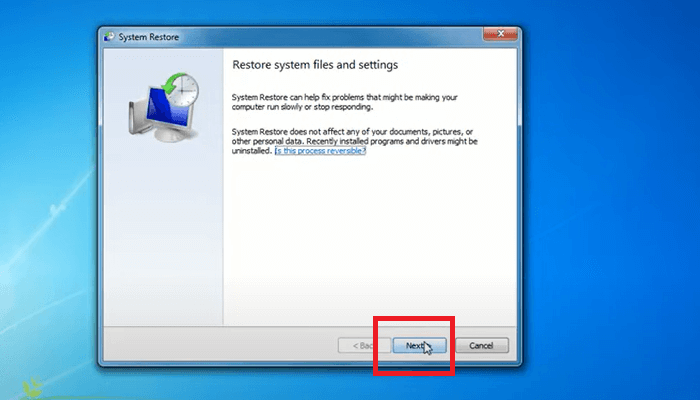
Step 3. Open "System Restore" click on next.
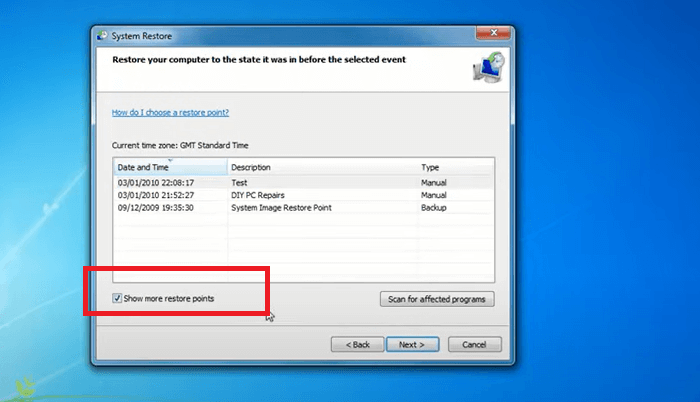
Step 4. To restore your computer to a previous state, click on the restore point created when your computer was in a safe and sound condition. If the list of restore points doesn't show all available options, select "Show more restore points" to view additional choices.
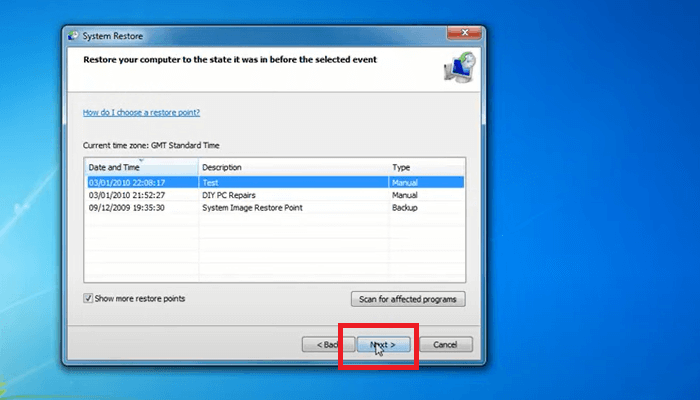
Step 5. Click on "Next" and let your computer restore your system to the point you have selected.
4. Fix Boot Issue in Safe Mode
Safe mode is a useful feature that allows you to remove problem-causing software without interference, and also makes it easier to use specific troubleshooting tools. To resolve Windows boot issues in safe mode, you can follow these steps:
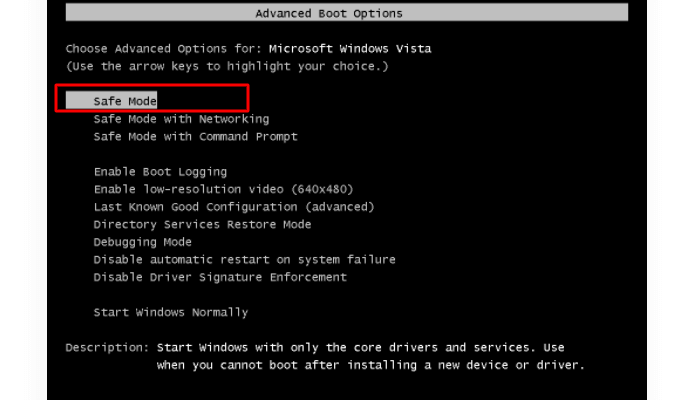
Step 1. To enter safe mode, press F8 when your computer is booting, then select "Safe Mode" from the menu that appears.
Step 2. Now, from the safe mode, go to advanced options, then startup settings, and finally restart.
Step 3. Once your computer restarts, you will see your computer preparing automatic repair.
5. Check Your Hardware Connection
You might have connected your PC with an external device that's not compatible with your Windows 7 PC, causing it to not boot. This could be due to a hardware component issue, where a newly added or replaced part is not compatible with your device.
These external devices can be your
- Printer
- Scanner
- Media card
- Digital camera
- Video recorder
Check your devices and connections, and try removing any devices that might be causing the issue. If the problem persists, it's possible that there's a hardware connection issue.
6. Rescue Data to New PC and Reset Old PC
If you've tried various methods to fix your Windows 7 boot issue and nothing has worked, a viable solution is to transfer your data to a new computer and then reset your old PC. This approach can help you get rid of a buggy or unstable version of Windows, effectively resolving the problem.
To transfer your data to a new PC and reset your old PC, you can follow these steps. First, connect both PCs to the same network, then use a cloud storage service like Google Drive, Dropbox, or OneDrive to transfer your files.
Step 1. Migrate data to another device via Qiling Disk Master
To safely transfer data from your old PC to your new PC, use a professional tool like Qiling Disk Master that makes the process easy and doesn't require reinstalling.
Qiling Disk Master is a great transfer software that enables users to transfer their applications, data, and accounts between computers. It offers a range of useful features that make it a valuable tool for users.
- Recover files and programs from a dead computer.
- It supports all the versions of Windows and OS.
- It lets you transfer your user accounts and settings
- You can transfer your favorites and custom files
- The software offers three transfer modes: same LAN, local disks, and image files.
With Qiling Disk Master, you can now transfer your data with ease and confidence, no longer worrying about losing your valuable information. This software is a reliable solution for all your data transfer needs, providing a seamless experience.
Important note: To ensure your system files are not corrupted, you can run a check using the built-in Windows utility called System File Checker. This utility scans your system files and replaces any corrupted or changed files with a cached copy from a trusted location. To run System File Checker, you can type the command `sfc /scannow` in the Command Prompt and press Enter.
- The partition where the system is located has a drive letter assigned to it, which is typically the letter "C" in most systems. This drive letter is used as the root directory for the system, and all files and folders are stored under this root directory.
- The system partition contains the system and programs file directory, which is accessible.
- The registry is not damaged
Step 1. Take out the disk from the old PC.
- Disconnect the power supply. Please take out the battery if it is a laptop.
- You want me to tell you about the hard disk in the old PC. The hard disk is the main storage device in a computer, responsible for storing all the data, programs, and operating system.
- Disassemble the shell by using a screwdriver to find the hard disk.
- To remove the hard disk, you need to disconnect the hard disk and cable, then take out the hard disk.
Step 2. Connect the hard disk to the new PC.
Multiple connection methods:
- To connect an old hard disk drive to a new PC, you can use a USB hard disk drive enclosure. This device allows you to connect the old disk to the enclosure, and then plug the enclosure into the new PC via USB.
- A USB hard disk drive adapter is a device that connects a traditional hard disk drive to a modern computer's USB port, allowing the old hard drive to be used with the new computer. It acts as a bridge, enabling the transfer of data from the old hard drive to the new computer. The adapter essentially converts the old hard drive's interface to a USB interface, making it compatible with the new computer.
- If the new PC is a desktop, the old disk can be connected as a secondary drive, allowing for a seamless transition of files and programs.
Step 3. Recover/Migrate the applications, files, accounts from the old disk.
1. Download and launch Qiling Disk Master. Choose the "Data Rescue" mode and click "Start".
2. Browse the steps and click "Scan".
3. Check that your disk is connected to your PC, then select the old disk you want to recover and click "Continue".
4. To rescue your desired applications, files, and accounts, select them from the list provided. This will help you identify what you want to recover and ensure a smooth rescue process.
5. Wait for a few seconds to complete data transfer.
Step. 2. Reset Windows 7
After transferring your data to a new PC, you can perform a clean installation of Windows 7, which will help you boot your PC quickly and improve its performance.
Once you have installed Windows 7 on your PC, you can transfer your data from your old PC and resolve any boot or startup errors.
To Sum Up
We know how frustrating it can be too stuck at the start of your Windows, especially when you have important tasks to cover. But don't be annoyed; we have suggested to you the best solutions that can solve your boot problems.
To reinstall Windows 7 and avoid losing data, you can use Qiling Disk Master to safely transfer your data. This software supports all versions of Windows and OS, and can even migrate old PC files to a new one. If you have any questions, you can email support@idiskhome.com.
Related Articles
- (Four Ways) Move Users Folder to Another Drive Windows 10 or Windows 11
- HomeGroup Not Showing Up Windows 10/11? Share Files Without HomeGroup
- How to Transfer Everything From your Old Computer to your New Computer Windows 11
- How to Transfer Files from Mega to Dropbox
- Move GoTo Opener to Another Computer
How to move goto opener to another computer. - How Do I Switch/Move Internet Explorer to Firefox - Qiling
As the Internet Explorer comes to its end of life, many users are looking for solutions to move data from Internet Explorer to other browsers. Switching IE favorites, passwords, etc., to Firefox on your current PC or between two computers is easy to accomplish.