Free! How to Move Files from OneDrive to Another OneDrive
PAGE CONTENT
1. Move Files from OneDrive to Another OneDrive via Copying
2. Move Files from OneDrive to Another without Copying
3. Move Files from One User Account to Another
Move Files from OneDrive to Google Drive/iCloud/SharePoint/Local Drive
Introduction
OneDrive is a cloud storage service developed by Microsoft that allows users to store and sync files across devices, offering up to 5GB of free storage.
Specifically, OneDrive enables you to perform the following functions:
- Share files, photos, and folders with friends and family.
- Sync files between cloud storage and your local computer.
- Backup files to prevent ransomware attacks.
- Access saved files from multiple devices using the client software.
You may want to transfer files from OneDrive to another OneDrive for many reasons, such as ensuring data safety and accessibility if your current account has issues, allowing you to conveniently access your files from the second account.
Moving files to another account is also appropriate if you want to transfer important documents from a shared account to another shared account, preventing others from accessing your documents. Additionally, moving files from OneDrive to another OneDrive account can be done to create backups for your data, keeping copies in case of data loss or a ransomware attack.
You may need to transfer files because your storage space is almost full, prompting you to move some files to free up space and keep only the most essential ones.
Move Files from OneDrive to Another OneDrive via Copying
Moving files from one OneDrive account to another can be done manually by copying. This involves downloading the files from the first account and re-uploading them to the second, with the download and upload speeds depending on your network.
You can apply the following steps to transfer the files:
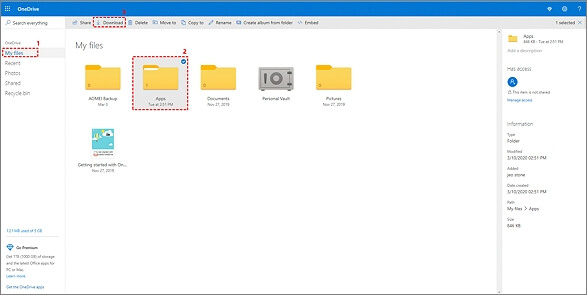
1. Sign in to your OneDrive account.
2. To transfer files from one OneDrive account to another, select the files you want to move and click on the "Download" button. This will download the selected files to your local computer. Once downloaded, you can then upload these files to the second OneDrive account.
3. To switch between OneDrive accounts, you can log out of the first account and then log into the second one. This will allow you to access files and data from the second account without interfering with the first account.
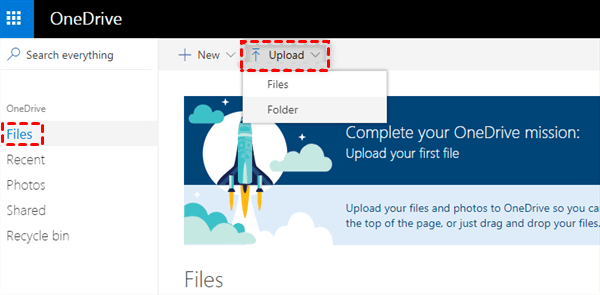
4. Once logged in, tap on "Upload" and select the files you initially downloaded. Wait until the upload process completes to transfer all the files to your second OneDrive account.
Note: When downloading multiple files from the first OneDrive account, they'll be saved in a zipped folder on your computer. You'll need to unzip them before uploading them to the second account.
Move Files from OneDrive to Another without Copying
If you don't want to move files across OneDrive accounts using the download-upload feature, you can use other alternatives such as syncing or Power Automate. Syncing involves setting up a new OneDrive account and syncing the files from the old account to the new one, effectively moving them. Power Automate, on the other hand, allows you to automate the process of moving files from one OneDrive account to another by creating a flow that copies files from the source account to the destination account. Both methods can be used to move files across OneDrive accounts without having to download and re-upload them.
1. Transfer Files from OneDrive to Another OneDrive via Syncing
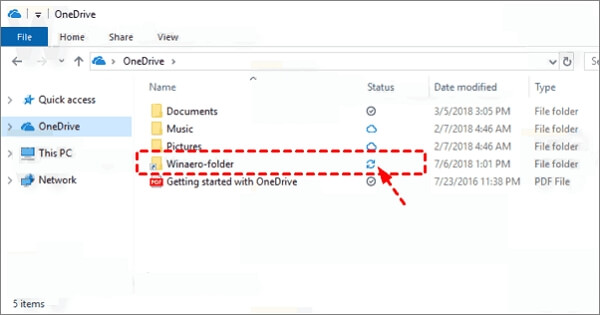
When you install OneDrive on your computer, it creates a folder with its name, allowing you to drag and drop files into it for automatic syncing to OneDrive. You can then sync these files to another OneDrive account.
To sync OneDrive files to another account, follow these steps:
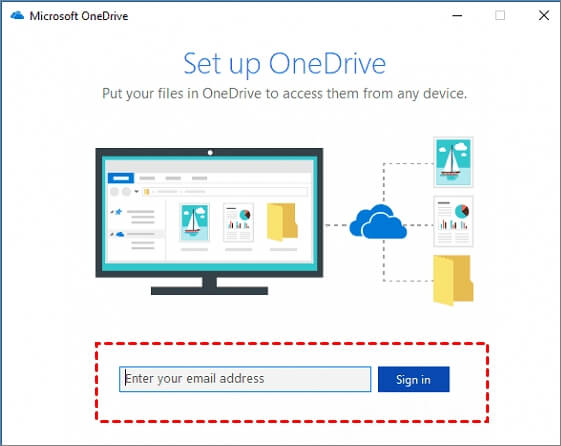
1. Download and install the OneDrive desktop app on your PC.
2. Sign in to your Microsoft account.
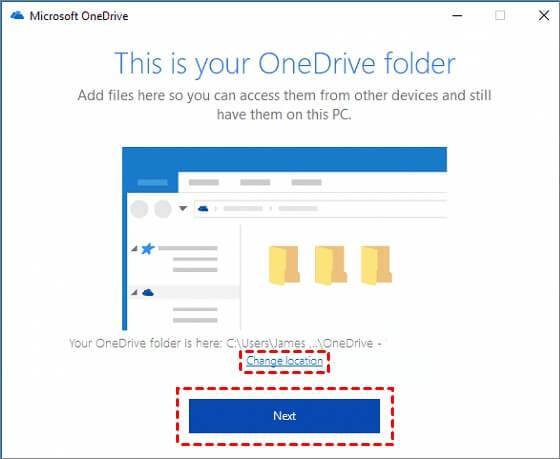
3. On the "This is your OneDrive folder" screen, click Next to accept the default storage location for the OneDrive folder.
4. On the next screen, select the "Sync all files and folders in OneDrive- On MSFT" option and click Next.
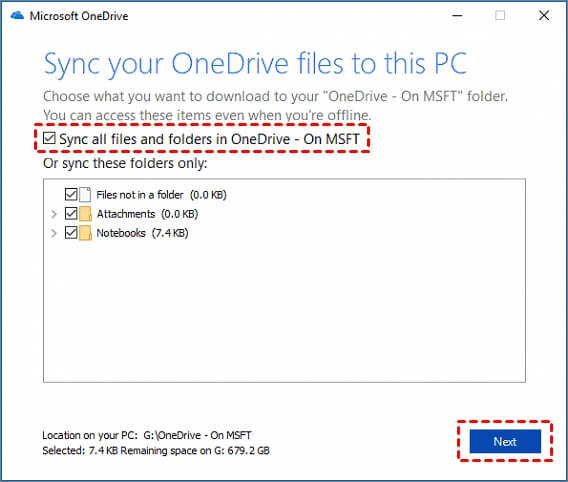
5. The computer creates a OneDrive folder in the default location, which is C:\Users\Username\OneDrive.
6. To add a second OneDrive account, click on the OneDrive icon on the taskbar, then click on "Settings" in the popup window.
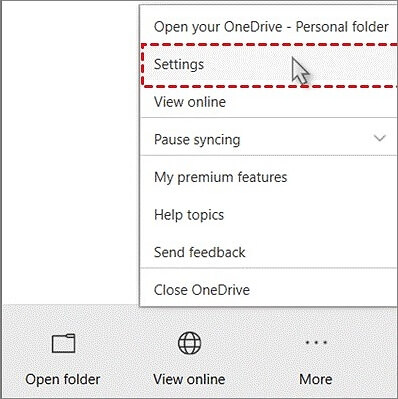
7. To create a second OneDrive account, click the "Add an account" button, then follow the steps to create a new account, which will result in having two OneDrive folders on your local hard drive.
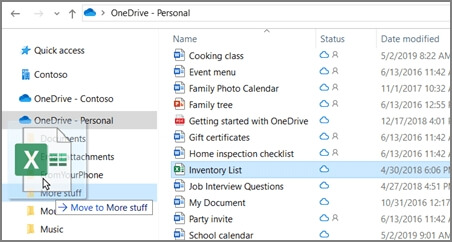
8. To sync files between the OneDrive folders, simply drag and drop each file from the first OneDrive folder into the second OneDrive folder, repeating the process for all files.
2. Transfer Files from OneDrive to Another OneDrive via Power Automate
To move files across OneDrive accounts using Power Automate, you can follow these steps. First, create a new flow in Power Automate and add a "OneDrive - Get files" action to retrieve the files you want to move.
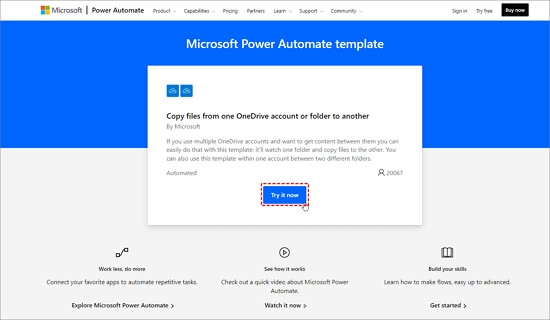
1. Click here to visit the Power Automate website.
2. Click on Try it now when the page "Copy files from one OneDrive account or folder to another" opens.
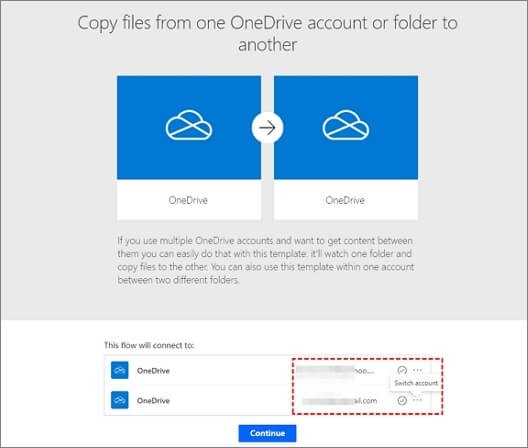
3. To add another account to your OneDrive, sign in to your existing account, click on the three dots icon, and select "Add new connection" to add another account, or click on "Continue" if you already have another account.
4. Configure the source and destination folders from the first and second OneDrive accounts respectively and click on Save.
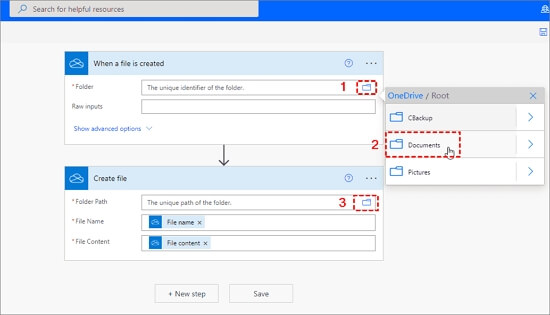
Note: If you choose to root both accounts, everything will be transferred from the first account to the second, but if you select the icon behind "Root", you'll have to manually choose which files to move.
5. To test the flow connection, upload a file from the first OneDrive account and verify if it syncs to the second OneDrive account. If the file appears, it indicates a successful connection.
Bonus Tip: Move Files from One User Account to Another
There's a software tool called Qiling Disk Master that allows you to easily transfer files from one account to another. You can install it on your computer to facilitate the process.
Qiling Disk Master is a recommended software tool to help transfer files between user accounts, with a simple interface and support for Windows 11/10/8/7 devices. It offers a faster method to transfer files by providing a single location for all data migration needs.
Features of Qiling Disk Master
- Qiling Disk Master allows you to migrate user accounts and custom settings from your old PC to your new one, making it easy to retain all your settings.
- Seamless data migration for Windows PCs. Qiling Disk Master enables one-click migration of files from one PC to another.
- Transfer programs to another PC. This software enables the transfer of applications like OneDrive and MS Office from one computer to another, facilitating the movement of large files that consume considerable disk space.
Advantages of Qiling Disk Master
- This tool enables users to transfer their programs and settings to a new PC in a swift and efficient manner, minimizing the need for manual setup and configuration.
- Completely automatic and intuitive to use.
- Migrate custom files and favorites
- Allows you to recover data from a dead or non-bootable PC.
- Offers free technical support.
To transfer files using this software, follow these clear steps: First, ensure you have the software installed on both devices, then select the files you want to transfer and choose the transfer method, whether it's through a local network or a cloud service. Next, initiate the transfer process and monitor its progress.
Step 1. Create a backup file.
1. Connect your USB drive/external hard drive to your source computer. Launch Qiling Disk Master, then click "File backup" on the "Backup & Restore" page.

2. Select your USB drive to move on.

3. To initiate a backup, hover over the "Applications", "Files" and "Accounts" columns to select the desired data, applications, and other items, then click "Proceed" to create a backup file.

Step 2. Recover via the created backup file.
1. Insert your USB drive that contains the created backup file into the target PC, and then open Qiling Disk Master. From there, navigate to the "Backup & Restore" page.

2. To upload an image, click on "Browse" to select the desired image file from your device, and then click "OK" to proceed to the next step.

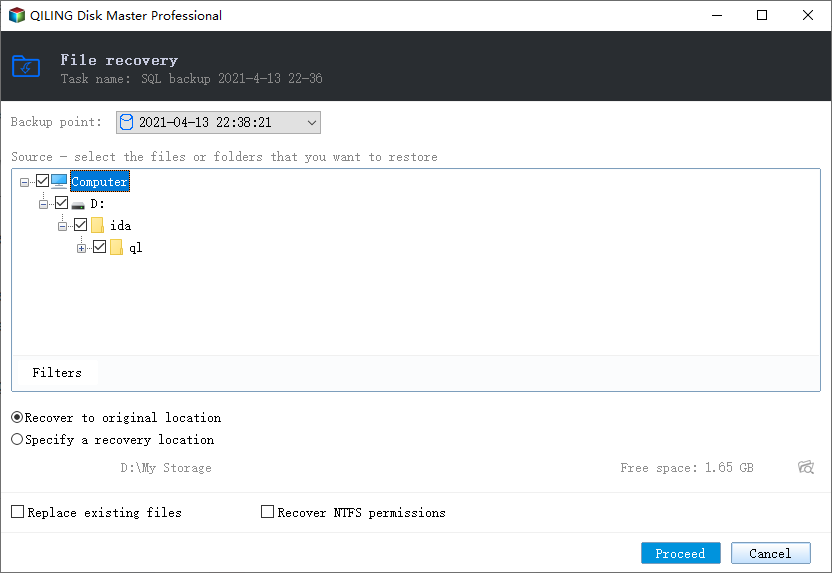
3. Now, you can select Applications/Files/Accounts you want to restore.
On the Applications, Files, or Accounts page, select the specific data you want to transfer. Click "Proceed" to confirm, or click the browse icon to change the target path to recover and save the files.
Move Files from OneDrive to Google Drive/iCloud/SharePoint/Local Drive
| Solutions | Contents | Get it |
| Transfer Onedrive to Google Drive | You can easily transfer files from OneDrive to Google Drive using three simple methods. First, you can use the built-in "Move to Google Drive" feature in OneDrive, which allows you to transfer files directly to your Google Drive account. | Read More |
| How to Transfer Files from Onedrive to iCloud on iPad | You can move files from OneDrive to iCloud using both Mac and PC, freeing up space, creating backups, or for easier access on iOS devices. | Read More |
| Migrate from Onedrive to SharePoint | To move files from OneDrive to SharePoint, you can use the Power Automate feature or do it manually. With Power Automate, you can create a flow that automatically moves files from OneDrive to SharePoint based on specific conditions, such as file creation or modification. | Read More |
| Move Files from OneDrive to Local Drive | To move files from OneDrive to a local drive, you can use copying, downloading, or desktop apps. These methods allow you to transfer files from the cloud storage service to your computer's hard drive, providing a local copy of your files. | Read More |
Conclusion
OneDrive is a top cloud storage service that lets you save and share files and photos with others, and also transfer files between different OneDrive accounts, making it ideal for backing up files, freeing up space, and ensuring safety.
You can transfer files from one account to another using various methods, including copying, syncing, or Power Automate. One effective tool for transferring OneDrive accounts and other accounts is Qiling Disk Master, which is user-friendly and allows you to migrate user accounts and data, as well as transfer programs from one PC to another.
To get started with Qiling Disk Master today, you can try out the free version here.
Related Articles
- How to Transfer Files from Computer to Original Xbox
- Best Online File Transfer: OneDrive, Google Drive, Send Anywhere, We Transfer
- How to Transfer/Import Favorites from IE to Chrome
- How Do I Transfer Everything from My Old Computer to My New Computer? Full Guide Is Here!
- How to Backup NAS? Top 3 Strategies
To back up your NAS, you have three options. You can simply copy your NAS data to an external hard drive, use backup software to securely transfer your files, or back up your NAS to a cloud drive for remote access and protection. - Backup Options in Windows 10: Which Is The Best Choice?
This article provides an in-depth look at the various Windows 10 backup options, comparing each one to help you determine the best choice for your needs. By the end of this article, you'll have a clear understanding of the different backup options available and be able to make an informed decision about which one to use.