(Infographic Poster) 9 Best PC to PC File Transfer Methods 2022
You can transfer files from one PC to another using various methods, such as PC-to-PC file transfer software, a USB cable, an external removable storage device, online transfer, or even cloud storage.
This page provides a comprehensive guide to file transfer between PCs, covering everything from the basics to advanced techniques.
What Is File Transfer and Why Do You Need It
9 Ways for PC to PC File Transfer (Infographic)
When it comes to transferring files from one PC to another, there are several methods to choose from. The best approach depends on the size and type of files, as well as the level of security required.
To transfer files from one PC to another, you have several methods at your disposal. You can use a USB drive to manually copy files, which is a straightforward and simple process.
The easiest and fastest way to transfer files from one PC to another is through a direct connection. This can be done using a USB cable, a network cable, or wirelessly using technologies like Wi-Fi Direct or Bluetooth.
What Is File Transfer and Why Do You Need It
File sharing and transferring are common practices in daily life, with various methods available, including mobile phone sharing, WiFi transfer, online file sharing, cloud storage, and cable file transfer.
- You can use a cloud storage service like Google Drive or Dropbox to share files with your colleagues. They can also access the files from their own devices, making it easy to collaborate and work on projects together.
- You may need to share some essential thesis files with your teachers and classes at school.
- I'd be cautious about sharing a file with someone you've just met, especially in public circumstances. It's best to get to know them better and establish trust before sharing sensitive information.
You can use a secure data sharing platform or service like Google Drive, Dropbox, or Microsoft OneDrive to share files with clients while maintaining confidentiality. These services allow you to set permissions and access controls, ensuring that only authorized clients can view the shared data.
To transfer files from PC to PC in Windows, you can use the built-in feature called "File Explorer" or the "File Transfer Wizard" to copy and paste files from one computer to another. If you're connected to the same network, you can also use the "Network" section in File Explorer to access and transfer files between PCs. Alternatively, you can use cloud storage services like Google Drive, Dropbox, or OneDrive to upload files to the cloud and then access them from another PC.
9 Normal Ways for PC to PC File Transfer in 2022 (with Infographic)
Here, we picked 9 PC to PC file transfer methods to help all Windows users successfully share files between computers, including Google Drive, Dropbox, OneDrive, File Explorer, Bluetooth, Wi-Fi Direct, Nearby Share, AirDrop, and Google Cloud Print.
#1. Use PC to PC File Transfer Software
#2. PC to PC File Transfer Without Network
#3. PC to PC File Transfer Online
Infographic 1 - 9 Ways for PC to PC File Transfer
Want to take a break from reading dense text? Instead, check out the infographic to learn about the 9 normal ways for PC to PC file transfer, making it easy to figure out the methods you can use. If you find this image helpful, you can copy the code and share it on your site! Thanks!
Which Way You Should Select for PC to PC File Transfer (Infographic)
To share or transfer files between computers, various methods can be used, and we've categorized them into different groups for Windows users of all levels. A comparison table is available to help determine which method is most suitable for each user's needs. This classification allows users to find the best method for transferring and sharing files between computers.
| Comparison | Data recovery service provider | Hard drive data recovery software |
|---|---|---|
|
Qiling Disk Master |
All Windows Versions |
☆ |
|
External Hard Drive/USB |
All Windows Versions |
☆ |
|
Send Anywhere |
Windows, macOS, Android, iOS |
☆ |
|
WiFi |
All Windows Versions |
☆☆ |
|
Teamviewer |
All Windows Versions |
☆☆ |
|
OneDrive/Google Drive |
Windows, macOS, Android, iOS |
☆☆ |
|
Windows Easy Transfer |
Windows 8/7/Vista/XP |
☆☆ |
|
LAN Cable |
All Windows Versions |
☆☆☆ |
|
USB Cable |
All Windows Versions |
☆☆☆ |
If you're unsure about which method to use to share and transfer files, consider your level of expertise. For beginners, tools like Google Drive, Dropbox, or OneDrive are great options as they offer user-friendly interfaces and seamless integration with other services. For intermediate users, tools like WeTransfer or pCloud might be more suitable, offering a balance between ease of use and advanced features.
- For Windows beginners, you may try Qiling Disk Master, external hard drive/USB, or Send Anywhere.
- For experienced users, there are several options available for transferring files from one PC to another, including Windows Easy Transfer, WiFi, Teamviewer, OneDrive/Google Drive, and more.
- For professionals, you're likely already familiar with the most straightforward PC-to-PC file transfer solutions.
Most people prefer easy and efficient solutions to share and transfer files, rather than resorting to complex file-sharing resolutions.
Infographic 2 - Which Way You Should Select for PC to PC File Transfer
We created a detailed infographic to help you decide which method is best for transferring files from one PC to another. If you're still unsure about the availability and difficulty of each option, this infographic is designed to provide clarity and inspire your decision.
If you agree with this and would like to help more of your friends who have the same requests for file transfer, you can share this infographic by copying the code on your site or saving the image on your PC to spread the word.
Tutorials for Transferring Files from PC to PC with Your Desired Method
1. Windows Easy Transfer - Windows 7/8/8.1/XP/Vista
Step 1. To run Windows Easy Transfer on your local PC, start by running the program and following the prompts to select an external hard disk or USB flash drive to save your files to. Then, plug in the external devices, and continue with the transfer process by selecting "This is my old PC" and customizing the transfer settings as needed.
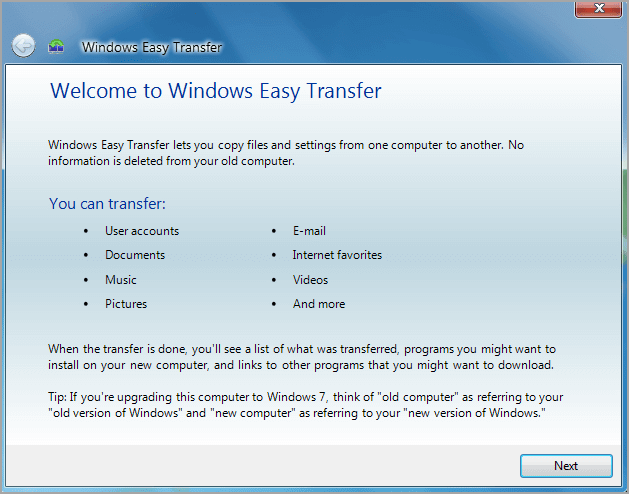
Step 2. To transfer files from an old PC to a new one, run Windows Easy Transfer on the new PC, select an external hard disk or USB flash drive as the transfer location, and choose "This is my new PC". Then, plug in your external devices, select "Yes" to continue, and open the Easy Transfer file location.
2. Qiling Disk Master Free - Windows 11/10/8.1/8/7/Vista/XP/Server
Step 1. Launch Qiling Disk Master on your source and target computers, and connect both PCs via the internet.
1. At the "Backup and recovery" section, click on "File sync" to proceed.

2. Select your target computer via its device name, enter its account password or verification code, select the transfer direction, and click "Connect" to continue.
To verify the code, check the right top of the "PC to PC" main screen on the target computer.

Step 2. You can select the categories of files to transfer via the internet, such as Applications, Files, and Accounts.
To transfer data selectively, click "Edit" under each category and choose the specific items you want to transfer.

Step 3. To transfer your apps/files/accounts from one computer to another computer via the Internet, click "Proceed" to start the process. This will initiate a transfer of your digital content, including applications, files, and accounts, from the original computer to the new one.
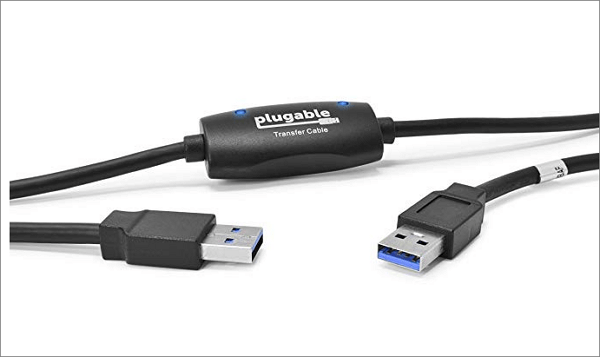
3. USB/LAN Cable
USB cable:
Step 1. Boot both PCs and connect them with the USB cable.
Step 2. To run the installation wizard, select the "USB Super link adapter" option and click "Next".
Step 3. If your device is not recognized by your computer, check the USB cable connection to your device. Go to Device Manager, expand the System Drives section, and verify that the USB cable is listed as "Hi-Speed USB Bridge Cable." If it is not listed, try unplugging and replugging the cable to see if it resolves the issue.
Step 4. Insert the installation disk that was packaged with the USB cable into your CD/DVD-ROM drive.
Step 5. See two-sided window on both computers > Drag and drop data on the desired location.
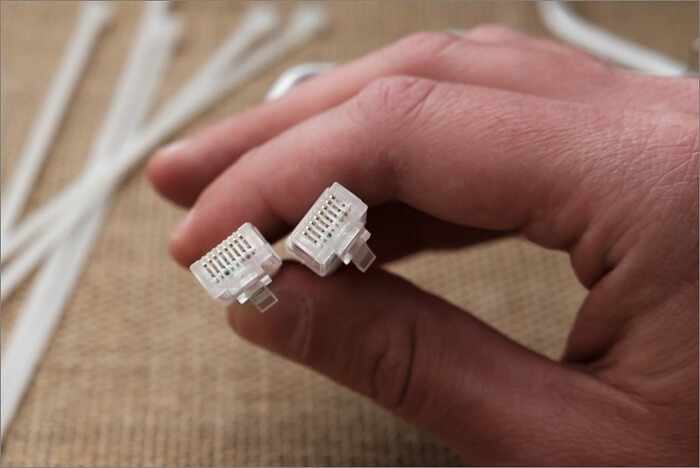
LAN cable:
Step 1. Connect Both PCs With LAN Cable.
Step 2. Enable Network Sharing on both PCs
To access the Advanced Settings in the Network and Sharing Center, follow these steps: Open the Control Panel, navigate to the "Network and Internet" section, select "Network and Sharing Center," and then click on "Change Advanced Settings." This will allow you to access and configure advanced network settings.
Choose "All Networks"> Turn off password protected sharing
Step 3. Set Up Static IP on both PCs
To access the Network and Sharing Center in the Control Panel, follow these steps: Open the Control Panel, then click on "Network and Internet." From the options listed, select "Network and Sharing Center.
To configure the TCP/IPv4 settings, follow these steps: Click on the Ethernet Status window, then select "Internet Protocol Version 4 (TCP/IPv4)" from the list, and finally click on Properties.
To set up the VPN on the computers, click on "Use the following IP address" and enter the following values on both computer 1 and 2: 192.168.
PC 1
IP Address: 192.168.1.1
Subnet mask: 225.225.225.0
Default gateway: 192.168.1.2
PC 2
IP address: 192.168.1.2
Subnet mask: 225.225.225.0
Default gateway: 192.168.1.1
Step 4. Share folder.
Right-To share a folder, click on it, go to "Give access to", select "Specific people", choose the targeted individuals, and then hit "Share".
4. External Hard Drive/USB Flash Drive
Step 1. Connect the external hard drive to the old PC.
Step 2. Open File Explorer and find your new device.
Step 3. Drag or copy the file you want.
Step 4. Connect the external hard drive to the new PC. Paste files.
5. WiFi
Step 1. Connect both PCs to the same WiFi router.
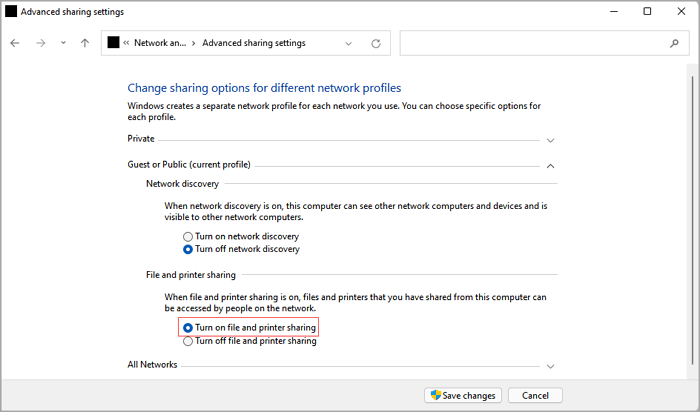
Step 2. Enable File and Printer Sharing on both computers.
To access advanced sharing settings, go to the Control Panel, then click on "Network and Internet," followed by "Network and Sharing Center." From there, click on "Advanced sharing settings.
To enable file and printer sharing on your computer, go to the Control Panel, click on the "Network and Sharing Center" icon, then click on the "Change advanced sharing settings" link on the left side of the window. From there, click on the "Private" section and select "Turn on file and printer sharing" from the dropdown menu. This will allow other computers on the same network to access shared files and printers.
Step 3. To share files between computers, view the available network computers from either computer by opening File Explorer, clicking on Network from the left panel, and checking the available PCs. Then, simply copy and paste the data you want to transfer.
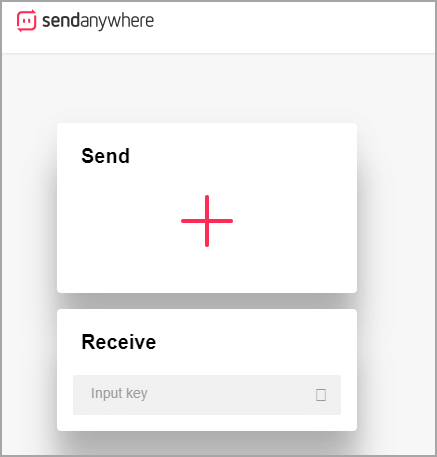
6. Send Anywhere
Step 1. On the old PC, click the Plus sign, select files to transfer, then click Direct > Send the 6-digit key to the receiver.
Step 2. Open the website and Input key under the Receive box on the new PC.
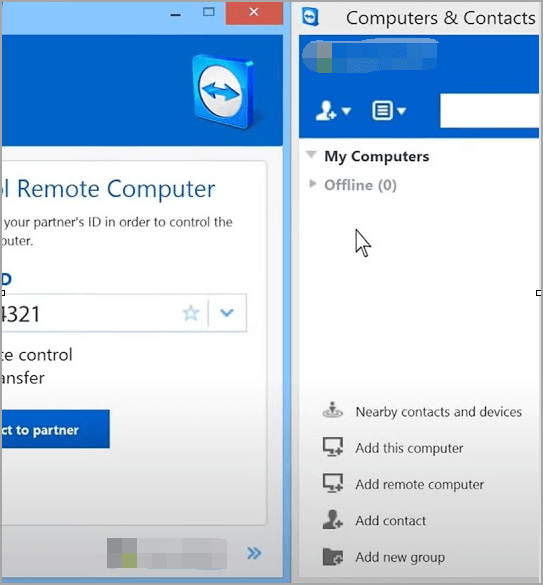
7. Use Teamviewer
Step 1. Install TeamViewer on both PCs. Open TeamViewer on the local computer and log in to your TeamViewer account.
Step 2. To access the Computer & Contacts window, go to the "My Computers" section and double-click the desired device.
Step 3. Open File Transfer browser—drag files to the right window.
Step 4. Select which device to transfer files.
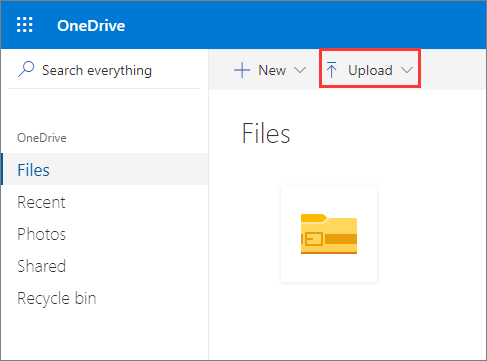
8. OneDrive/Google Drive
- To upload files to OneDrive, log in to the OneDrive website, select the "Upload" option, and then choose the files you want to upload.
- New PC: Download files.
Google Drive
- To upload files to Google Drive on an old PC, log into your account, click on "New", and then select either "File Upload" or "Folder Upload". From there, you can choose the files you want to upload.
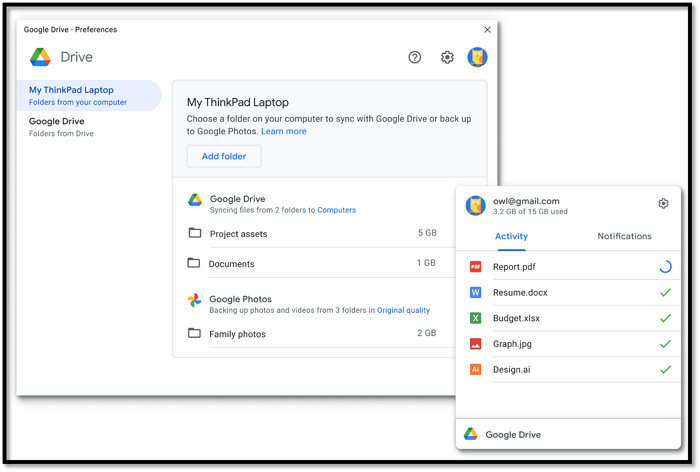
- New PC: Download files or folders.
The Easiest and Fastest Way for PC to PC File Transfer (Infographic)
Fast
To transfer files, applications, and settings from an old computer to a new one, you can use a combination of methods. Start by backing up your files from the old computer to an external hard drive or cloud storage service.
Professional
Qiling introduced smart file transfer mechanism into this software.
Simple
Less than 4 steps. No need to wake too many tools.
Wireless and Unlimited
You can transfer data without needing a cable or external hard drive, as all fixes are available online.
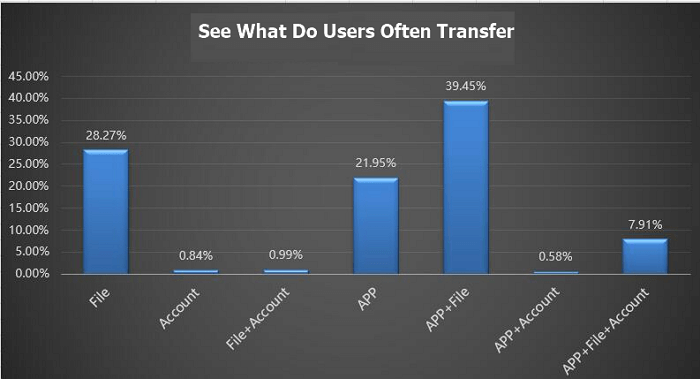
Infographic 3 - Pick Qiling Disk Master
This infographic highlights the reasons for choosing Qiling Disk Master for PC to PC file transfer, showcasing the types of data users commonly transfer. If you agree with this and want to help friends searching for file transfer software, you can copy the code to share on your site or directly share the infographic with them.
Related Articles
- Transfer Unlimited Files with 2022 Best LAN File Sharing Software
- How to Transfer Files from Mega to Dropbox
- How to Transfer Microsoft Teams to Another Computer [Full Guide]
- Windows Server 2016 Migration Step by Step Guide
- How to Back Up A Hard Drive Windows 7 [Ultimate Guide for Windows 7 Users]
Learn how to back up a hard drive in Windows 7 using backup tools or disk imaging to protect files before failure or upgrade. - How to Back Up Don't Starve World?
If you're looking for the most efficient way to back up your Don't Starve world, you've come to the right place. This post will provide you with all the useful tips and guidance you need to solve this problem.