How to Transfer Canon Inkjet Print Utility to Another Computer
Looking to transfer Canon Inkjet Print Utility to another computer? Let's find out how you can do that.
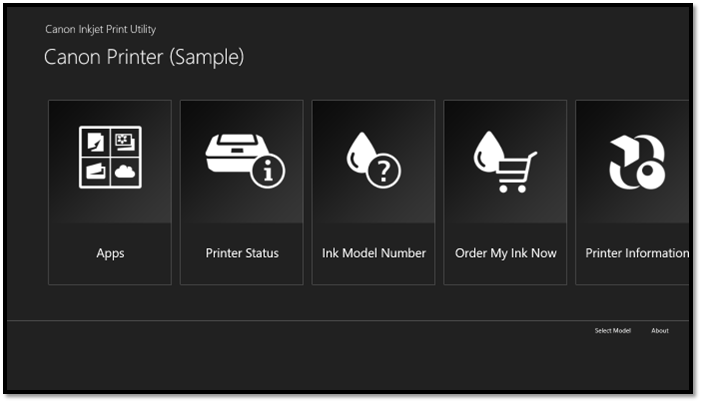
Canon's printer software, also known as the Canon Inkjet Print Utility, is a comprehensive program that provides essential features such as warranty information, printer status, and other relevant details.
To copy printer settings from one computer to another, you can use the Windows built-in feature called "Settings Sync" or use a third-party software like PrinterShare. Alternatively, you can also manually configure the printer settings on the new computer by reinstalling the printer driver and reconfiguring the settings. If you're looking to share a printer with another computer, you can use a network printer or a USB printer shared through a hub. To share printer settings, you can use a cloud-based service like Google Cloud Print or a local network drive to store the printer settings and access them from another computer.
What is Canon Inkjet Print Utility?
Canon Inkjet Print Utility is a software/driver package that allows Canon printer users to operate their printers, modify settings, and enable easy usage.
For instance, it can help you:
- Test printing
- Check printer's ink status
- Print various types of papers, pictures, and documents
- Check and buy ink online
- Find ink model number
- Check warranty and product information
The Canon Inkjet Utility is a popular software among Canon Inkjet users due to its user-friendly interface and various features. However, when users want to switch to a new computer or operating system, they often face the issue of transferring their settings and information. To resolve this, it's essential to transfer the Utility's settings to the new computer, ensuring a seamless transition and continued use of the software.
Transfer Canon Inkjet Print Utility to Another Computer via Software
To transfer your Canon Inkjet Print utility to another computer, a professional transfer tool such as Qiling Disk Master can be used, making the process easy and efficient.
So, why is this a particular tool? Because:
- It can help you transfer applications/software quite comprehensively
- A streamlined process enables efficient data migration and reduces time spent on the task, making it a valuable solution for those looking to minimize downtime and maximize productivity.
- Data rescue from broken or dead PC
- Quickly transfer configuration and settings to a new computer
To transfer Canon Inkjet Print Utility to a new computer, use a USB drive or cloud storage to move the program and its settings. This will help you avoid reinstalling the software and transferring settings manually. Simply copy the program and its settings to the new computer, and you'll have a fully functional version of Canon Inkjet Print Utility up and running.
Step 1. Run Qiling Disk Master on both PCs
On the source PC, select "File sync" on the main screen of Qiling Disk Master.

Step 2. Connect two computers
1. Connect your target PC via its IP address or device name and click "Connect" on it.
2. To access a target PC, enter the login password and click "OK" to confirm.
If you didn't see the target PC in the listed devices, you can also manually connect the target PC by clicking "Add PC" and inputting its IP address or device name.

Step 4. Select apps, programs, and software and transfer to the target computer
1. You can pick and choose which files, programs, and settings you want to transfer from the current computer to the target PC.
2. After choosing the desired applications and programs, click "Proceed" to initiate the transfer process.

Qiling Disk Master is the best data transfer tool available today, making it the leading option for migrating Canon Inkjet settings with ease.
Copy Printer Setting to Another Computer
To copy your Windows 10 settings to another computer, follow these steps:
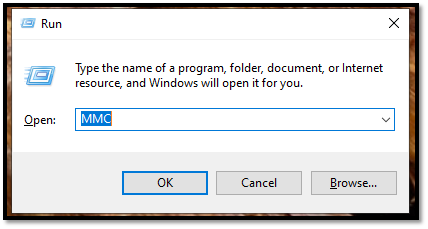
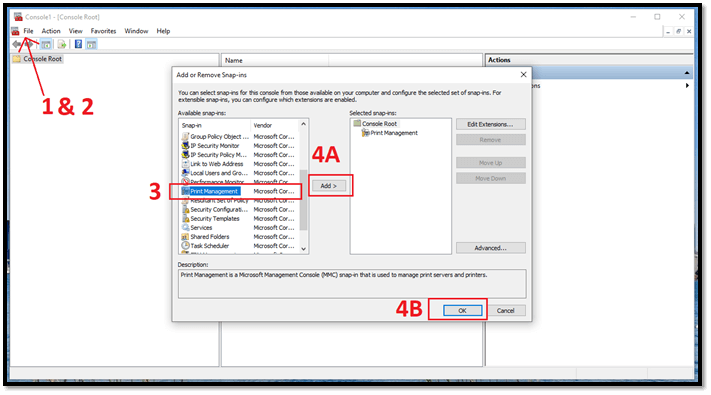
1. Press Windows+R and type MMC
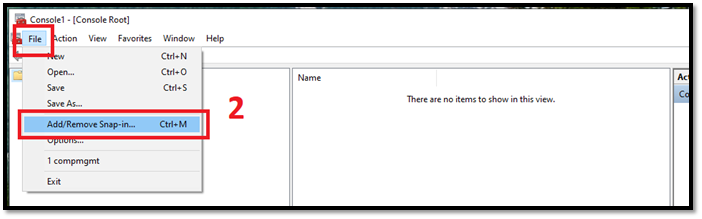
2. To add a new snap-in to the Microsoft Management Console (MMC), click on the "File" menu in the top-left corner of the MMC window, then select "Add/Remove Snap-in" from the drop-down menu. This will open the "Add Remove Snap-in" dialog box, where you can browse for and select the snap-in you want to add.
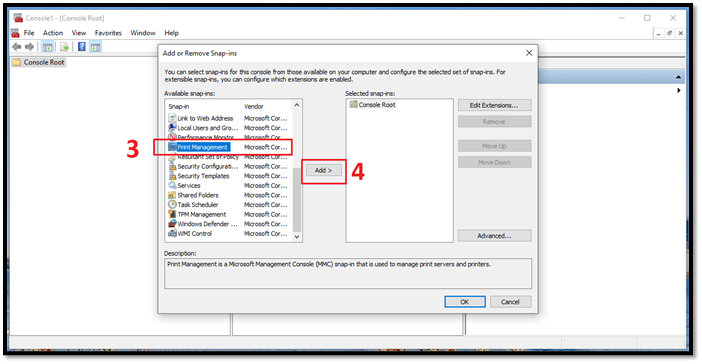
3. Navigate down and find Print Management
4. Click on Add
5. To set up your Canon Inkjet Printer, click on the "Browse" button and select your printer device from the list of available printers. This will allow you to connect your printer to your computer and start printing.
6. Click Add to List, then click Finish
To create a backup of your computer, you'll need to use an external drive, such as a pen drive or USB stick. First, insert the drive into your computer and make sure it's recognized by the system. Next, select the files and folders you want to back up, and use the built-in backup software or a third-party tool to transfer the data to the external drive. This will create a copy of your important files, which can be used to restore your system in case of a failure or data loss.
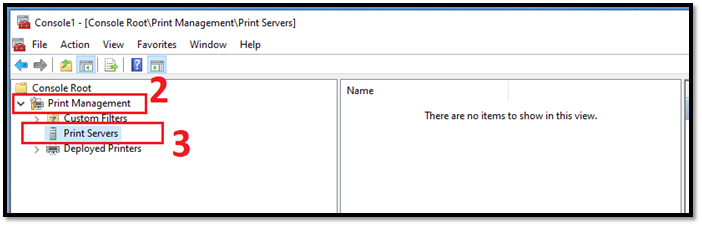
1. Select the newly added Print Management under Console Root
2. Double Click on Print Management to collapse the menu
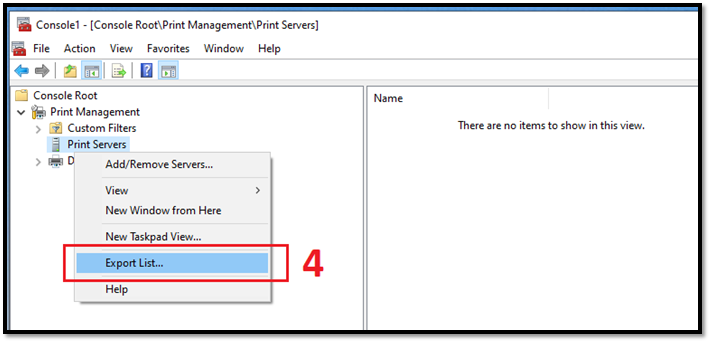
3. Right-click on Print Servers
4. Click Export List
5.Tap This PC and select the USB Drive
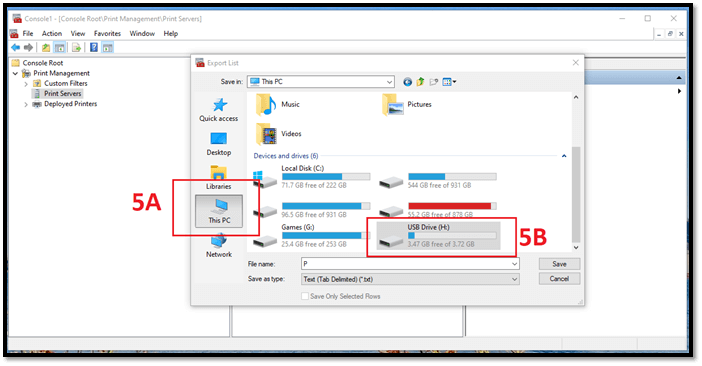
6. Save as Printer Settings
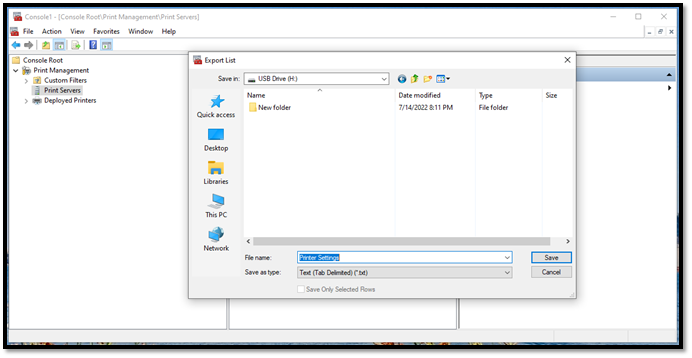
7. Done
To transfer Canon Inkjet Print Utility to another computer, save the utility's critical information first, then plug in the same USB device to the new computer, and follow the on-screen instructions to complete the transfer process.
1. Run MMC again
2. Head to File and click Add/Remove Snap-in
3. Navigate and find Print Management once more
4. Click Add once configured, then click OK
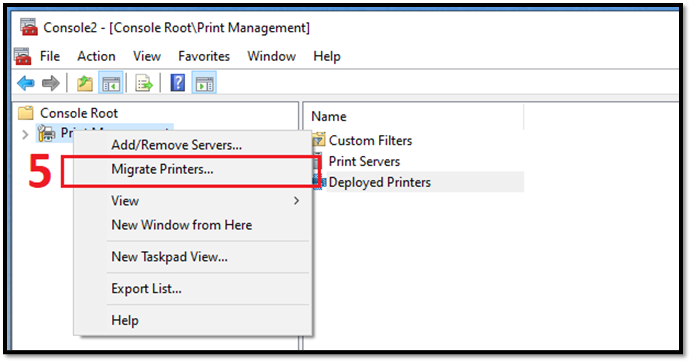
5. Right-click Print Management & click Migrate Printers
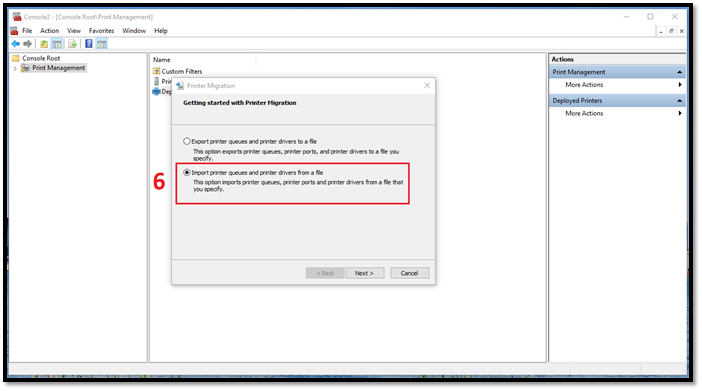
6. Select Import when Print Migration pops up
7. Click Next and then Browse
8. Pick "Printer Settings.txt"from the USB
9. Click next
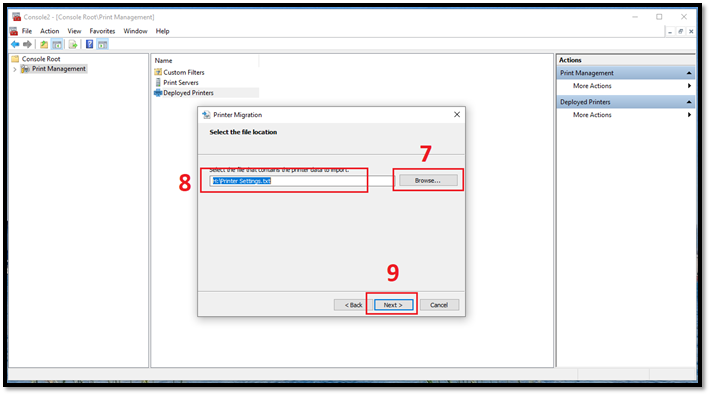
10. Done
Connect your printer to your computer, and it will retain the same settings as before.
Share Printer To Another Computer
You can also share your Canon Inkjet Printer with another computer via internet connection/Wi-Fi device. Microsoft has a simple guide that allows you to do this, regardless of your printer manufacturer, and it enables you to share your printer with another computer.
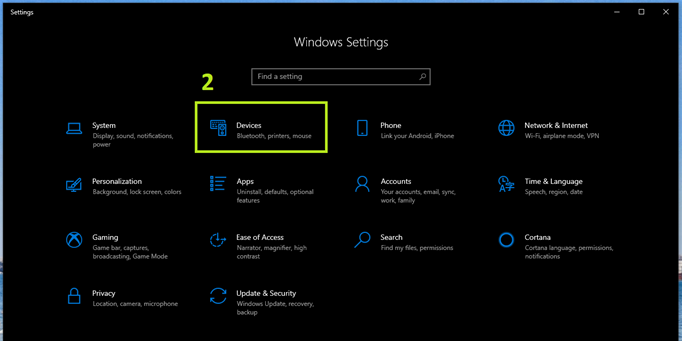
1. Head to Settings via the Start menu
2. Go to Devices
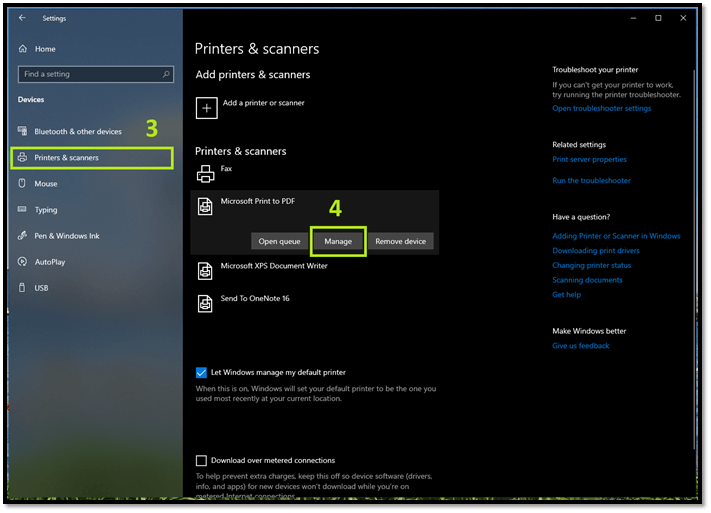
3. Find Printers & Scanners
4. Pick your printer, then click Manage
5. Click Printer properties
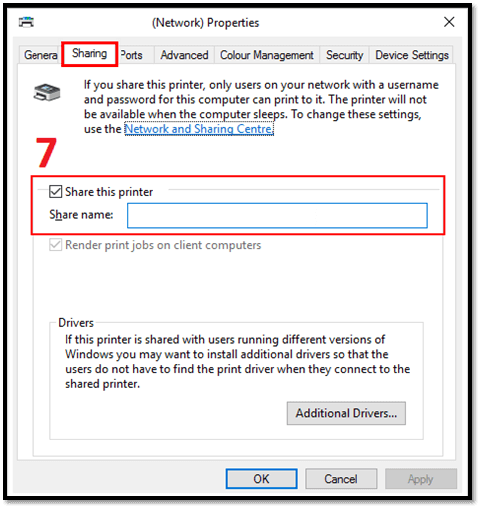
6. Click on Sharing tab
7.Check Share this printer & add a name
8. Done
To enable local network users to see and use your printer, you can configure your printer to be visible on your network. This typically involves accessing your printer's settings and selecting the option to share it on your local network.
Conclusion
This article demonstrated how to transfer the Canon Inkjet Utility to another PC in three ways. While all methods allow you to move printer settings to another computer, using Qiling Disk Master is recommended for the best possible transfer. You can download it here and give it a try!
Related Articles
- [microsoft edge vs internet explorer 11] Internet Explorer End of Life! Is Microsoft Edge the Future?
- (Easiest Way) How to Move MySQL Database to Another Server
- How to Copy MS Office from Laptop to Pen Drive/USB (Windows 11 Available)
- How to Transfer Photos from Google Photos to Gallery? Follow the Guide!
- Windows 7 System Image Backup Failed Not Enough Disk Space[SOLVED]
If you are facing Windows 7 system image backup failed not enough disk space error, fix it with the below solutions. Learn three methods to create disk space to store system image backup on your computer, - How to Back Up and Restore Thunderbird Emails (Windows & Mac Guide)
If you are looking for a way to back up and restore Thunderbird emails, you are in the right place. This article covers three working ways to back up and restore Thunderbird emails with a steps guide. Whether you are using a Windows or macOS computer, you can find your solution here.