[Full Guide] How to Transfer Realtek to Another Drive/Computer
Overview
Realtek sound drivers are widely used across Windows computers for their quality sound output. Despite being third-party drivers, users may face issues in locating them.
To avoid issues with Realtek drivers, it's likely that you'll need to transfer them to another drive to prevent any disruptions to your computer's services. This article provides solutions for transferring Realtek drivers to another location without affecting any services.
About Realtek and Its Products
Realtek is a company that provides computing solutions through hardware and software, offering innovative ideas and products such as communication network ICs, computer peripheral ICs, and multimedia ICs to enhance basic Windows computer functionality.
Can I Transfer Realtek Drivers to Another Drive?
Transferring Realtek drivers to another drive is possible, but requires some precautions. With proper care, the process is relatively simple. This article will guide users through various methods to successfully transfer Realtek drivers to another drive quickly.
Transfer Realtek Drivers to Another Drive via An Intelligent Tool
Transferring drivers to another drive can be complex, but a tool like Qiling Disk Master can help transfer Realtek drivers without any data loss.
Qiling Disk Master offers diverse file compatibility for processing transfers across computers, making it a great option in the market. It provides several notable benefits, making it a go-to solution for effective data transfer. Understanding these benefits can make your selection easier, making Qiling Disk Master a top choice for your needs.
- Qiling Disk Master allows users to easily transfer programs, software, applications, and games between devices, making it simple to move files across drives and computers.
- This method allows for data transfer without the need for a network connection, making it a better option than many other methods that require a network.
- The data transfer process is very smooth, saving users a lot of time and energy.
To transfer Realtek drivers, follow this guide: learn how to use this powerful tool to transfer your Realtek drivers. This guide will walk you through the steps to successfully transfer your drivers, ensuring your computer's audio and network functions run smoothly. By following this guide, you'll be able to transfer your Realtek drivers with ease, and get back to using your computer's audio and network features without any issues.
Step 1. Launch Qiling Disk Master and select transfer mode
To proceed, go to the "Backup and recovery" section on the main screen of Qiling Disk Master and click "File sync".

Step 2. Select apps and another drive to transfer
1. Select the source partition where the applications, programs, and software you want to migrate are located, and mark them as desired for migration.

2. To initiate the migration, select another drive or disk as your target device and click "Proceed" to start the process.

Step 3. Finish the migration process
When the transferring process finishes, click "OK" to complete.
To keep all the changes and run your migrated apps on the other drive again, you can simply restart your PC. This will allow you to utilize the new drive and apps without any issues.
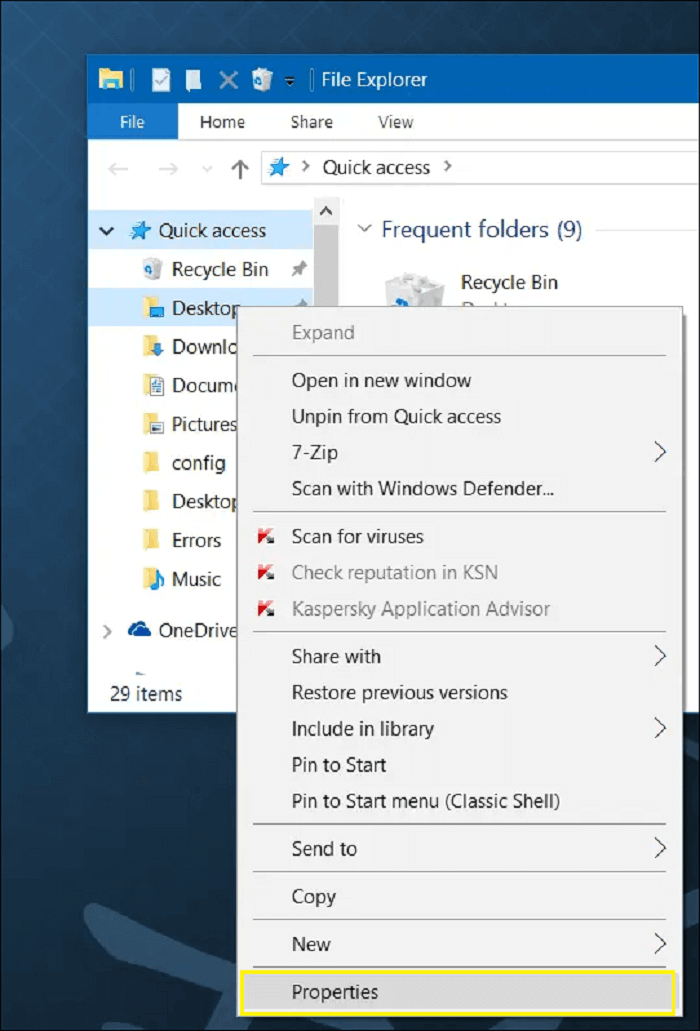
You can easily relocate your desktop folder to another drive on Windows and Mac by following some simple steps. On Windows, you can right-click on the desktop, select "Properties", and then click on the "Location" tab to change the folder's location.
To move the desktop folder to another drive on Windows and Mac, follow these simple steps. On Windows, right-click on the desktop and select "Properties" to open the Desktop Properties window.
Want to move your desktop folder to another drive on your Windows or Mac PC? This article provides the best ways to do so, making the process hassle-free and quick.
Transfer Realtek Drivers to Another Drive via Uninstall Shipment
To transfer Realtek drivers to a new drive, you can try uninstalling and reinstalling them. This process may take some time, but it's a straightforward solution that can be done without much difficulty. By following this method, you can easily transfer the drivers to your new drive without any complications.
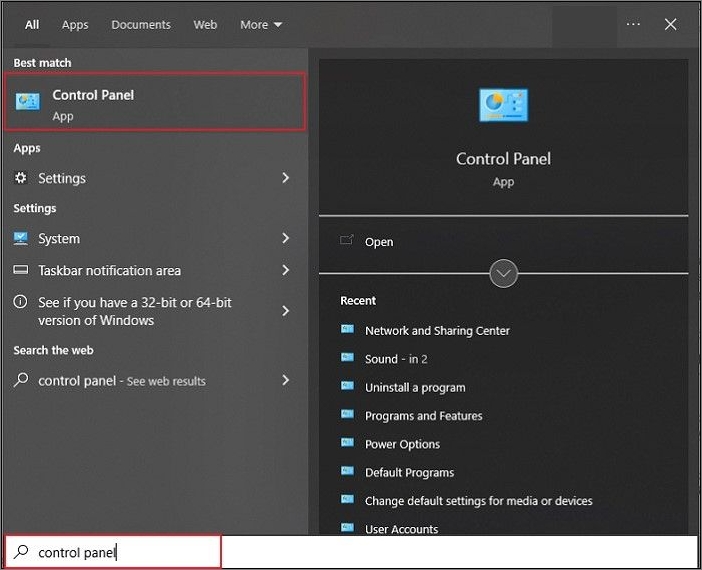
Step 1. Open the "Search" bar by using the shortcut keys of "Windows + S" and type in "Control Panel".
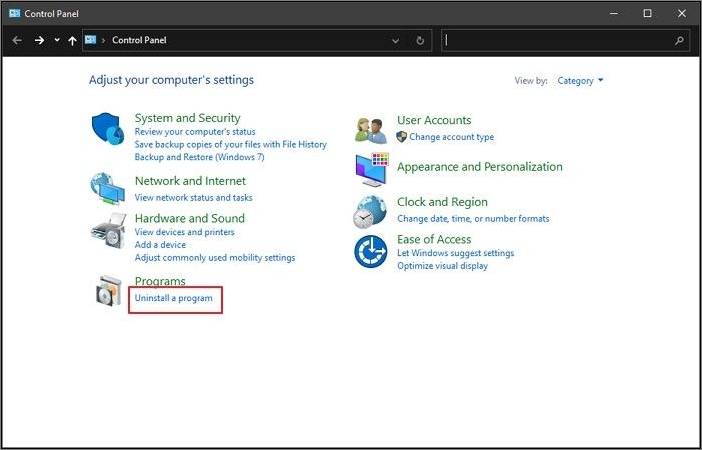
Step 2. To access the list of installed programs, open the Control Panel and navigate to the "Adjust your computer's settings" section. From there, click on "Uninstall a program" to open a window displaying all the programs installed on the computer.
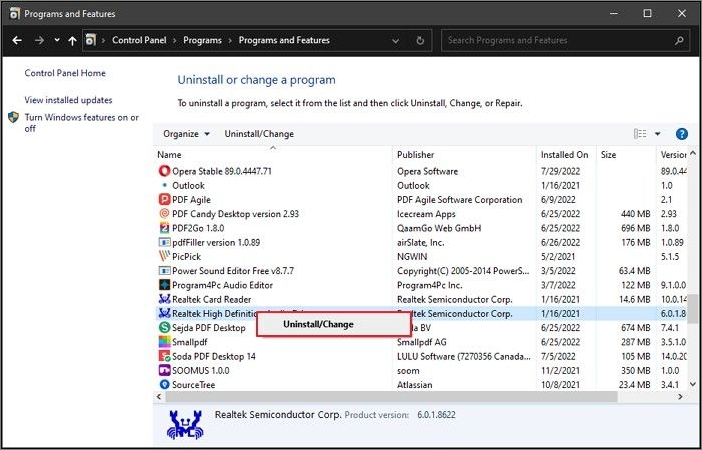
Step 3. To uninstall the Realtek drivers program, locate it in the list, right-click on it, and select "Uninstall/Change" from the options, then follow the on-screen instructions to complete the uninstallation.
Step 4. You need to reinstall Realtek from a trusted source, but since you want to transfer it to a new drive, you'll need to install it on that new drive instead of the original one.
How Can I Transfer Realtek Drivers to Another Computer?
Transferring Realtek drivers to another computer may seem unlikely, but it's possible with the right methods. By following these steps, you can successfully transfer your Realtek drivers to another computer, ensuring your requirements are met.
Transfer Realtek Drivers to Another Computer via USB Thumb Drive
Transfer Realtek Drivers to Another Computer Over the Same Network
Transfer Realtek Drivers to Another Computer via USB Thumb Drive
To transfer Realtek drivers to another computer using a USB, follow these steps: First, ensure you have the Realtek drivers downloaded on your current computer. Then, create a bootable USB drive using a tool like Rufus. Next, copy the Realtek drivers to the USB drive. Now, insert the USB drive into the new computer and boot it from the USB drive. Finally, install the Realtek drivers from the USB drive on the new computer.
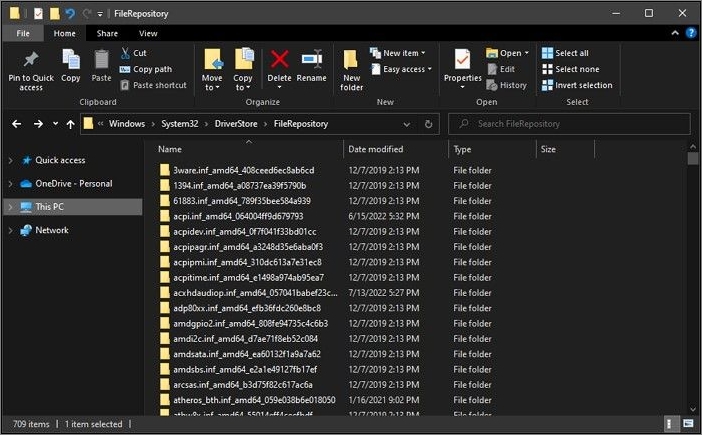
Step 1. Open the "File Explorer" across your computer and follow the driver repository as follows to access your Realtek drivers:
C:\Windows\System32\DriverStore\FileRepository
Upon accessing this repository through File Explorer, you will find a comprehensive collection of all installed drivers on your computer.
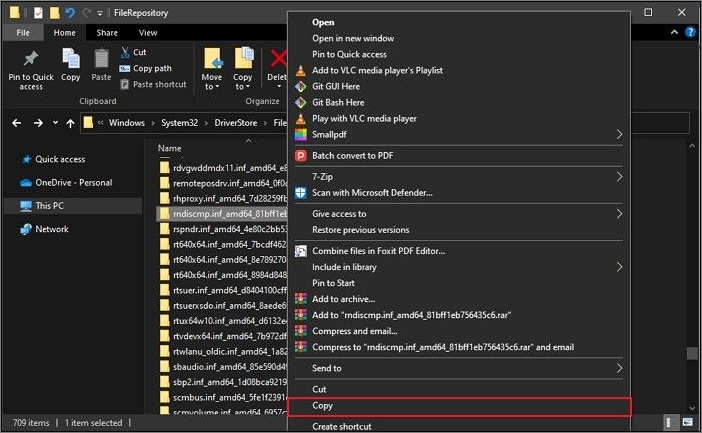
Step 2. Locate the Realtek drivers folder, right-click on it to select "Copy", and attach a flash drive to your computer. Then, copy the folder across to the flash drive.
Step 3. Take the flash drive to the other computer, access the external drive from File Explorer, and drag the copied folder to the desktop or a desired location.
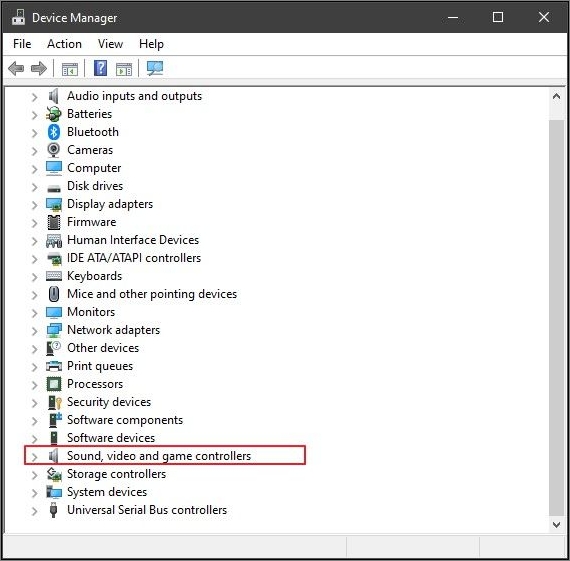
Step 4. To access the Device Manager, click on the "Search" icon on the taskbar and type in "Device Manager" to open a new window, then expand the "Sound, video, and game controllers" section.
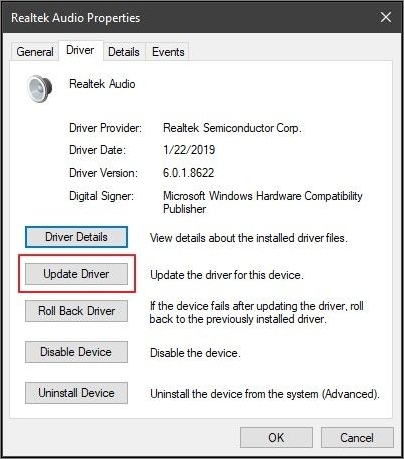
Step 5. To update a driver, right-click on it and select "Properties". Then, go to the "Driver" tab and click "Update Driver" in the window.
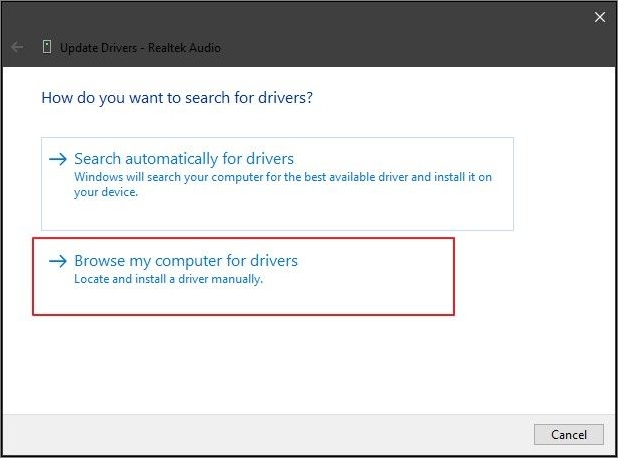
Step 6. On the next screen, select the option "Browse my computer for driver software" to update the process. Then, click "Browse" and navigate to the location where you dragged the copied driver folder. Finally, select the driver and click "OK".
Step 7. To install the drivers on your other computer, follow the on-screen instructions provided by the installation software. This will guide you through the process of setting up the drivers correctly and ensuring they are functioning properly on your other computer.
Transfer Realtek Drivers to Another Computer Over the Same Network
Discovering that you can transfer Realtek to another computer using your local network can be a game-changer. This process is seamless, but it requires a running network connection and the Realtek driver to be shifted from the C drive to another. To successfully execute this, follow the available steps, which will guide you through the process.
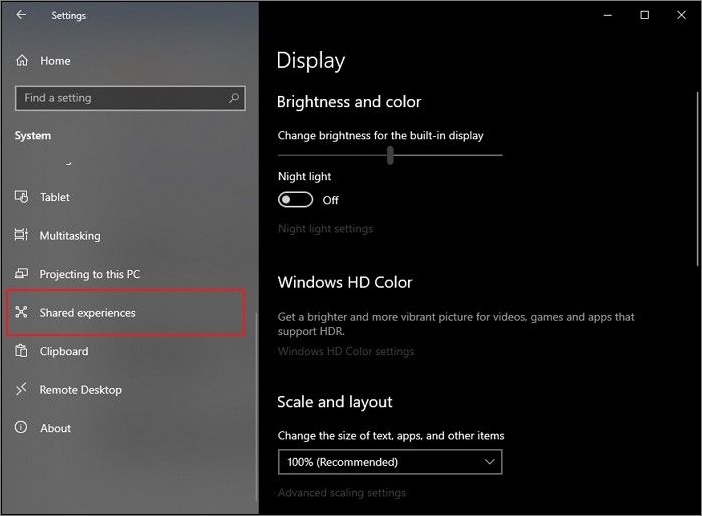
Step 1. To share files across computers, enable "Nearby Sharing" on both computers involved, which can be done by opening the Settings using the shortcut keys "Windows + I", navigating to the "System" tab, and selecting the "Shared experiences" option.
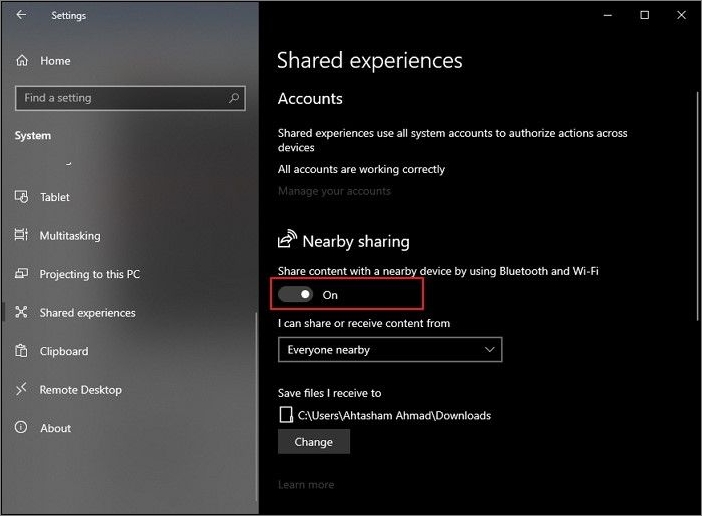
Step 2. To enable Nearby Sharing, scroll down on the window and turn on the toggle next to "Nearby Sharing". Then, change the drop-down option below the settings to "Everyone nearby".
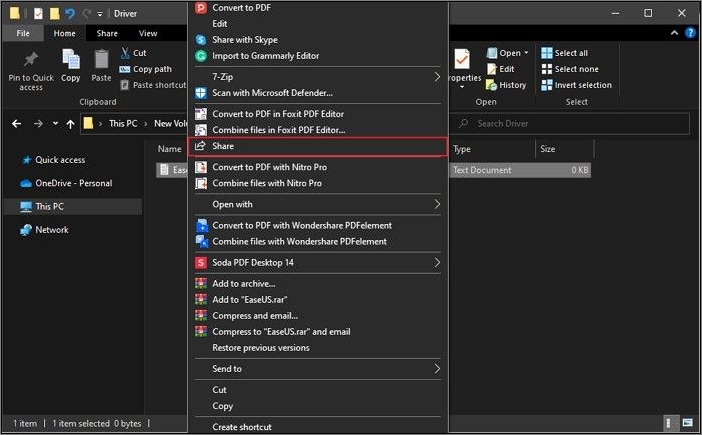
Step 3. To share the Realtek drivers, access the computer from where you want to transfer them. Go to the driver's repository and right-click on the folder. Select "Sharing" from the available options to share the folder. This will allow you to access the drivers from another computer.
Step 4. You will find the computer where you want to transfer the file in the "Find more people" section. Select the computer.
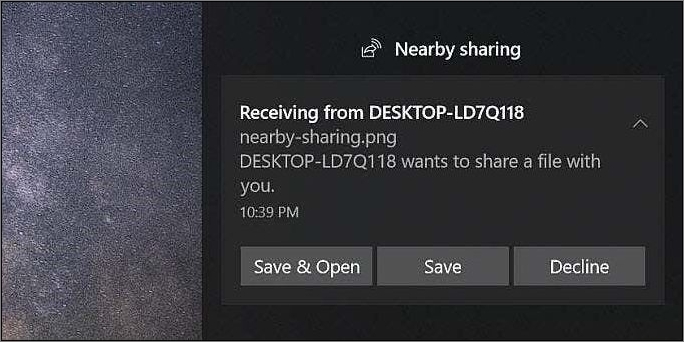
Step 5. When sending a file, a notification will appear on the new computer, prompting you to click "Save & Open" to accept the file transfer. After receiving the file, you can follow the same process as before to update your drivers through the Device Manager.
Conclusion
If you're frustrated with Realtek, don't worry, as we provide the best options for proficient file transfer. You can try using Qiling Disk Master to transfer files, which can be executed for exquisite results. This method can help you transfer Realtek to another drive with ease.
FAQs on Transfer Realtek to Another Drive
Here are the top concerned questions and answers in one paragraph:
1. Can I change my Realtek audio driver?
To update the Realtek High Definition Audio driver, first press the Windows Key + R to open the Run dialog box, then type devmgmt.msc and hit Enter to open Device Manager. Next, expand the Sound, video, and game controllers section and right-click on Realtek High Definition Audio, selecting Update Driver from the context menu.
2. How do I reinstall Realtek audio?
To update a device driver on Windows 10, click the "Start Menu" and go to Device Manager, then navigate to "sound, video, and game controllers", find the device that needs to be updated, right-click it and select "update driver".
3. Where are Realtek drivers located?
To access the audio driver Realtek High Definition Audio, click on the "Start" button and navigate to Device Manager, which can also be accessed via the Control Panel, and then expand Sound, video, and game controllers from the list, where you will find the audio driver.
4. Why is Realtek not showing in Device Manager?
If the Realtek HD Audio Manager isn't working on your PC, it might be due to outdated drivers or missing files. To fix this, try updating the Realtek HD audio drivers in the Device Manager, and also check for Windows Updates in the Settings app to automatically update the drivers.
Related Articles
- How Do I Move My Google Drive Folder to Another Location? [Step-by-Step Procedure]
- How to Move Microsoft SQL Server Compact Another Computer? [2022 Ultimate Guide]
- How to Move Cod Vanguard to Another Drive/PC [2022 Complete Guide]
- [2022 Guide]How do I Transfer Firefox Bookmarks from One Computer to Another
- HomeGroup Not Showing Up Windows 10/11? Share Files Without HomeGroup
HomeGroup has been removed from Windows 10, but you can still share printers and files using other alternatives. - How Long Does It Take Google Drive to Process a Video
Want to know how long it takes Google Drive to process a video? For that and more, including how to quickly process videos on Google Drive, click on the post to find out.