Windows 11 File History: Create File Backups and System Backup Image
- Page Content:
- Overview of Windows 11 Backup
- Everything About Windows 11 File History
- Windows 11 File History: A Complete User Guide
- Must-have Free Windows 11 File History Alternative
Your friend accidentally damaged your mobile hard drive, causing it to become unreadable. This device contains numerous large video and image files. To prevent a similar situation in the future, you should prioritize backing up your data. For Windows 11, you have several backup options available, including the built-in File History feature, System Image Backup, and the Backup and Restore (Windows 7) tool, which can also be used in Windows 11. These options allow you to create backups of your files, system, and settings, ensuring that your important data is safely stored and can be easily restored if needed.
Overview of Windows 11 Backup
Many people recognize the importance of backup in data security protection, but struggle to decide which backup software to use due to uncertainty about its cost.
There are several capable Windows backup and recovery software available, both free and commercial, but Microsoft's native backup solutions, such as File History, are also an option.
Everything About Windows 11 File History
Q1. How do I Access File History in Windows 11
You can access the File History option in Windows 11 in several ways, including entering it directly or using other methods. Two of the most commonly used ways are entering it directly, which allows you to configure and manage file history settings.
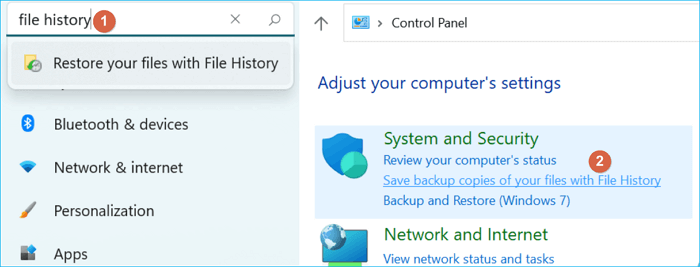
1) Open Settings, in the search box, type File History
To save backup copies of your files with File History, press the Windows + R keys and type "Control Panel". Then, under the "System and Security" section, click on "Save backup copies of your files with File History".
Q2. What does Windows 11 File History back up?
File History only backs up copies of files that are in the Documents, Music, Pictures, Videos, and Desktop folders and the OneDrive files available offline on your PC, but you can add files or folders elsewhere to be backed up by adding them to one of these folders.
Q3. Why is it said that File History has been removed from Windows 11?
Windows 11 users who have upgraded from Windows 10 may be surprised to find that the File History path has changed. Despite this, File History is still available in Windows 11 and can be used to back up various types of files.
Q4. Can You Use Windows 11 to Create a system backup?
Windows 11's File History is designed to back up individual files, requiring a separate solution, Windows Backup and Restore (Windows 7), to back up the operating system.
Does Windows File History Backup Everything?
File History, a built-in Windows feature, allows users to easily back up their content, but some users are unsure if it backs up everything on their Windows device. The good news is that File History does backup most files, including documents, pictures, and videos, but it may not cover everything. Some system files and certain types of files may not be included in the backup, so users should check their specific settings to ensure they are backing up all the files they need.
Windows 11 File History: A Complete User Guide
File History is a backup feature in Windows 11 that helps protect users' data by saving backups to an external hard drive or network drive, safeguarding documents, photos, videos, and desktop data from loss.
For backup purposes targeting at a hard drive, a disk partition, or an operating system, a reliable third-party backup and recovery program is required.
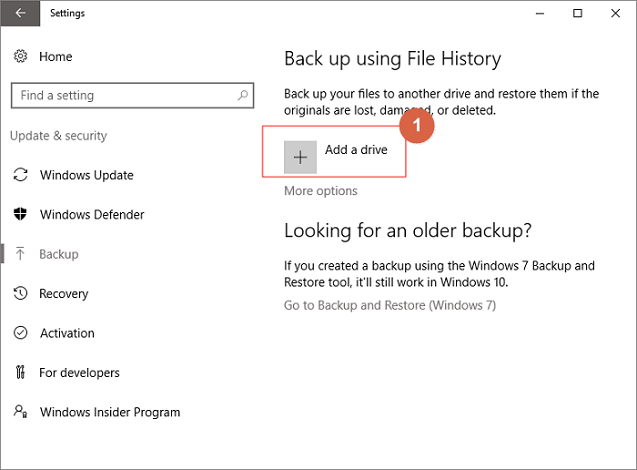
Step 1. To set up automatic backups, go to Start, then Settings, then Update & Security, then Backup, then Add a drive, and select an external drive or network location for your backups.
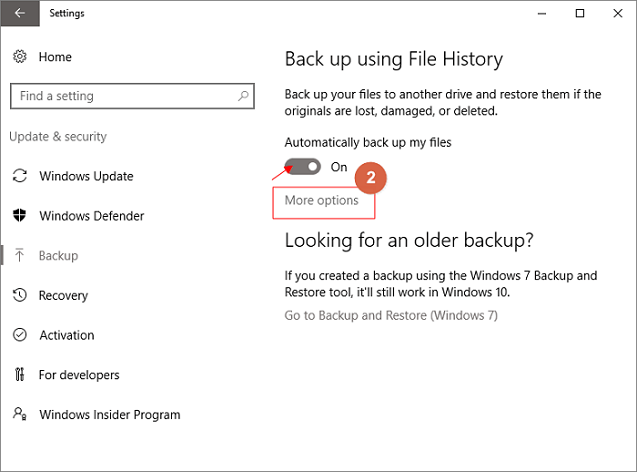
Step 2. After selecting a drive, the "Automatically back up my files" option will be enabled, and you can then select "More Options" to set up the backup cycle time and folder settings.
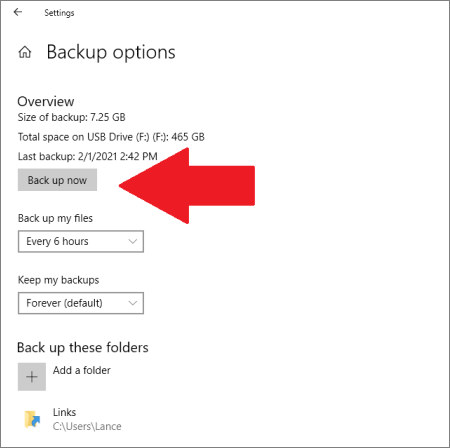
Step 3. Choose the cycle time, or frequency, of how often you want to back up your files, and the retention period, or duration, of how long you want to keep your backed-up files.

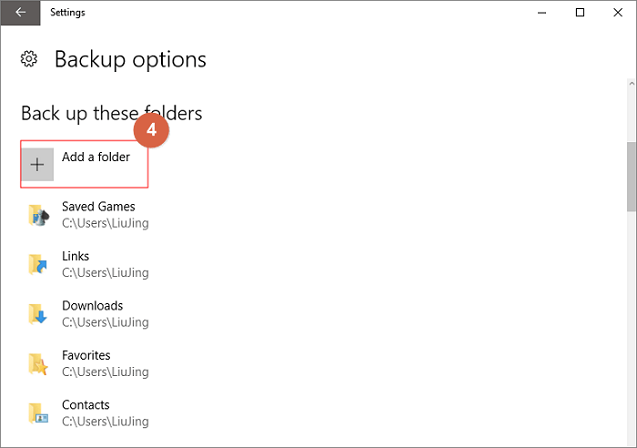
Step 4. The backup list shows which folders are being backed up, and you can also add new folders to back up by selecting the "Add a folder" option.
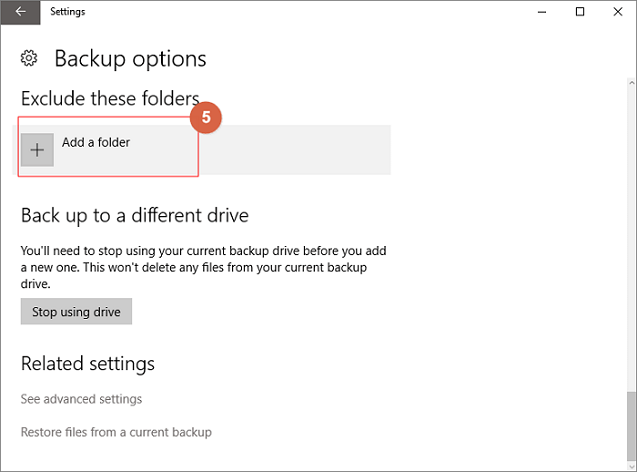
Step 5. To exclude certain folders from your backup, click on "Add a folder" under the "Exclude these folders" option. This allows you to specify specific folders that you don't want to be backed up.
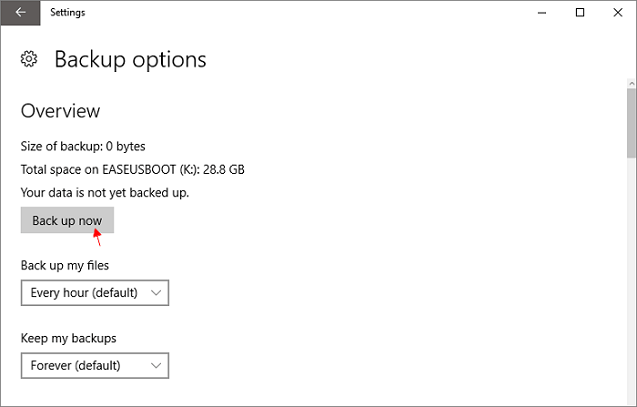
Step 6. After the setup is completed, please select Back up now.
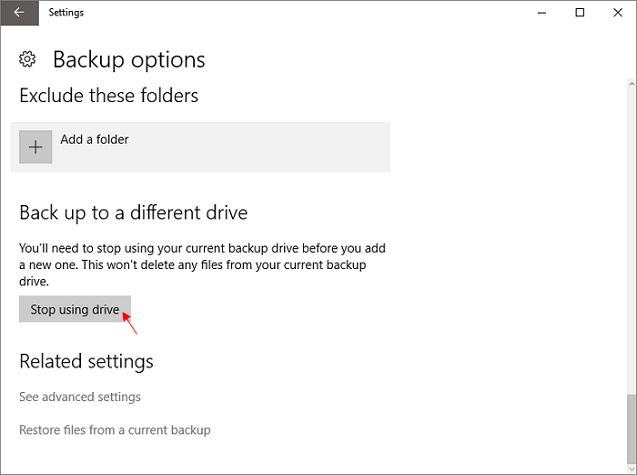
Step 7. To switch to a different backup drive, first stop using your current backup drive by selecting "Stop using drive", then you can choose another drive to back up your files.
Page Content:
Must-have Free Windows 11 File History Alternative
File History, a free backup product built into Microsoft Windows, is a useful but very limited tool for protecting personal data. However, as a computer user, it's not enough to just safeguard your files - backing up your entire system regularly is crucial, as a computer failure can result in the loss of all data, not just what's protected by File History.
Backing up your system can be made simple by choosing the right product, making it easier than using File History to back up files.
Qiling Backup Free is a full-featured backup product that is compatible with Windows 11, allowing for file, disk partition, and system backups, and can replace File History as a long-term security steward.
This software is considerate and efficient, allowing users to choose from various backup methods to optimize their backups. It enables incremental backup, differential backup, and compresses backup images to save disk space, while also giving users the option to delete unnecessary historical backups. This thoughtful approach helps users save space and time, making the backup process more streamlined and manageable.
To take a full Windows 11 system backup with Qiling free backup software, follow these steps: First, download and install Qiling on your Windows 11 system. Next, launch the Qiling software and create a new backup task.
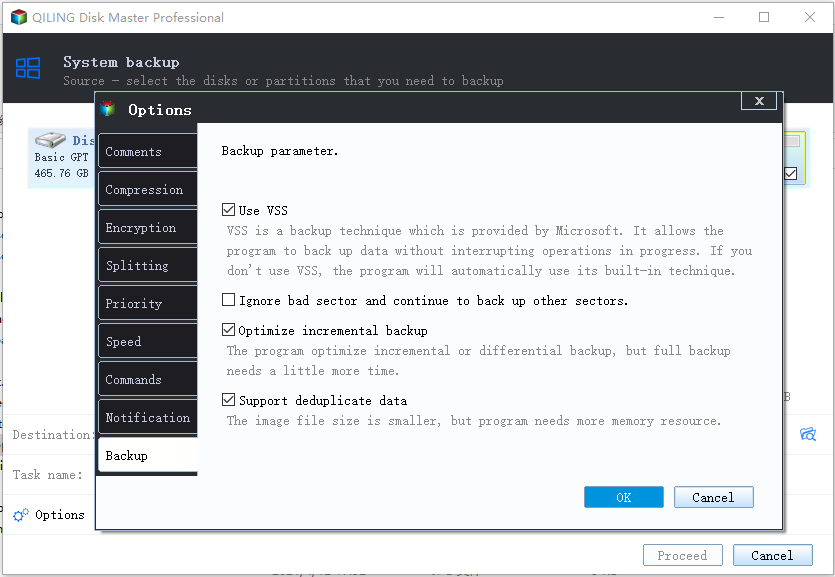
Step 1. To start a system backup, launch Qiling Backup and navigate to the "Backup and recovery" page. From there, select the "System Backup" option to initiate the backup process.

Step 2. The system partition will be automatically selected, you only need to choose the installation location.

Step 3. You can save backup files to your local drive, cloud storage, NAS, or even connect an external hard drive to store system backup files.

Step 4. You can customize the settings in "Options" at the left bottom. After that, click "Proceed", and the process will begin.
After finishing the backup process, you can check the backup status, recover, open, or delete the backup by right-clicking the backup task on the left. *
Related Articles
- Halo Inifinite Keeps Crashing on PC: Solved by Specialists' 10 Ideas
- 2022 Fix: Windows 11 Cumulative Update Failed to Download and Install
- How to Copy/Move Recovery Partition to USB or Another Hard drive [2 Ways]
- Expert Picks: Best Virus Protection for PC 2022 (Free & Paid)
- Qiling Disk Master vs. PCmover, Which File Transfer to Select
If you're looking for a comparison between Qiling Disk Master and Laplink PCmover, this page will help you decide which tool to use for file transfer, app transfer, and even users' settings & account settings. - Qiling Disk Master VS Zinstall: What Difference Between Them and Which Is Better
When it comes to data migration tools, you may wonder which software to choose. The hit data transfer software is Qiling Disk Master and Zinstall. This article will focus on the Qiling Disk Master vs. Zinstall. Go on to learn the main features, cost, specifications of both software.