Windows 11 File History: Create File Backups and System Backup Image
- Page Content:
- Overview of Windows 11 Backup
- Everything About Windows 11 File History
- Windows 11 File History: A Complete User Guide
- Must-have Free Windows 11 File History Alternative
"My friend broke my mobile hard drive and it cannot be read now. This hard drive stores many large size video clip files (> 500 MB/piece) and images. I cannot experience such a nightmare twice. Now I must take a backup of the future data. Any Windows 11 backup options?"
Overview of Windows 11 Backup
Many people agree on the importance of backup in data security protection, but struggle to decide on a specific implementation, including which backup software to use and whether it's expensive.
There are several capable Windows backup and recovery software options available, including both free and commercial ones. However, it's worth noting that Microsoft Windows also has its own native backup solutions, such as File History, which can be a viable option.
Everything About Windows 11 File History
Q1. How do I Access File History in Windows 11
To access the File History option in Windows 11, you can use one of several methods, including entering it directly or using the File Explorer.
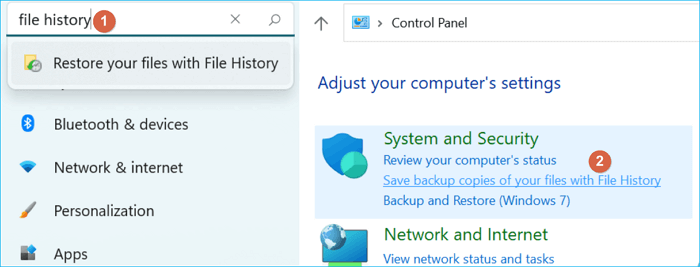
1) Open Settings, in the search box, type File History
To save backup copies of your files with File History, press the Windows + R keys, type "Control Panel," and then click on "Save backup copies of your files" under the "System and Security" section.
Q2. What does Windows 11 File History back up?
File History only backs up copies of files that are in the Documents, Music, Pictures, Videos, and Desktop folders, as well as OneDrive files available offline on your PC. To include other files or folders in the backup, you can add them to one of these folders.
Q3. Why is it said that File History has been removed from Windows 11?
In Windows 11, File History is still available, but its path has changed from Windows 10. Users who have upgraded to Windows 11 may find it difficult to locate the feature, thinking it has been removed. However, the function remains available for backing up various types of files.
Q4. Can You Use Windows 11 to Create a system backup?
Windows 11 has two backup solutions: File History, which backs up individual files, and Windows Backup and Restore (Windows 7), which backs up the operating system.
Does Windows File History Backup Everything?
File History is a Windows feature that allows users to back up their files, but it does not back up everything on Windows. It only backs up files from libraries, desktop, and documents, excluding system files and other sensitive data. This is a deliberate design choice to prevent accidental overwriting of system files.
Windows 11 File History: A Complete User Guide
File History is a popular backup choice for Windows 11, allowing users to protect their documents, photos, videos, and desktop data from loss by saving backups to an external hard drive or network drive.
For backup purposes targeting a hard drive, disk partition, or OS, you'll typically need to rely on advanced solutions from third-party backup and recovery programs.
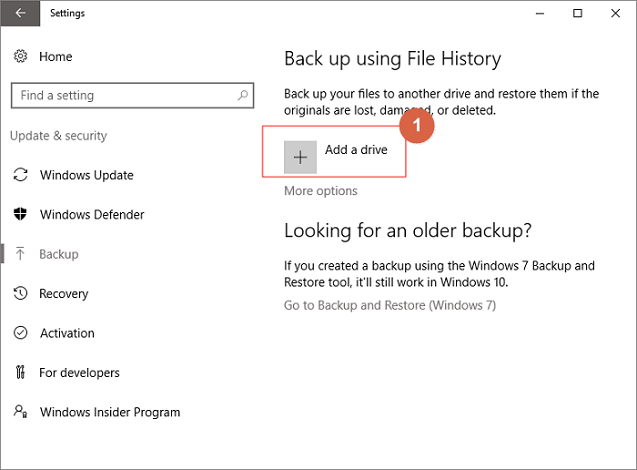
Step 1. To set up automatic backups on your Windows device, go to Start, then Settings, followed by Update & Security, Backup, and finally Add a drive. From there, select an external drive or network location where your backups will be stored.
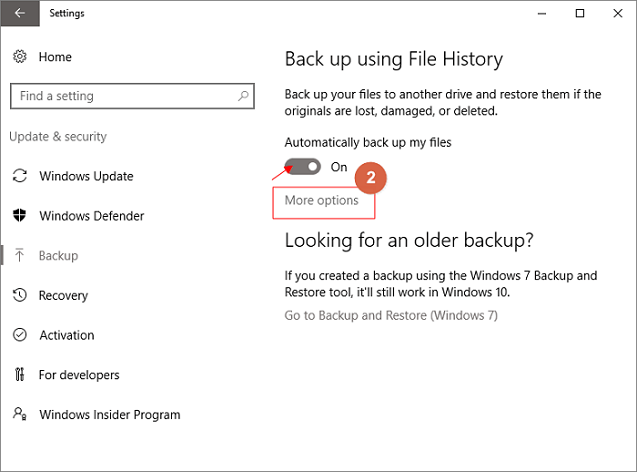
Step 2. After selecting a drive, the "Automatically back up my files" option will be enabled, and you can then select "More Options" to set up the backup cycle time and folder settings.
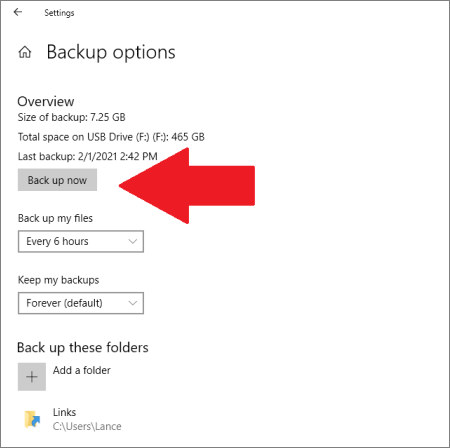
Step 3. Set the cycle time for how often you want to back up your files, and the retention period for how long you want to keep them.

Step 4. The backup list displays the folders that have been backed up, and you can also add new folders to back up by selecting "Add a folder".
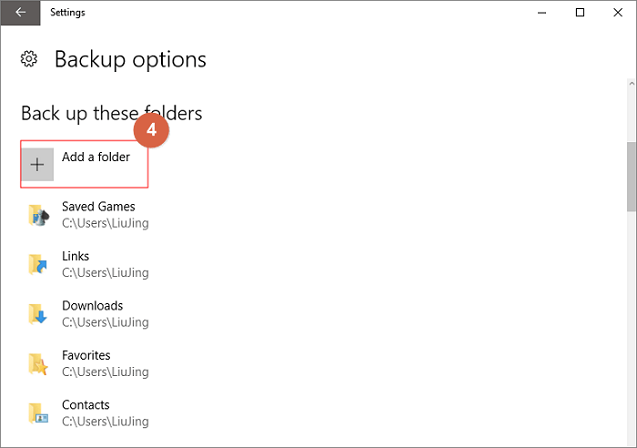
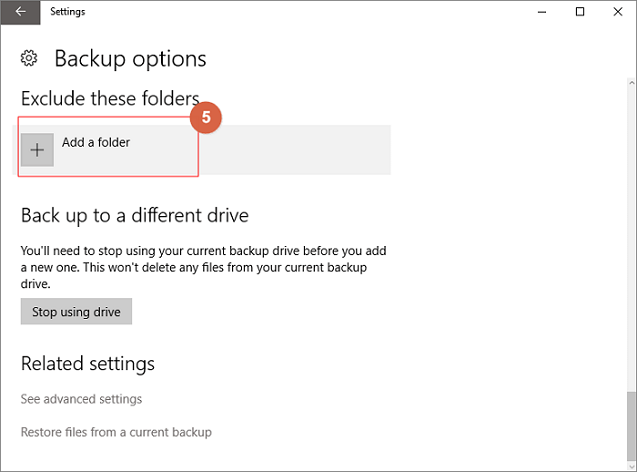
Step 5. To exclude certain folders from the backup, click on "Add a folder" under the "Exclude these folders" option. This allows you to specify which folders should be skipped during the backup process.
Step 6. After the setup is completed, please select Back up now.
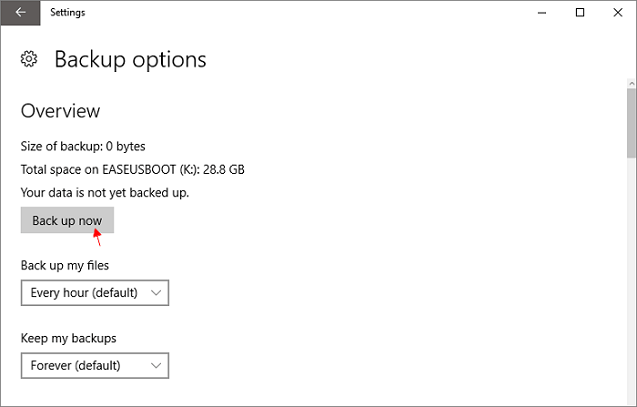
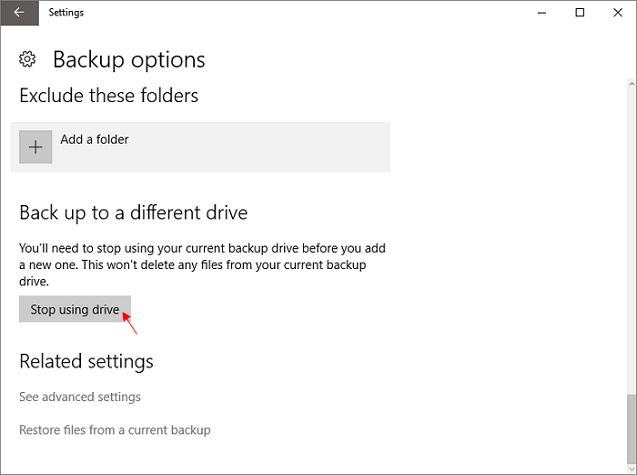
Step 7. To change to a different backup drive, you need to stop using your current backup drive first, then you'll be able to choose another drive to back up your files.
Page Content:
Must-have Free Windows 11 File History Alternative
File History is a free and limited backup product built into Microsoft Windows. While it's useful for protecting personal data, it's not enough to safeguard your entire computer. Regular system backups are crucial, as a computer failure can result in the loss of not just the data protected by File History, but the entire system itself.
Backing up your system can be made easy with the right product, making it simpler than using File History to back up files.
Qiling Backup Free is a user-friendly backup product compatible with Windows 11, offering file, disk partition, system, and commercial version features like Outlook email backups, replacing the need for File History.
The software is considerate and efficient in making backups, allowing users to choose from various backup methods such as incremental backup, differential backup, and compressing backup images to save disk space. It also enables users to delete unnecessary historical backups.
To take a full Windows 11 system backup using Qiling free backup software, follow these steps: you can use the software to back up your entire system, including all installed applications, settings, and files, to an external drive or network location. This can be done by selecting the "Full Backup" option and choosing the destination for the backup file.
Step 1. Launch Qiling Backup and choose "System Backup" on the home page.

Step 2. The system partition will be automatically selected, you only need to choose the location.

Step 3. You can save the backup file to your local drive, cloud storage, or NAS, or even connect an external hard drive to store the system backup files.

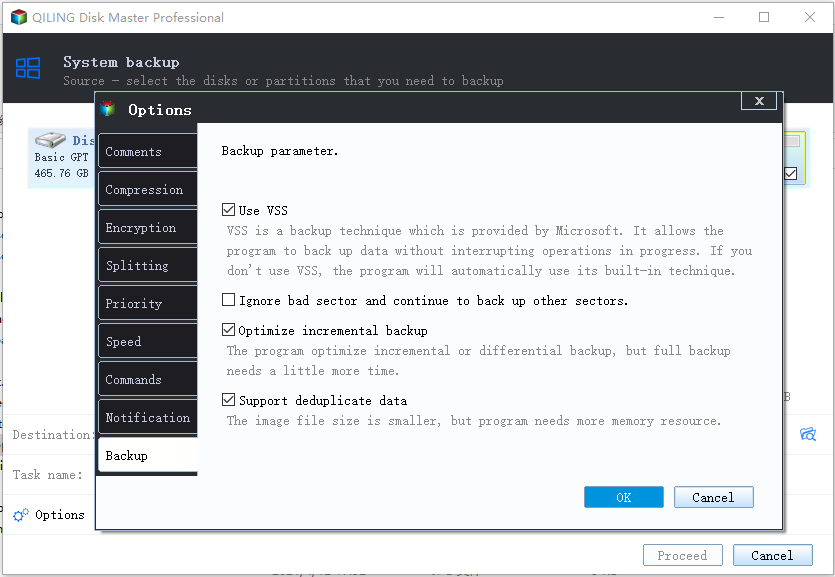
Step 4. You can customize your settings in "Options" at the bottom left, then click "Proceed" to start the process.
After finishing the backup process, you can check the backup status, recover, open, or delete the backup by right-clicking the backup task on the left.
Related Articles
- Halo Inifinite Keeps Crashing on PC: Solved by Specialists' 10 Ideas
- 2022 Fix: Windows 11 Cumulative Update Failed to Download and Install
- How to Copy/Move Recovery Partition to USB or Another Hard drive [2 Ways]
- Expert Picks: Best Virus Protection for PC 2022 (Free & Paid)
- How to Quickly Transfer Large Files Over Network
If you frequently transfer large files, consider using a file transfer server with SCP or FTP for easier transfers. A guide for file transfer is available to assist you. - Ransomware-proof Backup Solutions in 2022
Ransomware is a type of malicious software that encrypts a victim's files or makes their system unusable, and demands a ransom in exchange for the decryption key or a way to restore the system, posing a significant threat to individuals and organizations worldwide.