[Full Guide] Windows Defender Download Windows 11
After installing Windows, the system is initially vulnerable due to a protection gap in Microsoft Defender, which is caused by outdated antimalware software binaries. This vulnerability persists until the system receives its first antimalware software update, making it essential to keep Windows Defender updated, especially during the initial setup process.
Why You Should Download Windows Defender on Windows 11
To stay safe in the internet world, it's essential to prevent computer viruses and other potential threats. Windows Defender is a crucial tool that helps keep your Windows 11 safe, and disabling it can lead to various issues, including compromised system security, increased vulnerability to malware and other cyber threats, and potential data loss.
- Getting prominent to malware infections, viruses, or other threats
- Network-based attacks
- Flagging phishing sites
- Blocking exploits
- Lower PC performance
- Usage limitations
- Lower location tracking and parental controls
See also:
Here we are with the leading benefits that a Windows Defender brings:
- Absolute threat analysis and score for your device
- Ensured high-end performance
- Protection against malware infection
- Absolute network protection and file blocking
- Attack surface reduction
- File recovery in combination with OneDrive
5 Methods to Find and Enable Windows Defender On Windows 11
- Method 1. Find It From the Start Menu
- Method 2. Use Windows Search
- Method 3. Enable Windows Defender From Settings
- Method 4. Open Windows Defender via Control Panel
- Method 5. Activate Windows Defender From the System Tray
Windows Defender on Windows 11 can be easily enabled using different methods. If you are going to do it for the first time and don't have any idea about it, here we are with the top 5 solutions for you. You can enable Windows Defender by checking the box next to "Windows Defender" in the Windows Security app, or by going to Settings > Update & Security > Windows Security, and then toggling the switch next to "Virus & threat protection" to On.
Method 1. Find It From the Start Menu
Step 1. Tap on the Start button of your Windows.
Step 2. To access Windows Security or Windows Defender, click on the Start menu and select the Windows Security or Windows Defender app from the list of available apps. Alternatively, you can click on the All Apps icon to view a list of all installed apps, including Windows Security or Windows Defender.
Method 2. Use Windows Search
Step 1. Tap on the Start button on your Windows.
Step 2. Now type Windows Security in the search box.
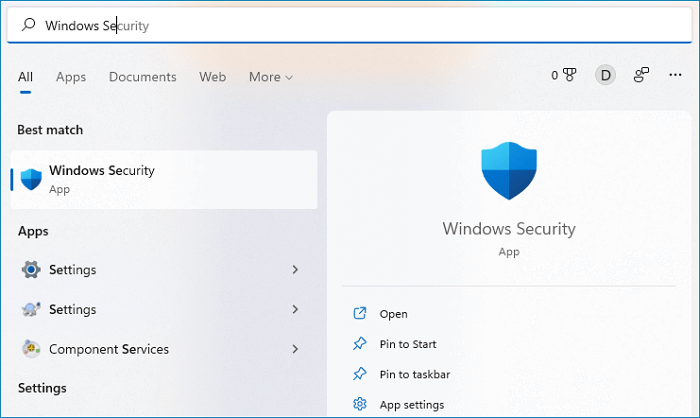
Step 3. To access Windows Defender, you'll need to click on the search icon in the taskbar, type "Windows Defender" or "Windows Security", and then click on the result that says "Windows Defender" or "Windows Security" to open it up.
Method 3. Enable Windows Defender From Settings
Step 1. Launch Windows Settings by tapping on "Windows" and "I" altogether.
Step 2. Tap on "Privacy & Security" to proceed further.
Step 3. You now have to tap on the Windows Security button on the left panel.
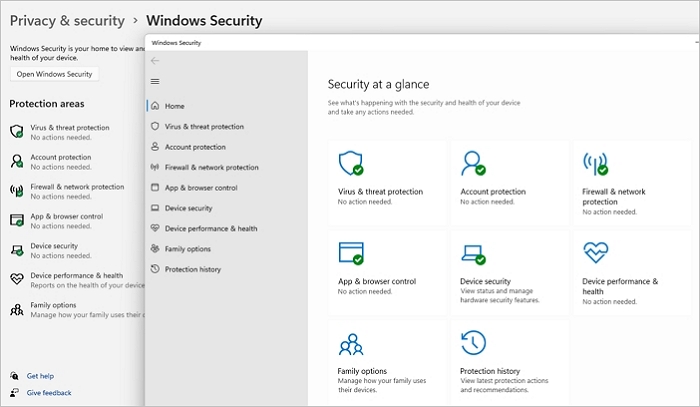
Step 4. Once you've completed the task, tap the Windows Security button on the right side of the Windows interface to open it.
Method 4. Open Windows Defender via Control Panel
Step 1. To launch the Run command on your device, press the Windows and R keys simultaneously. This will open a window where you can type commands and execute them directly, providing a quick way to access various system functions and utilities.
Step 2. To access the Control Panel in Windows, type "Control Panel" in the search bar and press Enter. This will open the Control Panel window, where you can navigate to various settings and options for your computer.
Step 3. Once you're done, the Control Panel will open up on your device.
Step 4. What is the process you're referring to? I want to understand the context better.
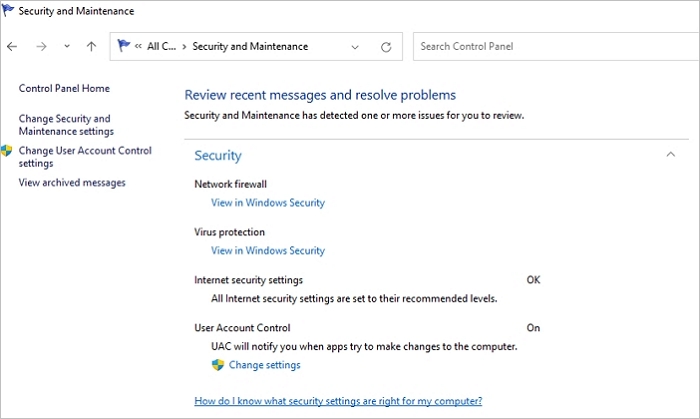
Step 5. To continue, tap on the Windows Defender Firewall, which will further open up its settings option.
Method 5. Activate Windows Defender From the System Tray
To open Windows Defender on Windows 11, simply double-click on the related icon in the system tray. If you don't see the icon, it's likely because Windows Defender is already enabled on your device. If you need to enable it, you can do so by following the necessary steps.
Step 1. To open Windows Settings, tap the Windows and I buttons together. This is a quick way to access various settings and options on your Windows device.
Step 2. Tap on "Privacy & Security".
Step 3. To open Windows Security, tap on the "Windows Security" option, then tap on the "Open Windows Security" section.
Step 4. Select Virus & threat protection and tap on the Manage settings option.
Step 5. To enable or disable Windows Defender on Windows 11 or 10, toggle the switch on or off under Real-time protection. This allows you to quickly turn Windows Defender on or off.
Is Windows Defender Good Enough to Protect PC?
Windows Defender is a built-in antivirus software that comes with Windows operating systems, and for most users, it is enough to provide basic protection against malware. However, it may not be sufficient for users who need advanced features, such as real-time protection, firewall control, and password management, or those who work with sensitive data. In such cases, installing additional antivirus software can provide extra layers of protection and peace of mind.

Additional Guide: Provide Full Protection for Windows 11
Windows Defender is a reliable protection for Windows 11, safeguarding against viruses and threats. It also offers comprehensive protection. To further safeguard your PC, enable regular backups of essential data using robust backup software like Qiling Backup. This simple step adds an extra layer of protection to your device.
Qiling Backup has a feature called Security Zone, which creates a secret partition on a computer that cannot be accessed or modified by users, third-party apps, or Windows itself.
Qiling Backup is a free and efficient backup software that provides one-click backup and instant recovery. It offers disk imaging performance and safely saves backups, making it a reliable solution for users worldwide. With millions of users globally, it's a perfect tool for backing up and restoring data anywhere, anytime.
Features:
- Security Zone - Protect important data from ransomware
- Ensured convenient backup
- Free backup and data recovery
- Ensured free cloud storage
- Simple and easy-to-go management system
- Enhanced backup efficiency
- Basic backup scheduling
To back up your data on Windows 11, you can follow these steps: first, go to Settings, then select "Update & Security," and finally click on "Backup." From there, you can choose what you want to back up, such as your files, system, or both, and select a location to save your backup.
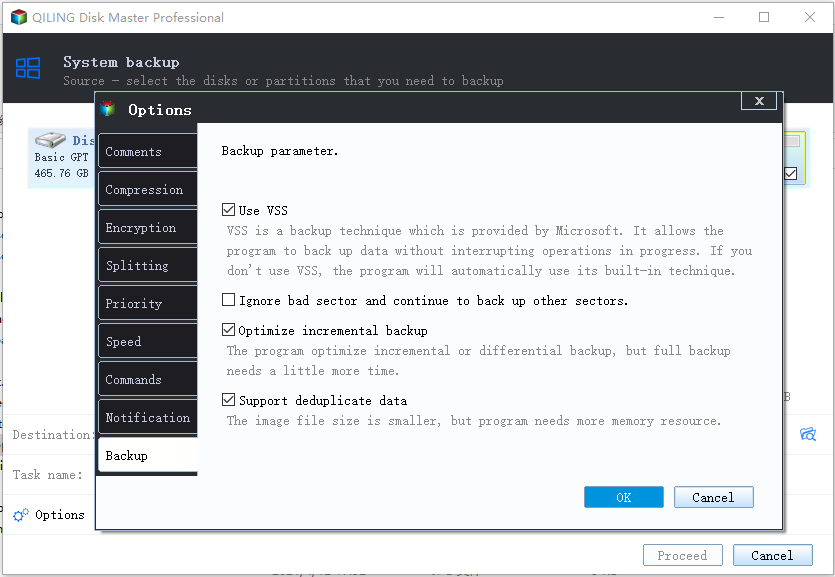
Step 1. Launch Qiling Backup and choose "System Backup" on the home page.

Step 2. The system partition will be automatically selected, so you only need to choose the location for the installation.

Step 3. You can save the backup file on your local drive, in the cloud, or on a network-attached storage (NAS) device, and you can also connect an external hard drive to store system backup files.

Step 4. You can customize settings in "Options" at the bottom left, then click "Proceed" to start the process.
Conclusion
To keep your Windows 11 safe, use Windows Defender as your ultimate security source. Before doing so, secure your data with a backup and recovery tool like Qiling Backup to ensure perfect access and protection. This combination will give you a solid defense against potential threats.
Related Articles
- 2022 Five Best Solutions to Backup Files in Windows 11
- What Is A System Image? Everything You Need to Know About Creating System Image Backups
- Windows 10 Backup No Usable Drives Found [Updated Issue Solved!]
- Is Vimm's Lair A Safe Site to Download Games?
- How to Transfer Adobe Creative Cloud to New PC Windows 11
To transfer Adobe Creative Cloud to a new PC Windows 11, back up your accounts and password, install Adobe Creative Suite, and then automatically transfer the Creative Cloud without reinstallation. - How to Transfer Adobe Flash Player to Another Computer?
Although Adobe Flash has been officially discontinued, there are still valid options to keep using Adobe Flash Player. You can explore alternative solutions to continue accessing Flash content, and if desired, easily transfer Adobe Flash Player to another computer to keep using it.