Quick Answer: Why Do Deleted Files Still Appear Mac
Mac users often delete files to free up space and improve performance, but are sometimes surprised to find that the deleted files still appear. This is a common issue with Macs, which have limited storage capacity, making it necessary for users to regularly delete files to make room for new ones.
Deleted files can reappear, causing confusion as you recall deleting them. This phenomenon can be attributed to various factors, and understanding these reasons can help clarify the situation. To resolve the issue, you can try forcing the deletion of the files, which involves specific steps and considerations. By exploring these aspects, you can gain a better understanding of why deleted files reappear and how to effectively remove them.
Why Deleted Files Still Appear on Mac
Deleting files on a Mac is a simple process that can be completed in just a few minutes. The most straightforward method is to drag the unwanted files to the Trash can. However, in some cases, deleted files may reappear, causing inconvenience.
The appearance of deleted files on your Mac can be attributed to several reasons. These include the files being moved to the Trash and not properly emptied, the use of external storage devices or cloud services that may not have been properly synced, or the presence of malware or viruses that can restore deleted files. Additionally, some Macs may have file recovery features enabled, which can cause deleted files to reappear.
- If you previously used an external drive connected to the Time Machine drive on your Mac, you can still see deleted files on that external drive.
- Sometimes, issues with the macOS Trash Can folders can cause deleted files to appear as if they still exist.
- In some cases, damaged or corrupted SD cards or USB drives can cause deleted files to reappear.
- If you have not emptied the MacOS Trash Can, you will see the deleted files appearing again.
- You might not be aware, but the file might not have permission to get deleted.
- Other applications on the Mac are currently using the file.
To recover deleted files on a Mac without using Time Machine, you can use two methods. Firstly, you can try using the "Recently Deleted" folder, which can be accessed by going to the "Finder" and then clicking on "Trash" and then "Recently Deleted".
If you want to use Time Machine, you'll need an external hard drive to create a backup of all your Mac files. However, if you don't have one, you can still restore your Mac data using Deep Data Recovery for Mac, which is available for download.
How to Completely Force Delete Files On Mac?
Deletion of files from a Mac can be a relatively straightforward process, but certain situations may require force deletion, which can result in permanent loss of the file.
Take a look at the different force delete methods that you can try on Mac.
- Method 1. Empty Your Trash
- Method 2. Remove Files Using Terminal
- Method 3. Delete Files Using Safe Mode
Method 1. Empty Your Trash
Step 1. To delete a file, click on the "Trash can" icon on the Dock at the bottom of the screen.

Here, there are two different options you can follow:
Option 1. To empty a specific item from the Trash, control-click the file and select the "Delete Immediately" option.
Option 2. The second path is emptying the entire Trash.
Step 2. To empty the Trash on a Mac, go to the Finder window, select the Empty Bin option from the drop-down menu, and click on the "Empty" option.
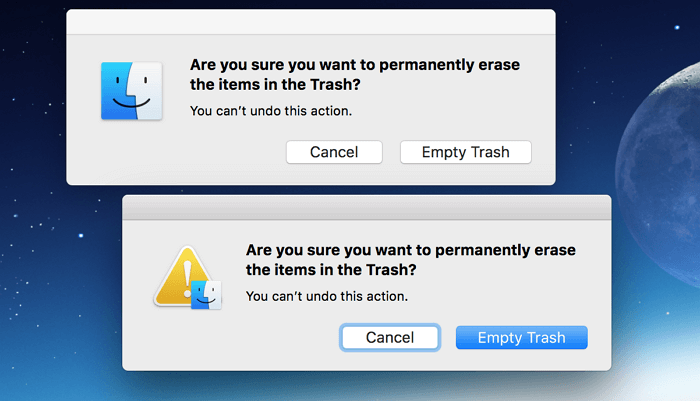
On a Mac, deleted files remain in the Trash until you choose to delete them permanently.
Note: This method permanently deletes files by overwriting the previously occupied space, ensuring they are completely removed from the system.
Method 2. Remove Files Using Terminal
Using the terminal method for file deletion is a high-risk approach, as even minor mistakes can have disastrous consequences. To avoid this, it's essential to be extremely cautious when using Terminal for file deletion.
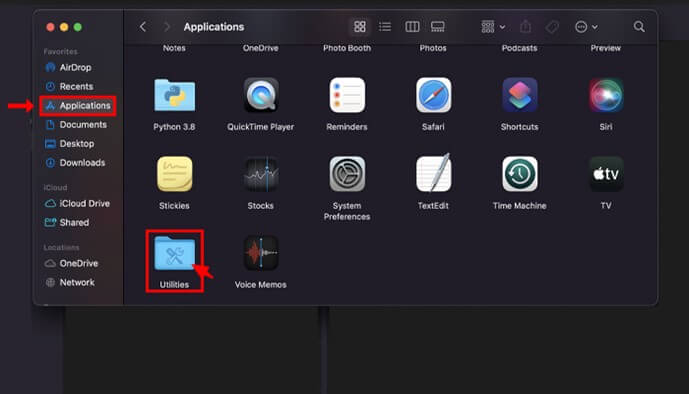
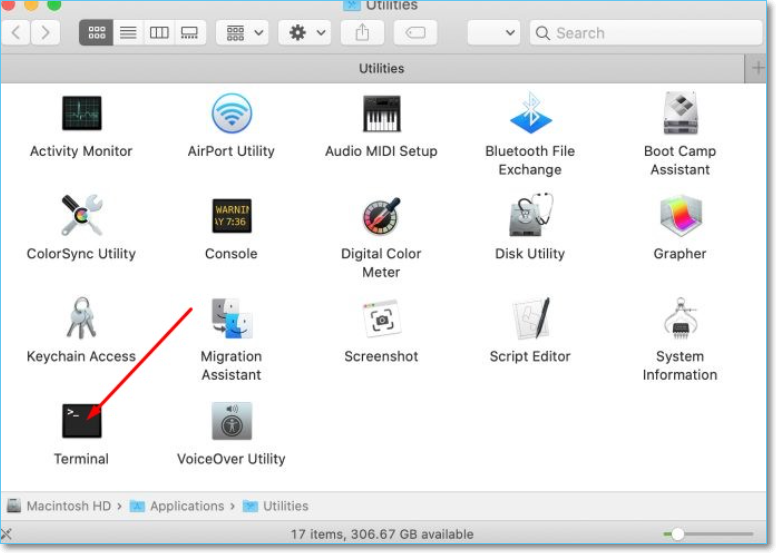
Step 1. Go to "Applications" and press the "Utilities" option.
Step 2. To delete files from a specific folder, open the Terminal app, navigate to the desired folder using the 'cd' command, and then use the 'rm' command to delete the files you want to remove. For example, if you want to delete all files in the current directory, you can use the command 'rm *'. If you want to delete specific files, you can list their names after the 'rm' command, separated by spaces.
Type the following command:
– rm-f. Make sure that there is a space after the f.
Step 3. To delete a file on a Mac, drag the file you want to delete to the terminal window. The filename and path will be automatically added to the terminal command. Double-check that it's the correct file, then press Enter to confirm the deletion.
To delete a folder, type the command "rm -rf" and press enter, following the same steps as deleting a file.
If that doesn't work, enter sudo rm–R. Keep in mind that there should be a space after the R.
Step 4. To delete a file on a Mac, simply drag the file you want to delete to the terminal window. This will add the filename and path to the terminal command, allowing you to delete the file with a single command.
Step 5. After double-checking, press the Enter key. Enter the Admin password and press the Enter key again.
Note:Using `sudo rm -R` on a Mac can be extremely dangerous as it may delete multiple essential files, taking a significant amount of time, especially for larger files. This command is more aggressive and requires caution, as it will delete files recursively without prompting for confirmation. It's recommended to exercise extreme care when using this command to avoid unintended data loss.
Method 3. Delete Files Using Safe Mode
Step 1. Press the Restart option on the Apple icon on the screen, and confirm the restart prompt.
Step 2. Press the Shift key while selecting the "Restart" option to access the login window. Release the Shift key once the login window appears.
Step 3. To delete a file in safe mode, select the file menu where the file you want to delete is located, then press the "Move to trash" option from the drop-down. This will remove the file from your system.
Step 4. To delete a file permanently, go to the trash icon, click and hold it, wait for the appearance of "empty trash", and then select the option to delete the file permanently instead of emptying the trash.
Step 5. Restart the system. That will exit the safe mode.
Related Guide: Delete Files from Your Mac that Won't Delete
Deleting files on a Mac can be a straightforward process, involving dragging files into the Trash. However, in some cases, files may not be deleted due to various reasons, making it necessary to explore alternative methods.
See also:
Several reasons indicate why Mac won't delete certain files:
- The file is locked.
- The file you want to delete is in use presently.
- Bugs in Mac Finder.
- Absence of permission to delete or edit the file.
- Corruption within the macOS.
Different solutions can rectify this problem. Check them out:
- Unlocking files: If the file you want to delete is locked, you must unlock it. To do this, press the control key, select the file, and click "Get Info" (⌘ + I). In the General section, uncheck the "Locked" option to unlock the file.
- Resolving the "File in use" error:To force quit an app on your Mac, go to the Apple icon, select Force Quit, and choose the app that might be interfering with the file deletion. Then, click Force Quit and confirm if a pop-up appears. Alternatively, close all apps and try deleting the file again.
Also read: How to Delete Files on Mac that Won't Delete
Watch Out! Don't Delete Those Critical Data
Force deleting files or opting for the deletion of files that Mac won't delete requires careful consideration. It's essential to understand the potential consequences, as the data may be irretrievable once deleted. Therefore, caution is advised to ensure you're making an informed decision.
To safely delete files, first try regular deletion methods, and consider creating a backup of the files you want to delete to avoid accidental loss of essential files.
If you experience data loss despite taking precautions, using the best data recovery software is the way to go. Deep Data Recovery for Mac is a reliable option that can help restore lost data, regardless of the cause, including photos, music files, videos, and emails.
Check out the steps that explain how to use Deep Data Recovery for Mac:
Step 1. Launch Qiling file recovery software on your Windows computer. Select file types and click "Next" to start the recovery process.

Step 2. Select the disk location where you lost data and click the "Scan" button to initiate the scan.

Step 3. Deep Data Recovery for Mac will immediately scan your selected disk volume and display the scanning results on the left pane.

Step 4. To recover the selected file(s), click the "Recover" button. This will restore the file(s) back to their original state.
Conclusion
Mac users may encounter deleted files that still exist on their system, but there's no need to panic as several reasons can explain this phenomenon. Fortunately, there are multiple solutions that can help force delete unwanted files.
Mac often refuses to delete certain files, typically configuration or system files, but there are solutions to overcome this issue.
Before deleting vital files, make sure to have a backup to avoid data loss. If you still lose data, consider using Deep Data Recovery software for Mac, which is easy to use and can help retrieve essential files.
Related Articles
- Follow 5 Effective Ways to Fix Mac Fusion Drive Not Showing Up
- (Easy!) How to Delete Apps on Mac
- Apps Unresponsive? Force Quit on Mac when Frozen
- MacBook Pro/Air Won't Turn on? 10 Fixes + Bootable Recovery Tips
- [SOLVED] Hard Drive/External Hard Drive Only Shows Half Capacity
Many reasons would result in hard drive showing partial capacity, like a half(1tb ssd only showing 500gb). If your hard drive only showing partial capacity, so you can get 6 fixes to how to restore hard drive full capacity. - Free Fix Hard Drive Partition Shows 0 Bytes Error in Windows 11/10/8/7
If your hard drive shows 0 bytes used on your computer, you may be unable to access saved data on a hard drive or partition that displays 0 bytes in Windows. Fortunately, Deep Data Recovery Free offers reliable fixes to solve the hard drive partition showing 0 bytes error and restore HDD data.