How to Recover Deleted Screenshots on Mac (5 Ways)
Mac users can take a screenshot by pressing Command + Shift + 3, but sometimes they may struggle to find the saved screenshot. This issue may be caused by the screenshot being saved to the desktop, or it may be saved to the clipboard, or it may be saved to the screenshots folder in the pictures folder, or it may be saved to the recently used files list.
- 1. Accidentally delete the screenshots on Mac.
- 2. Empty the Trash on Mac.
- 3. Virus or malware delete screenshots on Mac.
- 4. macOS Ventura upgrade failed.
- 5. System crashes suddenly.
- 6. Physical damage on Mac.
If you lose screenshots or files on Mac due to accidental deletion, disk formatting, or other reasons, you can still recover deleted screenshots on Mac with five simple methods. We will introduce each way in the following parts.
Method 1. Recover Deleted Screenshots on Mac with Software
The quickest way to recover deleted screenshots on a Mac is by using a screenshots recovery tool, such as Deep Data Recovery for Mac, which can safely and quickly recover deleted files on your Mac.
Choosing Deep Data Recovery for Mac is a reliable option for retrieving lost files, making it a good choice.
- Support for Mac screenshot recovery and file recovery, including deleted documents, music, videos, emails, and other files.
- Support for Mac hard drive recovery and recovering screenshots from various storage devices, including SD cards, memory cards, USB flash drives, external hard drives, and more.
- This software supports a wide range of file formats, including popular document files like DOC and CWK, as well as multimedia files such as PDF, MOV, MP4, and WAV.
To recover deleted files on Mac, follow these three steps. First, immediately stop using your Mac to prevent any new data from being written to the disk.
Step 1. Scan for lost photos
To recover your lost photos, go to the location where they were lost, such as your computer's "This PC" or "This Mac" section, and click the "Search for lost files" button. This will initiate a scan of the selected location for any missing files, including photos.
Step 2. Select wanted photos
Deep Data Recovery for Mac starts a scan on the selected disk volume, presenting scanning results in the left pane, where users can filter photos by Path and Type to quickly locate lost photos.
Step 3. Recover lost photos
Select the target photos you want to recover, and click the "Recover" button to retrieve them quickly and easily.
Method 2. Recover Deleted Screenshots on Mac with Time Machine
If you're a Mac user with good data backup habits, you may be able to recover deleted screenshots from your Mac Time Machine backup, even if you don't know how to recover data with Time Machine. To do so, simply follow this tutorial, and you'll be able to recover your deleted screenshots on your Mac.
Step 1. Type in Time Machine in the Spotlight.
Step 2. Launch Time Machine on Mac
Step 3. To filter files with a specific time on the right side, you can use the `datetime` module in Python. First, import the `datetime` module and define the specific time you're interested in.
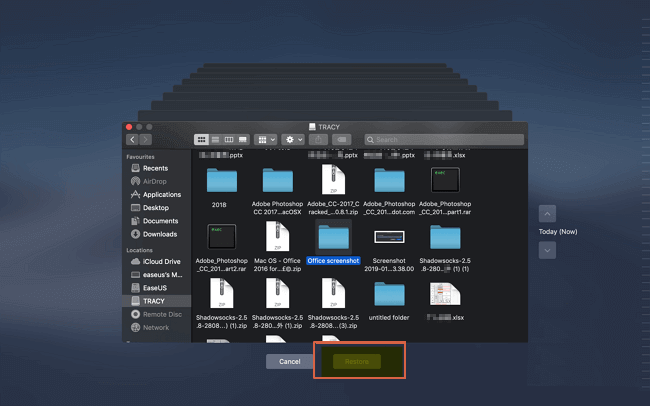
Step 4. Choose the screenshots you want to recover and click "Restore".
Method 3. Retrieve Lost Screenshots from Trash Bin on Mac
The Trash on a Mac can be found by searching "Trash" in the Spotlight, and it stores deleted files for a short time, allowing for easy recovery of deleted files, including screenshots, by simply clicking on the "Restore" option.
Step 1. Launch the Trash Bin by searching it in the Spotlight.
Step 2. Scroll down to find the screenshots you delete.
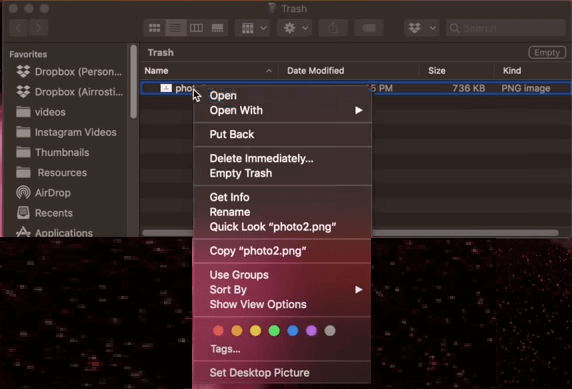
Step 3. Right-click the screenshot and click "Put Back".
Note: If you delete screenshots and empty the Trash with the Move to Trash shortcut on Mac, you should return to Method 1.
Method 4. How to Undo Screenshots Deletion on Mac
If you accidentally delete a screenshot on your Mac, you can often recover it immediately using the Undo option. This allows you to restore the screenshot to its original state, effectively reversing the deletion. Simply go back to the step before the deletion and the screenshot should be restored.
Step 1. After deleting essential screenshots. Click "Edit" from the menu bar.
Step 2. Click "Undo Move of [screenshot name]" to restore the deleted screenshot immediately. You can also press Command + Z to undo the deletion.

Method 5. Recover Deleted Screenshots on Mac from iCloud
After signing in to an Apple account, you'll also have 5 GB of iCloud storage space to store your Mac devices' data. To recover deleted screenshots on Mac from iCloud, you can follow the steps to retrieve them.
Step 1. Enter iCloud.com, and sign in with your Apple account.
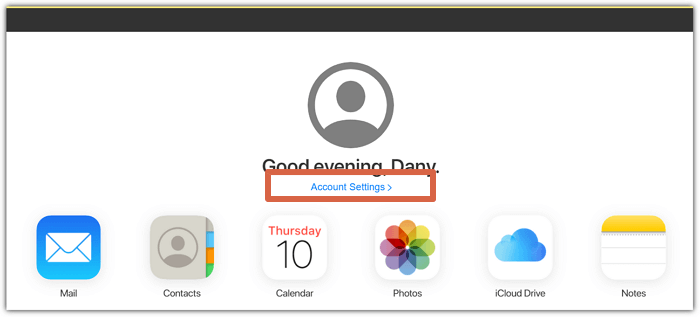
Step 2. Click "Account Settings" under your profile photo.
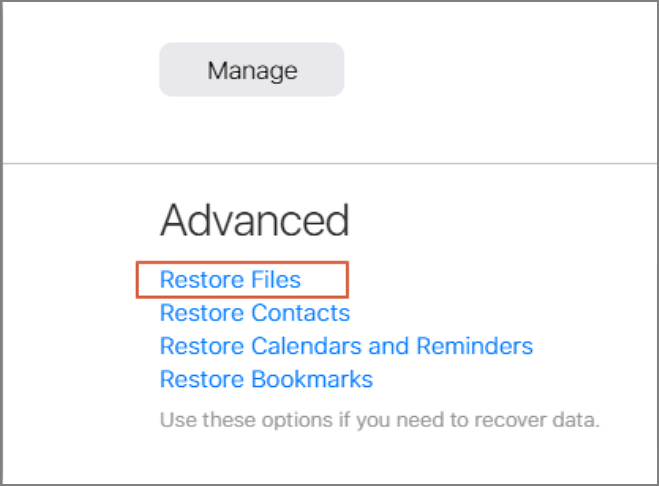
Step 3. To recover deleted screenshots, click on the "Restore Files" option in the advanced settings. This allows you to select and recover the deleted screenshots.
Summary
We have discussed five simple solutions to recover deleted screenshots, including using Time Machine, iCloud, Mac's Undo option, and the Trash. However, our most recommended solution is recovering deleted screenshots on your Mac with Deep Data Recovery for Mac, a recovery tool that can help you retrieve lost data. You can download and experience its effectiveness now.
Recover Deleted Screenshots on Mac FAQs
If you've accidentally deleted a screenshot on your Mac, don't worry - there are ways to recover it. You can try using the "Time Machine" feature to restore the deleted screenshot, or use a third-party data recovery software to scan your Mac's hard drive for deleted files.
Can I recover deleted screenshots on Mac without the software?
You can recover deleted screenshots on a Mac without using software, and there are four solutions to help you do so.
- 1. Recover from Time Machine backup.
- 2. Recover from iCloud.
- 3. Recover from the Trash.
- 4. Recover with the Undo option.
Can I recover deleted photos from iCloud on Mac?
You can recover deleted files, including photos, from iCloud on your Mac by going to the iCloud website, signing in with your Apple ID, and selecting the "Account Settings" option. From there, click on "iCloud Drive" and then "Browse" to locate the deleted file. If it's still available, you can download it back to your Mac.
- 1. Enter iCloud.com, and sign in with your Apple account.
- 2. Click "Account Settings" under your profile photo.
- 3. To recover deleted screenshots, click on the "Restore Files" option in the advanced settings, allowing you to select and recover the deleted screenshots.
How do I recover deleted screenshots on Mac after emptying the Trash?
After emptying the Trash on a Mac, you can recover deleted screenshots with the help of Deep Data Recovery for Mac.
- 1. Download and install this professional software.
- 2. Scan the Mac disk to find the screenshots.
- 3. Select the screenshots and click "Restore".
How to take a screenshot on Mac?
To take a screenshot on your Mac, press the keys Shift + Command + 3 to capture the entire screen or Shift + Command + 4 to capture a selected area.
Related Articles
- How to Delete a File on a Mac [Four Plans Provided]
- 5 Proven Solutions to Recover iMovie Projects on a Mac in 2023
- How to Undelete Data on Mac OS X
- Formatted Recovery Mac: How to Recover Data from Formatted Mac Hard Drive
- 2 Ways for How to Recover Files Deleted by Avast Antivirus
Avast deleting files without asking? Don't worry, you can recover deleted files from Avast free Antivirus software. If Avast has mistakenly deleted your files, follow this guide to learn how to recover them. - How to Recover Deleted Files from Recycle Bin in Windows 7
If you want to recover deleted files from the recycle bin in Windows 7 or restore the recycle bin itself, follow this step-by-step guide for Windows 7 recycle bin recovery.