How to Clone Your Drive Before a Motherboard Upgrade
Changing the motherboard replaces the part of the PC that Windows knows best. A cloned drive can still boot on the new board, but the drivers, the boot mode, and the activation all need attention, so the upgrade should start with a reliable image of the current system.
This guide explains how to clone the drive, prepare Windows for new hardware with Sysprep, and repair the boot if the first start on the new board fails.
PAGE CONTENT
- Why the Motherboard Matters
- Decide Between Clone and Clean Install
- Prepare Windows with Sysprep
- Clone the Drive with Qiling Disk Master
- Boot on the New Motherboard
- FAQs About Motherboard Upgrades
- Back Up Windows Before the Swap
Why the Motherboard Matters
- Windows stores drivers for the old chipset. The new board needs different storage and USB drivers.
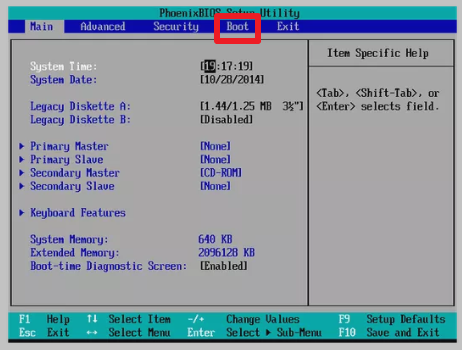
- The boot mode can change. An old BIOS board boots MBR; a new UEFI board usually boots GPT.
- Activation may break. A digital licence is tied to the old motherboard fingerprint.
- Some software is locked to the hardware. Antivirus and DRM tools may need reactivation.
- The storage controller mode differs. RAID or IDE modes on the old board may stop the new board from starting.
A clone is a good start, but it is not the whole job. The system has to be prepared for new hardware, or the first boot can hang on a black screen or a boot device error.
Decide Between Clone and Clean Install
- Clone when the installation is healthy. A clean, up-to-date Windows usually adapts to new hardware.
- Clean install when the system is unstable. Years of drivers and leftovers can block the new boot.
- Check the boot mode match. If the new board uses UEFI, the source disk should be GPT.
- Back up user data separately. Keep copies of documents and settings even if the clone succeeds.
- Note the product key. Activation may need the key again after the board changes.
The more the new board differs from the old one, the more a clean install pays off. For a same-vendor upgrade from one generation to the next, a clone often works with a little driver cleanup.
Prepare Windows with Sysprep
- Run Sysprep in audit mode. Open an elevated command prompt and run sysprep /generalize /oobe /shutdown.
- Remove hardware-specific drivers. Sysprep strips the driver cache so Windows rebuilds it on first boot.
- Set the storage controller to AHCI. The new board boots more reliably when the old system used AHCI too.
- Turn off fast startup. Fast startup can leave the disk in a state that the new firmware cannot read.
- Shut down fully. Do not hibernate; the disk must be clean for the clone.
Sysprep generalizes the installation so Windows redetects the hardware. Without it, the cloned system may keep trying to load drivers for a chipset that no longer exists.
Clone the Drive with Qiling Disk Master
Qiling Disk Master copies the whole system disk, including the EFI and recovery partitions, to another drive or to an image file. The destination is overwritten, so confirm it holds nothing you still need.
Watch the video tutorial below to clone the drive step by step with Qiling Disk Master.
Step 1. Open Qiling Disk Master, choose Clone, and then select Disk Clone.

Step 2. Select the current system disk as the source and click Next.

Step 3. Select the destination disk or image file and confirm that its data will be replaced.

Step 4. Keep the EFI and recovery partitions, and confirm the boot mode matches the new motherboard.

Step 5. Click Proceed, wait for the copy to finish, then shut the machine down before you swap the board.

Boot on the New Motherboard
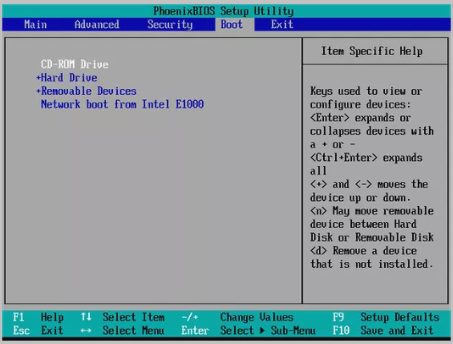
- Match the boot mode. Set the firmware to UEFI for a GPT disk or to Legacy BIOS for an MBR disk.
- Let Windows detect the hardware. The first start can take several minutes while drivers install.
- Reactivate Windows. Use the product key or the activation troubleshooter if the licence does not move.
- Install the chipset drivers. Download the latest drivers from the motherboard vendor.
- Keep the old board aside. If the new build will not start, the old hardware still boots the same disk.
If Windows stops on a boot device error, the boot mode usually does not match the disk style. Switch the firmware between UEFI and Legacy, or repair the boot files from installation media.
FAQs About Motherboard Upgrades
Can I keep the same Windows installation after changing the motherboard?
Often yes, but Windows may need new drivers and reactivation, and the boot mode must match the new firmware.
Do I have to run Sysprep before the swap?
It is recommended. Sysprep removes old drivers so Windows redetects the new hardware cleanly.
Will my programs still work on the new motherboard?
Most do, but software locked to the old hardware may need reactivation or reinstallation.
Why does the cloned drive not boot on the new board?
The boot mode or storage controller mode usually does not match. Set the firmware to AHCI and to the correct partition style.
Should I do a clean install instead of cloning?
A clean install is more reliable on very different hardware, but a clone saves the time of reinstalling everything.
Back Up Windows Before the Swap
A motherboard swap is one of the riskiest hardware changes for Windows. Create a full backup before the clone, so a failed boot costs nothing but time.
Watch the video tutorial below to back up Windows and restore it if the clone fails.
Step 1. Open Qiling Disk Master and select System Backup to include the boot partitions.

Step 2. Save the image to a drive other than the target disk and start the backup.

Step 3. Click Proceed to start the system backup and wait patiently until it finishes. You can also tick Shut down the computer when the operation is completed to power off automatically.

Step 4. If the new board will not start, restore the image to the original drive and boot it on the old hardware.

Conclusion
A motherboard swap needs more than a drive clone. Generalize Windows with Sysprep, match the boot mode to the new firmware, keep the storage controller in AHCI, and have a backup ready. Then let Windows redetect the hardware, install the chipset drivers, and reactivate if the licence does not follow.
For more on hardware changes, see How to Migrate Windows 10 from One PC to Another, Windows Not Activated After Cloning, How to Clone Windows 11 to a New Laptop, and How to Clone a Windows Server System Disk.
Related Articles
- How to Migrate Windows 10 from One PC to Another
Carry the whole setup over to fresh hardware. - Windows Not Activated After Cloning
Reactivate the licence on the new hardware. - How to Clone Windows 11 to a New Laptop
Move the system to a different machine. - How to Clone a Windows Server System Disk
Move a server installation to new storage. - How to Migrate OS to SSD Without Reinstalling Windows
Compare migration with a full disk clone.
Products
Articles & Tutorials
- Data Recovery
- Data Backup
- File Recovery
- File Backup
- System Backup and Restore
- Disk and Partition Clone
- Technical articles
- Mobile articles
- Disk Master Help
- Windows Data Recovery Tutorials
- Windows Secure Delete Tutorials
- Windows Partition Management Tutorials
- Windows File Backup and Restore Tutorials
- Windows System Backup and Restore Tutorials
- Windows Disk Backup and Restore Tutorials
- Windows Clone Tutorials