How to Clone a Hard Drive with the Linux dd Command
The dd command copies raw blocks from one device to another, which makes it the oldest and most direct way to duplicate a disk on Linux. It ships with every distribution, needs no installation, and reads and writes at the speed the hardware allows.
This guide explains how to name the correct devices, run the copy without destroying the wrong disk, and confirm that the result is a working clone rather than a half-written drive.
PAGE CONTENT
- Why Use dd for Cloning
- Identify the Source and Target
- Clone the Disk with dd
- Clone a Windows Disk with Qiling Disk Master
- Verify and Boot from the Clone
- FAQs About dd Cloning
- Back Up Before You Clone
Why Use dd for Cloning
- It exists on every system. dd is part of coreutils, so a live USB image already has it.
- It copies blocks, not files. The partition table, boot code, and every byte travel with the copy.
- It works without a desktop. A headless server or a recovery shell can run the same command.
- It is transparent. The command line shows exactly which device is read and which is written.
- It has no size limit. Multi-terabyte disks copy the same way as small ones.
dd is ideal for plain data disks, full-disk images, and Linux installations. It is more dangerous than a graphical tool, because it writes wherever you point it and never asks for confirmation.
Identify the Source and Target
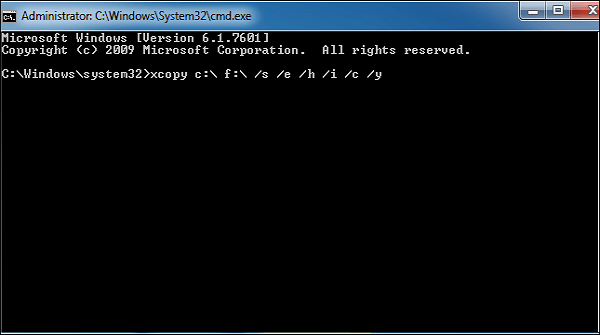
- List the disks. Run lsblk -o NAME,SIZE,MODEL or sudo fdisk -l to see every device.
- Match by capacity and model. A 2 TB source cannot be cloned to a 1 TB target.
- Check the mount state. Unmount both devices before you read or write them.
- Note the device names. /dev/sda and /dev/sdb can swap after a reboot.
- Confirm the model string. The model name is the safest way to tell the drives apart.
Reversing the two device names is the classic dd failure. Read both devices twice, and disconnect every other external drive so the list stays short and unambiguous.
Clone the Disk with dd
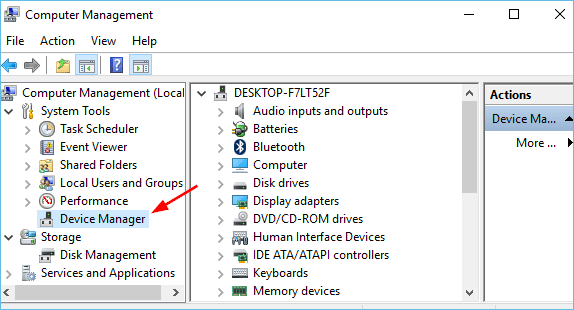
- Run the copy. Type sudo dd if=/dev/sda of=/dev/sdb bs=64M status=progress.
- Pick a sensible block size. 64M or 128M keeps the copy fast on modern drives.
- Add conv=sync,noerror. This keeps the copy going when a source sector is unreadable.
- Use a pipe for images. Add gzip -c to compress an image file instead of a live disk.
- Wait for the prompt. dd prints nothing until it finishes unless status=progress is set.
A copy that ends without an error message can still be incomplete if the target is smaller than the source. Check the byte count in the final line against the source size before you trust it.
Clone a Windows Disk with Qiling Disk Master
dd is a poor choice for a Windows system disk, because it copies the boot records exactly and cannot rebuild the boot configuration for a different drive. Qiling Disk Master handles that step and lets you clone from Windows with a guided wizard.
Watch the video tutorial below to clone the drive step by step with Qiling Disk Master.
Step 1. Open Qiling Disk Master, choose Clone, and then select Disk Clone.

Step 2. Select the source disk and click Next.

Step 3. Select the destination disk and confirm that its data will be replaced.

Step 4. Choose the clone mode and keep the boot partitions on the target.

Step 5. Click Proceed, wait for the copy to finish, then shut the machine down before you remove any cable.

Verify and Boot from the Clone
- Compare the byte counts. The dd summary must match the source size exactly.
- Check the partition table. Run sudo parted -l and confirm the table and partition sizes.
- Mount the copy read-only. Open it with mount -o ro and confirm the files are readable.
- Grow the partition if needed. A larger target keeps the old size until you resize it.
- Boot alone. Disconnect the source disk so the firmware has only one option.
If the cloned Linux disk stops at a boot prompt, reinstall the bootloader with grub-install on the new device. The files are usually intact, and the boot record is the part that needs a second pass.
FAQs About dd Cloning
Is the dd command safe for cloning a live system?
Not for the disk you are running from. Boot from a live USB so nothing writes to the source while dd reads it.
How long does a dd clone take?
It is limited by the slower of the two drives. A 1 TB copy on SATA hardware usually runs for a few hours.
Why does dd report fewer bytes than the source size?
The target was smaller than the source, or the copy stopped early. Check both capacities before running it again.
Can dd clone a disk to a larger disk?
Yes, but the extra space stays unallocated. Resize the partition afterwards with parted or GParted.
Does dd preserve the boot sector?
It copies it exactly. That works for identical hardware, while a different disk often needs grub-install or a boot repair.
Back Up Before You Clone
A dd command writes without confirmation, so one wrong device name erases a disk. Keep an image of the source on a separate drive before you type the command.
Watch the video tutorial below to back up Windows and restore it if the clone fails.
Step 1. Open Qiling Disk Master and select System Backup to include the boot partitions.

Step 2. Save the image to a drive other than the target disk and start the backup.

Step 3. Click Proceed to start the system backup and wait patiently until it finishes. You can also tick Shut down the computer when the operation is completed to power off automatically.

Step 4. If the clone fails, restore the image to the original drive and clone again with the correct settings.

Conclusion
dd clones a Linux disk in one command and leaves nothing behind, which is why it still earns a place in every recovery toolkit. Read the device names twice, unmount both disks, use a large block size with progress reporting, and verify the byte count before you remove the source. When the disk holds a Windows installation, hand the boot repair to a tool that understands it.
For more on command-line cloning, see Clone a Hard Drive Using Command Prompt, Clone HDD to SSD Without Software, Sector-by-Sector Clone vs Intelligent Clone, and Best Free Disk Cloning Software in 2026.
Related Articles
- Clone a Hard Drive Using Command Prompt
Clone from Windows without extra tools. - Clone HDD to SSD Without Software
Free ways to move Windows to a new disk. - How to Clone a Drive with GParted
GParted copies partitions one by one. Learn the limits and the bootloader fix. - Clone a BitLocker Encrypted Drive
Copy an encrypted disk safely. - Clone a Disk Larger Than 2TB
Handle GPT disks above the 2 TB line.
Products
Articles & Tutorials
- Data Recovery
- Data Backup
- File Recovery
- File Backup
- System Backup and Restore
- Disk and Partition Clone
- Technical articles
- Mobile articles
- Disk Master Help
- Windows Data Recovery Tutorials
- Windows Secure Delete Tutorials
- Windows Partition Management Tutorials
- Windows File Backup and Restore Tutorials
- Windows System Backup and Restore Tutorials
- Windows Disk Backup and Restore Tutorials
- Windows Clone Tutorials