(2022) Migrate Dell OS with Dell Migrate or An Alternative
| Two Tools | Main Contents |
|---|---|
|
Tool 1. Dell Migrate |
What does Dell Migrate do?...Full steps How to use it...Full steps Possible problems you may meet...Full steps |
| Tool 2. Qiling Disk Copy |
Advantages of Qiling Disk Copy...Full steps How to use it...Full steps |
What Does Dell Migrate Do?
Dell Migrate makes it easy to transfer files and settings from an old PC to a new Dell PC using the Dell Data Assistant, allowing work to continue uninterrupted during the transfer process, and eliminating the need for a PC restart after completion. Once done, users can securely erase unwanted data, enabling them to confidently trade, sell or recycle their old PC.
This tool is limited to transferring data between two PCs, specifically Dell computers. It cannot clone data for transfer to multiple computers, requiring a different software for such tasks.
Pros of Dell Migrate
- You can choose what you want to migrate
- You can wipe the original computer clean of all data without worrying about any confidential information being leaked, ensuring a secure and private process.
- No need to restart the PC
Cons of Dell Migrate
- The process is a bit complicated, but it can be summarized.
- The device cannot perform migrations via a USB drive or cable, but rather requires a network connection for this process.
- Dell Migrate requires that both computers be turned on and connected to the same internet connection.
- It only supports Dell computers
How to Use Dell Migrate
Step 1. Install SupportAssist on both old and new PCs
Step 2. Open SupportAssist and launch Dell Migrate
Step 3. To connect the old and the new PCs, you can use a USB cable to create a network between them. This will allow you to transfer files and share resources between the two systems. Alternatively, you can use a crossover Ethernet cable to create a wired network between the two PCs.
To migrate your data from an old PC to a new one, ensure both devices are connected to the same network throughout the process. This allows for smooth data transfer and synchronization.

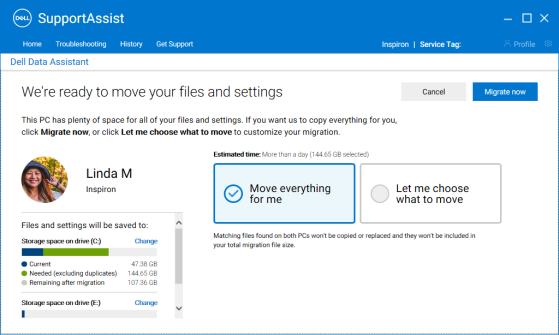
Step 4Migrate searches for the files and settings to be migrated from the old PC to the new PC on the old PC.
Step 5To begin the migration process, start the migration tool by selecting the files and settings you want to transfer, and then click on "Migrate now" to initiate the migration.
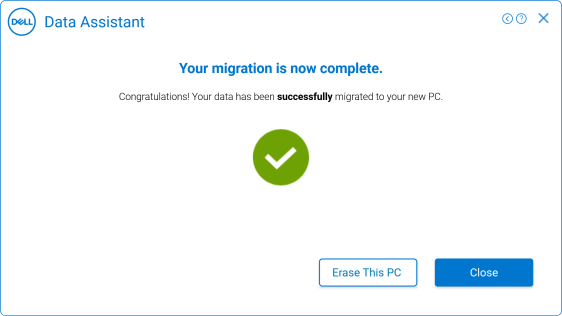
Step 6. Complete migration and click Erase This PC
Problems You May Encounter When Using Dell Migrate
1. To resolve the issue, you can try the following:
2. The accounts on the old and the new PCs are not the same
3. Dell Migrate may not work with all types of files, so users should check file compatibility before transferring.
Related reading: How to Connect Two Computers In Multiple Ways
The Best Alternative for Dell Migrate - Qiling Disk Copy
Qiling Disk Copy is a reliable disk cloning tool that creates an exact replica of your hard drive, taking time depending on drive size and data amount.
Unlike Dell Migrate, Qiling Disk Copy offers more flexibility and choices, allowing users to clone all file types, the entire disk, or a single partition. It also provides a simpler and faster interface, so the cloning process can be completed in just a few steps. Let's give it a try!
Why choose Qiling Disk Copy
Qiling Disk Copy is a fantastic tool that offers numerous advantages and convenience. It allows users to create a bootable clone of their hard drive or SSD, making it easy to recover from system crashes or other issues. The software also supports multiple cloning methods, including sector-by-sector and block-by-block, ensuring that all data is accurately transferred.
- Support disk, partition, and system clone
- Clone both internal and external hard drives
- No restrictions on file types and computer brands
- The process is straightforward with a user-friendly interface and clear instructions, making it easy to navigate and complete the task in a few simple steps.
- Reliable and fast
How to use Qiling Disk Copy
Follow the steps below and you can easily migrate your Dell OS:
Prior Notice:
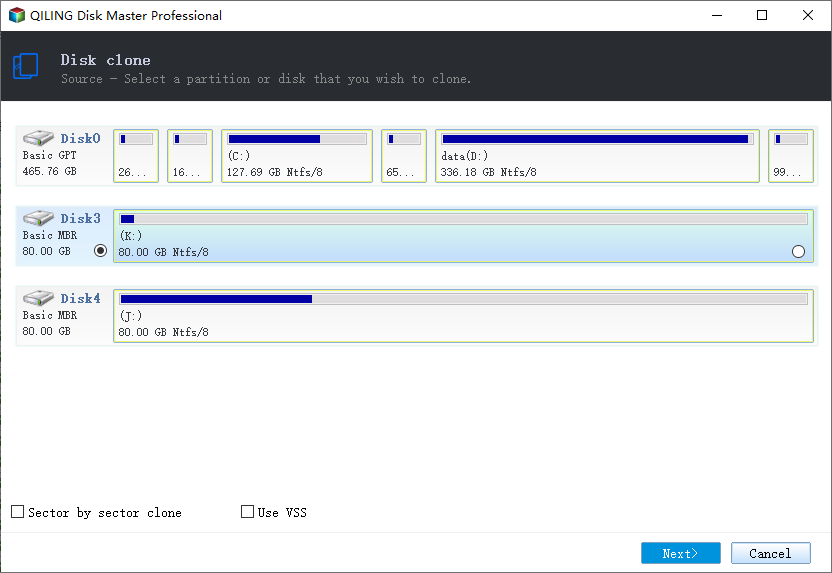
- The "Sector by sector copy" feature requires the destination disk to be at least as large as the source disk, making it necessary to clone a larger hard disk to a smaller one. If you want to clone a larger disk to a smaller one, you should uncheck this feature.
- Be sure to back up any important files before using the disk wipe feature. This will ensure that your data is safe and secure.
Step 1. To start copying/cloning an entire disk to another, select the disk you want to clone as the source disk under "Disk clone" and click "Next".
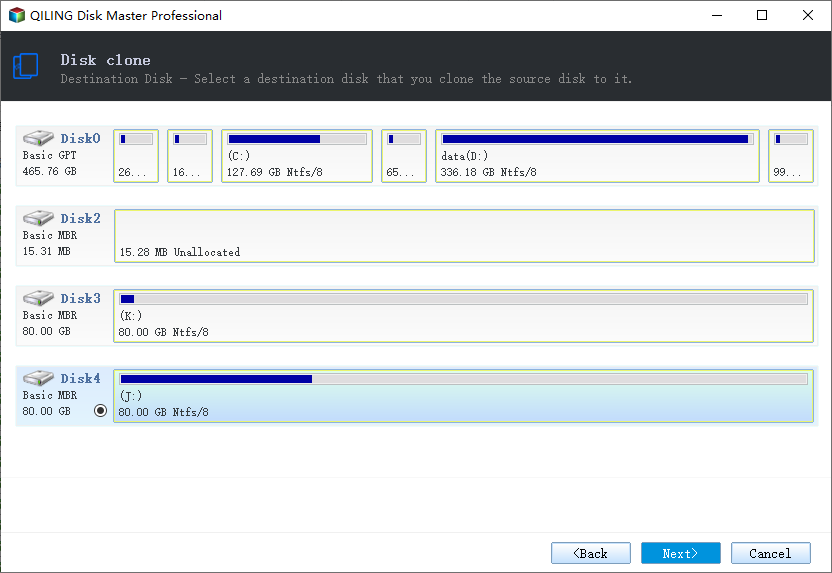
Step 2. Choose the other disk as the destination disk.
Step 3. The disk layout of the two disks can be checked and managed by selecting "Autofit the disk", "Copy as the source", or "Edit disk layout" to adjust the destination disk's layout.
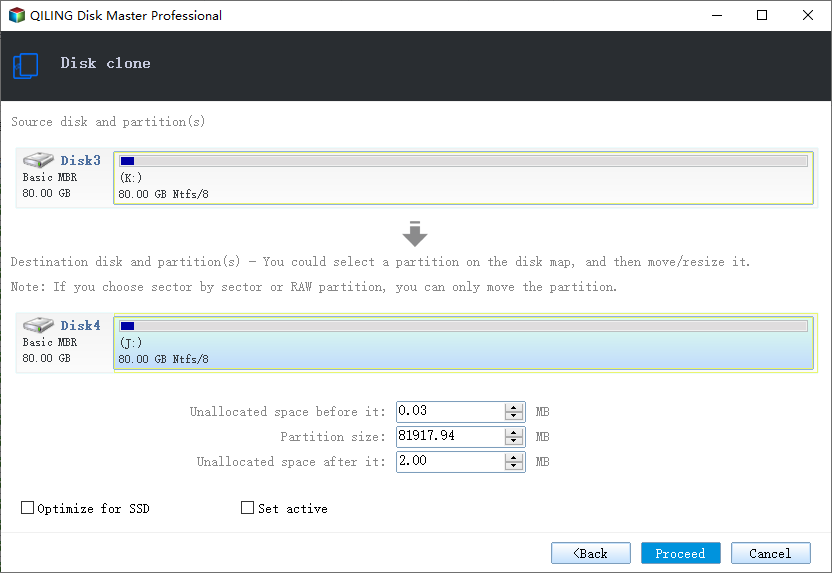
- "Autofit the disk" makes some changes to the destination disk layout by default to ensure optimal performance.
- "Copy as the source" does not change anything on the destination disk, and the layout remains the same as the source disk.
- "Edit disk layout" allows you to manually adjust the partition layout on the destination disk.
To optimize your SSD's performance, check the "Check the option if the target is SSD" option. This will put your solid-state drive in its best possible state for efficient operation.
Step 4. Click "Proceed" to officially execute the task.
A message now appears, warning you that data will be lost. Please confirm this message by clicking "OK".
Conclusion
We have two options to help you migrate your Dell OS: using Dell Migrate or Qiling Disk Copy. Qiling Disk Copy is a simpler and more user-friendly option that can clone your disk without requiring extensive computer knowledge. If you need further assistance, please don't hesitate to contact us.
Related readings:
How to Fix Dell No Hard Drive Detected Error
To improve and speed up your Dell laptop or PC on Windows 10/8/7, consider implementing the following methods: disabling startup programs, upgrading your RAM, cleaning up temporary files, uninstalling unused software, and running a disk cleanup and disk defragmentation. Additionally, enabling the Windows Update feature, updating your drivers, and using the built-in Disk Cleanup tool can also help.
Related Articles
- Which One to Choose: Macrium Reflect vs Samsung Data Migration
- Preferred Way to Clone C Drive to External Hard Drive
- Why Cloning Hard Drive Taking Forever? How Long Does It Take to Clone a Hard Drive
- How to Clone Hard Drive Without Windows Operating System [Simple as a Few Clicks]
- Successfully Clone HDD to SSD Including Recovery Partition
Qiling Disk Master, as a professional disk clone software, is able to clone HDD to SSD including recovery partition successfully. - Easiest Way to Clone HDD to SSD via USB
Can you clone HDD to SSD via USB? how to do it easily? Scroll down to learn more and follow a step-by-step guide to clone hard drive with secure boot.