NVMe SSD Missing After BIOS Update: How to Get It Back
Quick Navigation:
- What the Update Changed
- Restore the Settings in Order
- Check the Data Before You Experiment
- Read the Layout, Back It Up, and Clone It
- Frequently Asked Questions
A BIOS or UEFI update resets more than the version string. Boards commonly return to their default storage mode, disable a slot that the previous profile had enabled, or change the boot mode, and an NVMe drive that was working an hour earlier is then missing from Windows. The drive is usually fine. What changed is the path the firmware uses to reach it, and the setting that matches the installed system can usually be restored without opening the case.
What the Update Changed
The storage mode is the first suspect. A board that was set to RAID or to Intel VMD can come back as AHCI, and the reverse happens just as often. Windows installs a driver for the mode it saw at setup, so a drive that is present in firmware may be invisible to the operating system until the mode is set back.
Boot mode and Secure Boot come next. A reset to UEFI-only from a legacy configuration, or a cleared Secure Boot key store, changes which devices the firmware exposes as bootable. Some boards also disable an M.2 slot by default when a SATA port shares its lanes, and the slot stays dark until that port is turned off again in the firmware settings.
Finally, the update may simply have cleared the profile that held your settings. Most firmware offers a save-to-file option for exactly this reason, and without a saved profile every option has to be restored by hand from the values you remember. That is why the disk layout should be recorded before the update, and not after the drive has already gone missing from Windows without a warning.
Restore the Settings in Order
Enter firmware setup and set the storage mode to the value Windows was installed with. If the machine was set up with VMD or RAID, AHCI will not boot it, and switching to AHCI to make the drive visible can produce an inaccessible boot device error. When you are unsure, check which storage driver is installed in Windows before you change anything.
Then restore the boot mode and the Secure Boot state, enable the M.2 slot, and free any SATA port that shares lanes with it. Save the changes, power off completely, and start again; a warm restart does not always re-train the link or re-read the device list. If the drive appears in firmware but not in Windows, install the storage driver that matches the mode and rescan.
The firmware setup, Device Manager, and Disk Management mentioned here are Microsoft or board-vendor tools and are not part of Qiling Disk Master. They are used only to restore the path to the drive; every copy and clone described below is made with Qiling Disk Master once the drive is visible in Windows once more, and nothing below depends on those tools.
Check the Data Before You Experiment
Each mode change is a chance to boot into a system that cannot read its own volume. Before you try a different configuration, confirm that the data exists somewhere else, or that the drive can be read from another machine or from bootable media. A working copy turns a risky experiment into a routine adjustment that can be undone with the same settings.
If Windows does start and the drive appears, copy the files or image the disk immediately. A board that lost its settings once can lose them again after the next update or a failed CMOS battery, and the second time may not be as gentle as the first. Do not initialize the disk or accept a format prompt while it is missing; those prompts appear when the partition table cannot be read.
Read the Layout, Back It Up, and Clone It
Qiling Disk Master can read the disk map, image a disk, and clone it, but backup and clone are two separate operations with different purposes. A backup protects the data you already have and belongs before any firmware or slot change. A clone copies the whole layout onto another disk and is for moving the system, not for keeping a copy of it. Finish the backup first, and clone only when the drive has to be replaced or moved.
Operation 1: Back Up the NVMe Disk
This is the operation to complete before you touch the BIOS again, and it stays valid even if the drive disappears for good.
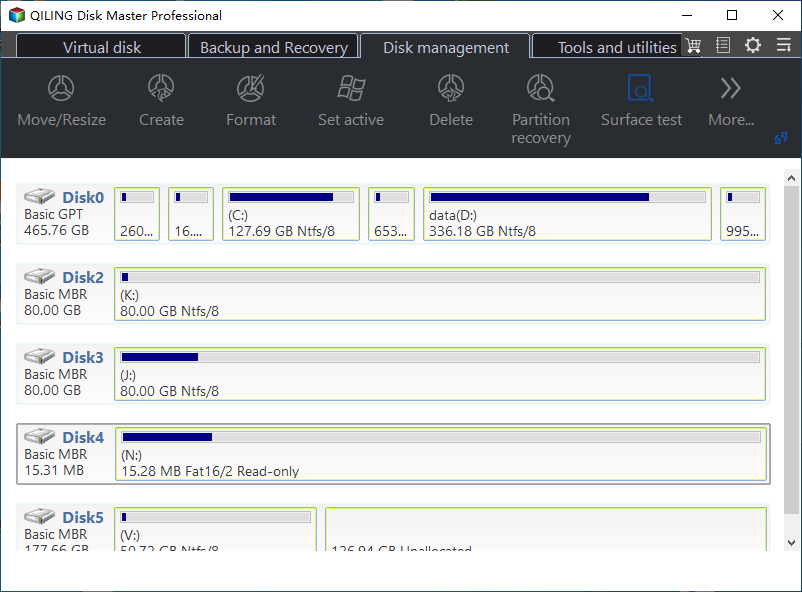
Step 1. Read the disk layout. Open the disk map and note the disk number, the partition style, and the size of every partition on the NVMe drive. That record tells you whether the drive came back with the same layout after the firmware change, and it is what you compare against if a partition disappears later on.
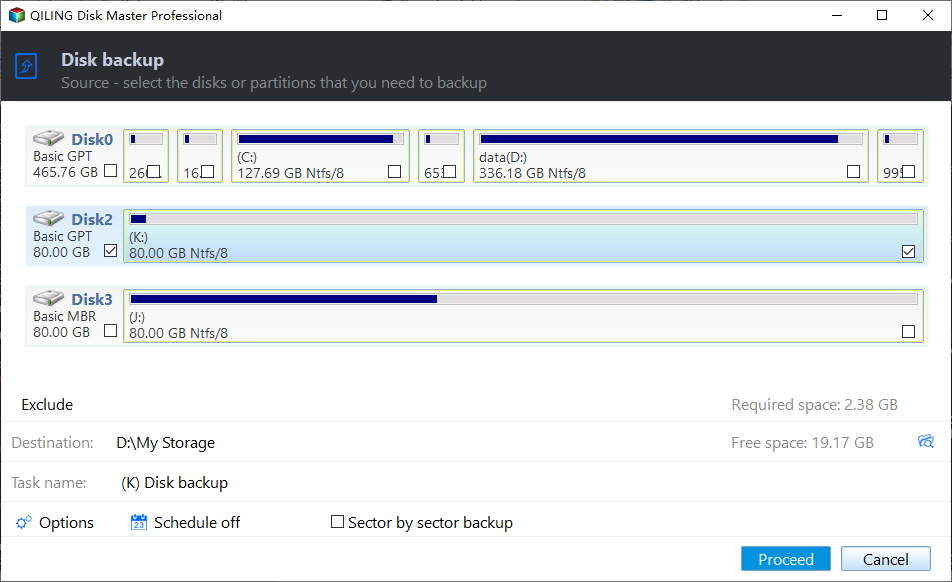
Step 2. Image the disk to another controller. Choose Disk/Partition backup on the Backup and Recovery tab, tick the NVMe disk, and set the destination on a SATA disk or an external drive attached to another controller. Check the task in the preview, click Proceed, and open the image afterwards to confirm that every partition is inside it. A copy stored on the same controller resets along with that controller.
Operation 2: Clone the Disk Only When You Move It
Cloning writes the same layout to a second disk, so run it when the drive is being replaced or moved to another machine, and only after Operation 1 has finished. A clone is not a backup of the original.
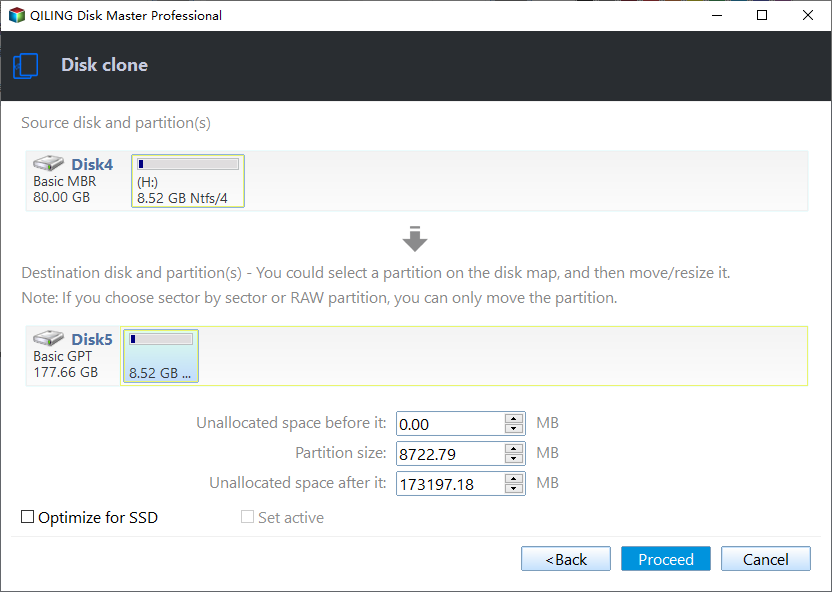
Step 1. Select the source and the destination. Choose Disk/Partition clone, take the NVMe disk as the source and the new disk as the destination, and confirm the direction shown on screen. A larger destination leaves the extra space unallocated, which you can use later.
Step 2. Preview the task and click Proceed. The preview states which disk is copied onto which. After Proceed, follow the progress to the end; if the clone is meant to boot, keep the original untouched until the new disk has started once.
Frequently Asked Questions
Does a BIOS update erase the SSD?
No. A firmware update rewrites the board's settings, not the contents of the drive. The data stays on the flash, and the risk comes from the settings that change afterwards and from any repair attempted while the drive is invisible. Keep the original disk untouched until a copy has been read back on another machine and fully verified on that machine.
Should I update the SSD firmware as well?
Only from the vendor utility, and only after the backup has been verified. A firmware update on a drive that is already disappearing can finish the job, and it is not a step to take while troubleshooting another problem. Solve the missing drive first, then decide whether new firmware is worth the risk at all right now, if ever, on this drive.
Why is the drive visible in BIOS but not in Windows?
That pattern points at the storage driver or the mode, not the hardware. Windows needs a driver for the controller mode in use, and a mode change leaves the old driver unable to see any disk behind that controller. Check which driver is installed, then match the firmware setting to it before you change anything else on the board or in Windows.
Related Articles
- NVMe SSD Disappears From BIOS Intermittently
- M.2 Slot Disabled by SATA Port Lane Sharing
- How to Check NVMe SSD for Health
- NVMe SSD Disappears After a Windows 11 Update
- M.2 SSD Shows Empty on the New PC
Products
Articles & Tutorials
- Data Recovery
- Data Backup
- File Recovery
- File Backup
- System Backup and Restore
- Disk and Partition Clone
- Technical articles
- Mobile articles
- Disk Master Help
- Windows Data Recovery Tutorials
- Windows Secure Delete Tutorials
- Windows Partition Management Tutorials
- Windows File Backup and Restore Tutorials
- Windows System Backup and Restore Tutorials
- Windows Disk Backup and Restore Tutorials
- Windows Clone Tutorials