[iOS 12 Supported] How to Delete Apps on iPhone 8/8 Plus Permanently
If you're looking to delete storage-consuming and unnecessary applications on your iPhone 8 or 8 Plus, or want to get rid of unwanted pre-installed apps, you can find the answers here. We offer three fast and simple ways to delete apps on iPhone 8/8 Plus (iOS 12 supported): you can delete one app at a time using iPhone's own features, or remove multiple apps at once with 1-click using Qiling MobiMover, a popular and 100% free iPhone data manager.
Tip 1. Delete apps on iPhone 8/8 Plus from Home screen
Deleting apps on iPhone 8/8 Plus is a straightforward process that can be completed in a few simple steps, making it an uncomplicated task.
Step 1: To turn on your iPhone 8 or 8 Plus, press and hold the Sleep/Wake button on the top right side of your device until you see the Apple logo. Then, go to the Home Screen by tapping the Home button, which is a small, circular button at the bottom of the screen.
Step 2:Find the apps you don't want anymore.
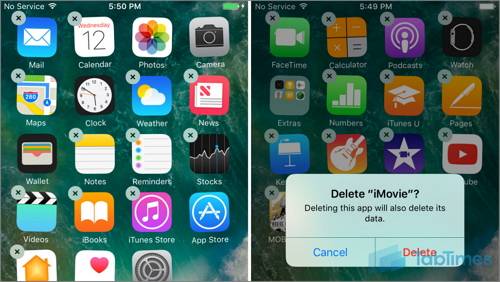
Step 3:To delete an app on an iPhone, gently press and hold the app icon until it begins to wiggle and with an "X" symbol at the top right corner.
Step 4:To delete an app on an iPhone 8 or 8 Plus, tap the X in the corner of the app icon, then confirm the deletion to permanently remove the app.
- Notice here:
- When you press and hold the app icon, an X doesn't appear, so you need to go to Settings, tap General, scroll down and tap Restrictions, then tap Enable Restrictions and turn on Deleting Apps.
Tip 2. Delete apps on iPhone 8/8 Plus from Settings
On iPhone 8/8 Plus, you can delete apps from the Home screen, but you can also remove apps from the Settings app. To do this, go to Settings, then tap on the app you want to delete, and finally tap on the "Delete App" option. This will remove the app from your iPhone.
Step 1: To turn off Find My iPhone on your iPhone 8/8 Plus, simply turn on your device, then navigate to the "Settings" app, followed by tapping on "General".
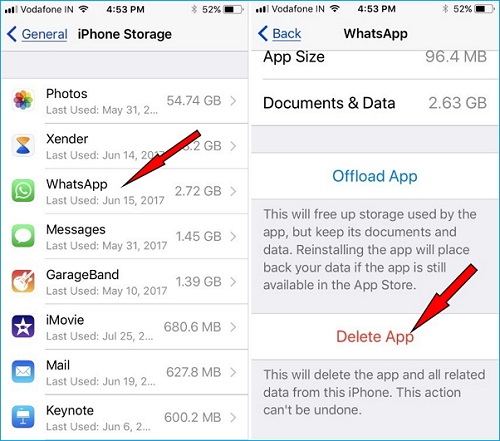
Step 2: To delete an app on your iPhone, tap the "Settings" app, then scroll down to "iPhone Storage" and find the app you want to delete. Tap the app's name and then tap "Delete App" to confirm.
Step 3: Here, you will see two options of "Offload App" and "Delete App".
Step 4: Tap "Delete App", and choose "Delete App" on the pop-up warning window. Note that if the apps you deleted were purchased, you can download them again for free.
Tip 3. Delete multiple apps at once with MobiMover Free (1-click)
To delete multiple apps at once, you can use Qiling MobiMover, a free and all-in-one iOS data manager that allows you to transfer and delete files on iPhone. This app can save you time and effort compared to deleting apps one by one. With Qiling MobiMover, you can also perform other operations on your iPhone, such as adding ringtones, backing up data, syncing data from old to new iPhone, and downloading online videos using a URL. It's a convenient and reliable tool that won't let you down.
To delete multiple apps from your iPhone with one-click, install Qiling MobiMover on your computer, click the download button below, and follow the steps. This software is a green and clean option, and you can use it freely.
Step 1.To delete apps on iPhone 8/8 Plus, connect your iPhone to your computer, launch Qiling MobiMover, and select "Content Management" > "Apps" to view the installed apps on your iPhone.
Step 2.Select the apps you want to delete and click "Uninstall."
Step 3.Click "Uninstall" button to delete the selected apps on your iPhone 8/8 Plus.
Related Articles
- iPhone Contacts Not Syncing with iCloud/Gmail/Mac in iOS 11? Fixes Here!
- What is Screen Time Passcode and How to Set or Reset it
- Can't Download Apps in iOS 12/11 on iPhone and iPad? Fixed Here!
- How to Perform Hard Disk Image File Restore in Windows 10
You can learn how to perform Windows 10 hard disk image file restore in this article with Windows built-in tool and another freeware (Qiling Disk Master).