How to Open HEIC File in Photoshop
Quick Navigation:
- Open HEIC File in Photoshop with Free HEIC to JPG Converter
- Turn HEIC Files into JPG with an Online Converter
- Convert HEIC File to JPG with the File Apps
- In Conclusion
Adobe Photoshop is a powerful photo editing software that can be used for editing photos, creating digital paintings, designing graphics, and more. It's a versatile tool for image processing.
While Photoshop brings many benefits to users in the aspect of image editing, it also has some limitations, such as not supporting HEIC photos, which can be a challenge for iOS users who need to edit their pictures. However, these users can easily convert their HEIC photos to JPG using the methods outlined in this guide, allowing them to then open and edit them with Photoshop.
Open HEIC File in Photoshop with Free HEIC to JPG Converter
If you want to edit HEIC photos in Photoshop, you'll need to convert them to JPG format first, as Photoshop doesn't recognize HEIC photos. Fortunately, you can use a free iPhone data transfer and HEIC to JPG converter called Qiling MobiMover to make this process easy, whether you're working with a single photo or a batch of them.
Step 1. Launch Qiling MobiMover on your PC and click "HEIC to JPG" on the navigation panel.
Step 2. Click "Browse" to select and add one or multiple HEIC photos from your PC, or drag and drop to import HEIC photos to Qiling MobiMover.
Step 3. To convert HEIC photos to JPG, click "Convert" or "Start All" to initiate the process. Once the conversion is complete, you can click "View" to check the converted JPG photo on your PC.
Qiling MobiMover is a comprehensive iPhone data management tool that helps organize iPhone data with ease, allowing for data transfer, backup, and management of files such as WhatsApp messages.
Turn HEIC Files into JPG with an Online Converter
The online HEIC to JPG converter is a convenient option, but be cautious when using it, as it may come with potential privacy issues. We recommend using alternative methods to convert HEIC files to JPG.
If you're aware of the potential issues associated with online converters but still want to use them to convert HEIC to JPG, here are some recommendations for reliable converters to consider.
- heictojpg.com
- cloudconvert.com
- freetoolonline.com
- convertio.co/heic-jpg/
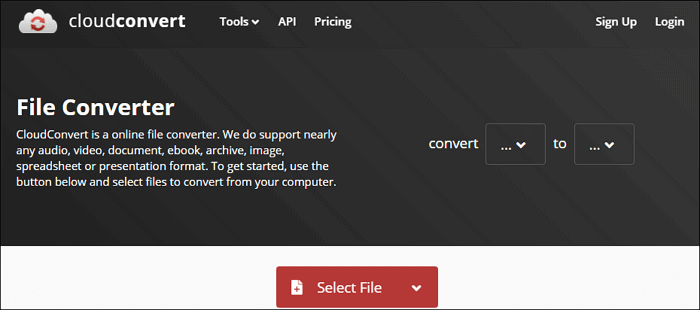
To better understand how websites like cloudconvert.com work to convert HEIC photos to JPG format, we'll demonstrate the process using this website.
Step 1. Enter the cloudconvert.com.
Step 2. Choose "Select File" to upload the HEIC pictures you want to convert into a different format.
Step 3. Select the "Convert to" dropdown menu and choose either "JPG" or "PNG" as the desired file format.
Step 4. Click "Convert" to start the converting process.
Convert HEIC File to JPG with the File Apps
To convert HEIC to JPG using the File App on your iPhone, you can follow these steps: Open the File app, select the HEIC image you want to convert, tap the "Share" icon, and then choose "Save to Files" from the share menu. Next, tap "On My iPhone" and select the "Photos" folder. The converted JPG image will be saved in the Photos folder. This method allows you to convert HEIC images to JPG format directly on your iPhone without needing any additional software or online services.
Step 1. On your iPhone, open the Photos app.
Step 2. Select an album and tap "Select" to choose the photos you want to convert into a different format.
Step 3. Tap "Share," then tap "Copy Photos."
Step 4. Open the Files app on your iPhone, and select the desired storage location, such as iCloud Drive, On My iPhone, or another cloud service, to view and manage your files.
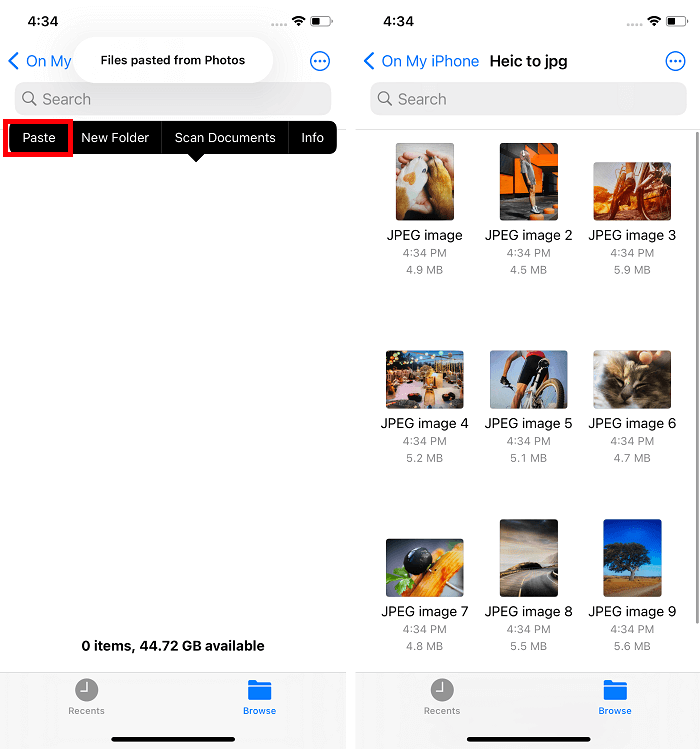
Step 5. To create a new folder on your device, tap the three dots inside a circle in the upper right corner of the screen and select "New Folder" from the menu.
Step 6. To create a new folder, enter the new folder, and then long press and tap "Paste" to add the copied items.
Step 7. Your pictures will be saved in a new folder in JPEG format.
Step 8. To save the converted images, open them on your iPhone, tap the Share icon, and select "Save Image" to save the chosen pictures. You can then transfer them to your computer and open them with Photoshop for editing.
In Conclusion
Converting HEIC files to JPG can be done using various methods, including cloud services. However, using cloud services can be more complicated, requiring changes to upload settings, uploading photos, and then downloading them, which can be time-consuming, especially for large numbers of pictures. It may be more practical to choose one of the simpler methods mentioned above.
Related Articles
- How to Sync iPod Touch to a New Computer Without Losing Data
- How to Transfer Music from Computer to iPod With/Without iTunes
- How to Download and Convert Instagram to MP4
- Best Free SyncToy Alternative for Windows 11, 10, 8, 7
This page offers you the best free SyncToy alternative for Windows 11/10/8/7 - Qiling Disk Master. Some other common file sync tools are also introduced here.