How to Transfer Photos from Mac to iPhone in 5 Ways
Photo transfer between devices is a common need, whether it's to enrich a device's photo library, make a backup of precious pictures, or simply share images between devices.
To transfer photos from Mac to iPhone, you can use the Photos app on your Mac and the Photos app on your iPhone. Simply select the photos you want to transfer on your Mac, then click the "Share" button and select "Export Selected Photos" to export the photos to your iPhone via AirDrop. Alternatively, you can also use the "Share" button to share the photos directly to your iPhone, or use the "Import" option in the Photos app on your iPhone to import the photos from your Mac.
Part 1. 4 Methods to Transfer Photos from Mac to iPhone Without iCloud
While iCloud can sync photos from your Mac to your iPhone, it may not be the best solution for everyone, as it doesn't allow for selective photo transfer, only syncing all photos at once.
You can transfer photos from your Mac to your iPhone without using iCloud by using alternative methods such as professional iOS data transfer software, iTunes, AirDrop, or Google Photos.
Even if you prefer to transfer photos from Mac to iPhone without iTunes, you can still find other alternative ways. You can also apply the same ways to transfer photos from Mac to iPad.
Method 1. Transfer Photos from Mac to iPhone Without iCloud or iTunes
To import photos from a Mac or PC to an iPhone without using iCloud or iTunes, you can use an iPhone data transfer tool like Qiling MobiMover. With Qiling MobiMover installed on your computer, you can easily transfer photos and other data from your Mac or PC to your iPhone, making it a convenient solution for managing your device's content.
- Transfer files from computer to iPhone/iPad and vice versa
- Transfer data from one iPhone/iPad to another
- Manage iOS content by deleting, editing, and adding items
Qiling MobiMover also works as a WhatsApp manager, allowing you to back up WhatsApp to your computer or transfer WhatsApp messages to a new iPhone.
To transfer photos from Mac to iPhone:
Step 1. To transfer files from your Mac to your iPhone using Qiling MobiMover, launch the software on your computer, connect your iPhone to your Mac, select the "Mac to Phone" option on the main interface, and then click "Select Files" to proceed.
Step 2. With MobiMover, you can easily transfer photos and other popular files from your Mac to your iPhone and iPad by selecting the files, clicking "Open" to load them, and then choosing the device you want to transfer them to.
Step 3. MobiMover will display the selected files on the screen. If an item is missed, click "Add Contents" to import more files. Then, click the "Transfer" button to initiate the transfer process.
You can copy a wide range of content, including videos, music, ringtones, voice memos, and books, from your Mac to your iPhone or iPad, or from a Windows PC to your devices using Qiling MobiMover. This software is a must-have for frequent data transfers between your iDevice and computer, making it an essential tool for anyone who needs to transfer data often. Give it a try!
Method 2. How to Import Photos from Mac to iPhone Using iTunes/Finder
If you're sure you want to remove the existing music, movies, TV shows, books, and tones from your device and sync it with iTunes, you can do so. Note that starting from macOS Catalina, iTunes is replaced by Finder, but you can still use iTunes in earlier versions (Mojave and earlier) or Finder in later versions (Catalina and later).
To import photos from Mac to iPhone with iTunes:
Step 1. Connect your iPhone to your computer.
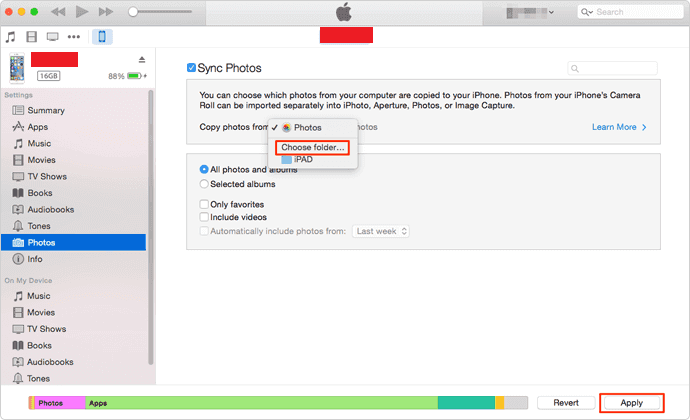
Step 2. After iTunes runs automatically, click on the device icon and select "Photos."
Step 3. Check "Sync Photos" and select the pictures you will copy from the option "Copy photos from."
Step 4. Click "Apply" to start syncing photos from your Mac to your iPhone via iTunes.
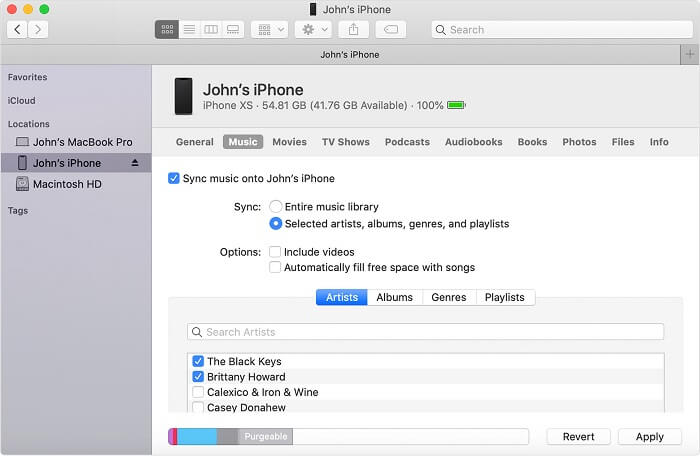
To sync photos from Mac to iPhone via Finder
Step 1. Open Finder and connect your iPhone to the computer.
Step 2. Unlock your mobile device and trust the Mac.
Step 3. To share a category from your iPhone in Finder, select your iPhone from the Finder sidebar, then choose the category you want to share. This will allow you to share files from that category with others, such as photos, videos, or documents.
Step 4. To share specific items from a category, check the "Sync [category]" option and select the items you want to share, then click "Sync" to sync them with your other devices.
Step 5. To transfer files from your Mac to your device, start by clicking the "Apply" button. This will initiate the file transfer process.
Step 6. When the scan is complete, you can access the items in the Photos app on your iPhone to check them.
Method 3. Import Photos from Mac to iPhone via AirDrop
AirDrop is a wireless option to share photos and other content between Mac and iPhone, enabled by turning on AirDrop on both devices, allowing them to discover each other, and selecting the content to share.
- Ensure that your iPhone and Mac both have their WiFi and Bluetooth enabled.
- Make sure any Personal Hotspots have been turned off.
- To ensure AirDrop settings are set correctly, go to Settings > General > AirDrop and change the receiving option from "Receiving Off" to either "Contacts Only" or "Everyone". This will allow you to successfully share files using AirDrop.
- To set up iPhone and Mac to share Wi-Fi, place them within 9 meters (30 feet) of each other. This will allow them to connect to each other's Wi-Fi networks and share data.
To import photos from Mac to iPhone via AirDrop:
Step 1. To enable AirDrop on your Mac, first make sure that you have the most recent version of macOS installed. Then, go to System Preferences, click on Sharing, and select AirDrop. Make sure it's turned on. If you're having trouble getting AirDrop to work, you can try restarting your Mac or resetting the AirDrop settings.
- To turn on AirDrop on your Mac, go to Finder, then click on "Go" and select "AirDrop". Additionally, make sure Bluetooth and WiFi are turned on.
- To make your Google account more discoverable, you can set the option "Allow to be discovered by" as "Everyone" or "Contacts Only" in your Google account settings. This will allow others to find and connect with you on Google services like Google Maps, Google Search, and Google+.
Step 2. Turn on AirDrop on your iPhone.
- To open the "Control Center" on your device, swipe up from the top or bottom of the screen.
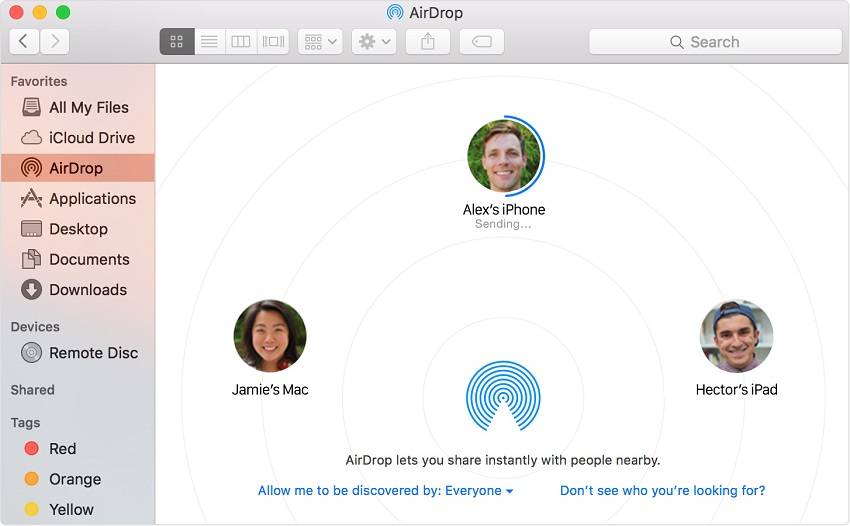
- To share files using AirDrop, tap on the AirDrop icon and select whether to be discovered by "Contacts Only" or "Everyone."
Step 3. Once your Mac and iPhone are connected, you can easily send photos from your Mac to your iPhone using AirDrop. There are two ways to transfer photos from Mac to iPhone without using iTunes, and both methods utilize AirDrop to facilitate the process.
- To send photos from your Mac to an iPhone, drag the desired photos to the Photos app on the recipient's iPhone, then click "Send" to share them.
- To share a file, you can click the "Share" button in an App, choose "AirDrop" from the share sheet, select the recipient, and then click "Done."
Step 4. To check the transferred items in the Photos app on your iOS device, go to the Photos app, tap the "Albums" tab, and then tap "Media Types" at the bottom of the screen. From there, you can select the type of media you want to view, such as "Photos" or "Videos", and see the transferred items in that category.
Method 4. Move Photos from Mac to iPhone with Google Photos
You can transfer photos from your Mac to your iPhone wirelessly without using AirDrop. Cloud-based photo-sharing services like Google Photos allow you to share photos across your devices, making it easy to sync files across your devices. To use cloud storage services, ensure you have the necessary setup on your devices.
- You are using the same account on both your Mac and iOS devices.
- You have 5GB of free iCloud storage space, which should be enough for most files. This includes documents, photos, and other small files.
To transfer photos from your Mac to your iPhone, ensure the requirements are met and follow these steps: ensure your iPhone and Mac are connected to the same Wi-Fi network, open the Photos app on your Mac and select the photos you want to transfer, click the "Share" button and select "iCloud Photo Library" from the menu, then sign in with your Apple ID and password to enable iCloud Photo Library on your Mac, and finally, on your iPhone, go to Settings > [your name] > iCloud > Photos and toggle on "iCloud Photo Library" to start syncing your photos from Mac to iPhone.
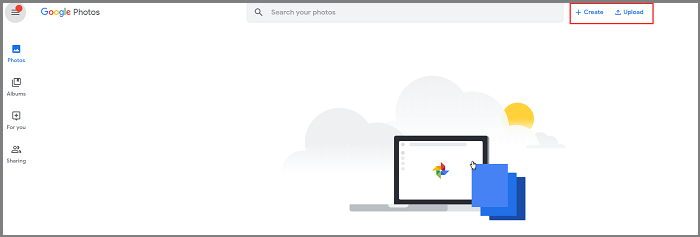
Step 1. Upload photos from Mac to Google Photos.
- If you have installed Google Photos for Mac, you can upload photos directly from the app.
- If you're unable to upload photos from your Mac, try going to Google Photos, signing in, and clicking the "Upload" button to send photos from your Mac.
Step 2. Download and install the Google Photos app on your iPhone.
Step 3. Sign in with the account you used to upload the photos.
Step 4. After importing photos from your Mac, all the selected pictures will be displayed, allowing you to select and download the desired ones to your iPhone.
You can transfer photos from your Mac to iPhone without using iTunes in four proven ways. Two of them, using Qiling MobiMover and iTunes, allow you to share photos via a USB cable, while the other two enable wireless transfer. If you prefer to import pictures without using iCloud, you can apply one of these methods to get the job done quickly.
Part 2. Sync Photos from Mac to iPhone with iCloud
Enabling iCloud Photos on your Mac allows your photos to be automatically uploaded to your iCloud account, syncing with other iOS devices using the same Apple ID. To use iCloud, you'll need to.
- Make sure there is enough iCloud storage available.
- To get started, install the Photos app on your Mac if you're running macOS Yosemite or later.
- Create a folder to house the photos you wish to export on your Mac.
If you've prepared well, you can transfer photos from your Mac to your iPhone by using iCloud, which offers two options: managing files via the iCloud Control Panel or the iCloud website, allowing you to choose the method that suits you best.
Option 1. Use the iCloud Photos app
Step 1. To access your iCloud Photos settings on your iPhone, go to the Settings app, select your name, and then choose iCloud, followed by Photos.
Step 2. To enable iCloud Photos, go to Settings, then tap on your name at the top, followed by "iCloud". Scroll down and toggle the switch next to "Photos" to the right, which will enable iCloud Photo Library in earlier iOS versions. This will allow your photos and videos to be synced across all your Apple devices.
Step 3. Go to the Apple menu on your Mac and select "System Preferences."
Step 4. Choose "iCloud" and sign in.
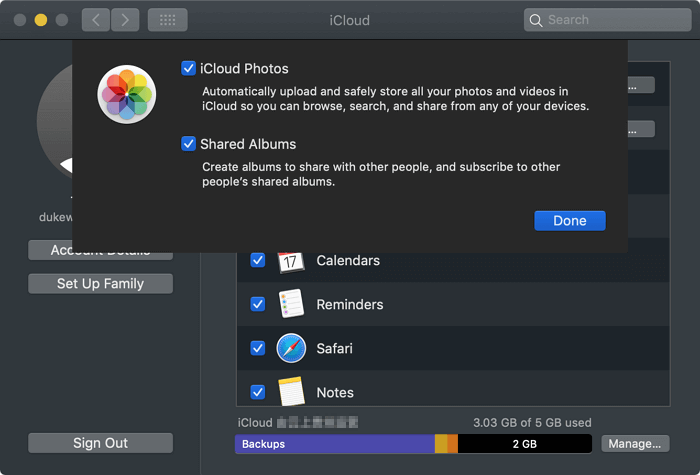
Step 5. To enable iCloud Photos, click on the "Options" dropdown menu next to "Photos" and toggle on "iCloud Photos." Then, click on "Done" to apply the changes.
Step 6. After syncing, head to the Photos app on your iPhone to verify the images.
Option 2. Use the iCloud Website
Step 1. Likewise, make sure your iCloud Photos have been enabled on your iPhone.
Step 2. Open icloud.com on a new web browser and sign in to your Apple ID.
Step 3. From the iCloud page, choose "Photos."
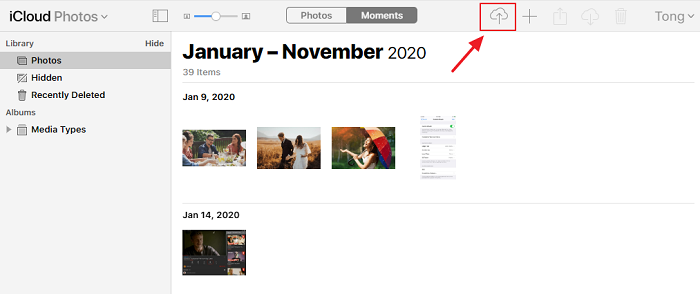
Step 4. To upload a file, click the "Upload" button at the top of the page, which resembles a cloud.
Step 5. To upload images from the folder on your Mac, first, navigate to the folder that contains the images you want to upload. This can be done by using the Finder app on your Mac.
Step 6. Click "Choose."
Step 7. Once you've enabled iCloud Photos, all of your photos will be automatically uploaded to iCloud, where they'll be stored and accessible from any of your devices. This means you can view and access your photos from any device that's signed in with your Apple ID, without having to manually transfer them.
Part 3. Bonus Tip on How to Transfer Photos from PC to iPhone
If you're planning to switch your Mac to a PC one day, it's essential to know how to transfer photos from your PC to your iPhone. There are six options available, including using an iPhone data transfer tool, iTunes, iCloud, Google Photos, Dropbox, and OneDrive. The steps for transferring photos using these methods are similar to those outlined in our previous guide, so we won't repeat them here. For more information, you can refer to our previous guide on how to transfer photos from a PC to an iPhone.
The Bottom Line
Now that you know how to put photos on iPhone from Mac using different methods, you can also refer to our guide on how to transfer files from Mac to iPhone/iPad if you need to add other types of content to your device.
Related Articles
- How to Transfer Text Messages from iPhone with A Free iPhone Data Transfer
- How to Download Videos from Twitter in Every Possible Way
- Ultimate Guide on SD Card Recovery in 2022
SD cards are widely used due to their high data transmission speed and hot-swappable features, which often lead to data loss problems. If you accidentally delete files on your SD card, you can use various recovery methods and SD recovery software to help recover deleted files. - Unlock PDF Without Password | Remove Password from PDF Files [2022 Real Fix]
If you're looking to open a password-protected PDF file without entering the password, there are a few ways to do so. You can use Google Chrome to open the file, Adobe Acrobat to access the contents, or a free online PDF password remover tool to bypass the password.