How to Fix Selected File Is Not a Proper BIOS [4 Ways]
When trying to update or install a BIOS, you might get an error saying "Selected File Is Not a Proper BIOS". This usually happens when the BIOS file you're trying to install is damaged or not compatible with your computer's hardware and software. The BIOS is what helps your computer's hardware and software talk to each other.
Qiling will explore four efficient approaches to resolve the "selected file is not a proper BIOS" issue, guiding users through troubleshooting steps to resolve this frustrating error, each method offering a distinct approach.
How to Fix Selected File Is Not a Proper BIOS - 4 Ways
- Preparations
- Way 1. Format the External Hard Drive
- Way 2. Update BIOS with the Correct File
- Way 3. Update the Outdated Drivers
- Way 4. Run CHKDSK to Check Your External Hard Drive
The BIOS (Basic Input/Output System) is a crucial component of any computer system, serving as a bridge between hardware and software. To proceed, it's essential to prepare properly for the process ahead.
Preparations for Fixing Selected File Is Not a Proper BIOS
1. System Information Check
To identify the correct BIOS update for your system, start by accessing your system information to collect details such as the system model, BIOS version and date, BIOS mode, and specific motherboard name and model number. This information is crucial in determining the appropriate BIOS update for your system.
2. Verify BIOS File Integrity
If you notice any signs of a corrupted BIOS file, it's essential to obtain a new, legitimate BIOS file from a trusted source. Also, consider temporarily disabling your anti-malware software to prevent it from mistakenly flagging the BIOS file as a threat and deleting it.
3. Creating a System Image Backup
To protect your data, create a backup of your system image before updating your BIOS, as this ensures that your data is safe in case of any corruption or failure during the update process.
By taking these preparatory steps, you can set yourself up for success in resolving the issue with the selected file, which is not a genuine BIOS error, and move forward with confidence in the subsequent troubleshooting steps.
Way 1. Format the External Hard Drive
The selected file is not a proper BIOS error is often due to the incompatible format of the external hard drive. To resolve this issue, formatting the drive to FAT32 becomes essential, facilitating compatibility between the external hard drive and computer.
The Qiling Disk Master Professional is an efficient tool for formatting an external drive to FAT32, offering a user-friendly and simplified method for this task, along with additional functionalities.
Formatting your hard drives becomes a swift and simple task with Qiling Disk Master. You can easily format your external hard drive to FAT32 by following these steps, making it a hassle-free process.
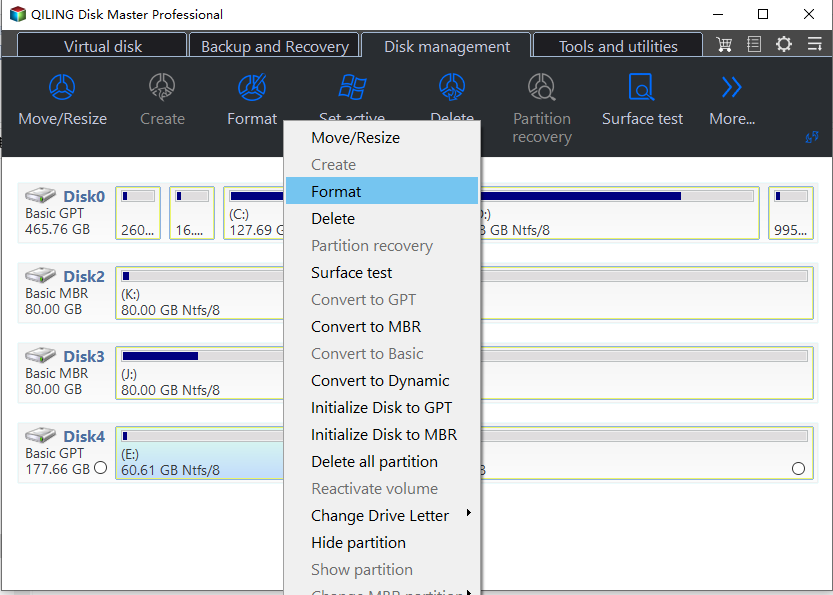
Step 1. Launch Qiling Disk Master, right-click the partition on your external hard drive/USB/SD card which you want to format and choose the "Format" option.
Step 2. Assign a new partition label, file system (NTFS, FAT32, EXT2, EXT3, EXT4, exFAT), and cluster size to the selected partition.
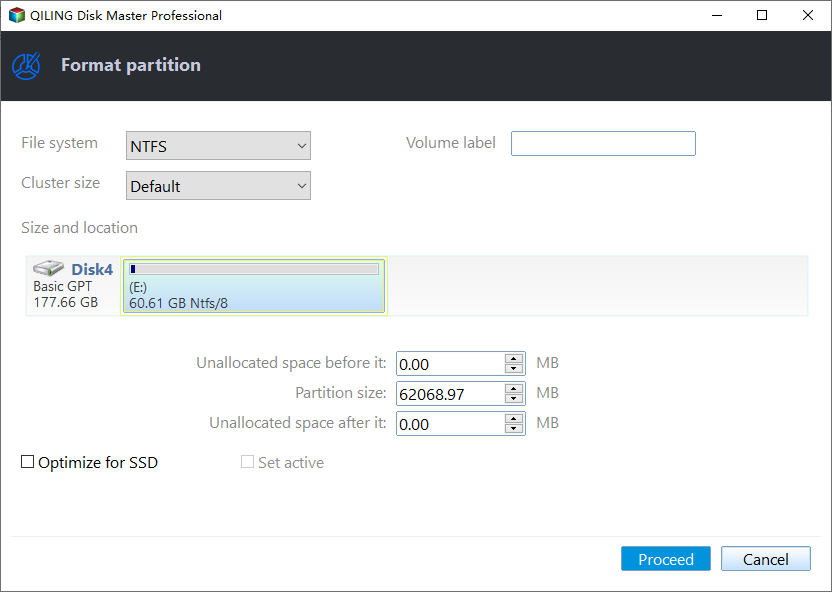
Step 3. Click the "Proceed" button to start formatting your external hard drive/USB/SD card.
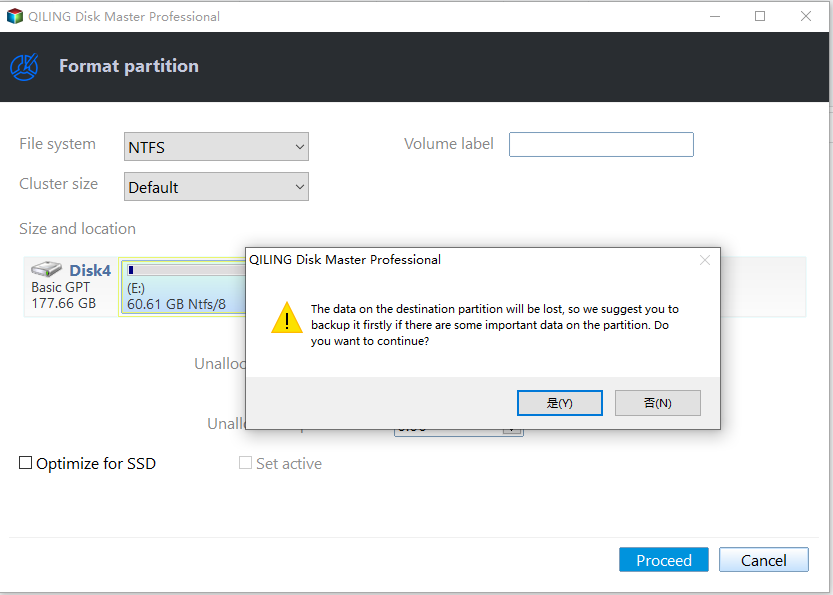
Step 4. In the Warning window, click "Yes" to continue.
Other Features of Qiling Disk Master
- To resolve the issue where the boot drive is not showing up in BIOS, you can try resetting the BIOS to its default settings. This can often resolve the problem by refreshing the BIOS configuration and ensuring that the boot drive is properly recognized.
- Format Hard Drive from BIOS Windows 10
- To fix the "Default Boot Device Missing or Boot Failed" error on Windows 10/11, you can try the following steps. First, restart your computer and enter the BIOS settings by pressing the corresponding key (usually F2, F12, or Del).
Considering its user-Qiling Disk Master is a reliable solution for users who want to format their external hard drives and potentially resolve BIOS compatibility issues, offering friendliness and versatility in disk management tasks.
Way 2. Update BIOS with the Correct File
Using an incompatible or corrupt file for updating the BIOS can lead to issues, including the selected file not being a proper BIOS. To resolve this, obtain the accurate BIOS update file compatible with your specific hardware configuration and follow the correct update procedure, which can often resolve compatibility issues and ensure a proper BIOS installation.
Phase 1. Format a USB to FAT32
Use Qiling Disk Master to format a USB drive to FAT32 format. Refer to Way 1 instructions.
Phase 2. Download the Correct BIOS File Online
After formatting the USB to FAT32, the next step is to obtain the correct BIOS file. It's crucial to get the exact BIOS file that matches your motherboard model, which can be found in your computer's documentation. Visit the motherboard manufacturer's official website, go to the support or downloads section, and look for your motherboard's model number to find the correct BIOS file.
Phase 3. Update BIOS
To update your computer's BIOS, you'll need to download the appropriate BIOS update file from the manufacturer's website, create a bootable USB drive or CD/DVD with the update, and then follow the on-screen instructions to complete the update. This process may require you to restart your computer multiple times, and it's essential to follow the manufacturer's instructions carefully to avoid any potential issues. Once the update is complete, your computer's BIOS will be updated, and you can verify the new version number to ensure the update was successful.
Step 1. To update your BIOS, insert the USB drive containing the correct BIOS file and restart your computer. This will initiate the BIOS update process, allowing you to install the new BIOS version.
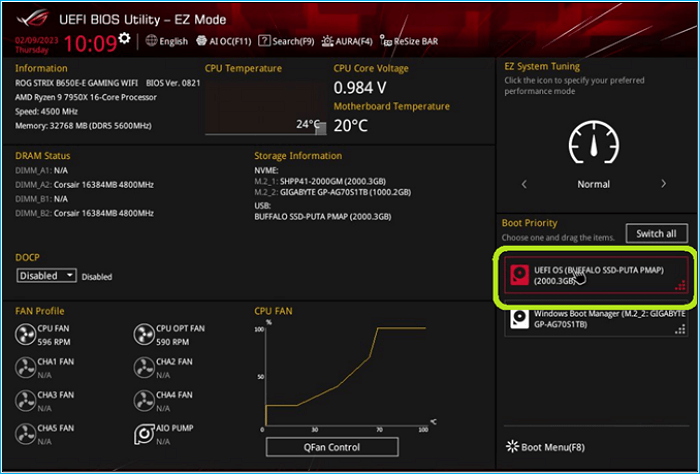
Step 2. Press the F10/F12/F2 key to launch the BIOS.
Step 3. Set the target USB as the boot device and boot from it.
Step 4. Then, select the correct BIOS file and confirm the action.
The BIOS update process will take 2-3 minutes, after which you should restart your PC. For a more detailed explanation, you can refer to the comprehensive guide available here.

To update your BIOS with a USB drive in 2024, first, go to the manufacturer's website and download the latest BIOS version for your device. Then, create a bootable USB drive using a tool like Rufus or Etcher.
Updating BIOS with a USB drive is a feasible process that can be done in two ways. The first method involves using the BIOS Flashback feature, which allows the BIOS to be updated without needing to enter the BIOS settings.
Way 3. Update the Outdated Drivers
Updating outdated drivers can often resolve compatibility issues related to the "selected file is not a proper BIOS" error. To update the outdated drivers on your Windows computer, follow these steps below.
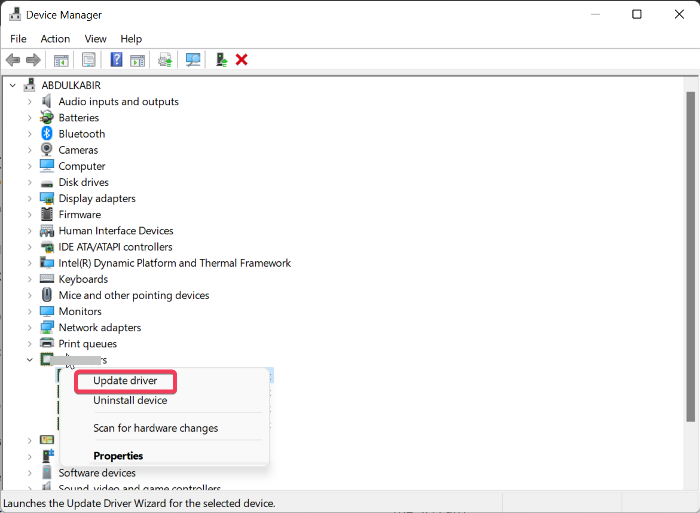
Step 1. To update the display driver on your Windows computer, press the "Win + X" keys to access the power menu, click on "Device Manager," navigate to the "Display Adapters" tab, right-click on the driver, and select "Update Driver."
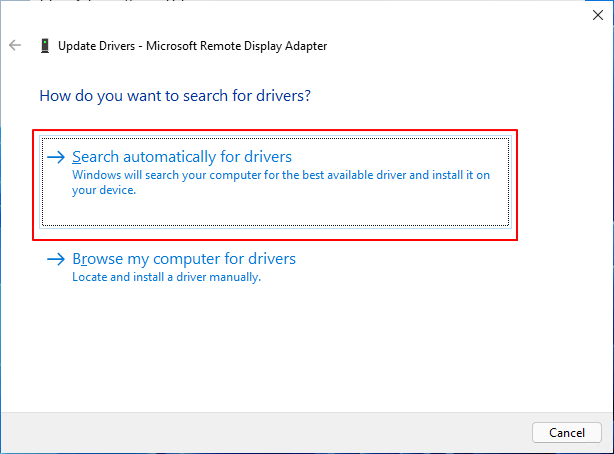
Step 2. Click "Search automatically for drivers" to find and install any available updates, then follow the on-screen prompts to complete the update. If the problem persists, further troubleshooting may be necessary.
Way 4. Run CHKDSK to Check Your External Hard Drive
Sometimes, a damaged or error-A faulty or corrupted USB drive can be the root cause of the issue. Running the CHKDSK utility on the external hard drive can help detect and fix errors that might be contributing to the problem. You can check the USB drive using the CHKDSK utility by following these instructions.
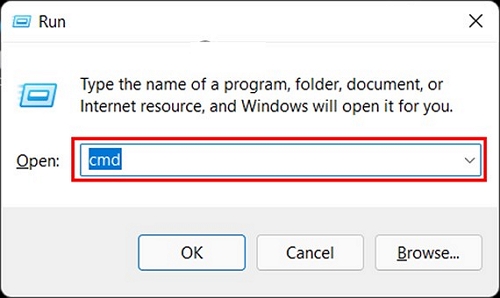
Step 1. To start, open the Task Manager and click "Run New Task." On the pop-up window, type "cmd" and check the box to create the task with admin privileges. Click "OK" to run Command Prompt as an administrator. This will allow you to perform actions that require elevated permissions.
Step 2. To troubleshoot a BIOS issue with an external hard drive, run the Command Prompt command "chkdsk [drive letter]: /f" in the Command Prompt interface, substituting [drive letter] with the designated letter allocated to the external hard drive, and then hit Enter to execute the command and allow CHKDSK to rectify any issues with the drive.
You can now successfully resolve the issue, and to help others, share this tutorial.
Why Selected File Is Not a Proper BIOS
The frustrating message "selected file is not a proper BIOS" can be caused by several factors, including corrupted or incomplete BIOS files, incorrect BIOS settings, outdated or incompatible BIOS versions, and hardware issues such as faulty storage devices or incorrect boot order. Additionally, incorrect UEFI settings or firmware issues can also lead to this error. Furthermore, issues with the bootable media, such as a corrupted USB drive or incorrect partitioning, can also cause this error. It's also possible that the selected file is not a valid BIOS file, or that the BIOS is not compatible with the system's hardware.
- Incorrect or Corrupted BIOS File: Using an incorrect or corrupted BIOS file during an update or installation can cause the system to fail to identify or properly utilize the file, resulting in this error.
- Outdated Drivers: The presence of outdated drivers in the system might clash with the BIOS update, leading to conflicts that result in the selected file not being a proper BIOS error message.
- Damaged or Corrupted External Hard Drive: If the external hard drive used for the BIOS update becomes damaged or corrupted, it can cause complications. The damage or corruption can prevent the hard drive from accurately reading or executing the BIOS file, resulting in an error.
- Wrong Format for External Hard Drive: This error message can occur due to an incorrect format of the external hard drive, causing it to be incompatible with the system's requirements, such as using a file system that the BIOS cannot read.
Below are some posts that related to the boot issues:
Conclusion
The error "selected file is not a proper BIOS" is caused by various factors, including incorrect or corrupted BIOS files, outdated drivers, and damage to the external hard drive, among others. Addressing these potential causes can help resolve the issue and ensure a successful BIOS update or installation.
Qiling Disk Master is a standout solution that facilitates formatting drives to ensure compatibility with the BIOS update process, and also provides a range of disk management functions.
FAQs About Selected File Is Not a Proper BIOS
Comprehensive answers to common queries can be immensely beneficial for those seeking further clarification or specific guidance. For instance, if someone is experiencing issues with their selected file not being a proper BIOS issue, the answers can provide concise information on how to troubleshoot and resolve the problem. This can include checking for corrupted files, verifying the BIOS version, and ensuring that the system is properly configured.
1. How do I restore my ASUS BIOS?
To restore the ASUS BIOS, follow these steps:
Step 1. To access the BIOS utility on an ASUS computer, simply restart the device and press the designated key, usually DEL or F2, as soon as the ASUS logo appears on the screen, allowing you to enter the BIOS setup.
Step 2. Press "F9" or select the "Default" option, and when prompted to "Load Optimized Defaults," press "OK."
Step 3. Save the BIOS settings by clicking "Save & Exit" or pressing "F10".
2. How do I fix the incorrect BIOS Settings?
To rectify incorrect BIOS settings, you can reset the BIOS settings. The steps for this are:
Step 1. To reset your computer's BIOS settings, reboot your computer and keep pressing the F2 key to enter the BIOS settings. From there, navigate to the "General" section on the left side and click on "Restore Settings" to reset the BIOS to its default values.
Step 2. To confirm your decision, select "OK" to proceed with the procedure. Follow the on-screen prompts to finalize the process.
3. How do I factory reset my BIOS?
Perform a BIOS factory reset with these steps:
Step 1. To access the Windows Recovery Environment, go to Troubleshoot, then Advanced Options, and select UEFI Firmware Settings. Click Restart to boot into the BIOS setup.
Step 2. To restore the BIOS to its default settings, navigate to the BIOS settings and click "Load Setup Defaults" or "Restore to Default Settings". Confirm the action by tapping "Yes" and wait for the process to complete. This will reset the BIOS to its original factory settings.
Related Articles
- Download Partition Magic Server Software for Windows Server 2012/2012 R2
- 3 Ways: How to Increase C Drive Space in Windows 10/8/7
- Fix Windows PC Won't Boot After Enabling Secure Boot
- Wyze Cam SD card Format: How to Format SD Card for Wyze Cam?
- Can't Shrink the 3 TB USB Drive, How to Fix?
If you have encountered the 'Can't shrink the 3 TB USB drive' problem, this post may be able to help as it contains an effective method of shrinking a 3 TB USB drive. - Can't Delete Files or Format My SD Card, What Should I Do?
Why can't delete files or format my SD card? This article provides a detailed guide on this issue and introduces an efficient way to help format a write-protected SD card.