How to Check Update to Windows 11 and Set Up Your PC to be Windows 11 Compatible
Microsoft has confirmed that Windows 11, codenamed Sun Valley, will be released this Fall, with most compatible computers expected to receive the update starting from November. The new operating system will be available as a free upgrade, and users can check if their devices are eligible by downloading a free update checker. To check if your old computer or laptop can install Windows 11, you'll need to meet the minimum hardware and system requirements, which can be found online. With this information, you'll be able to determine if you can upgrade to Windows 11 and start the upgrade process.
What are The Minimum System Requirements?
On the day Microsoft confirmed the Windows 11 OS rollout date, the most searched topics were mainly "Windows 11 requirements" and "Windows 11 compatibility checker", which are the key factors that will determine whether one can directly download the update after the final release or needs to upgrade their hardware or device to install the revamped OS.
Here's an overview of minimum system requirements
- Processor: 1 gigahertz (GHz) or faster with 2 or more cores on a compatible 64-bit processor or System on a Chip (SoC).
- Memory: 4 GB RAM
- Storage: 64 GB or larger storage device
- System firmware: UEFI, Secure Boot capable
- TPM: Trusted Platform Module (TPM) version 2.0
- Graphics card: DirectX 12 compatible graphics / WDDM 2.x
- Display: >9" with HD Resolution (720p)
- Internet connection: Windows 11 Home requires a Microsoft account and internet connectivity to set up, which is a departure from previous versions of Windows that allowed for a local account and offline setup. This change is likely due to the increasing reliance on cloud services and online features in Windows 11, such as Microsoft's cloud-based storage and security features.
How to Check If Your Computer Is Windows 11 Compatible
To get a free Windows 11 upgrade, your PC must meet all eight system requirements, which include having a 64-bit system, Secure Boot, Trusted Platform Module (TPM), and more. If any one of these elements is missing, you won't be eligible for the upgrade. Microsoft has a PC Health Check app to help you check if your PC meets the requirements, although it's not currently available to use.

The Windows 11 Upgrade Checker from Qiling Software allows users to automatically check their PC's compatibility with Windows 11. The software can be downloaded and installed, and then run to quickly determine if the computer is ready for the upgrade. This tool helps users assess their PC's readiness for Windows 11.
Step 1. Download Qiling Windows 11 Upgrade Checker.
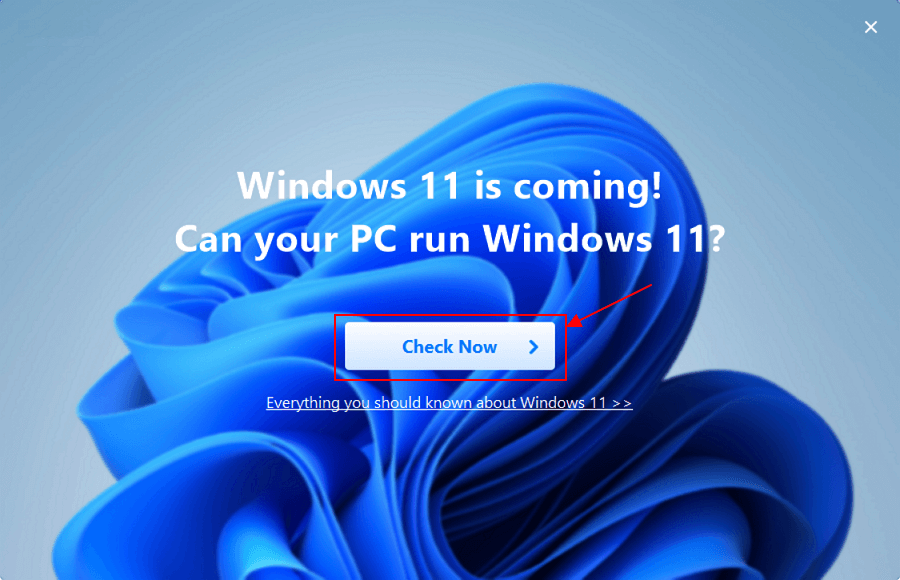
Step 2. Click the Check Now button to start.
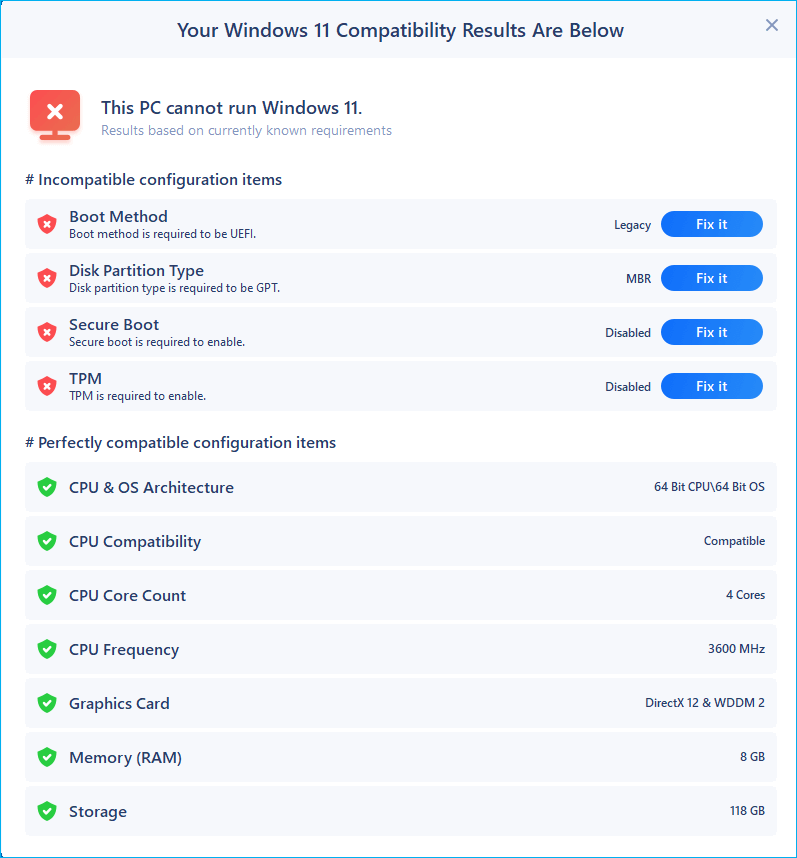
Step 3.The Windows 11 compatibility result window will soon appear, listing all incompatible and compatible configuration items.
How to Check and Enable TPM 2.0 on Your Computer
Microsoft requires a TPM 2.0 chip for Windows 11, which many older devices lack, making them incompatible with the update. This is because TPM 2.0 is a security feature that helps maintain platform integrity and facilitate disk encryption, and Microsoft made it mandatory in 2016, a year after Windows 10 was released. As a result, computers purchased before 2016 are unlikely to have a TPM 2.0 chip and therefore cannot support the Windows 11 update.
For post-2016 devices, we suggest owners follow the guide to check if there is a TPM module on their motherboard. If the result is positive, they should enable the TPM 2.0 in BIOS to get their computer ready for Windows 11 upgrade.
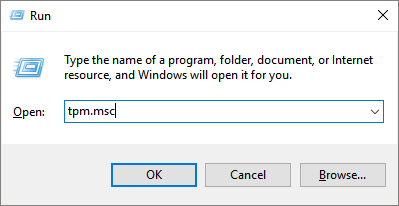
Step 1. To open the Trusted Platform Module (TPM) Management Console, press the Windows + R keys to bring up the Run box, type tpm.msc, and hit Enter.
Step 2.The computer is not equipped with a TPM chip, as indicated by Figure 1, which means it's not ready for Windows 11. However, Figure 2 suggests that the computer can be prepared for Windows 11, implying that the TPM chip can be enabled or configured to meet the Windows 11 requirements.
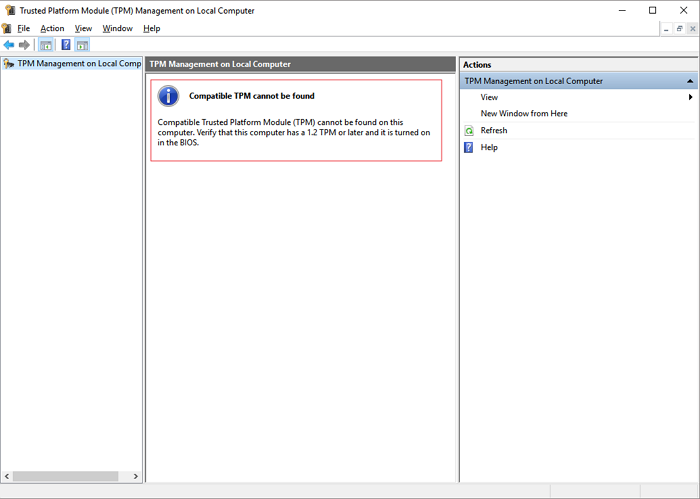
The image shows a system without a Trusted Platform Module (TPM) module, resulting in a specific error message or warning. The absence of a TPM module can lead to security vulnerabilities and potential issues with system integrity and authenticity verification.
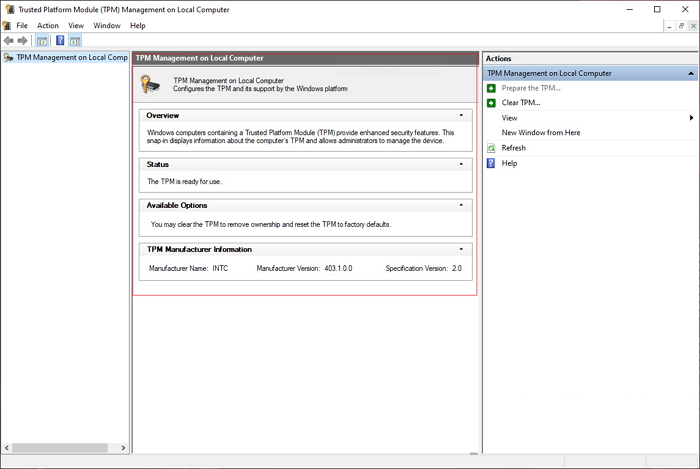
Figure 2: The result when you have a TPM module
If the Upgrade Checker reports the TPM missing or disabled, but you have a TPM 2.0 module on your motherboard, try to turn it on.
Step 3. Press and hold the required key* Pressing DEL or F2 during the boot process allows you to access the firmware settings, where you can enable the Trusted Platform Module (TPM) chip on your computer. This is typically done while restarting your PC or laptop.
Common BIOS keys by brand you can refer to:
- Acer: F2 or DEL
- ASUS: F2 for all PCs, F2 or DEL for motherboards
- Dell: F2 or F12
- HP: ESC or F10
- Lenovo: F2 or Fn + F2
- Lenovo (Desktops): F1
- Lenovo (ThinkPads): Enter + F1.
- MSI: DEL for motherboards and PCs
- Microsoft Surface Tablets: Press and hold volume up button.
- Origin PC: F2
- Samsung: F2
- Sony: F1, F2, or F3
- Toshiba: F2
Step 4. Navigate to the Security tab using the arrow keys, locate the Trusted Platform Module (TPM) option and press Enter.
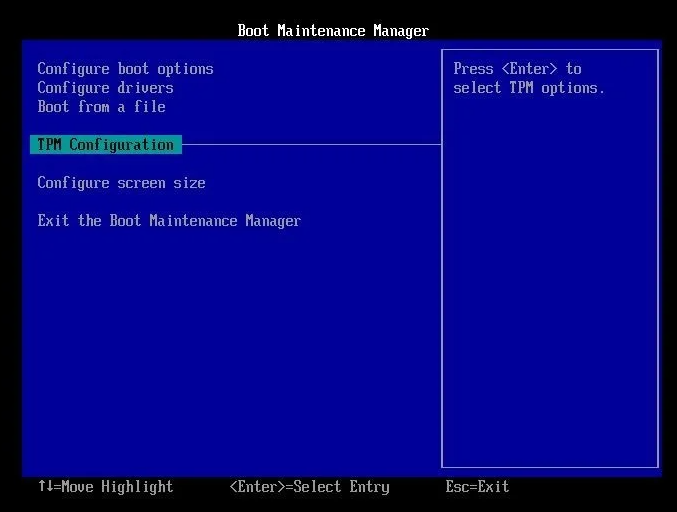
Step 5. Select Enable from the drop-down menu.
Step 6. Save and exit the BIOS and restart your PC.
How to Enable UEFI Secure Boot on a Supported Computer
Microsoft requires a UEFI secure boot for system firmware, which is designed to improve Windows security along with the TPM 2.0. UEFI is a newer firmware concept that succeeds Legacy BIOS and is becoming the dominant firmware mode. As a result, Windows 11 makes UEFI secure boot an essential element for upgrades.
Further reading: BIOS vs. UEFI: Difference and Conversion
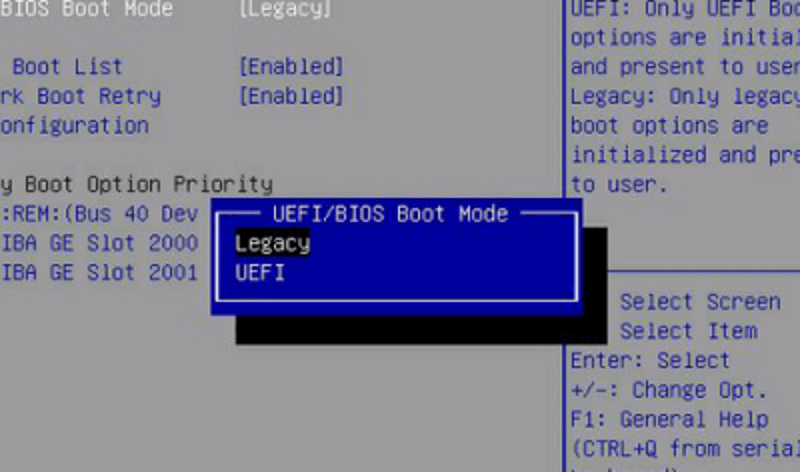
Modern OEM PCs often have UEFI firmware support, but the Qiling upgrade checker reports that many are still using Legacy BIOS settings, despite being UEFI compatible. This can be seen in the BIOS settings, where both Legacy and UEFI options are available, such as in the boot section.
You can't directly switch from Legacy to UEFI to reach Windows 11. First, you need to convert the disk style from MBR to GPT to support the UEFI boot loader. This is a prerequisite for installing Windows 11.
How to Convert MBR to GPT
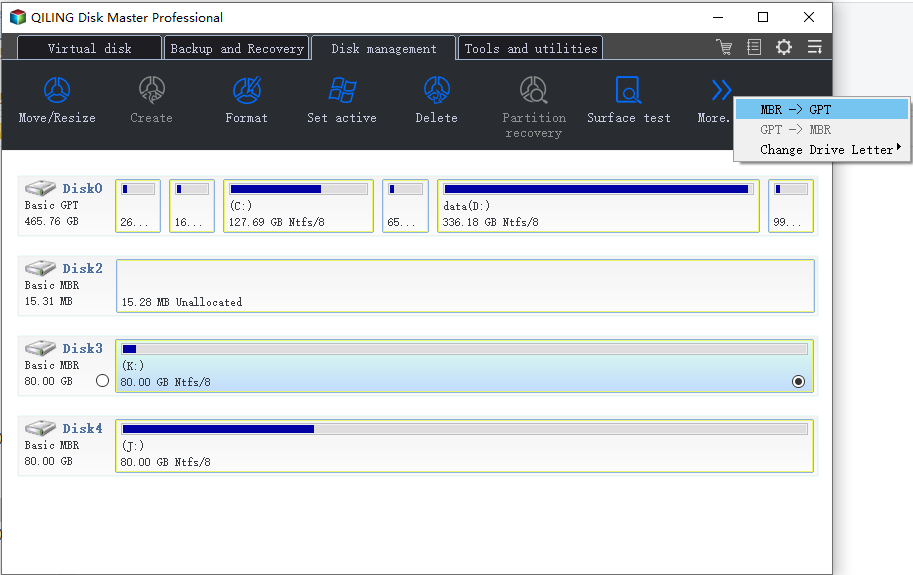
Qiling Partition Master is a comprehensive disk & partition management program that offers solutions such as disk space adjustment, partition merging or splitting, copying or cloning a drive, migrating OS from HDD to SSD, and converting a disk from MBR to GPT to secure boot Windows 11 from UEFI mode.
Step 1. Download and launch Qiling Partition Master on your Windows computer.
Step 2. To convert a Master Boot Record (MBR) disk to a GUID Partition Table (GPT) disk, select the MBR disk you want to convert, click the "More" feature, and then choose the option to convert it from MBR to GPT.
Step 3. After that, tha app will start the conversion.
How to Change Legacy BIOS to UEFI
To finalize the conversion from MBR to GPT, you'll need to re-enter the BIOS setup screen, disable Legacy support, enable UEFI, and also turn on Secure Boot.
Step 1. Enter the BIOS setup utility again by pressing the key that was previously determined to access it, such as F2, F12, or Del, and make the necessary changes to the boot order to prioritize the USB drive. Ensure the USB drive is selected as the primary boot device and save the changes.
Step 2. Under the Boot tab, select the UEFI/BIOS Boot Mode using the up or down arrow key and press Enter to choose UEFI mode, then save the change.

Step 3.Switch to the Security, Boot, or Authentication tab in your firmware interface, find the Secure Boot setting, and set it to Enabled.
Related Articles
- How to Map a Network Drive in Windows 11? Your Complete Guide Is Here
- Go Back to Previous Version of Windows in Windows 11 Even After 10 Days
- Windows 11 Installation Has Failed? Your Fixes Are Here
- Windows 11 Is Not Activated: How to Activate Windows 11 OS for Free
- My Laptop is Showing Only C Drive Not Other Drives
Why is my laptop showing only C drive not other drives? How do I get the missing partitions back? If you are facing such problems on your Windows laptop, read this post, and we will show you the solution to this troublesome issue. - M.2 SSD Shows Empty on the New PC, but Definitely Not
Have you ever encountered this 'M.2 SSD shows empty on the new PC, but definitely not' problem? Let me explain why this issue will happen and how to resolve it easily.