How to Format a Hard Drive While Installing Windows
Windows Setup can format a hard drive before installing Windows, but the disk screen can be confusing when several partitions are listed.
This guide explains what to check before formatting, how to use Windows Setup safely, and when to prepare the disk with Qiling Disk Master.
PAGE CONTENT
- What This Problem Means
- Before You Start
- Use Windows Built-in Tools First
- Use the Qiling Product Workflow
- Check the Result
- FAQs
What This Problem Means
Formatting during installation removes the file system from the selected partition so Windows can install cleanly.
- EFI, MSR, Recovery, and primary partitions have different purposes.
- Deleting all partitions on the wrong disk can remove personal files permanently.
- MBR/GPT and UEFI/Legacy mode affect whether Windows can install.
- A clean install is not the same as a secure wipe.
- 顦?/i> Important
- Disconnect backup drives before installing Windows so you do not format the wrong disk.
Before You Start
Back up personal files, export needed keys, and identify the target disk by capacity and model.
- Confirm the exact disk, partition, USB drive, SD card, or Windows installation you are changing.
- Copy irreplaceable files to another drive if the device is still readable.
- Check whether BitLocker, Secure Boot, UEFI/Legacy mode, or a vendor recovery partition is involved.
- Avoid formatting, deleting, wiping, or running DiskPart clean until you know whether data must be recovered first.
Use Windows Built-in Tools First
Use Windows Setup when you want a clean install on a known target disk.
Step 1. Boot from the Windows installation USB and choose language and keyboard.
Step 2. Click Install now and choose Custom: Install Windows only.
Step 3. Select the target partition and use Drive options to format only that partition if you want to keep others.
Step 4. For a completely clean target disk, delete partitions on that disk only, select unallocated space, and click Next.
Step 5. If Windows shows an MBR/GPT error, stop and check boot mode before conversion.
Detailed Qiling Disk Master Workflow
Use Qiling Disk Master when Disk Management cannot finish the operation, the option is grayed out, or you need a clearer preview before changing a partition. Back up important files before resizing, formatting, converting, or deleting anything.
Step 1. Open Qiling Disk Master and locate the target disk or partition. Confirm the drive letter, capacity, file system, and position.
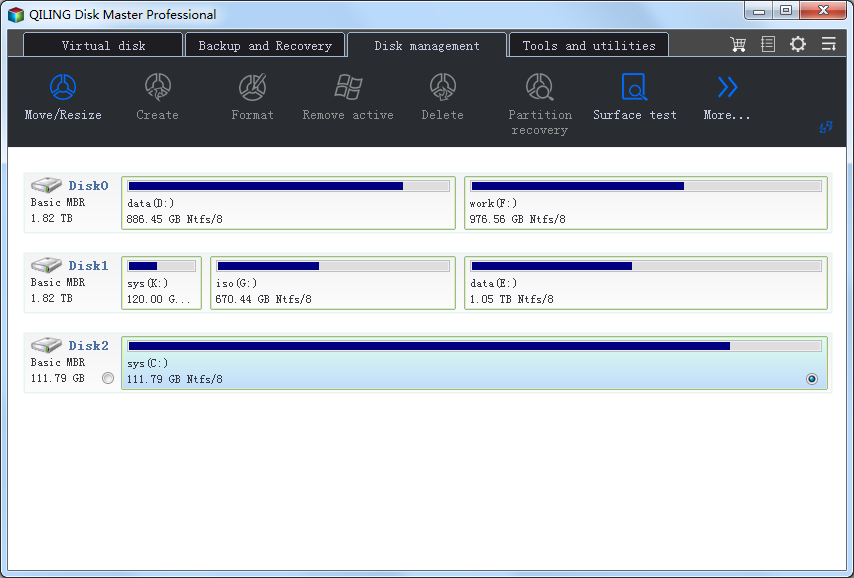
Step 2. Select the required task, such as resize/move, create, format, check partition, convert disk, or change a drive property.
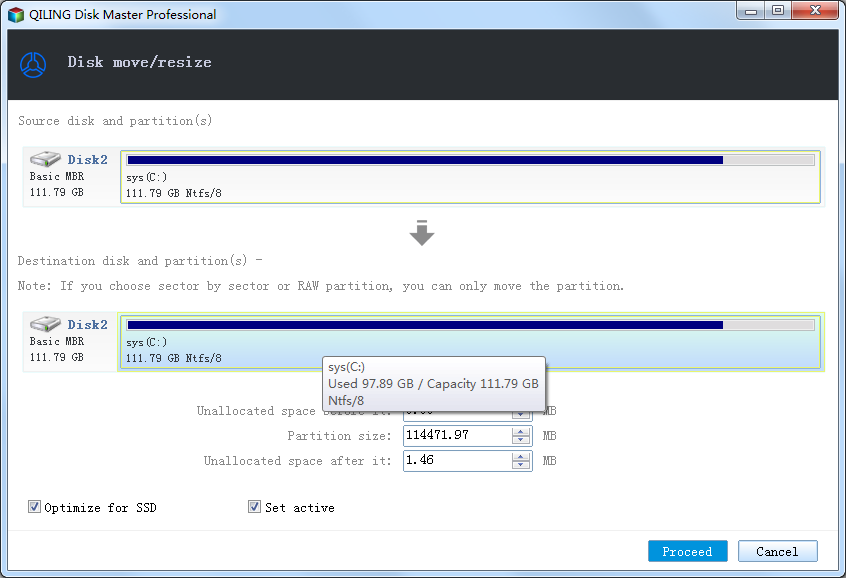
Step 3. Configure the operation. For resize, drag the partition border or enter the size. For format, choose the file system and label. For checking, choose disk health or partition check.
Step 4. Preview the pending operation list. Make sure EFI, System Reserved, Recovery, and data partitions still appear correctly.
Step 5. Click Proceed and keep the computer powered on until the operation completes.
Step 6. Restart if prompted, then reopen Disk Management and File Explorer to verify the result.
Check the Result
Install chipset, storage, network, and graphics drivers, then reconnect data drives one at a time.
- Restart Windows and confirm the drive, partition, backup task, or cloned disk appears as expected.
- Open several files instead of only checking that a drive letter exists.
- Keep one recent backup on an external drive before making another high-risk change.
- If the same error returns, check hardware health, cable quality, firmware, and Event Viewer before repeating the same operation.
FAQs
Does formatting during setup delete all drives?
No, only the selected partition is formatted, but deleting partitions on the wrong disk can erase that disk.
Should I delete EFI and Recovery partitions?
Only on the target disk during a clean install, never on another working disk.
Can files be recovered after setup formatting?
Sometimes, if new Windows files have not overwritten them. Stop using that disk and recover from another system.
Conclusion
Formatting during Windows installation is safe only when the target disk is clear. If the layout is confusing, prepare or back up the drive with Qiling Disk Master first.
Related Articles
- Best Free Partition Manager Software of 2026
- How to Clone HDD to SSD in Windows 10/11/7
- Windows System Backup and Restore Tutorials
- Windows Data Recovery Tutorials
Products
Articles & Tutorials
- Data Recovery
- Data Backup
- File Recovery
- File Backup
- System Backup and Restore
- Disk and Partition Clone
- Technical articles
- Mobile articles
- Disk Master Help
- Windows Data Recovery Tutorials
- Windows Secure Delete Tutorials
- Windows Partition Management Tutorials
- Windows File Backup and Restore Tutorials
- Windows System Backup and Restore Tutorials
- Windows Disk Backup and Restore Tutorials
- Windows Clone Tutorials