How to Install Windows 11 on Windows 7 (Get In-depth Guide)
Can I Upgrade from Windows 7 to Windows 11
You can upgrade from Windows 7 to Windows 11 for free, but you'll need to meet the minimum system requirements, which include having a TPM 2.0 chip, among other things.
Check Compatibility
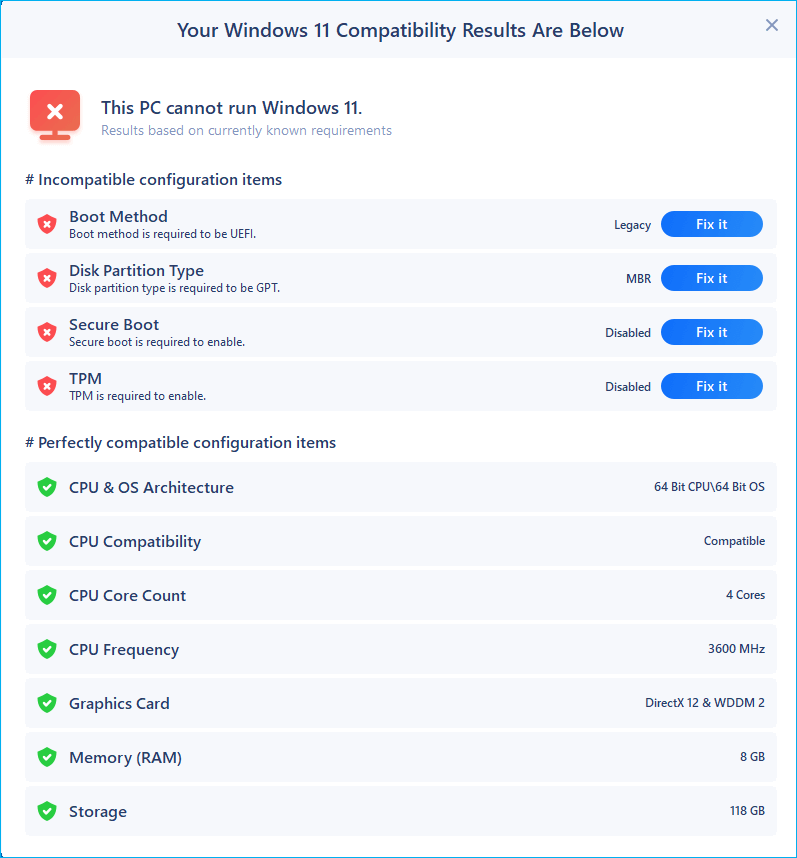
For beginners, it can be difficult to determine if their device is eligible for an upgrade to Windows 11. To simplify the process, a free Windows 11 Upgrade Checker is available, which can help identify whether your device meets the system requirements, including processor, graphic card, and TPM 2.0 chip.
Step 1. Download Qiling Windows 11 Upgrade Checker.
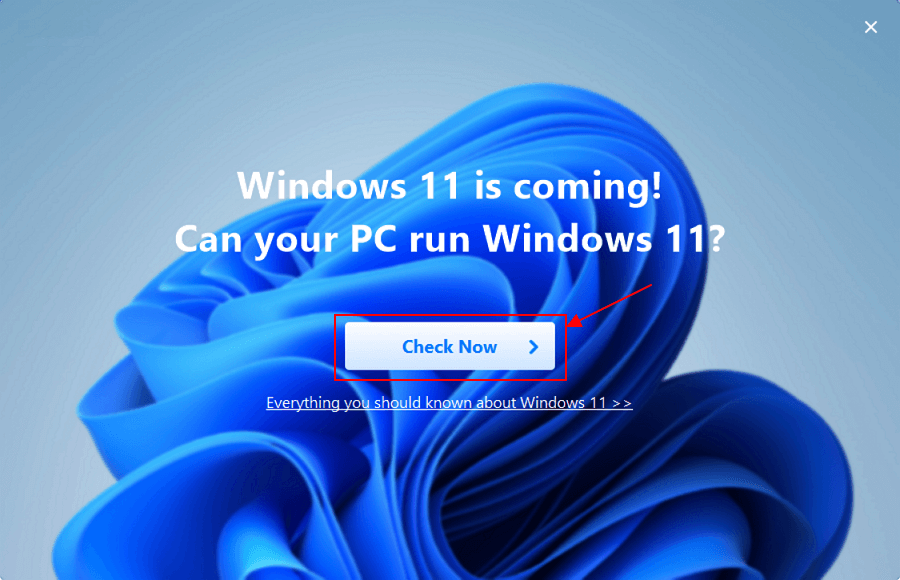
Step 2. Click the Check Now button to start.
Step 3. The Windows 11 compatibility result window will soon appear, listing all incompatible and compatible configuration items.
Change to UEFI Mode for Your Computer
The computer market is shifting towards using UEFI mode for system firmware due to its faster and more secure boot process, and support for large storage capacities, making it a likely replacement for traditional BIOS boot. To boot in UEFI mode, the hard drive's partition should be in GPT style.
The Legacy mode is compatible with MBR and the UEFI mode is compatible with GPT. To boot from UEFI mode, convert the partition style now.
- Legacy - MBR
- UEFI - GPT
You can't easily replace the process, graphic card, or TPM chip, but you can modify your system firmware by converting the Master Boot Record (MBR) to GUID Partition Table (GPT) using software like Qiling Partition Master, which can do this conversion without data loss on Windows 7.
To optimize your computer for Windows 11, you can use Qiling Partition Master to enhance your system's performance by adjusting disk space, extending the C drive, formatting, creating, and formatting partitions. This can help improve your overall computing experience.
Download Windows 11 ISO File to Install Windows 11 on Windows 7
To quickly download the Windows 11 ISO file, you can use the Qiling Windows 11 builder, a free software that provides a downloadable Windows 11 ISO image. Simply connect a USB flash drive to your computer, follow the steps, and you'll have the Windows 11 ISO file downloaded to your computer.
Step 1. The Windows11 builder is integrated with the Qiling OS2Go software, allowing users to download and install it after installation.
Step 2.The name of the software was changed from WinToGo Creator to Windows Install Drive Creator. This change allows users to access system information on the home screen, which continuously updates. Additionally, the software supports the creation of Windows 10/8.1, in addition to Windows 11.
Step 3. Connect your USB flash drive to the computer and click the "Create" button once it's detected by the Win11 builder.
Step 4. The software will erase data from a used USB drive once it's downloaded. Simply wait for the download to complete before leaving or resuming your tasks.
Step 5. After downloading the Windows 11 iso image file to a USB drive, start the installation process by following the installation wizard step by step from the bootable USB drive on your computer.
Upgrade Process from Windows 7 to Windows 11 for Free
With the help of Qiling Windows 11 Builder, you have installed Windows 11 files on your USB flash drive, making it possible to upgrade Windows 7 to Windows 11 via the USB device.
Note: Make sure your computer has enough power and will not shut down during the upgrade process.
How Do I Install Windows 11:
Step 1. To connect a Windows 11 USB, insert the device into your computer, open File Explorer, click on "This PC," and find the USB device listed under "Devices and drives." Clicking on it will open it.
Step 2. Find the setup.exe file and launch Windows 11 setup program.
Step 3. Click Yes to confirm the User Account Control window.
Step 4. Windows 11 will prepared to set up.
Step 5. To set up Windows 11 without downloading updates, click on "Change how Setup downloads updates" and select "Not right now". Then, click the "Next" button.
Step 6. Wait for a second and choose what to keep
- Keep personal files and apps.
- Keep personal files only.
- Nothing.
After selecting, click on the Next button.
Step 7. You can check the "Ready to install" message. Click on Install.
Step 8. Your PC will now install Windows 11.
Step 9. Once the upgrade to Windows 11 is complete, you can log in to your account and customize your personal settings on the operating system.
Roll Back Upgraded Windows 11 to Previous Windows OS
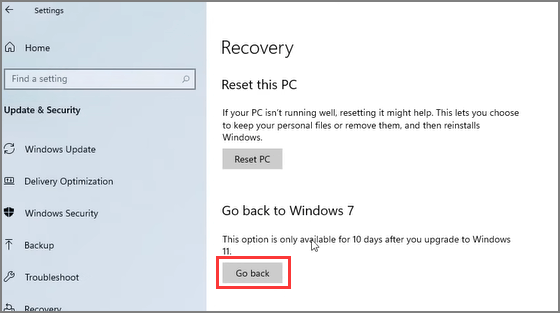
Step 1. Click Settings on the taskbar.
Step 2. To go back to Windows 7, go to "Update & Security" > Recovery, hover on "Go back to Windows 7" and click on the "Go back" button.
Step 3. You are being asked to choose why you want to go back to Windows 7. Select one of the options that best describes your reason, then click "Next".
Wait for a while to restore your previous version of Windows.
Final Thought
We've introduced a quick way to install Windows 11 on Windows 7, and you can get the free tool for preparation. If Windows 11 isn't your cup of tea, you can take steps to roll back.
Related Articles
- Fixed: We Couldn't Format the Selected Partition | 0x8004242d Error [2022]
- Setup SSD/HDD and Change System/OS Disk for Windows 11/10
- Free Download 2022 Best Memory Card Format Tool, Format SD Card for Free
- How to Merge Unallocated Space Windows 11/10/7
- Free Partition Manager on Windows Server 2008
How to find a free partition manager/magic on Windows Server 2008? We will introduce some free partition managers to quickly extend or move partition for space management. - Download Free Toshiba Format Tool and Format Toshiba Device with Ease
Download free Toshiba format tool here to format Toshiba laptops, USB flash drives, memory sd cards, internal and external hard drives.