How to Install Windows 11 on SSD - SATA/M.2/NVMe on Your Own? Your Guide Is Here
| Workable Solutions | Step-by-step Troubleshooting |
|---|---|
| Preparation | Get New SSD/M.2/NVMe SSD Ready for Windows 11 Installation...Full steps |
| Install Windows 11 on SSD |
Method 1. Upgrade OS to Windows 11, and Transfer Windows 11 to SSD...Full steps Method 2. Install Windows 11 on SSD from USB, Without Removing HDD...Full steps |
| Make SSD Bootable After Windows 11 Installation | Step 1. Restart your computer and immediately press the F2, F10, or Del key (depending on your computer model) to access the BIOS settings. This will allow you to configure basic settings such as boot order and time.Full steps |
Microsoft released the first beta version of Windows 11 on June 24th, 2022, followed by a second beta version on July 8th, making its new features and designs available to Windows users through the Windows Insider program.
Windows 11 is available, with new features and changes. For details, visit the official Microsoft website at https://www.microsoft.com/en-us/windows/windows-11.
Can I Install Windows 11 on M.2 SSD?
Installing Windows 11 is not a complex procedure, and with a clear understanding of the steps involved, anyone can successfully install it on their PC.
- Warning
- Windows 11 is currently only available for Windows Insider users to update, and if you're concerned about bugs and known issues, it's recommended to stick with your current OS for now.
Windows 11 is expected to become the dominant operating system in the near future, likely within the next few years.
To install Windows 11 and enjoy its new features on your computer, follow this step-by-step guide. Start by checking if your computer meets the system requirements, then head to the Microsoft website to download the Windows 11 installation tool. Run the tool, and it will check your computer's compatibility and prepare the installation. Once ready, follow the prompts to create a bootable USB drive or ISO file, and then restart your computer to begin the installation process.
Preparation: Get New SSD/M.2/NVMe SSD Ready for Windows 11
To ensure your computer runs smoothly with Windows 11, it's essential to choose a suitable SSD (Solid-State Drive) as the OS drive, as it meets the higher hardware and software requirements for installation.
Here are the tips to get your new SSD disk ready for Windows 11 in one paragraph:
#1. Select a suitable SSD - SATA, M.2, or NVMe SSD
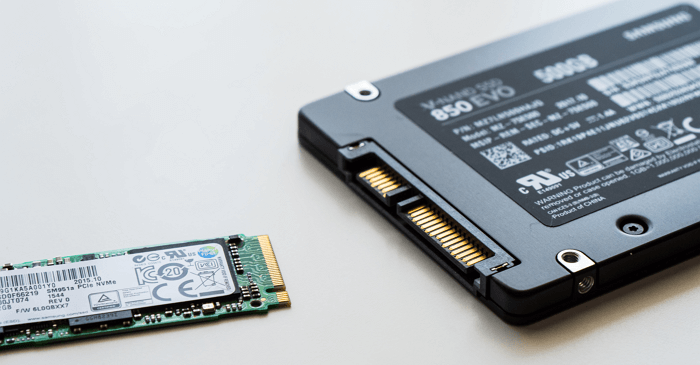
If you're deciding which type of SSD to get, consider the following comparison: SATA SSDs offer slower speeds (around 500-600 MB/s) but are generally more affordable and widely supported. M.2 SSDs, on the other hand, have faster speeds (up to 2000 MB/s) and are more compact, but may require a separate M.
| Comparison | SATA SSD | M.2/NVMe SSD |
|---|---|---|
| Connector | SATA connector | SATA, PCI-Express (PCIe) |
| Reading & Writing Speed | 545~600MB/s | 3GB/s |
| Price | ~$.21/GB | ~$.50/GB |
Editors' Pick: For a fast and endurable computer, the current M.2 SSD is ideal for installing Windows 11.

#2. Set Up SSD
To ensure your new SSD is compatible with Windows 11 installation, initialize it as a GPT disk type. This can be done by following these steps:
Step 1. To replace the old SSD with a new one, shut down the computer, open the computer case, and insert the new M.2 or NVMe SSD into the designated SSD slot. Secure it with screws to ensure it's properly fastened.
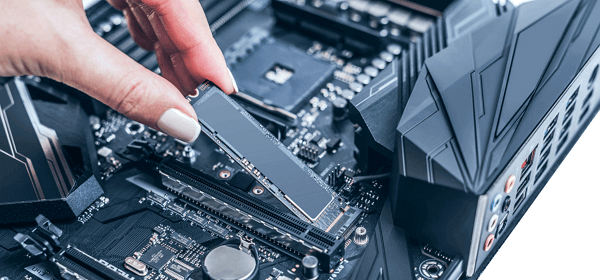
Step 2. Close the computer case and reboot the PC.
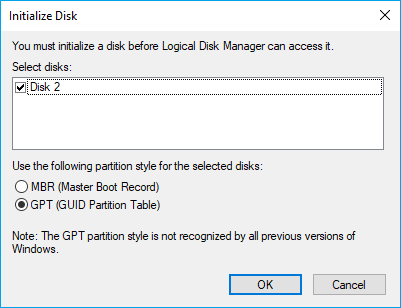
Step 3. To open Disk Management, press the Windows key + R, type diskmgmt.msc, and then press Enter. This will open the Disk Management utility, where you can view and manage your computer's disks and partitions.
Step 4. Right-click on the new SSD, select Initialize Disk, and choose GPT as the disk type.
To ensure a smooth installation of Windows 11, select the GPT disk type, which is required for the operating system's GPT UEFI and Secure Boot mode.
How to Install Windows 11 on SSD (SATA/M.2/NVMe)? 2022 Tutorial
There are three ways to install Windows 11 on your PC:
- 1. Update to Windows 11 as Insider
- 2. To update to Windows 11 on Windows 10, go to Settings, then Update & Security, and finally, Check for updates. If an update is available, select Download and install now.
- 3. Download Windows 11 and Install It on SSD from USB
Note that the first two options are to free update Windows 11 on your original OS disk, which could be a hard disk drive.
So what are the exact steps? How to get Windows 11 installed on your target drive? Follow the next two methods for help.
Method 1. Upgrade OS to Windows 11, and Transfer Windows 11 to SSD
Step 1. Download and update to Windows 11
#1. Get Windows 11 Update as Insider:
- Open Windows Insider Program page, sign in.
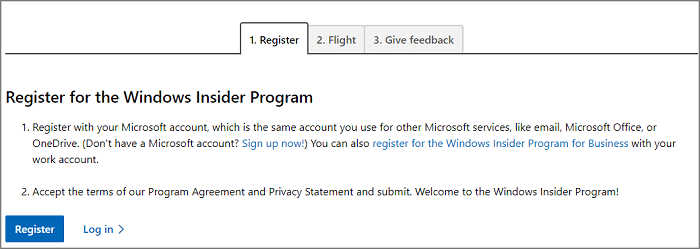
- Go to Settings > Update & Security > Windows Insider Program > Get Started.
- Select + to connect your account and select Dev channel.
- Confirm the Privacy Statement and program terms, select Restart Now or Restart Later.
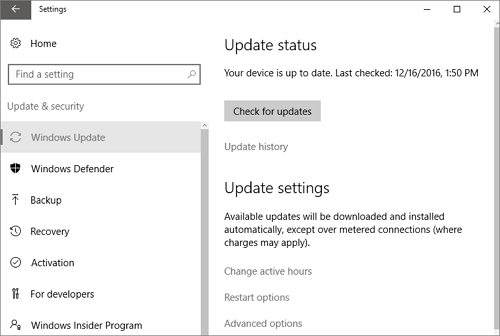
- After computer restart, go to Settings > Update & Security > Windows Update > Check for Updates.
#2. Check and Get Windows 11 Update on PC
- To check for Windows updates, go to Settings, then select Update & Security, followed by Windows Update, and finally click on Check for Updates.
Step 2. When the new update is available, click Download and install.
Step 3. Follow the on-screen instructions and wait for Windows 11 to be installed on your computer.
Step 4. After installing Windows 11, you can now move or transfer the OS to a newly installed SSD, allowing you to upgrade your computer's storage to a faster and more efficient drive.
To transfer Windows 11 to a new SSD without reinstalling, use Qiling Partition Master to help you. This software allows you to move your operating system to the new SSD, eliminating the need for a full reinstall.
Steps to migrate OS to HDD/SSD:
- Run Qiling Partition Master, select Migrate OS from the top menu.
- Select the SSD or HDD as the destination disk and click Next.
- Be aware that data and partitions on the target disk will be deleted. Make sure to back up important data before proceeding. If you haven't done so, do it now.
- Then click Continue.
- Preview the target disk layout, then click Proceed to start the OS migration to the new disk.
Note: When migrating an operating system to a new SSD or HDD, be aware that if the target disk doesn't have enough unallocated space, the process will delete existing partitions and data on it. This means any important files or data on the target disk will be lost, so it's essential to back up any critical data to an external drive before proceeding.
After installing Windows 11 on the new SSD, you can proceed to the next step to set the new SSD as the boot drive in BIOS. This will enable Windows 11 to boot from the new SSD.
Method 2. How to install Windows 11 on SSD from USB, Without Removing HDD
Unfortunately, since Windows 11 is only available in the Dev Channel, the option to directly install Windows 11 to SSD from a USB drive is not currently available.
If you want to install it now, try method 1.
If Windows 11 is available for free download its ISO files now, go through the guidelines as listed below:
Step 1. To prepare an empty USB external drive with up to 8GB or bigger space, simply remove any existing data from the drive and then format it using your computer's operating system. This will erase all data on the drive and make it ready for new files.
Step 2.To get started, go to the Windows 11 page and download the ISO file directly to your computer.
Step 3. Burn the ISO file into your USB drive.
To create a Windows 11 installation media, you can download the Windows 11 creation media from the official Microsoft website and burn it to a USB drive. Alternatively, you can directly download the Windows 11 creation media and install it to your USB drive.
Step 4. To set up the USB drive as a boot device, reboot your PC and enter the BIOS settings. From there, you can configure the USB drive as the primary boot device, allowing your computer to boot from it instead of the hard drive.
Step 5. Once the computer boots on the USB disk, follow the onscreen instructions to install the new operating system.
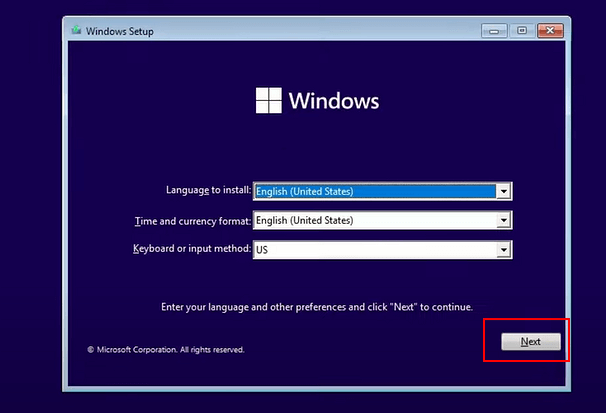
Step 6. To set up your computer, select the language, time, and currency format you want to use, and choose your keyboard or input method. Click Next to proceed.
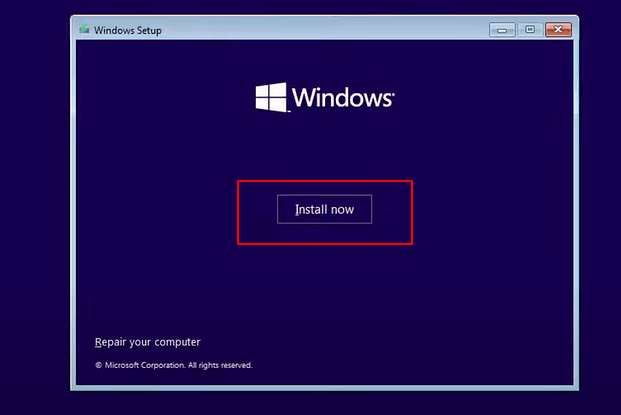
Step 7. Click Install Now to enter the next step.
Step 8. Click I don't have a product key to continue.
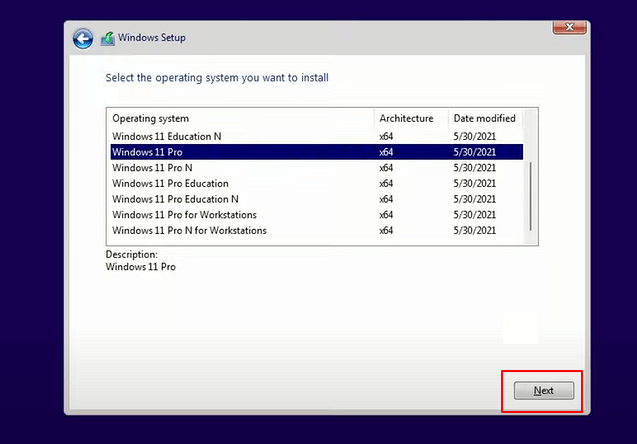
Step 9. Select Windows 11 edition that you want to install and click Next to continue.
Step 10. Click to accept the Microsoft License Term and click Next.
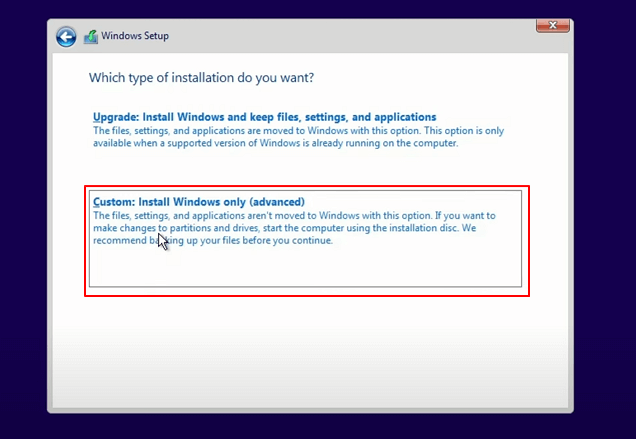
Step 11. Click Custome: Install Windows only on the new disk.
Step 12. Select the new SSD as the target disk and click Next to proceed.
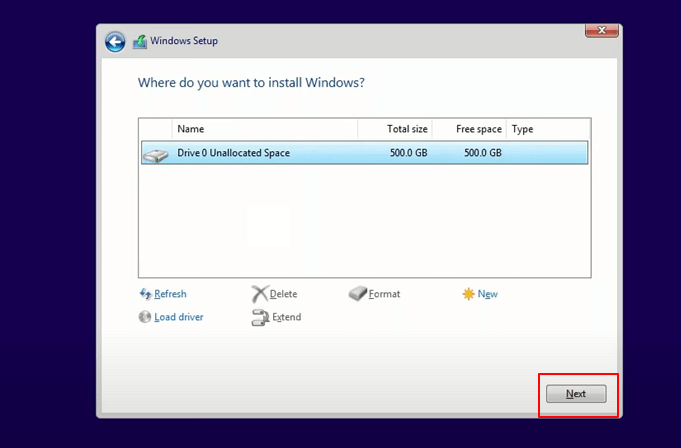
To create a partition for Windows 11 installation on the SSD, click the "New" button. This will partition the drive, allowing you to install Windows 11 on it.
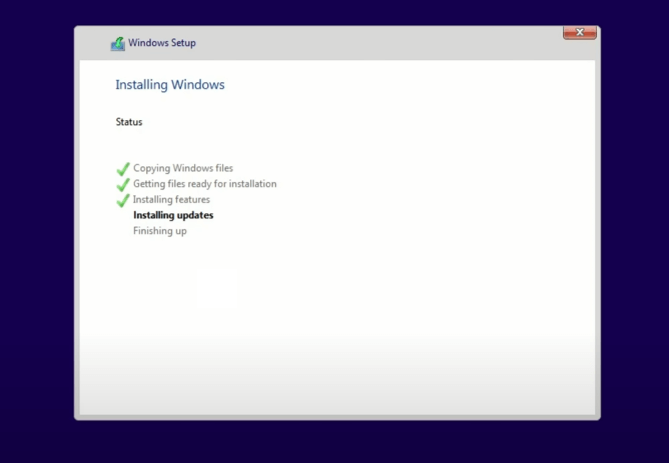
Step 13. Wait for the installing process to complete, then the computer will restart automatically.
Then follow the on-To set up your computer, start by installing the new SSD into your computer's drive bay. Next, connect the SSD to your motherboard and ensure it's properly powered. Then, enter your BIOS settings and set the boot order to prioritize the new SSD.
How Do I Make My (SATA/M.2/NVMe) SSD Bootable After Windows 11 Installation
To set the new SSD disk as the Boot Drive after installing Windows 11 on it, you'll need to enter the BIOS settings, navigate to the Boot Order section, and prioritize the SSD drive over the existing hard drive. This will ensure that your system boots from the SSD drive instead of the traditional hard drive.
Step 1. Restart PC and press the F2/F10/Del key to enter BIOS settings.
Step 2. To set the new SSD as the boot drive, go to the Boot Menu, and select it as the primary boot device. This will ensure that the computer boots from the new SSD instead of the old one.
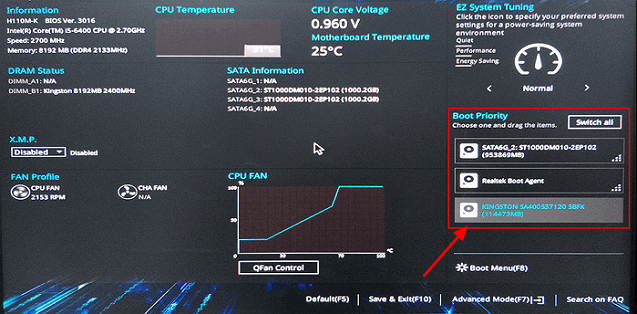
Step 3. Save the changes and exit to restart Windows 11 again.
Windows 11 Is New & Get Your New SSD Ready to Install the Update Now
This page guides you through the process of selecting a new SSD, preparing it, and installing Windows 11 on it, providing a comprehensive step-by-step guide to ensure a smooth setup.
- If you're new to tech or have no prior knowledge, installing Windows 11 is a straightforward process. You can follow this guide to successfully install the new update on your computer.
- If your OS drive is an HDD and you installed the OS on it, you can directly transfer Windows 11 to a new SSD using Qiling Partition Master.
Windows 11 is currently only available for download and installation through the Insider channel, making it accessible to those who want to try it out on their computer with a new SSD.
Microsoft will update and fix bugs and issues in Windows 11.
Related Articles
- How to Troubleshoot Critical Process Died Error in Windows 10/8/7 (10 Solutions)
- How to Repair or Fix MBR (Master Boot Record) in Windows 11/10/8/7/Vista/XP
- How to Set SSD as Boot Drive [2022 Updated]
- What Is USB Format for PS3 | How to Format PS3 USB
- What Is Format SD Card, Everything You Are Concerned About
What is format SD card? When do you need to format your SD card? This page covers what formatting an SD card means and also elaborates on how to format an SD card. - What is Seagate Discwizard? How Can I Use It and Its Alternative?
If you're looking for a suitable alternative to Seagate DiscWizard, Qiling Partition Master is a great option. This software offers a range of essential features that can help ease your troubles.