2022 Magic Wester Digital (WD) Partition Manager Software Free Download
If you're looking for a reliable tool to manage your Western Digital hard drive partition, this guide can help. With this WD partition tool, you can easily manage partitions on your HDD, SSD, or external hard drives, giving you the flexibility you need. Follow this tutorial to learn how to fully manage your Western Digital hard drive partition with ease.
Western Digital, A well-known storage device manufacturer offers a range of data storage solutions to help customers capture and preserve their valuable data on various devices, including hard disk drives, solid-state drives, USB flash drives, SD cards, memory cards, and more.
To utilize the WD hard drive partitions, you can use a partition manager software to manage and partition your Western Digital hard drive. This process involves selecting a reliable partition manager, opening it, and following the software's instructions to partition your WD HDD/SSD. The entire process can be completed in a few clicks, allowing you to efficiently manage your hard drive partitions.
Western Digital (WD) Partition Manager Software Free Download
Here is a list of cases that you'll need to turn to a reliable partition tool for help:
- Resize partitions - extending or shrinking
- Create partitions (logical or primary)
- Merge two partitions into one
- Migrate OS from the old drive
- To format a WD hard drive for use with a Mac, you'll need to erase the drive and configure it as a single partition that's compatible with macOS. This process will delete all data on the drive, so make sure to back up any important files first. You can use the Disk Utility app on your Mac to format the WD hard drive. Simply connect the drive to your Mac, open Disk Utility, select the drive from the list on the left, and click the "Erase" button.
- Copy partitions to another drive for backup
- Wipe WD disk
- More...
WD Partition Manager Software Is Available Here to Free Download
To partition a Western Digital hard drive in Windows 10/8/7, you can use a reliable third-party partition manager software, which can help you manage and partition your hard drive with ease.
Qiling Partition Master is a comprehensive disk management tool designed for use with WD hard drives, external hard drives, and other portable storage devices.
Manage and Partition WD Hard Drive with Qiling Partition Master
To partition a WD external hard drive, you can use Qiling Partition Master, a lightweight Windows application that allows users of all levels to partition and manage hard disks in Windows 10/8/7, Vista, and XP.
To manage your Western Digital hard drives, SSDs, or external storage media, follow the tutorial guides below. You can check the official Western Digital website for detailed instructions on how to set up and configure your devices, as well as troubleshoot any issues you may encounter.
Tutorial 1: Partition Hard Drive
Step-by-Step Guide to Partition WD Hard Drive:
Step 1. Check for free space
To divide a disk partition into multiple ones, it's essential to have sufficient free space available to allocate to the new partitions. This will ensure a smooth and successful partitioning process.
Step 2. Shrink a disk partition to create unallocated space
To resize a partition with free space, start by right-clicking on it and selecting the "Resize/Move" feature. This will allow you to adjust the partition's size and move it to a different location on the disk.

To create more unallocated space, you can drag either end of the partition to the right or left, allowing you to shrink its size. This can be seen in the "Partition size" area, where you can visually track the decrease in space.

After shrinking the disk, click "Proceed" to save the changes. This will create unallocated space on the same disk, which can be used for future needs.
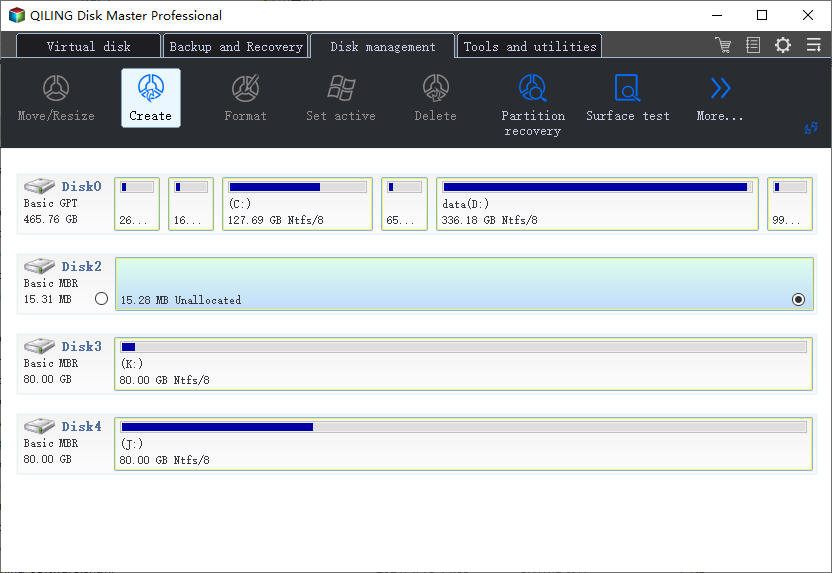
Step 3. Create a new partition on unallocated space
The final step is to create a usable partition drive with a recognized file system from the unallocated space. To do this, right-click on the unallocated space and choose "Create".
In the Advanced Settings, you can customize the partition information by selecting a drive letter, partition label, file system (such as NTFS, FAT32, EXT2/3/4, or exFAT), and other settings.
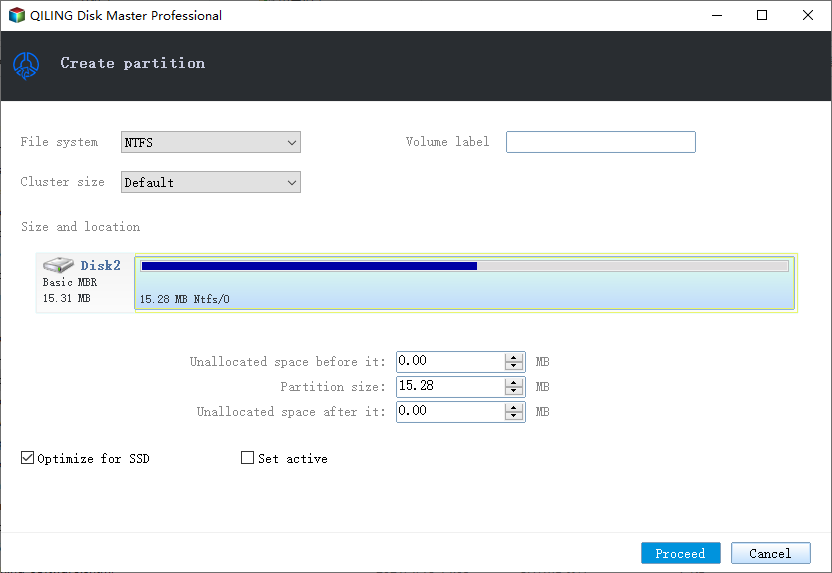
To create a partition on the unallocated space, first, select the unallocated space from the list of drives, then click the "New" button to create a new partition. Next, choose the file system type, such as NTFS or FAT32, and set the partition size to the desired amount of space. Finally, click "Proceed" to confirm the partition creation, and repeat the process to create additional partitions as needed.
Tutorial 2: Format Western Digital Hard Drive
Qiling Partition Master can also work as a WD quick formatter, allowing users to format WD partitions to NTFS, FAT32, EXT2, or EXT3.
You can use it to format a WD external hard drive for a Mac on a Windows PC, setting the file system to FAT32 for better Mac compatibility.
Note that formatting will remove all existing data on the WD disk. Therefore, remember to back up your data first. Then take steps as shown below to start formatting the WD hard drive:
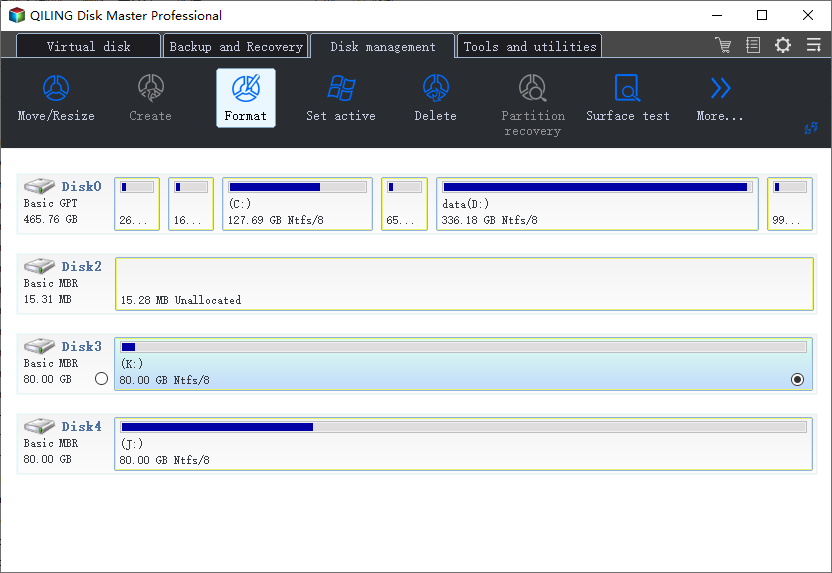
Step 1. To format a partition on your external hard drive, USB, or SD card, launch Qiling Partition Master, right-click the partition you want to format, and choose the "Format" option.
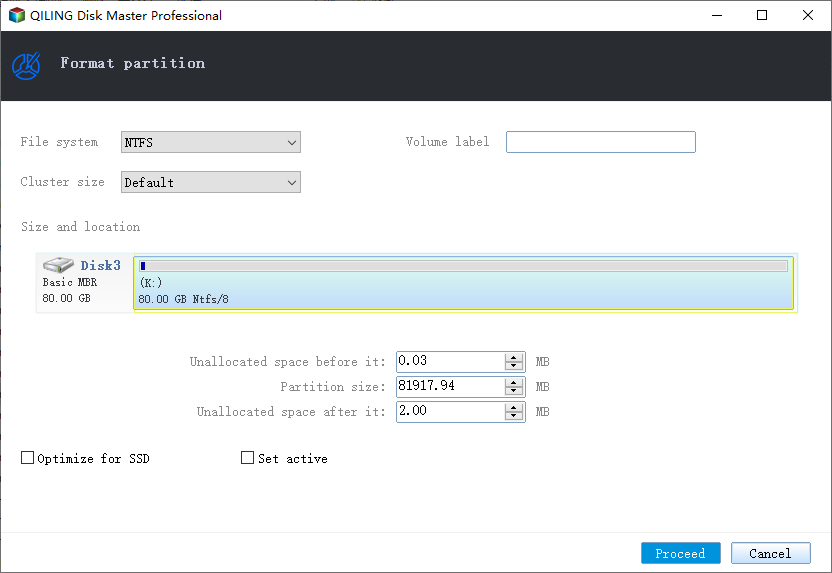
Step 2. Assign a new partition label, file system (NTFS/FAT32/EXT2/EXT3/EXT4/exFAT), and cluster size to the selected partition, then click "Proceed".
Step 3. Click "OK" in the Warning window to start formatting your external hard drive, USB, or SD card.
You May Also Interest In:
In addition to the two features mentioned, Qiling Partition Master also allows you to perform advanced operations on your WD internal or external hard drive, including executing various tasks.
Take Action to Make Use of WD Hard Drive
Some users might consider using Windows' built-in Disk Management, which can meet basic needs like partitioning a hard drive. However, it has limitations, only allowing users to extend, shrink, delete, and format volumes, and sometimes even those functions may be unavailable.
If your WD hard drive requires more management than what Windows Disk Management can offer, consider downloading Qiling Partition Master, a powerful Western Digital partitioning software that can provide the extra assistance you need.
To make use of your Western Digital hard drive, you can start by connecting it to your computer via a USB cable. Once connected, the drive should be recognized by your computer's operating system, and you can access it through the file explorer or finder.
Related Articles
- How to Fix USB Drive Incorrect Size Problem
- Fixed: We Couldn't Format the Selected Partition | 0x8004242d Error [2022]
- How to Format 128GB SD Card to FAT32
- Fixes for 'File Is Too Large for Destination File System' on USB/External Hard Drive
- How to Fix Hard Drive Won't Boot [Top 6 Fixes🏅]
If your hard drive won't boot, you may encounter a black screen and an error message stating “Disk Boot Failure, Insert System Disk, and Press Enter.” Fortunately, this issue can be resolved with one of the five effective solutions outlined in this article, which address the potential causes of the problem. - How Big Is Baldur's Gate 3: File Size on PC/PS5
The file size of Baldur's Gate 3 varies depending on the platform and the version you're downloading. On PC, the minimum space required is around 30 GB, while the recommended space is 50 GB.