Newest Partition Magic Server Software Review and Download in 2022
When looking for a reliable partition magic Server software, consider factors such as resizing, adjusting, and managing hard disk partitions to optimize disk space performance.
When selecting a partition magic Server software, consider the following factors. First, assess your server's hardware and software requirements to ensure the software can handle your workload.
In this article, you'll learn:
- What Is Partition Magic Server Software
- Newest Partition Magic Server Review Factors
- Reliable Partition Magic Server Software Recommendation and Download
- Why Choose Qiling Partition Magic Server Software
- How to Use Qiling Partition Magic Server Software
Note: To successfully manage a Windows Server hard drive, you can rely on a partition magic Server software to help you, even if you have little knowledge about disk partitioning.
What Is Partition Magic Server Software
Partition Magic ServerSoftware for Windows Server is a powerful tool that enables users to easily partition hard drives, adjust disk space, and optimize disk performance, making it a valuable utility for Windows Server users.
A partition magic Server software is a tool that allows normal Windows users to create, format, delete, and combine partitions with ease, just like an expert, without requiring significant effort.
Searching for partition magic server software on Google yields results featuring well-known options such as Qiling Partition Master Server.
To determine if the current partition magic software is the one you need for managing disk partitions on Windows Servers, review its features and functionality to ensure it meets your specific needs. Consider factors such as disk partitioning, resizing, and merging capabilities, as well as any additional features like data recovery and disk wiping. Compare the software's performance and compatibility with your Windows Server version to guarantee a smooth and efficient experience.
Newest Partition Magic Server Review Factors in 2022
To determine if a partition tool or software is suitable for your tasks on Windows Servers, consider the following key factors: compatibility, ease of use, data protection, and performance. Ensure the tool is compatible with your Windows Server version and can handle the size and complexity of your partitions. Look for user-friendly interfaces and intuitive wizards to simplify the partitioning process.
Features:
Confirm if the target partition software or tool can fulfill your task with features such as extend, shrink, merge, delete volume, migrate OS, etc.
Supported OS:
The partition magic software should be compatible with your Windows Server system to work effectively. Check the system requirements and supported operating systems listed by the software developer to ensure it supports your Windows Server system.
Pricing:
You may need to consider if the price of the Partition Magic Server software is within your budget.
Support:
When looking for a web hosting service, it's not just about the features and pricing, but also about the level of support you can expect. You want a provider that offers timely and responsive support, so you can get help when you need it.
When selecting a partition magic server software, consider the four key factors: ease of use, compatibility, scalability, and security. These factors are the most important principles to ensure the tool is qualified to help. By evaluating these factors, you can determine which partition magic server software is best suited for your needs.
Reliable Partition Magic Server Software Recommendation and Download
Here are the top 3 best and most widely used partition magic Server software. These software options are highly recommended for Windows Server and can be compared in a table to determine the most suitable choice.
| Reviews | Qiling Partition Master Technician | Acronis Disk Director | Paragon Hard Disk Manager Business |
|---|---|---|---|
| Features |
Basic Features:
Advanced Features:
|
Basic Features:
Advanced Features:
|
Basic Features:
Advanced Features:
|
| Supported OS |
|
|
|
| Pricing |
|
|
|
| Support |
|
|
|
When it comes to partitioning and managing Windows Server hard drives, Qiling Partition Master can handle basic partitioning tasks, making it a tough choice for a first pick.
For advanced tasks, you can choose from the supported features and pick one that you trust. For example, if you're looking for a comprehensive and powerful partition magic software for Windows Servers, Qiling Partition Master is a reliable option.
Why Choose Qiling Partition Magic Server Software
So why choose Qiling? Three reasons here:
#1. Comprehensive
Qiling Partition Master Technician is a comprehensive partition manager software that offers both basic and advanced features, making it accessible to users of all levels.
This tool allows you to create, resize, move, merge, split, format, or wipe partitions, and also offers features like migrating OS, converting disk, cloning HDD/SSD, recovering lost partition content, and optimizing SSD performance, making it a versatile tool for managing Windows hard disks and virtual disks, including VMware machines.
#2. Supportive
Qiling has a strong customer support team, offering assistance via email, live chat, and remote services via Teamviewer or Skype, making support accessible at any time.
If you need immediate help, you can make a call for real-time assistance or visit the customer self-support page to resolve the issue on your own.
#3. Cost-effective
Qiling Partition Master Technician and its Server edition offer a cost-effective alternative with advanced features, making it accessible to all Windows users, including those with Server computers.
How to Use Qiling Partition Magic Server Software
To use Windows Server, you can take advantage of three major features. Firstly, you can utilize the built-in security features to protect your server and data. Secondly, you can leverage the server's scalability to handle heavy workloads and ensure smooth performance.
#1. Partition Hard Drive
Step 1. Check for free space
To divide a disk partition into multiple ones, ensure there is adequate free space to be allotted.
Step 2. Shrink a disk partition to create unallocated space
To resize a partition, start by clicking on the "Resize/Move" feature, then select a partition with a lot of free space to begin the resizing process.

To resize the partition, drag either end of it rightwards or leftwards to decrease its size, creating ample unallocated space. The "Partition size" area will display the amount of space that has been decreased.

To finalize the disk shrinking process, click the "Proceed" button to save all changes. On the main window, you should now see unallocated space appearing under the same disk where the shrinking was performed. This indicates that the resizing has been successfully completed.
Step 3. Create a new partition on unallocated space
To turn the unallocated space into a usable partition drive with a recognized file system, click on the unallocated space and choose "Create".
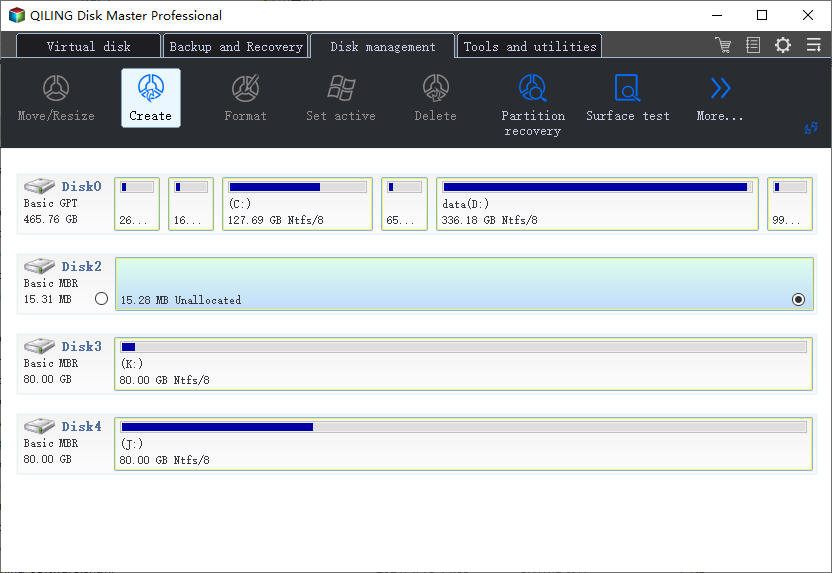
To customize the partition information, you can select a drive letter, partition label, file system (such as NTFS, FAT32, EXT2/3/4, or exFAT), and other settings in the Advanced Settings.
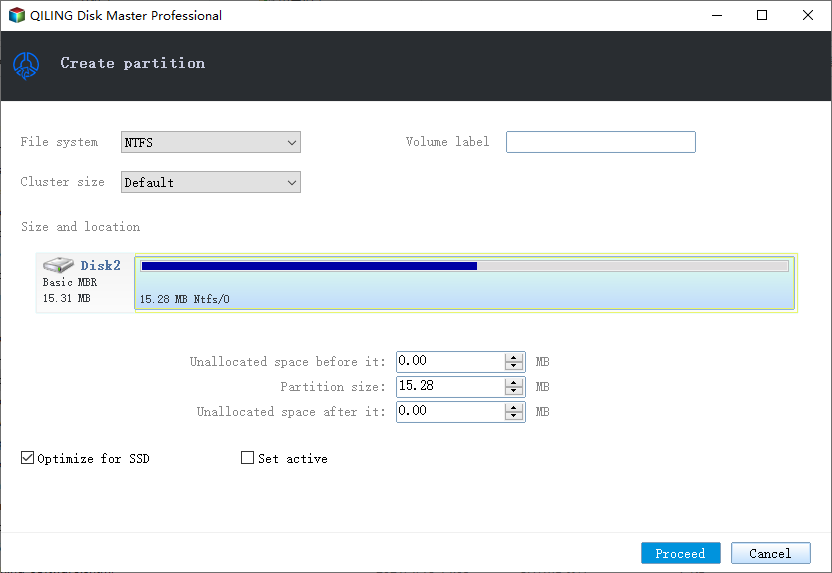
To create a partition on unallocated space, select the unallocated space, click "New" and choose the size of the partition. Then, select the file system, assign a drive letter, and click "Proceed" to confirm. Repeat this process to create multiple partitions on the hard drive.
#2. Migrate OS - Transfer Server to HDD/SSD
Step 1. Check for free space
To divide a disk partition into multiple ones, you must ensure that there is adequate free space available to be allotted.
Step 2. Shrink a disk partition to create unallocated space
To resize a partition, start by clicking on the "Resize/Move" feature, then select the partition with a lot of free space.
To free up space, drag either end of the partition to the right or left, allowing you to shrink its size as indicated by the red arrow. This will create unallocated space, and the "Partition size" area will display the amount of space that has been decreased.
To finalize the resizing, click "Proceed" in the Disk Management window. This will apply the changes. After resizing, the main Disk Management window should display unallocated space under the disk that was resized.
Step 3. Create a new partition on unallocated space
To turn the unallocated space into a usable partition drive, click on it and choose "Create" to convert it into a partition with a recognized file system.
To customize the partition information, you can select a drive letter, partition label, and file system (such as NTFS, FAT32, EXT2/3/4, or exFAT) and many other settings through the Advanced Settings.
To partition a hard drive in many more partitions, first, open the Disk Management tool. Then, select the unallocated space and click "New" to create a new partition. Choose the size of the partition and click "Next.
#3. Convert MBR to GPT
Step 1. Check for free space
To divide a disk partition into multiple ones, you must ensure that there is adequate free space to be allotted.
Step 2. Shrink a disk partition to create unallocated space
To resize a partition, start by clicking on the "Resize/Move" feature, then select the partition with a lot of free space.
To free up unallocated space, drag the partition's either end rightwards or leftwards to shrink its size, allowing for more unallocated space. This can be monitored in the "Partition size" area, showing the decrease in space.
To save the changes, click "Proceed" on the main window, and go back to see unallocated space appearing under the same disk as the one you shrunk.
Step 3. Create a new partition on unallocated space
To turn the unallocated space into a usable partition drive with a recognized file system, click on the unallocated space and choose "Create".
Customize the partition information by selecting a drive letter, partition label, file system (NTFS, FAT32, EXT2/3/4, exFAT), and other advanced settings.
To partition a hard drive in many more partitions, start by opening the Disk Management tool. Select the hard drive you want to partition and right-click on it. Choose "New Simple Volume" from the context menu.
Partition Magic Server Software Makes Everything Easy in Disk Managing, Don't Miss It
This page explains Partition Magic Sever software and provides four factors to help you determine if the current tool you plan to use is qualified.
We compared the top partition manager software for Windows Server users and found Qiling Partition Master Technician to be a powerful and cost-effective option, making it worth trying.
Partitioning a disk in a Windows Server computer can be a straightforward process if you choose the right partition magic Server software. By selecting a recommended tool, you can make the task easy and enjoyable, just like any other administrative task.
Related Articles
- How to Extend C Drive in Windows 7/8/10
- How to Resize EFI System Partition on Windows 11/10/8/7
- MBR VS GPT | What's the Difference and Which Is Better
- How Do Experts Free Disk Space in Windows Server in 2022 [5 Ways]
- How to Fix Your PC Did Not Start Correctly | 8 Ways🔥
If you power up your computer and only find a warning message: Your PC did not start correctly, as this post will offer you eight workable solutions to fix this error immediately. - Acer Stuck on Loading Screen - 9 Quick Fixes 🔥
If your Acer laptop is stuck on the loading screen, don't worry - you can fix it using advanced repair features and professional software. To resolve the issue, follow a step-by-step guide that will walk you through the process of troubleshooting and repairing your laptop.