Where to Find and Recover Missing Windows 11 Screenshots
Quick Navigation:
- Find the Screenshot's Actual Location
- Before You Scan
- Recover a Saved, Deleted Screenshot
- Prevent Future Screenshot Loss
- Frequently Asked Questions
A screenshot may be on the clipboard, saved to Pictures, or uploaded to a synced folder. First determine whether an image file was ever saved; that changes the recovery route.
Find the Screenshot's Actual Location
Check Pictures\Screenshots, the folder used by Snipping Tool, and OneDrive Pictures if sync is enabled. Search by capture date and image extension, not just by an assumed filename.
A capture copied only to the clipboard is not the same as a saved image file. Once clipboard content is replaced, disk scanning may have no screenshot file to find.
Before You Scan
If the screenshot was saved and later deleted, check Recycle Bin and cloud deleted items before scanning. Record the disk that held the screenshot folder.
Avoid taking more captures or saving new images to that same disk. Prepare another drive for recovered output and note whether the original file was PNG or JPG.
Recover a Saved, Deleted Screenshot
Qiling Deep Data Recovery can scan an accessible Windows drive for files that are no longer visible. The steps below use the mode that fits this case; scan results are possibilities, not a guarantee of intact recovery.
Step 1. Check Saved and Synced Copies
Look in screenshot folders, Snipping Tool history where available, Recycle Bin, and OneDrive. Only begin a disk scan if a saved file is actually missing.
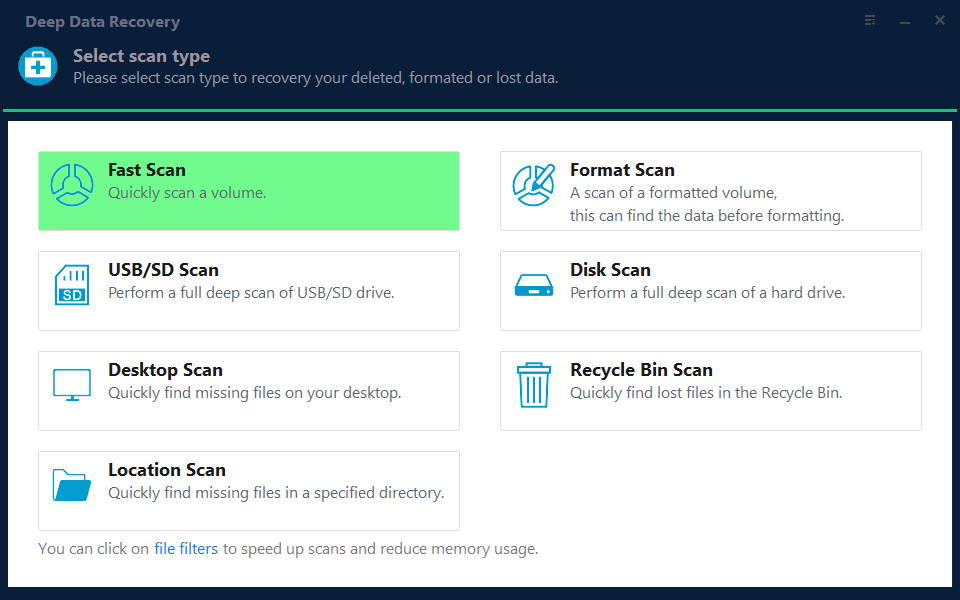
Step 2. Choose the Right Mode
For a recent local deletion choose Fast Scan; after emptying Recycle Bin choose Recycle Bin Scan. Use USB/SD Scan only when captures were saved to removable storage.
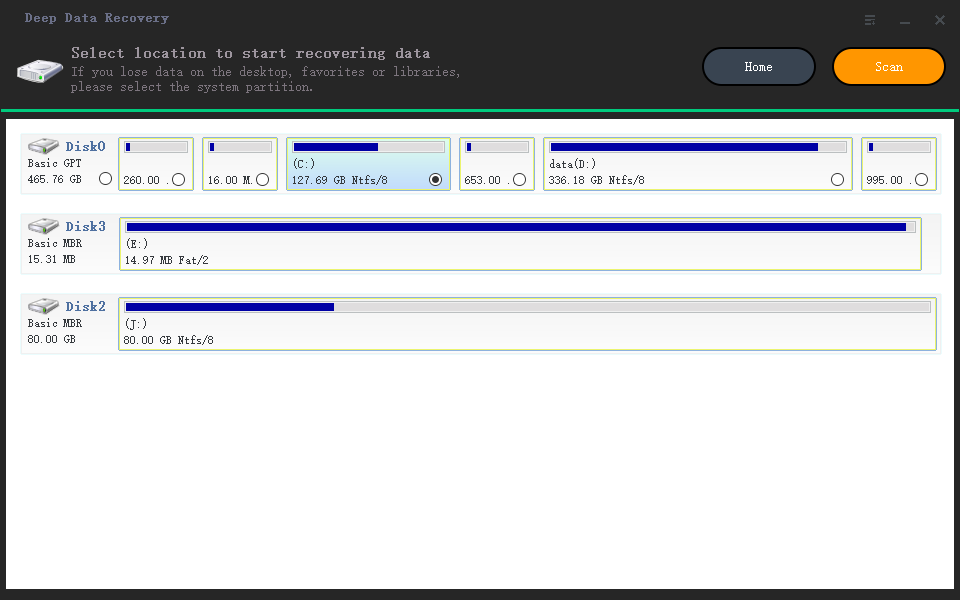
Step 3. Select the Screenshot Drive
Select the disk that contained the image folder and verify its capacity. Scan that disk rather than the folder currently selected in Snipping Tool if the save location changed.
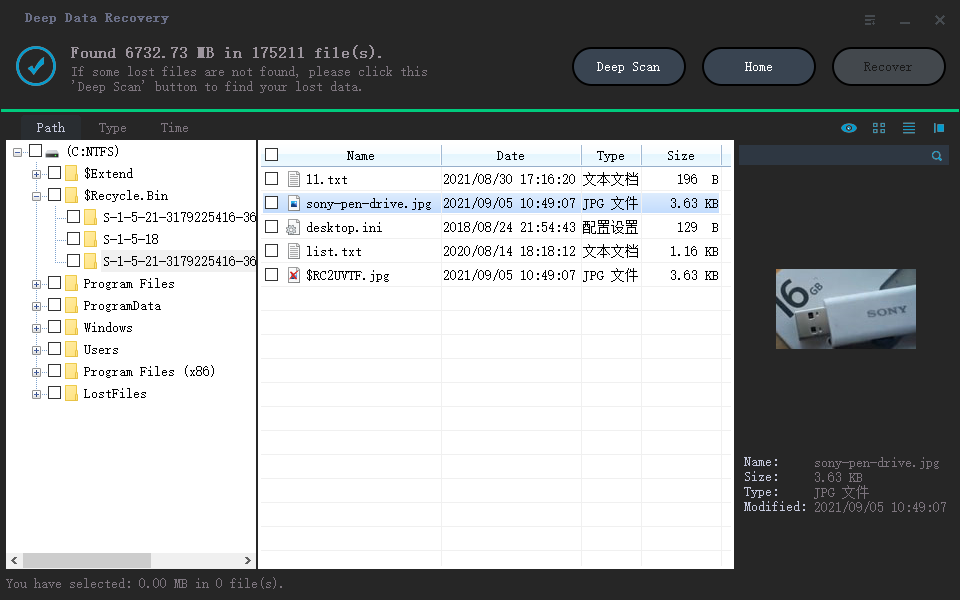
Step 4. Preview Image Candidates
Filter PNG and JPG results and preview images by content. Screenshots often have generic names, so visual confirmation matters more than filenames.
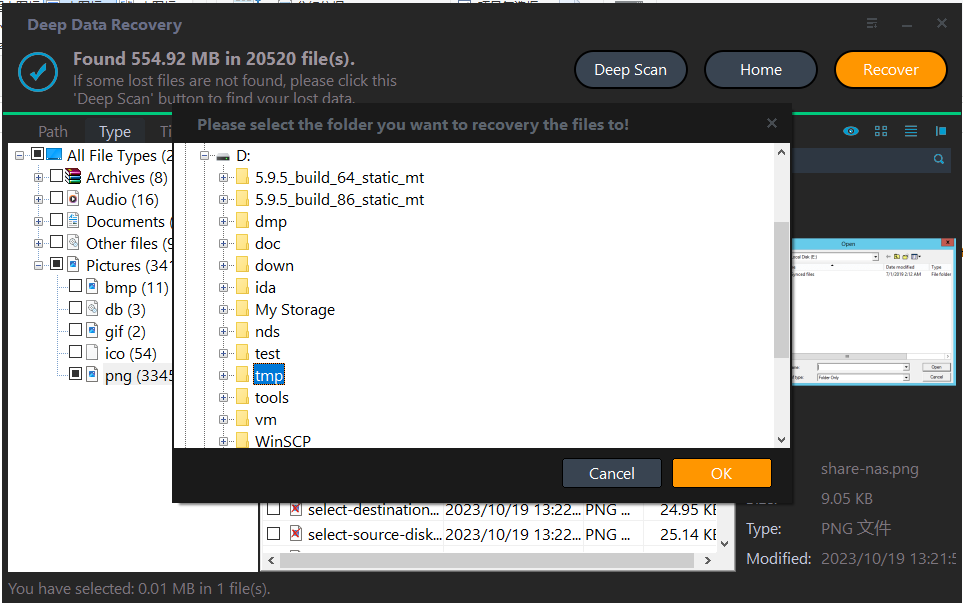
Step 5. Save Images Elsewhere
Select wanted images, click Recover, and write them to a separate drive. Open them at full size to ensure text and edges are readable.
Prevent Future Screenshot Loss
Confirm where your capture tool saves files and whether OneDrive sync is active. A clipboard-only workflow can lose a capture without producing a recoverable file.
For important captures, save immediately to a known folder and include that folder in a backup. A scan cannot restore what was never stored.
Frequently Asked Questions
Can recovery software restore a screenshot copied only to the clipboard?
Usually no; check whether you also saved a file or pasted the image into a document.
Why is Pictures\Screenshots empty?
The capture tool may have saved elsewhere or not saved a file at all. Check its save location and OneDrive.
Which extension should I filter for?
Start with PNG, then JPG and other formats used by your capture tool.
Related Articles
- Qiling Deep Data Recovery for Windows
- Recover Deleted Files on Windows 11
- Photo Recovery Software for Windows
Products
Articles & Tutorials
- Data Recovery
- Data Backup
- File Recovery
- File Backup
- System Backup and Restore
- Disk and Partition Clone
- Technical articles
- Mobile articles
- Disk Master Help
- Windows Data Recovery Tutorials
- Windows Secure Delete Tutorials
- Windows Partition Management Tutorials
- Windows File Backup and Restore Tutorials
- Windows System Backup and Restore Tutorials
- Windows Disk Backup and Restore Tutorials
- Windows Clone Tutorials