Recovered Files Have the Wrong Size: How to Check Them
Quick Navigation:
- Understand the Problem
- Check Before Another Recovery Attempt
- Recover With Qiling Deep Data Recovery
- Verify the Recovered Files
- Frequently Asked Questions
A recovered file can have a familiar name but the wrong size, or a scan can claim to find more data than the disk could ever hold. Treat those numbers as clues to inspect, not proof that the complete original file has survived.
Understand the Problem
Recovery results can include old directory records, multiple candidate versions and content found without its original directory entry. Damaged metadata can also report an implausible length. The sum of those candidates is not the amount of unique, usable data on the device.
A large logical size does not necessarily mean all those bytes were saved correctly. Conversely, a small file may be a thumbnail, sidecar or genuinely short document. Compare its purpose and content rather than applying one minimum-size rule to everything.
Check Before Another Recovery Attempt
Check 1. Compare with a reliable reference
Look for an attachment, backup, original export or another copy whose size is known. Use Properties to compare Size in bytes. Do not confuse Size on disk, which depends on storage allocation, with the content length.
Check 2. Keep plausible versions separate
Select several candidates if they differ in size or path. Recover them into separate destination folders so a later candidate does not replace an earlier one. Record which result produced each copy.
Check 3. Inspect content rather than totals
Open documents throughout their length and check whether a video reaches the expected ending. A zero-byte copy contains no payload to rebuild locally; locate another version rather than expecting a rename to add data.
Check 4. Prioritize a realistic selection
If results include enormous or obviously invalid candidates, avoid selecting everything at once. Recover known important files first and watch the space available on the destination. Do not change the source partition to match a suspicious size.
Recover With Qiling Deep Data Recovery
Qiling Deep Data Recovery offers a visual mode chooser, a source-location screen, file results with supported previews and a separate recovery destination dialog. Use this workflow only when Windows can read the source reliably. It does not bypass encryption or guarantee recovery of overwritten data.
The screenshots are examples from the product interface. Their drive letters, file counts and sample selections are not instructions to choose the same disks on your computer. The download is not a promise of unlimited free recovery; check the current edition and license terms.
Step 1. Prepare the Source and a Separate Destination
Stop routine use of the affected device. Check independent backups first, then connect a healthy destination with adequate free space. Download and install Qiling on healthy storage, not the volume holding the missing files. If the system disk is affected, consider another suitable computer or specialist assistance to limit background writes.
Step 2. Choose the Scan Mode for the Original Loss
Use the mode that fits the original loss. On a healthy volume, Fast Scan may preserve useful file records; after formatting, Format Scan may expose different candidates. Neither choice guarantees an accurate size for every result.
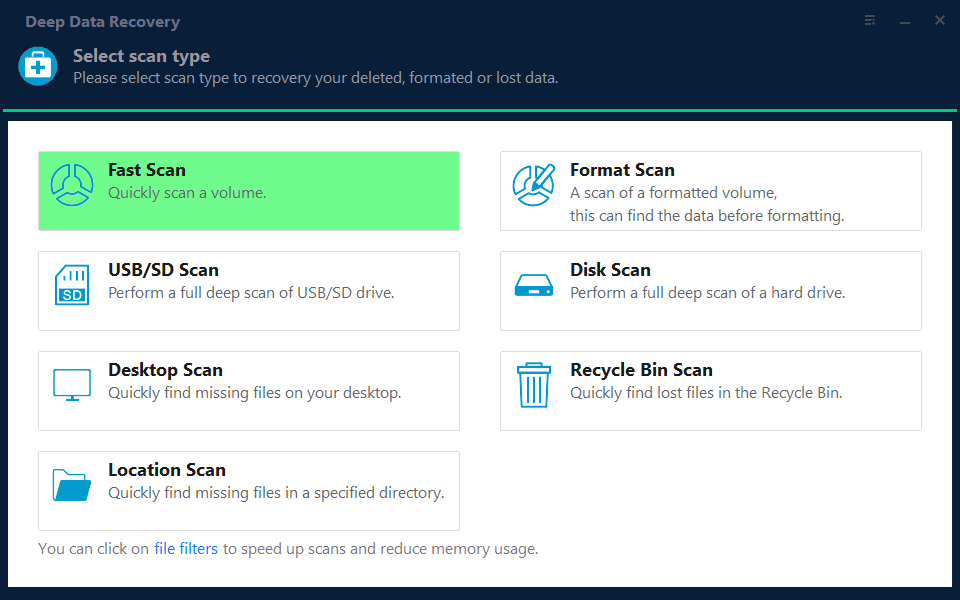
Step 3. Select the Original Source and Start the Scan
Select the original physical device or relevant volume and click Scan. Confirm its capacity before accepting any result with an implausibly large size.
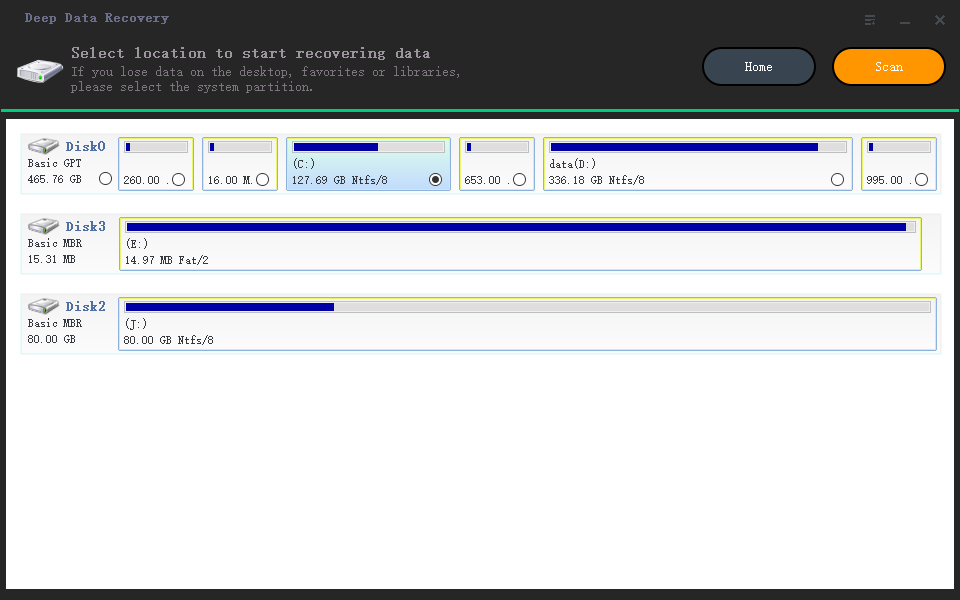
Step 4. Inspect Results and Preview Suitable Candidates
Compare the Size column with Path and Type. Preview supported candidates, and use Deep Scan only when important files are still missing on a stable source.
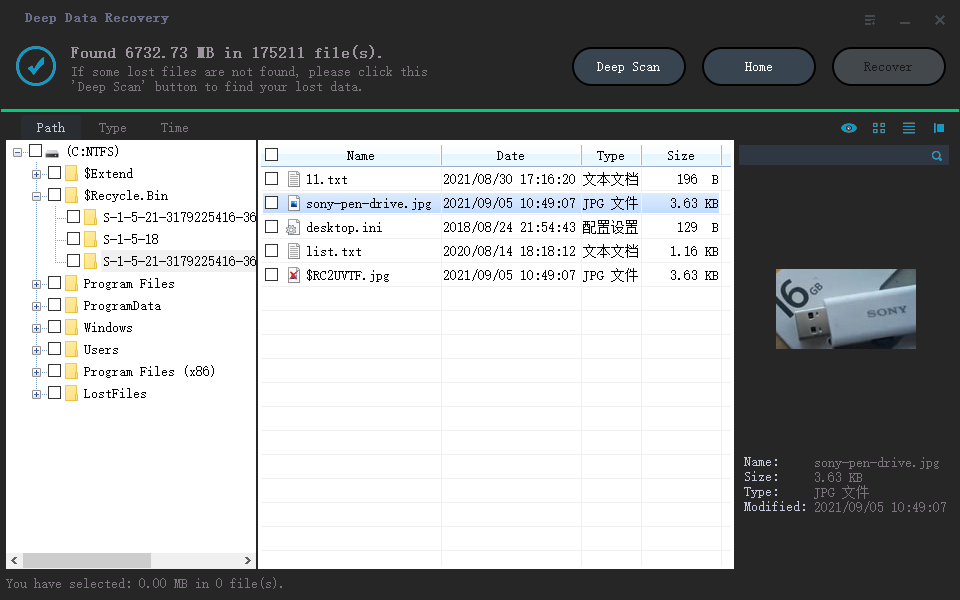
Step 5. Recover to Healthy Independent Storage
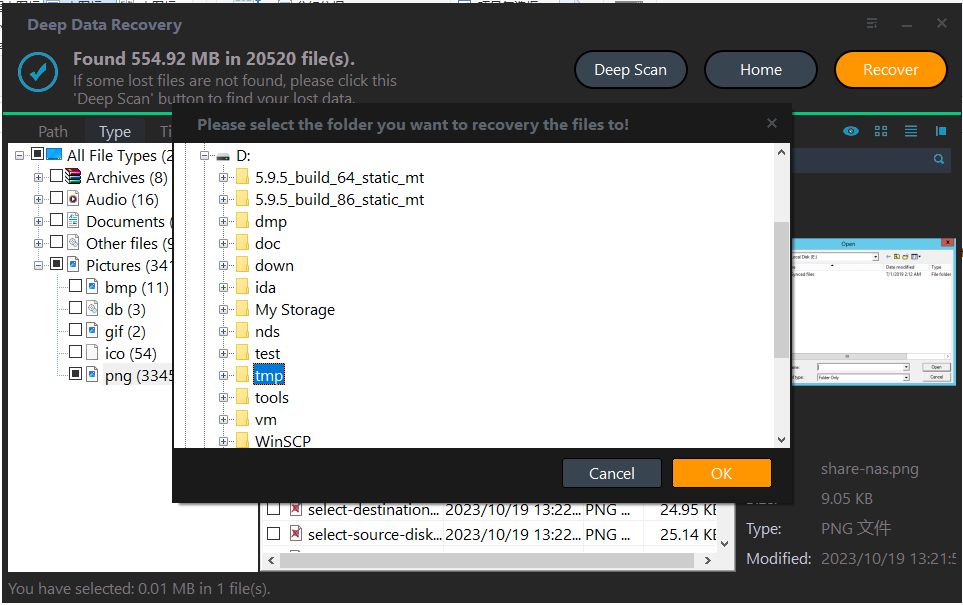
Recover a limited test set to a separate disk with sufficient free space. If a candidate is reported as larger than expected, do not risk exhausting the only destination before checking a sample.
In the destination dialog, choose the intended folder and confirm with OK. Wait for the selected export to finish without disconnecting either device. If an error occurs, record it and keep any incomplete output separate rather than assuming the batch succeeded.
Verify the Recovered Files
Compare the exported file size with the scan entry, then open the copy in its original application. Save screenshots or notes of differences if you need support.
A known-good cryptographic hash is stronger evidence of matching content than a matching size. Without a reference, a hash only helps compare recovered candidates with each other.
Stop condition: Do not truncate, pad or hex-edit the only recovered file to make its size look correct. Work on duplicates after preserving the source.
Frequently Asked Questions
Why does the scan total exceed the disk capacity?
The list can include overlapping candidates and historical records. It is not a count of unique recoverable bytes.
Does a correct file size prove the file is intact?
No. Overwritten or unreadable portions can exist inside a file with the expected length.
Can I recover a zero-byte file by changing its extension?
No. An extension identifies a format; it does not supply missing content. Search for another copy or candidate.
Related Articles
- Cannot Preview Files in Data Recovery Software: Next Steps
A missing preview does not always mean a file is lost. Check file type, size and a recovered sample before judging Qiling recovery results. - Recovered ZIP Shows a CRC Error: Check the Archive Safely
Test a recovered ZIP copy, distinguish password and missing-part issues, and compare alternate candidates without altering the original source. - Solutions to Recovered Files Not Opening - Qiling
Products
Articles & Tutorials
- Data Recovery
- Data Backup
- File Recovery
- File Backup
- System Backup and Restore
- Disk and Partition Clone
- Technical articles
- Mobile articles
- Disk Master Help
- Windows Data Recovery Tutorials
- Windows Secure Delete Tutorials
- Windows Partition Management Tutorials
- Windows File Backup and Restore Tutorials
- Windows System Backup and Restore Tutorials
- Windows Disk Backup and Restore Tutorials
- Windows Clone Tutorials