Windows File Recovery Found No Files: Filters, Modes and Next Steps
Quick Navigation:
- Understand the Problem
- Check Before Another Recovery Attempt
- Recover With Qiling Deep Data Recovery
- Verify the Recovered Files
- Frequently Asked Questions
An empty Windows File Recovery output folder does not explain why the files were not recovered. The command may have targeted the wrong drive, excluded the filename pattern, or searched data that is no longer present. Review the exact attempt before running a broader one.
Understand the Problem
A command-line recovery task depends on both its mode and its filters. A path that belonged to an old Windows account, a missing wildcard or an unnecessarily narrow extension selection can exclude the desired content.
Results are still limited by the physical source. A file stored only on a cloud server or network share is not recovered by scanning a client's local disk. Overwriting and SSD deletion behavior can also leave no usable original bytes.
Check Before Another Recovery Attempt
Check 1. Confirm the original source letter
Compare the command's source with Disk Management and the file's original location. External drive letters can change. Do not guess based on where the file's shortcut was stored.
Check 2. Review filters against a concrete example
Check the expected extension, original account folder and spelling. Use the installed Winfr help for syntax. Do not assume all user files have the type selected by an example command.
Check 3. Choose the mode based on file-system history
Check whether the source was healthy, formatted or damaged and consult Microsoft's current mode guidance. Do not repeat a recently-deleted-file example unchanged for a different situation.
Check 4. Inspect the actual output before switching tools
Check the destination folder that Winfr created, including nested folders, and read the final message. If a visual inspection would help, try Qiling on the same stable source without writing to it. Keep each attempt's output separate.
Recover With Qiling Deep Data Recovery
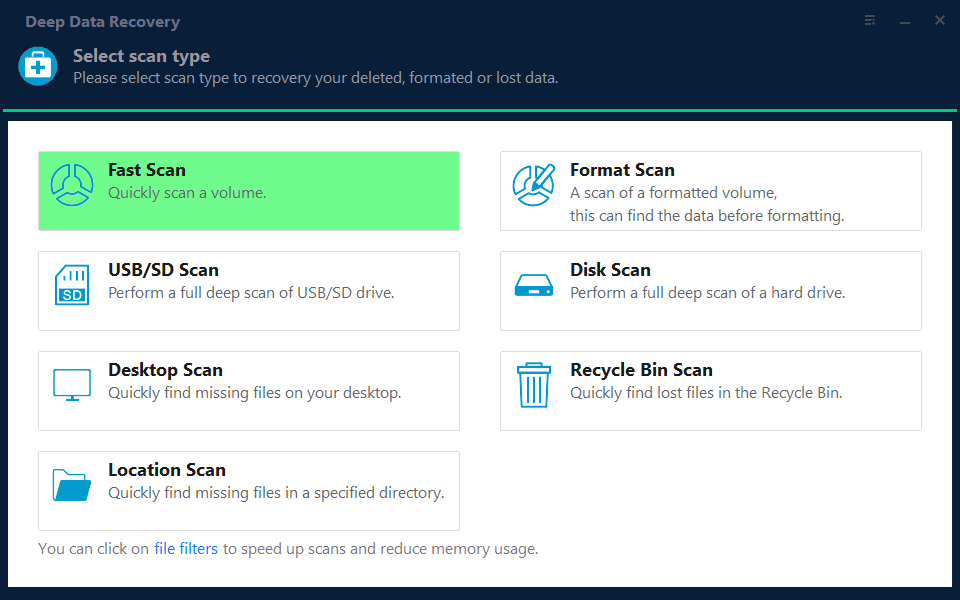
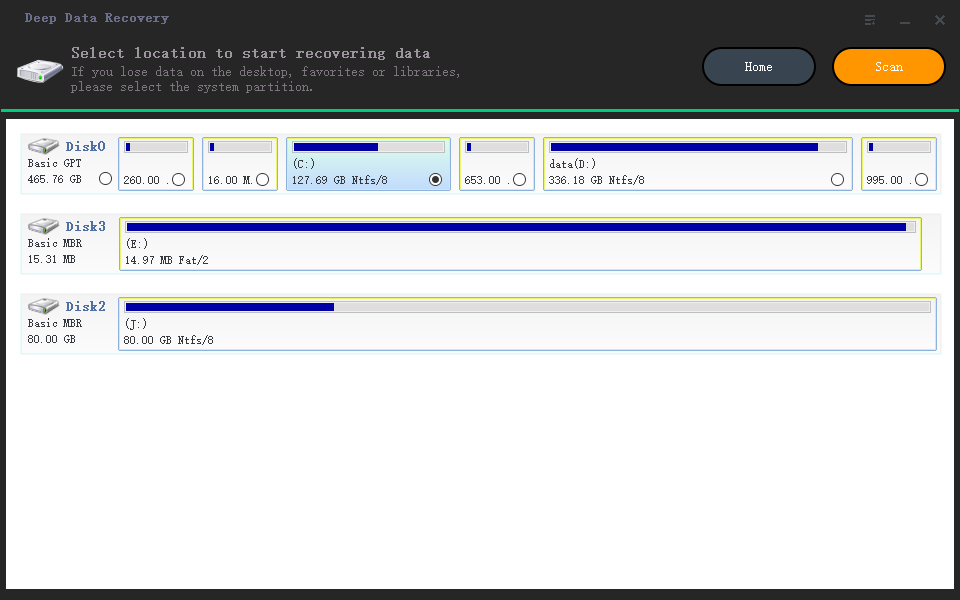
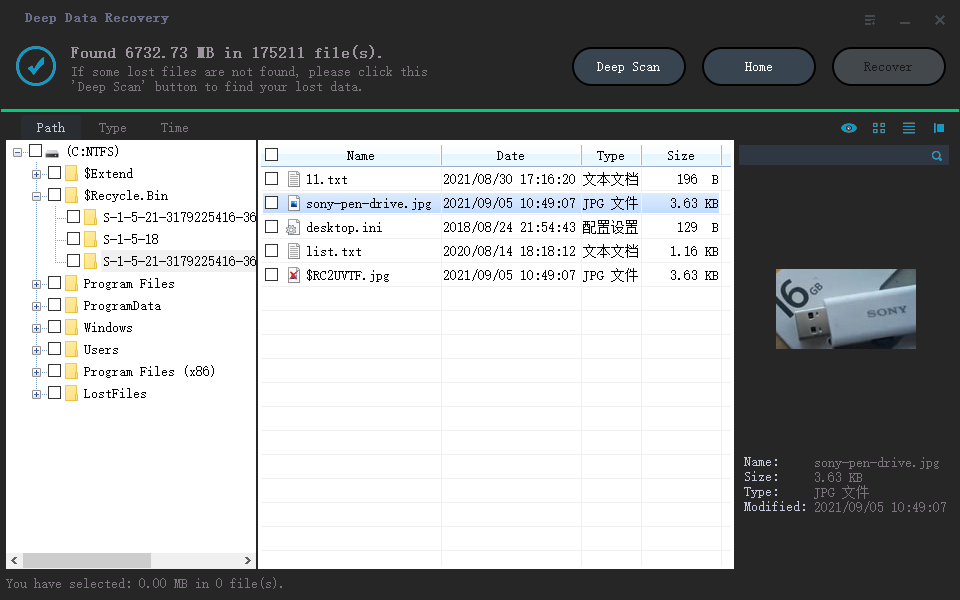
Qiling Deep Data Recovery offers a visual mode chooser, a source-location screen, file results with supported previews and a separate recovery destination dialog. Use this workflow only when Windows can read the source reliably. It does not bypass encryption or guarantee recovery of overwritten data.
The screenshots are examples from the product interface. Their drive letters, file counts and sample selections are not instructions to choose the same disks on your computer. The download is not a promise of unlimited free recovery; check the current edition and license terms.
Step 1. Prepare the Source and a Separate Destination
Stop routine use of the affected device. Check independent backups first, then connect a healthy destination with adequate free space. Download and install Qiling on healthy storage, not the volume holding the missing files. If the system disk is affected, consider another suitable computer or specialist assistance to limit background writes.
Step 2. Choose the Scan Mode for the Original Loss
For the Qiling alternative, select Fast Scan for ordinary recent deletion, Format Scan after formatting or USB/SD Scan for removable storage. Do not copy Winfr's mode names into Qiling instructions.
Step 3. Select the Original Source and Start the Scan
Select the device where the original file data lived and click Scan. If it was never local, return to the cloud account, server administrator or backup rather than scanning unrelated storage.
Step 4. Inspect Results and Preview Suitable Candidates
Clear unnecessary filters and inspect Path and Type views. Preview plausible candidates. If the first pass is incomplete and the source is stable, use the available Deep Scan control for a justified broader search.
Step 5. Recover to Healthy Independent Storage
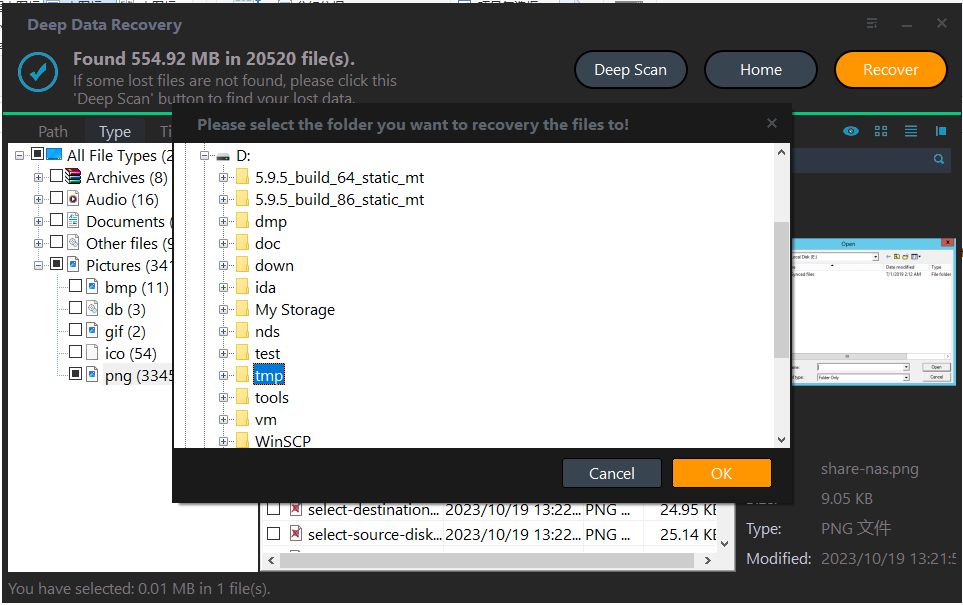
Select plausible candidates, click Recover and save to another physical disk in a fresh folder. Keep this batch distinct from Winfr output so you can compare results accurately.
In the destination dialog, choose the intended folder and confirm with OK. Wait for the selected export to finish without disconnecting either device. If an error occurs, record it and keep any incomplete output separate rather than assuming the batch succeeded.
Verify the Recovered Files
Open recovered samples and compare their content with the missing originals. A different program finding more names does not necessarily mean it recovered more usable data.
If no approach produces valid files, check backup history or seek professional assessment. Preserve the source while deciding, rather than installing more tools on it.
Stop condition: Do not initialize or format the source to make a recovery command accept it. Stop if the storage is physically unstable.
Frequently Asked Questions
Should I just remove every filter?
A broader selection can test a filtering mistake, but also creates more output and reads. Confirm the source and storage stability first.
Does Qiling always find what Winfr misses?
No. Results depend on remaining data and the scenario. Compare actual verified files rather than assuming one tool guarantees success.
Can another mode reverse SSD TRIM or overwriting?
No. A broader search cannot restore original bytes that are no longer available.
Technical References
Related Articles
- No Files Found After a Data Recovery Scan: What to Check
Check the source, scan mode and hidden filters when a recovery scan finds no files. Learn when a deeper Qiling scan is useful and when to stop. - Windows File Recovery Cannot Create a Destination Folder
Check the recovery destination's path, free space and write access before retrying Winfr, or use Qiling's visual destination chooser. - What Is Deep Data Recovery? Deep Scan Explained for Windows
Products
Articles & Tutorials
- Data Recovery
- Data Backup
- File Recovery
- File Backup
- System Backup and Restore
- Disk and Partition Clone
- Technical articles
- Mobile articles
- Disk Master Help
- Windows Data Recovery Tutorials
- Windows Secure Delete Tutorials
- Windows Partition Management Tutorials
- Windows File Backup and Restore Tutorials
- Windows System Backup and Restore Tutorials
- Windows Disk Backup and Restore Tutorials
- Windows Clone Tutorials