Fix Corrupted Hard Drive on Mac with Two Methods
Hard drive failure or corruption is a nightmare for many Mac and Windows users, as it can result in the loss of entire data in a single moment.
To ensure your important data is safe, make it a habit to regularly backup your hard drive, allowing for easy restoration in case of a problem. Additionally, being aware of early signs of disk failure, such as sudden slowdowns, frequent crashes, or unusual noises, can help you address potential issues before they become major problems.
- When you encounter errors in Disk Utility like 'Error: This disk needs to be repaired', it's likely due to a corrupted or damaged file system. This can be caused by a power outage, software issues, or physical damage to the disk.
- Files, folders, or partitions become inaccessible or seemingly vanish, leaving users puzzled and seeking a solution.
- If some programs or applications run abnormally on your Mac
- Mac operating system becomes unstable
- Mac fails to recognize the hard drive while booting
- Some grinding or whining noises coming from the hard drive
- Your MacBook may become hotter when used for an extended period due to the buildup of heat from its internal components, such as the processor, graphics card, and hard drive. This is a normal phenomenon and doesn't necessarily indicate a problem with your device.
- The worst-case scenario is when you notice a burning plastic smell emanating from your Mac, which can be a sign of a serious hardware issue, such as a failing hard drive or a malfunctioning battery. This is a clear indication that something is amiss and requires immediate attention to prevent further damage to your device.
If you're experiencing symptoms of a corrupted hard drive on your Mac, such as data loss or system crashes, it's essential to act quickly and learn how to fix the issue. Fortunately, this post will guide you through the process of repairing your corrupted hard drive, helping you to restore your Mac to its original state in no time.
How to Fix Corrupted Hard Drive on Mac with Disk Utility?
Disk Utility is a built-in Mac repair tool that can scan the hard drive and fix most drive errors related to formatting and directory structure, as well as specific disk errors such as apps quitting unexpectedly, external devices failing to work, or the Mac failing to boot up.
Disk Utility is a tool that can scan and repair issues with your disk. It's relatively easy to fix a corrupted hard drive using Disk Utility, which can identify and correct problems with your disk.
Step 1. Launch Disk Utility
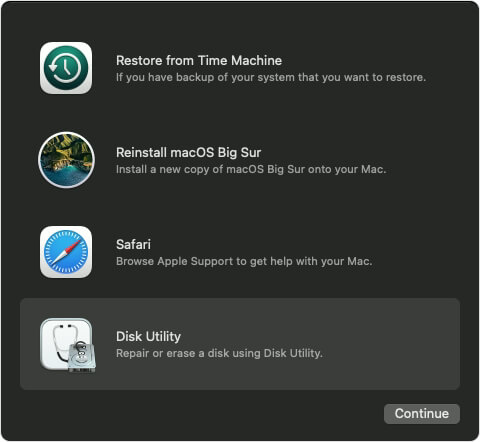
To access Disk Utility, launch it from the Utilities folder under your Application folder, or use macOS Recovery if your Mac won't boot up.
To determine whether your Mac is using an Apple silicon or Intel processor, check the About This Mac page. If it says Apple silicon, follow these steps for an Apple silicon Mac. If it says Intel, follow these steps for an Intel Mac.
- To reset your Apple silicon Mac, turn on the device and hold the power button until the startup options window appears. Click on the Options button and then select Continue.
- To boot up a Mac with an Intel processor, users need to press the Command (⌘) and R keys simultaneously as soon as the computer is turned on. This action will boot the Mac in recovery mode, allowing users to access the macOS Utilities window and perform various tasks such as reinstalling the operating system, running diagnostics, and more.
To proceed, select a user account that you know the password for, and then from the Utilities window in macOS, select the Disk Utility.
Step 2. Choose your hard drive
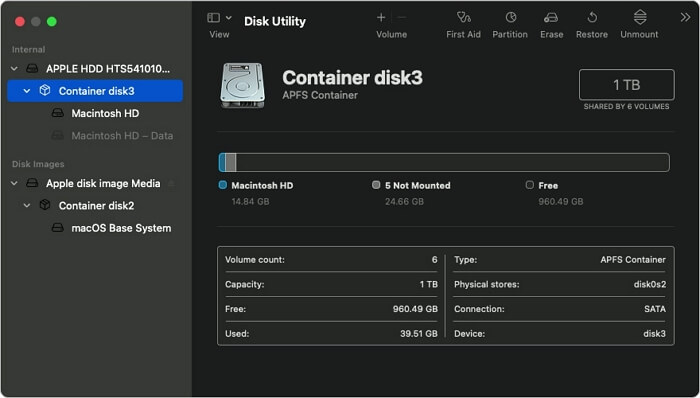
To view all devices on your Mac, go to Choose View > Show All Devices in Disk Utility. This will display a sidebar showing all disks or storage devices available, with containers and volumes listed beneath each disk.
Step 3. Repair volumes, containers, and disks
To fix a disk on your Mac, select the last volume on that disk and click on the First Aid button. This will initiate a disk check and repair any issues that are found.
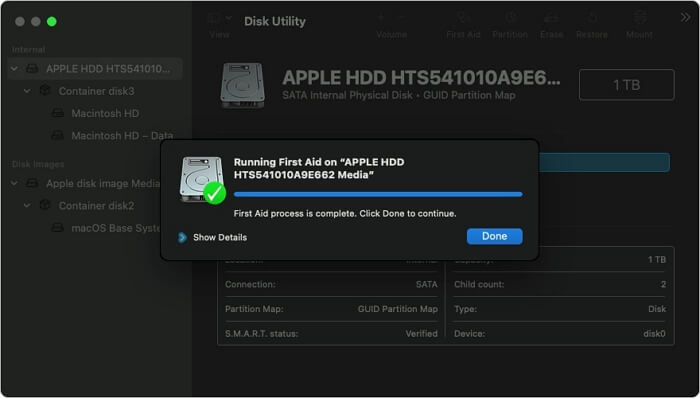
To check the disk for errors, launch Disk Utility, select the disk from the sidebar, and click on the "Run" button to start the scan. After the scan is complete, select each volume on the disk and click on the "Run" button to check for errors. Next, select each container on the disk and click on the "Run" button to scan for errors. Finally, select the entire disk and click on the "Run" button to perform a comprehensive scan.
What To Do when Disk Utility Failed to Repair Hard Drive
If Disk Utility can't fix your damaged hard drive, it's recommended to first backup the corrupted drive and then format it, after which you can recover data from the backup files.
To avoid losing data, make a Time Machine backup before your hard drive becomes corrupted, as you won't be able to back it up once it's corrupted.
If you haven't backed up your Mac hard drive before, you can still restore your data using third-party data recovery software, even without a Time Machine backup, to fix and recover your corrupted hard drive.
Deep Data Recovery for Mac is the perfect data recovery software. It can recover data from physically damaged drives as long as the hard drive can mount onto macOS X, making it a reliable tool for data recovery.
Moreover, it can recover the damaged Time Machine hard drives, USB flash drives, and SD cards. The tool offers additional features.
- Fast scan speed to find lost data
- Export and import scan results
- Recover lost data from emptied Trash
- Recover unsaved Word document
- An intuitive user interface makes the recovery process easy, etc.
To recover your hard drive on a Mac using Deep Data Recovery, simply download and install the software, then follow the on-screen instructions to scan your hard drive for recoverable data. The software will search for deleted files, formatted partitions, and other lost data, and display the results in a user-friendly interface.
Bonus Tip: How to Protect Mac Files and Data
Mac users can be careful and alert, but their disk can still fail at any time, resulting in lost data. To protect against this, the best practice is to back up your Mac data.
Backing up your Mac files and data in real-time eliminates the risk of disk corruption or failure. Mac users have several options to back up their data, including real-time backup, which ensures that all changes are automatically saved, protecting against data loss due to hardware failure or other issues.
Time Machine
Time Machine is a free Mac solution to backup your photos, videos, or documents. It can frequently back up your Mac data once set up, allowing you to easily recover files in case of a loss.
Step 1. Plugin your hard drive or SSD.
Step 2. you can find a message on your screen asking if you want to use the drive with Time Machine.
Step 3. Click on the Use as Backup Disk option.
Step 4.If the message won't pop up on your screen, ensure that the drive is formatted correctly.
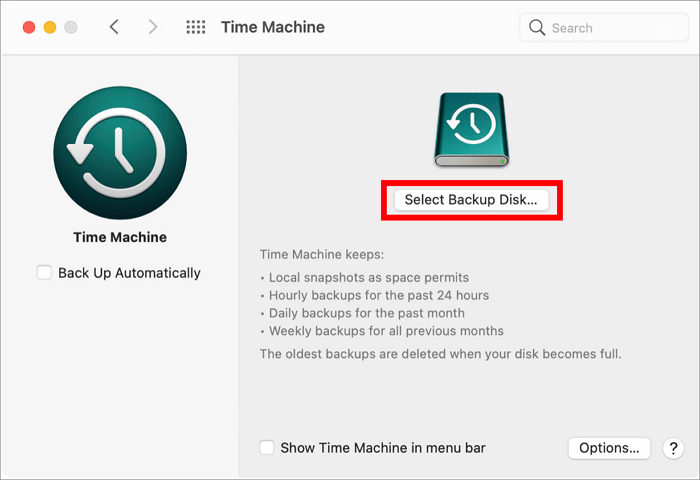
Step 5. If the message doesn't automatically appear, go to System Preferences > Time Machine > Select the Backup Disk.
Step 6.To select a storage device, click on the Start menu, then on the "This PC" or "Computer" icon. From the list of available storage devices, choose the one you want to use and click on the "Use Disk" option.
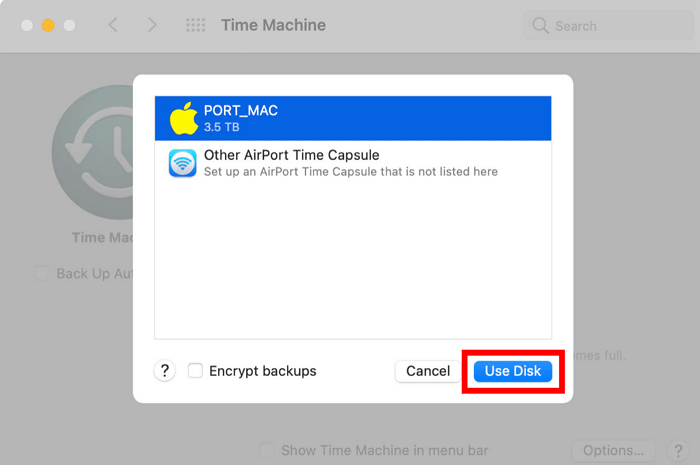
Step 7.Just check the box next to Back Up Automatically to resume Mac backup immediately.
iCloud Drive
Apple users can safely backup their data using iCloud Drive, which allows them to automatically store Mac files and folders on iCloud.
iCloud offers free backup storage up to 5GB, and paid membership options start at $0.99/month for 50GB, increasing to $2.99/month for 200GB and beyond.
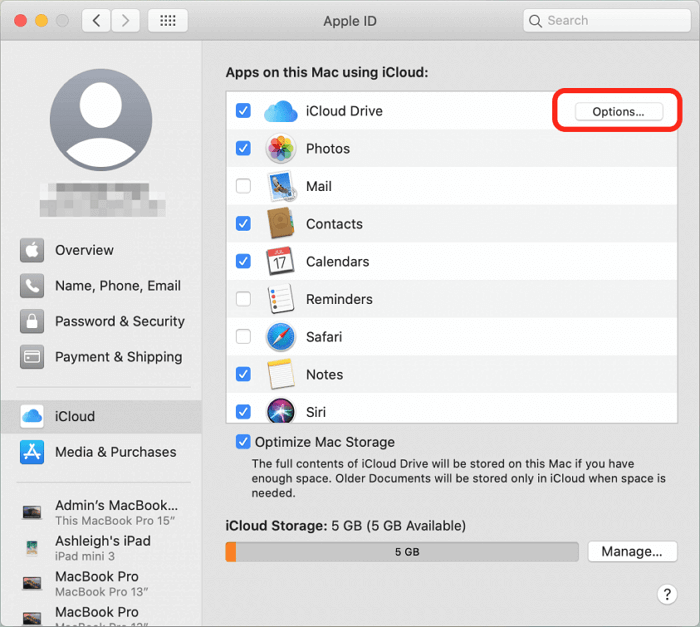
To backup up your Mac data with iCloud, simply go to System Preferences, then click on iCloud, and from there, select "Options" next to iCloud Drive. This will allow you to enable iCloud Backup, which will automatically back up your Mac's data, including files, photos, and more, to your iCloud account.
Step 1. Launch System Preferences > iCloud.
Step 2. Sign in to your iCloud account and check the box next to iCloud.
Step 3. To backup your iCloud, click on the Options box and select the boxes beside every item that you want to backup in iCloud.
Step 4. To keep your iCloud storage organized, open the Finder on your Mac, navigate to the iCloud Drive folder, and move any folders that are not already stored in iCloud to a different location on your computer. This will help free up space and prevent unnecessary duplication of files.
Third-party cloud storage
If you don't want to use iCloud to backup files, you can use alternative cloud storage services like Dropbox or Google Drive, where you can create an account and upload your data.
Other disks
If you have two hard disks on your Mac, you can easily backup files from one disk to another. Before doing so, it's a good idea to compress the files to save space - simply choose File > Compress to do this. This will allow you to transfer the files to the other disk without taking up too much space.
External storage devices
You can also backup all your Mac files on external storage devices for extra safety, such as a USB flash drive, hard disk, CD, or DVD.
Conclusion
When your hard drive corrupts, it can be a stressful experience, as all your data will be lost. However, if you've already backed up your data, you can rest assured that your important files and information are safe, making the situation much less stressful.
When Disk Utility, a program that helps Mac users fix corrupted hard drives, itself starts showing errors, it becomes impossible to fix or restore data using the program.
In such cases, using third-party data recovery software like Deep Data Recovery for Mac can be a good idea, as it can even help recover damaged Time Machine drives and USB flash drives.
To fix a corrupted hard drive on Mac, it's essential to have a timely backup of your data, which can be easily restored in case of hard disk failure. Fortunately, we have previously shared various methods to protect and backup data on Mac, so you can simply choose the right method and secure your data now.
Related Articles
- Recover Lost Data from Pen Drive on Mac OS X/macOS
- How to Recover Deleted Photos from iCloud on Mac
- How to Recover Deleted Safari History on Mac
- Mac Data Recovery | How to Recover Pictures from Photo Booth on Mac
- How to Recover Deleted Photos from Picasa
Picasa photo recovery: if you want to retrieve pictures from Picasa on Windows or Mac after you losing them coincidentally or deleted intentionally, try the simple 3 steps to recover deleted photos from picasa in this article. - How to Recover Deleted Photos from Windows 8 Computer
To recover permanently deleted photos in Windows 8, follow the steps outlined in the Windows 8 picture recovery article, which provides a step-by-step guide on how to recover deleted photos efficiently.