How to Fix Drive Is Not Accessible in Windows 10/8/7 [Real Fix]
Quick Fix to the 'Drive is not accessible' error:

If you're seeing an Access is denied error message, it's likely because you need to adjust the Owner's status in Windows. This might seem complicated, but it's actually quite simple - you just need to change the ownership of the file or folder to your own account, which will then grant you the necessary permissions to access it. To do this, right-click on the file or folder and select Properties, then go to the Security tab and click on the "Edit" button. From there, you can select your own account and click "Apply" to change the ownership.
- Right-click on the inaccessible hard drive, select Properties.
- Go to the Security tab, hit Advanced, then click the Edit button.
- On the Owner tab, modify the ownership of the specified account.
Overview of Drive is Not Accessible
Hard drives, external storage, and USB flash drives may become inaccessible due to viruses or power failures, and reformatting the partition can be a quick fix, but it will erase all data on that partition, making data recovery impossible.
The "Drive is not Accessible" error prevents you from accessing any files on the disk, making it difficult to back up your data. Therefore, it's recommended to wait until your files are safely backed up before reformatting the partition.
If you've already reformatted your drive and lost your data, you may still be able to recover it. When you delete files on a PC, they aren't actually deleted, but rather the space they occupy is made available for the system to write over. To avoid overwriting your files, don't use your PC. Instead, download Qiling hard drive recovery software to recover your formatted partition data.
Common Error Messages
The main error message 'Location is not available' is often followed by a secondary error that indicates the type of issue the PC is experiencing, which can be helpful in determining the repair method. Some common problems include various errors that can be resolved with troubleshooting and repair steps.
- Access is denied
- Data Error Cyclic Redundancy Check
- The file or directory is corrupted and unreadable
- The parameters are incorrect
Effective Solutions
The most common reason for the issue is that the drive is not accessible, with access being denied. To resolve this, we have a step-by-step guide in the next section specifically for Windows users to fix this problem.
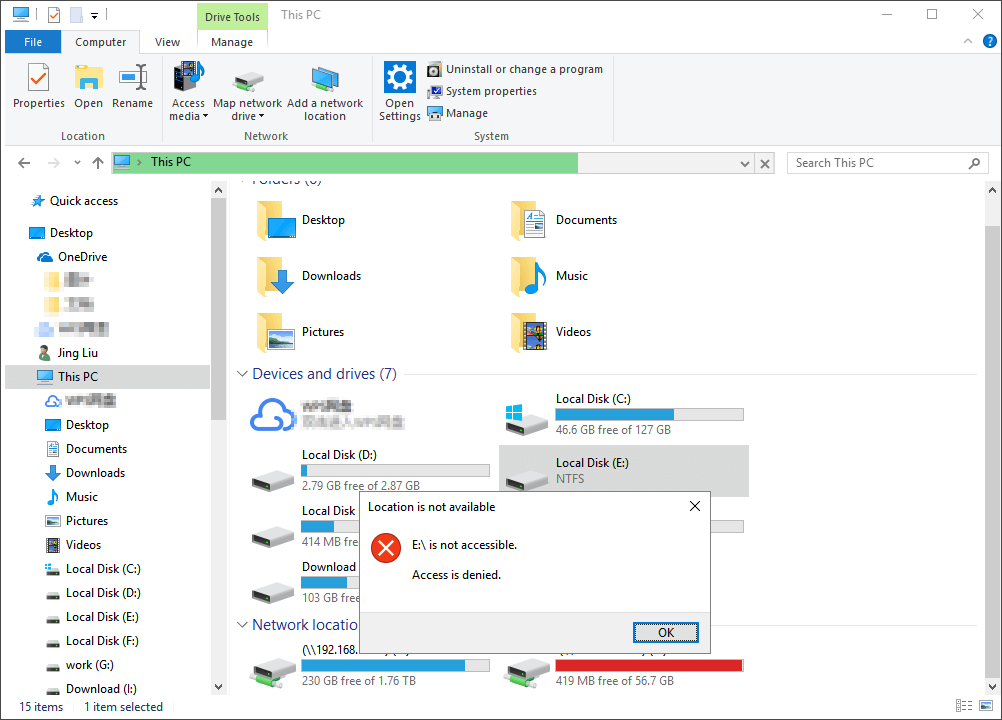
Fix the "Drive is not accessible. Access is denied" error
If your external hard drive displays the "Drive is not accessible. Access is denied" error, it's likely due to incorrect privilege settings in Windows. To resolve this, you can take ownership of the drive, which provides you the necessary permissions. To do this, right-click on the drive, select Properties, and then click on the Security tab. From there, click on the "Edit" button, select your user name from the list, and check the box next to "Full control".
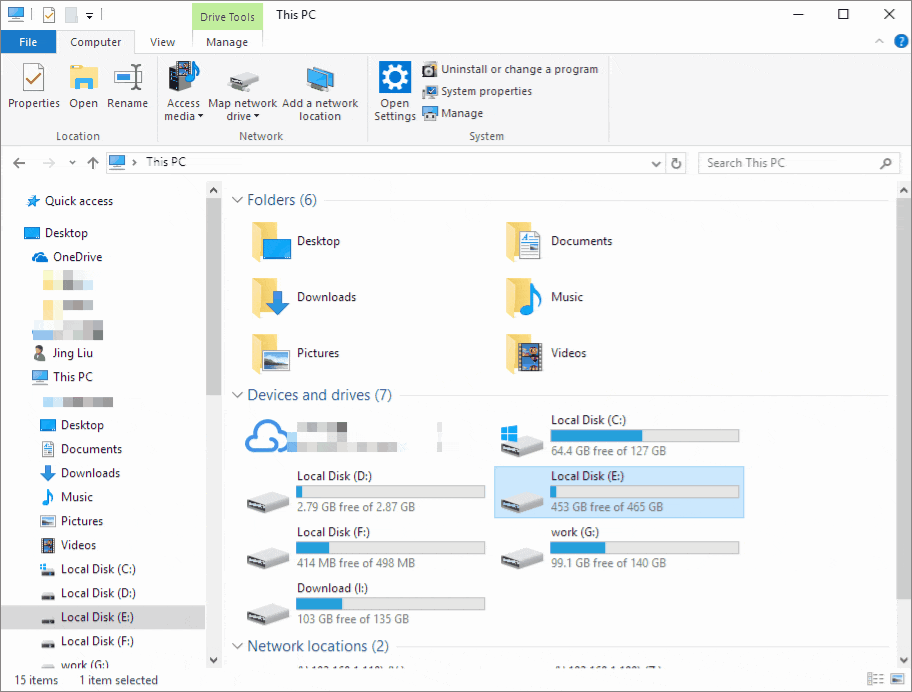
Right-click on the inaccessible hard drive, select Properties.
The image shows how to change the drive's ownership, add a new user to read the drive, and the "Everyone" setting, which increases the risk of exposing the computer to unauthorized access.
Here's a demonstration of how to fix the 'drive is not accessible, access is denied' error:
Data storage devices such as HDDs, memory cards, or USB sticks may not be recognized by the operating system, making them inaccessible to personal or professional data. However, with the help of experts, it's possible to repair and fix these inaccessible drives, making your data accessible again.
Consult with SalvageData's experts to recover data from inaccessible or corrupted digital media, regardless of brand or format.
- Certified ISO–5 class 100 cleanroom recovery
- Free diagnostic, no data, no charge
- Support all operating systems and devices
- Offer a range of turnaround times for fast recovery
Fix the 'Drive is not accessible' issue with other error messages
If you're experiencing a "drive is not accessible" issue, but the secondary message isn't "access is denied", it's likely due to file system or data corruption, disk errors, or bad sectors. To resolve this, run the CHKDSK tool in Windows. To do this, open the Command Prompt as an administrator, type "chkdsk" followed by the drive letter of the problematic drive (e.g.
- Warning
- Running the built-in Windows utility `chkdsk` can potentially resolve issues causing the drive to be inaccessible. To run `chkdsk`, press the Windows key + E to open File Explorer, then right-click on the drive in question and select "Properties.
Step 1. The external hard drive, USB drive, or memory card should be plugged into your PC.
Step 2. Open a Command Prompt.
- In Windows 7, click Start, type "cmd" in the search box, hit Enter, and then click "cmd.exe" under the list of programs.
- To open the Command Prompt as an administrator in Windows 10/8, press the Windows Key + X buttons and select the Command Prompt (Admin) option.
Step 3. In the new Command Prompt window, type chkdsk E: /f /r, where E is the drive letter of the disk that's showing the "drive is not accessible" error.
Step 1. Select file types
Launch Deep Data Recovery software and select the desired file types to recover. Click "Next" to proceed with the recovery process.

Step 2. Scan the hard drive partition
Select the drive where the lost files were located, click "Scan" and let the software scan for all lost data and files on that drive.

Step 3. Check the results
After the scan is complete, you can apply filters or search for specific files or folders using the "Search files or folders" option.

Step 4. Restore lost hard drive data
Select the files you want to recover and click "Recover" to save them to a different location.
Recover data and format drive affected by "not accessible" error.
If all else fails, consider using Deep Data Recovery, a top-notch hard drive data recovery program that can rescue files from inaccessible drives, potentially saving your data.
It's generally recommended to attempt data recovery before reformatting a drive to ensure the best possible outcome, as reformatting can erase any remaining data. Once you've tried to recover your data, you can then reformat the drive to get it working again.
Step 1. Select file types
Launch Deep Data Recovery software, select the desired file types, and click "Next" to initiate the recovery process.
Step 2. Scan the hard drive partition
To recover deleted or lost files, select the drive on your hard disk where the files were lost or deleted, then click "Scan" to let Qiling data recovery software scan the drive and locate all lost data and files.
Step 3. Check the results
When the scan is done, you can apply the "Filter" feature or click "Search files or folders" to look for the missing files on the hard drive.
Step 4. Restore lost hard drive data
Select the files you want to recover and click "Recover" to save them to a different location.
You May Also Like:
After the data recovery process is complete, you can now reformat the drive to its original state. To do this, simply take the necessary steps to erase the drive and restore it to its factory settings, effectively getting it back to a healthy state.
- 1. Go to My Computer or This PC and right-click on the disk you need to repair.
- 2. Choose the "Format" option.
- 3. In the pop-up window, you can set the file system and cluster size, then click "OK" and Windows will handle the rest of the formatting process.
Related Articles
- [SOLVED] USB Keeps Disconnecting and Reconnecting Windows 11/10
- 10 Ways to Fix Non System Disk or Disk Error on Laptops/PC
- Fix USB Access Denied Without Data Loss
- Recover Data from Dead, Failed or Crashed SSD in Windows 11/10
- How to Recover Files from Corrupted Micro SD Card
When a micro SD card becomes corrupted, it can be due to various reasons, and recovering files from it is crucial. In such situations, a Micro SD card corrupted recovery tool can be used to retrieve files from the corrupted card. This tool can help restore access to important data, even if the card is no longer readable. - How to Recover Files from Crashed Windows 7
If you want to recover data from crashed Windows 7, try the steps for how to use system crash data recovery tool to recover all kinds of files when Windows 7 crashed.