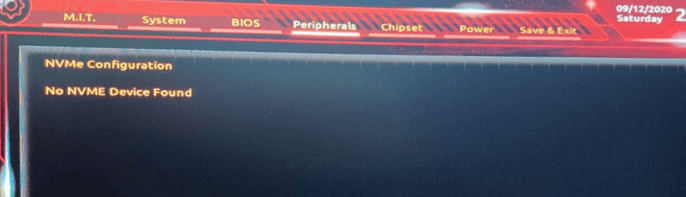
Here Are the Solutions to Fix NVME SSD Not Detected (Windows/Mac)
To fix the NVMe SSD not detected problem without data loss, start by checking the BIOS settings to ensure the NVMe drive is enabled and set as the primary drive. If the drive is not detected in the BIOS, try resetting the BIOS to its default settings.
| Workable Solutions | Step-by-step Troubleshooting |
|---|---|
| Fix NVME SSD Not Detected in BIOS | Fix NVME SSD not detected in BIOS in 2 ways: Enable PCIE support and reinstall the NVME SSDs...Full steps |
| Fix NVME SSD Not Detected in Disk Management | Change NVME SSD drive letter; update NVME SSD drive letter; connect the NVME SSD to another PC; run Hardware and Device Troubleshooter...Full steps |
| Recover Data from NVME SSD in Windows 10 | If you're unable to get your NVME SSD to detect, you can still attempt to recover data from it using Qiling data recovery software. It can scan your NVMe drive fully and restore lost files, providing a comprehensive solution for data recovery.Full steps |
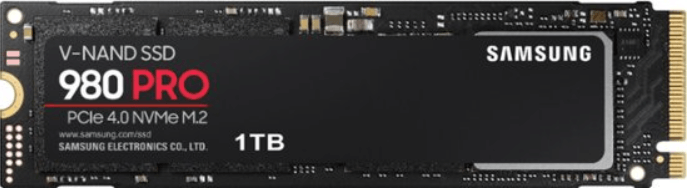
You've purchased a Kingston A2000 NVMe SSD, but your motherboard isn't recognizing it, despite trying various settings. Your BIOS is up-to-date at version F15B, but that hasn't resolved the issue. What's the next step you'd like to take to troubleshoot this problem?
What Is NVME SSD
NVMe, Non-Volatile Memory Express (NVMe) is a high-performance transport protocol for solid-state drives (SSDs) that delivers the highest throughput and fastest response times for enterprise workloads. It communicates between the storage interface and the system CPU using high-speed PCIe sockets, supporting tens of thousands of parallel command queues. This makes NVMe significantly faster than traditional hard disks, and it's becoming the new standard for both servers in the data center and client devices like laptops, desktop PCs, and more.
Why Does NVME SSD Not Detecting
The NVME SSD not detecting issue can be caused by several reasons, including faulty hardware, incorrect BIOS settings, outdated drivers, and conflicts with other devices. Other potential causes include issues with the NVME controller, corrupted firmware, or problems with the SSD's power management.
- NVME SSD is not enabled
- NVME SSD is not properly connected to the computer
- The NVME SSD driver needs to update
- Your drive letter is missing
To fix an NVMe SSD not detecting error, consider the various reasons behind it, such as a faulty NVMe controller, a failing SSD, or incorrect BIOS settings. Once the cause is identified, you can attempt to resolve the issue with the provided solutions, which may include updating your BIOS, checking the NVMe controller, or replacing the SSD if it's faulty.
NVME SSD Not Detected in BIOS
If your NVME SSD is not detected by the BIOS, you can try the following solutions to make it detectable: Check the NVME SSD is properly seated in the PCIe slot, ensure the BIOS is set to AHCI mode, check the power connection and cable, and try booting from a different NVME SSD if possible. If none of these solutions work, you may need to reset the BIOS to its default settings or update the BIOS to the latest version.
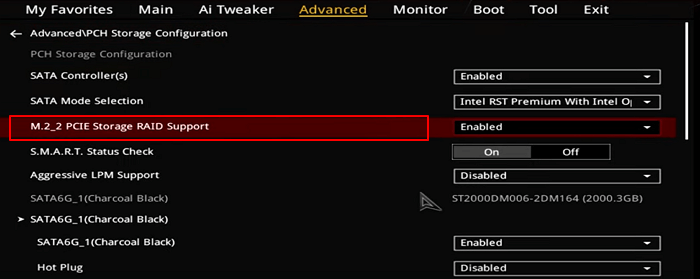
Solution 1 - Enable PCIE Support
Step 1. Restart PC and press F2/Delete to access BIOS.
Step 2. Go to "Advanced > M.2_2 PCIE Storage RAID Support"
Make sure it's enabled, and save the changes.
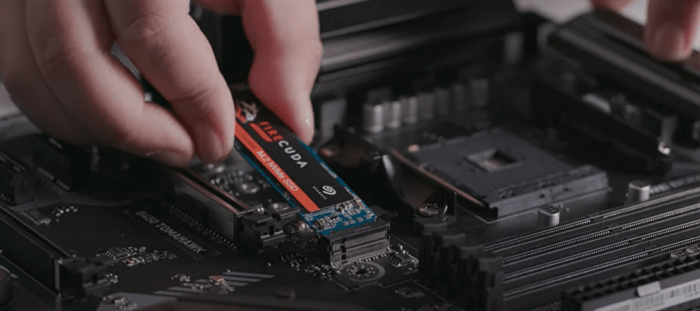
Solution 2 - Reinstall the NVME SSDs
Step 1. Disconnect Your PC's power supply and open the computer.
Step 2. You can see a horizontal slot labeled SATA or PCIE
Step 3. To reseat the NVME SSD, remove the mounting screw opposite the slot, and then reinstall the drive. After that, restart your PC and follow the on-screen instructions.
NVME SSD Not Detected in Disk Management
If your BIOS can detect your drive but Windows does not, you can try the following solutions to troubleshoot the NVME SSD not detecting error. First, ensure that the NVME SSD is properly seated in the PCIe slot and that the power cable is securely connected.
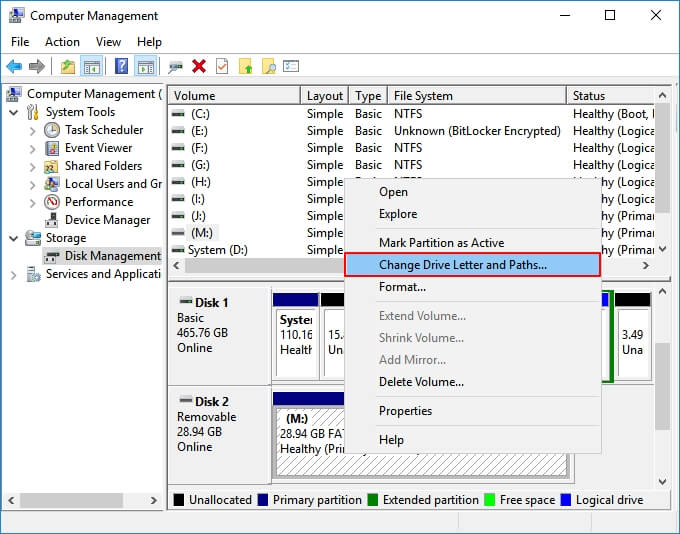
Method 1. Change NVME SSD Drive Letter
Step 1. Right-click "This PC" and select "Manage".
Step 2. Open Disk Management.
Step 3. Right-click your SSD and choose "Change Drive Letter and Paths..."
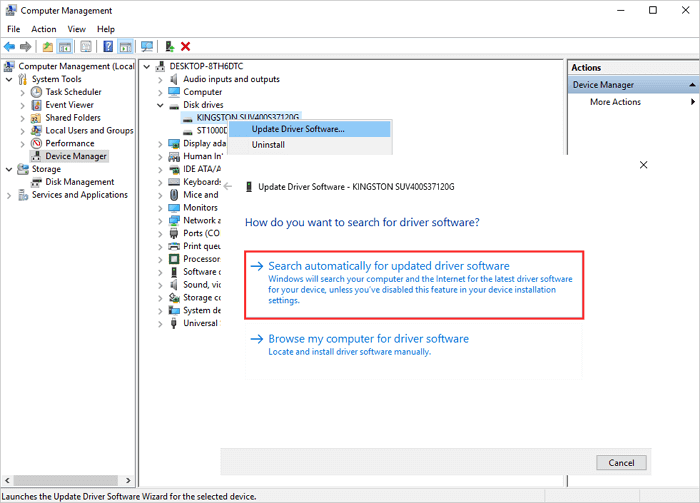
Method 2. Update NVME SSD Drive Letter
Step 1. Press Windows + X and click "Device Manager".
Step 2. Expand Disk Drives.
Step 3. Right-click the NVME SSD and choose "Update Driver Software".
Step 4. In the update driver software window, select "Search automatically for updated driver software" to let the computer scan for available updates and install the latest drivers.
Method 3. Connect the NVME SSD to Another PC
If your NVME SSD is not showing up in File Explorer or Disk Management, try changing the cable or PC to see if the drive can be recognized.
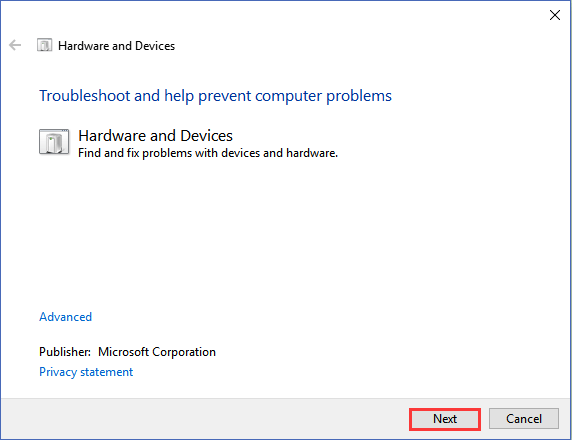
Method 4. Run Hardware and Device Troubleshooter
If the NVME SSD is still not detected, try to resolve the issue using the hardware and devices troubleshooter. This tool can help identify and fix problems with hardware, including NVME SSDs, and may resolve the issue.
Step 1. To get started with the Hardware and Devices section, simply type "Hardware and Devices" in the search box and click on the result to begin.
Step 2. Click "Next" and wait for the scanning.
Step 3. If your computer is experiencing issues, the problem-finding process involves identifying the root cause of the issue. This can be done by running diagnostic tests, checking system logs, and analyzing system performance.
How to Recover Data from NVME SSD in Windows 10
If you're unable to get your NVME SSD to work, you can still try to recover data from it using Deep Data Recovery, a powerful tool designed for hard disk data recovery.
Deep Data Recovery
- Restore lost or deleted files, documents, photos, audio, music, and emails with ease and effectiveness.
- You can recover deleted files from various storage devices, including SD cards, memory cards, flash drives, digital cameras, and camcorders, by using data recovery software. This software can scan the device for deleted files and recover them, even if the recycle bin has been emptied.
- Data recovery support is available for sudden deletion, formatting, hard drive corruption, virus attacks, and system crashes, helping users recover their data under various situations.
Step 1. Select file types
Download and install Deep Data Recovery on your Windows 11/10 64-bit computer. Select file types and click "Next" to begin the recovery process.

Step 2. Scan the SSD
Select the SSD where you lost data, and click the "Scan" button to initiate the scanning process. This will allow the software to search for and recover any recoverable data from the selected storage device.

Step 3. View the results
When the scanning finishes, use the "Filter" and "Search" options to find lost SSD data by checking the "Deleted Files" and "Other Lost Files" folders.

Step 4. Recover SSD files
Select the desired data and click the "Recover" button to recover lost SSD files.
Conclusion
If your NVME SSD is not showing up or detecting on your Windows PC. We've explained the reasons behind this issue and provided practical fixes to get your SSD up and running. However, if you lose data during the process, you can use Deep Data Recovery, a tool that enables you to recover your data in just three steps.
Related Articles
- Ext3/EXT2 Recovery | How to Recover Linux Partition in Windows
- Fixed: Samsung 860 EVO Not Detected in Windows 10/11
- Free Download Deep Data Recovery Torrent, Serial Key
- Download USB Pen Drive Repair Software Full Version with Crack
- M3 RAW Drive Recovery Crack Alternative with License Code/Key
Stop using M3 data Recovery crack for data recovery. Download M3 RAW Drive Recovery crack alternative software with license code to effectively recover your lost documents, videos, images, audio files, and other types of files from RAW SD card, hard drive, USB, etc., with ease. - How to Make Files Undeletable in Windows
To avoid deleting or losing files in your Windows PC, we've got effective methods to make files undeletable. With these methods, you'll never have to worry about losing precious data again. Whether you're using Windows 10, 8, or 7. Read on to learn how to protect your files and keep them safe from accidental deletion.