A Complete Guide to Recover Data from Broken RAID 0, 1, 5, 10 [SOLVED]
What Is RAID 0, 1, 5, 10?
RAID (Redundant Array of Independent Disks) allows you to connect two or more drives to act as one large volume, or set them up to automatically duplicate your data for real-time backup. This enables faster data access and real-time backup, making it a useful feature for storage systems.
RAID 0
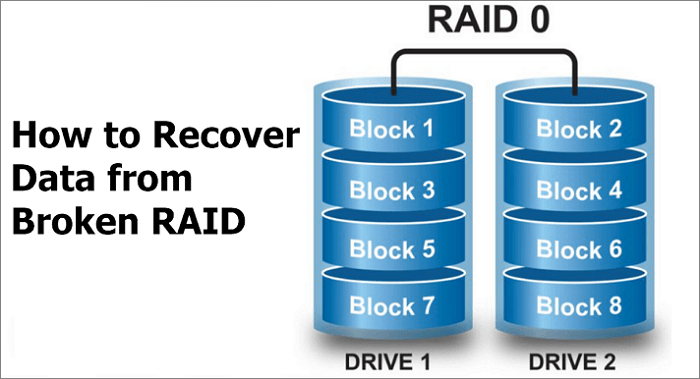
RAID 0 provides disk striping across all drives in the RAID drive group, breaking up data into smaller segments and distributing them across each drive for optimal performance, but it doesn't offer data redundancy.
RAID 1
In data protection mode, the system splits the capacity in half, using one half to store your data and the other half to create a duplicate copy. This means that if one drive fails, your data is protected because it's duplicated on the other half of the drive.
RAID 5
A four-drive system provides fast performance by striping data across all drives, while also offering data protection by dedicating a quarter of each drive to fault tolerance, leaving three-quarters of the system capacity available for data storage.
RAID 10
The RAID 10 mode delivers high I/O rates by striping RAID 1 (mirrored) segments, making it ideal for business-critical database management solutions that require maximum performance and high fault tolerance, but it reduces the total capacity to half of all the drives in the array.
Qiling Broken RAID Recovery Software - Outstanding Features
RAID data recovery can be a complex process, but it doesn't have to be. The traditional method of pulling out the disk, rebuilding RAID, and connecting to a PC to restore data is often thought to be the only way, but it's not.
Qiling NAS data recovery software makes things easier by allowing you to recover data without needing to pull the disk out and rebuild the RAID. Simply use the software, open it, and run it, then let it scan your NAS server, which has several advantages.
- Designed to recover software and hardware RAID
- Recovers files from RAID like Synology, Western Digital, Dell, etc.
- Recover files from corrupted RAID configurations, including RAID 0, RAID 1, RAID 4, RAID 5, and RAID 10.
- Windows restrictions are bypassed by the recovery process.
How to Recover a Broken/Failed RAID 0, 1, 5, 10
Here are the details to recover data from a broken, damaged, or failed RAID 0, 1, 5, or 10. Follow the steps below to get back data from your broken RAID. First, ensure you have a backup of your data, if possible.
Method 1. Run Qiling NAS DATA Recovery Software
Step 1. Select a NAS server and start recovering.
Download and install Deep Data Recovery on your Windows 11/10 64-bit computer. Open the software, select "NAS Recovery", and it will automatically list all NAS servers; choose your target NAS device and click "Scan".

Step 2. Enable SSH service on the NAS server.
To enable remote access, go to the "Control Panel > Terminal & SNMP" and check the box to enable the SSH service. Note the port number for remote access, then proceed with Deep Data Recovery by clicking "Next".
Step 3. Connect to the NAS server remotely.
This software automatically detects your IP and Port, requiring only your username and password to be input. If the detected IP address or Port is incorrect, you can manually correct it, after which clicking "Connect Now" will initiate the connection.

Step 4. Recover lost/deleted NAS data
Qiling data recovery software will connect to your NAS and start a scanning process. After the scan, you will see all deleted, lost, or existing files on your NAS server, allowing you to recover what you need.
To locate lost files on a hard drive, use the "Filter" feature or click "Search files or folders" to search for them. Select the desired files from the NAS, then click "Recover" to save them to a new location.
Click the "Recover" button to restore deleted NAS files.

Method 2. Turn to Qiling Manual Data Recovery Service
If you're struggling to recover data from your NAS/RAID, consider seeking help from experts. Qiling also offers data recovery services to assist you further.
Consult with Qiling data recovery experts for one-on-one manual recovery service, which includes repairing damaged RAID structures and restoring data from all RAID levels, all done after a FREE diagnosis. Our decades-experienced engineers are knowledgeable and skilled to handle the task.
- Data can be restored from various RAID levels, including RAID 0, RAID 1, RAID 5, RAID 6, RAID 10, and others.
- Recover data from enterprise RAIDs such as QNAP, Synology, WD, Buffalo, and other brands is a complex task that requires specialized expertise. These devices often use proprietary storage systems and RAID configurations, making it difficult to access and retrieve data in the event of a hardware failure, data corruption, or other issues.
- Retrieve lost RAID data caused by any issues
- Fix disks that become GPT protected partitions
- Recover data from RAID remotely, no need to ship
Conclusion
Now that you've learned the basics of broken RAID recovery, you can start the process with the Qiling NAS data recovery software, a powerful tool that can help retrieve lost, formatted, or deleted data.
Related Articles
- Unformat USB | Free Download USB Unformat Tool to Recover Data from Formatted USB
- How to Recover Permanently Deleted Excel File in Windows 10, Mac, iPhone, and Android
- Recover Deleted Files Windows 10 | 6 FREE Ways
- Free PDF Recovery: Recover Deleted, Unsaved, and Corrupted PDF File
- Deep Data Recovery Said File Is Unrecoverable | How to Repair or Recover
If Deep Data Recovery is unable to recover a file due to it being 'unrecoverable', you can try using a different recovery tool, such as EaseUS Data Recovery Wizard, or attempting to repair the file using a file repair tool like Glary Utilities, to see if it can recover or repair the file. - How to Recover Unsaved/Deleted Notepad (TXT) Files on Any Device
To recover unsaved Notepad files, you can check the 'Recent Documents' list in Notepad to see if the file you were working on is still listed. If it is, you can reopen it from there. If not, you can try using the Windows Task Manager to see if Notepad is still running in the background.