Fix Hard Drive Not Detected/Recognized in BIOS Without Losing Data
If your Windows 10/8/7 desktop computer or laptop is experiencing issues with its hard disk or SSD not being detected, don't worry - there are complete solutions to help you fix the problem without losing any data. You can try booting in Safe Mode, checking for BIOS updates, running a disk check, or using a third-party tool to scan and repair disk issues.
Internal Hard Disk Drive Cannot Be Recognized by PC in BIOS, help!
"Hi guys, I'm having this problem that my second hard drive in PC fails to show up in PC. I tried some instructions to see whether it can be detected in BIOS, but nothing was found.
The hard drive even disappeared from BIOS. What can I do? And how about the data saved in the drive? Do you know how to fix such a problem? If you do, please let me know. Thank you very much."
BIOS may fail to detect a hard disk if the data cable is damaged or improperly connected, or if the SATA drivers are not properly installed, the hard disk is not enabled in BIOS, the hard drive keeps spinning up, or the hard drive is corrupted, failing, or dying.
If your hard drive fails to show up on your PC or in BIOS, try quick fixes like checking the power cable, resetting the BIOS, and updating the BIOS. If these don't work, try advanced fixes like running a disk check, checking for loose connections, and trying a different SATA port. If you're still having issues, you can try using a data recovery software to recover your data.
| Workable Solutions | Step-by-step Troubleshooting |
|---|---|
| Recover data from disk | Create a bootable disk > Boot from the bootable USB > Recover...Full steps |
| Two quick fixes | 1. Reconnect hard drive; 2. Connect the hard drive to another desktop/laptop as a second HDD...Full steps |
| Four advanced fixes | 1. Use Windows repair services; 2. Enable BIOS connection by yourself; 3. update driver; 4. repair hard disk corruption...Full steps |
Recover Data from Unbootable, Undetected Hard Drive in Advance
When a disk issue occurs, such as being unrecognized, inaccessible, damaged, or unbootable, the initial priority should be to recover data first. This is because many disk repair methods can potentially result in data loss, making it wise to restore data beforehand.
If your system drive hard drive fails to boot from BIOS, don't worry, Deep Data Recovery with Bootable Media can help you recover data from dead or corrupted hard drives efficiently.
Step 1. Create a bootable disk
To prepare for creating a bootable USB, make sure to copy any important data from the USB to another device, as the process will erase the data on the USB. Once cleared, you can use a tool like Deep Data Recovery WinPE Edition to create a bootable disk on the USB.
Connect the USB drive to your PC, then launch the Deep Data Recovery WinPE Edition software. Select the USB drive and click "Create" to create a bootable disk.
Step 2. Boot from the bootable USB
Connect a bootable disk to a PC that won't boot and change the boot sequence in the BIOS settings to prioritize the disk. This can often resolve the issue by restarting the computer and pressing the designated key (usually F2) to access the BIOS menu.
To boot your PC from a device other than the hard drive, press F10 to save and exit the BIOS settings, then set the boot order to prioritize "Removable Devices" (such as a bootable USB drive) or "CD-ROM Drive" (such as a bootable CD/DVD).

Step 3. Recover data from a hard drive that won't boot
When you boot from the USB, you can run Deep Data Recovery from the WinPE bootable disk. This allows you to select the drive you want to scan to find all your lost files.

Click "Scan" to start the scanning process.
After scanning, you can preview all recoverable files, select the targeted files, and click the "Recover" button to restore your files. It's recommended to save all recovered data to another place to avoid data overwriting. This will ensure the integrity and safety of your recovered files.

Two Quick Fixes for Hard Disk Not Detected in BIOS
If your hard disk is not detected or recognized in BIOS, don't worry, you can try two quick fixes to regain access to your saved data. These fixes can help you resolve the issue and get back to your files.
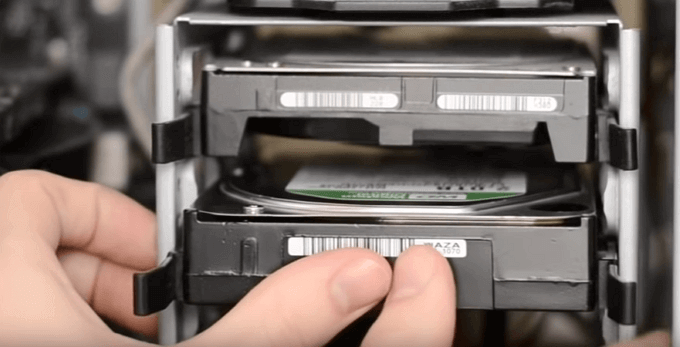
#1. Reconnect Hard Drive to Your PC
Reconnecting a hard drive helps to determine if a faulty hard disk cable is preventing the BIOS from detecting the hard drive.
If your hard drive isn't showing up on your PC, even in the BIOS, it might be due to a faulty data cable or the hard drive not being properly plugged in. Try reconnecting the hard drive to your computer's motherboard USB port to see if you can access your saved data.
Step 1. Shut down your PC at first.
Step 2. Remove all the screws from the computer case using a screwdriver. This will allow you to access the internal components of the computer.
Step 3. Unplug the hard drive that Windows BIOS fails to recognize, and disconnect its ATA or SATA cable and power cable.
If the cables (ATA or SATA and power) are damaged or covered in dust, replace them or clean them respectively.
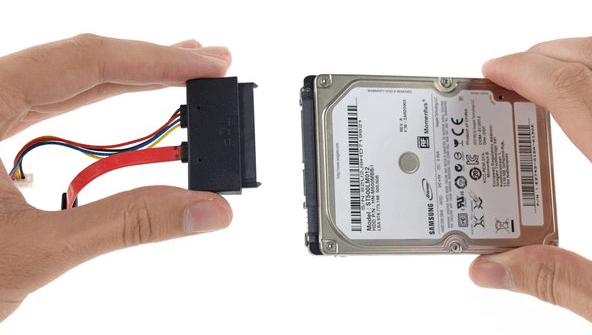
Step 4. Remove the hard drive, clean it, and then put it back into the computer case.
Step 5. Reconnect the hard drive to your computer motherboard with the SATA or ATA cable, and plug in the power cable on the drive.
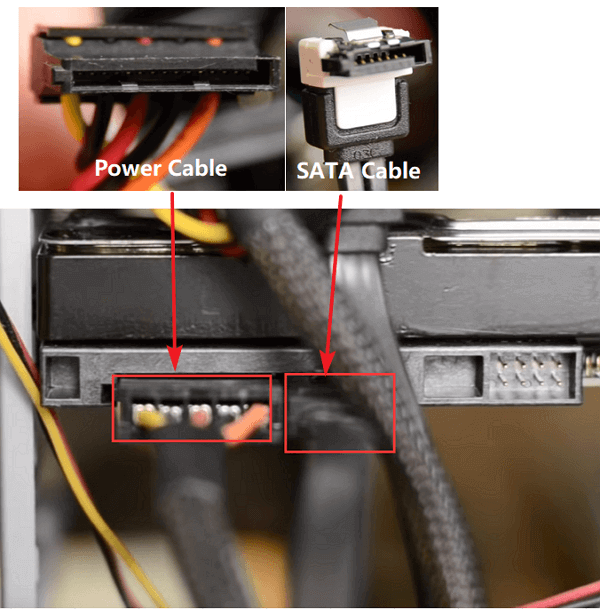
To properly connect the hard drive to your computer, ensure it is securely fastened with the cables, making sure they are correctly aligned and tightened to prevent any damage or data loss.
Step 6. After updating your BIOS, restart your PC and check if the hard drive shows up in your PC. If it still doesn't show up, try booting your PC in Safe Mode and see if the hard drive is recognized.
If your hard drive shows up and you can access your data on the drive, congratulations. If the hard drive fails to show up, try booting your computer in safe mode, then go to disk management to check if the drive is recognized. If still not recognized, try to boot from a live USB or CD/DVD, then try to access the drive from there.
#2. Connect No Detected Hard Drive to Another Desktop/Laptop as a Second HDD
Run a built-in diagnostic tool called "chkdsk" (short for Check Disk) to check the hard drive for any errors or damage. This tool will scan the drive, identify any problems, and attempt to repair them.
Connecting your hard drive to another PC or laptop as a second HDD is an efficient way to access your data. If you have a second computer at your office or home, you can try connecting your hard drive to it and access your hard disk data on the new PC. This allows you to easily access your files and data from a different device.
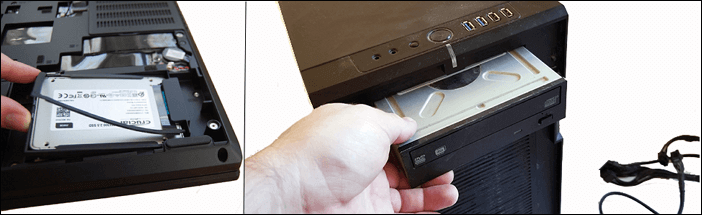
Step 1. Remove the old computer's hard drive and any other internal components that you want to keep, and then place them in an anti-static bag to prevent damage. Next, unplug the power cord and any other cables from the old computer, and then carefully lift the computer out of its original location.
Step 2. Open the new computer or laptop case.
Step 3. Locate the hard drive slot and insert the hard drive into the slot. The hard drive slot is usually located on the motherboard and is marked with a label indicating the type of hard drive it supports.
Step 4. To reconnect the hard drive as the second HDD on the computer, you can simply plug the ATA/SATA cable and power cable back into the computer. This will allow the computer to recognize and utilize the hard drive as a secondary storage device.
Step 5. If the hard drive doesn't show up after restarting, it's likely that the hard drive is not properly connected or is faulty. In this case, you may need to troubleshoot the connection or replace the hard drive.
If the hard drive shows up, congratulations and you can re-access the data on your disk again.
If the hard drive is not recognized, it may have other issues or the data may not be accessible, but you can try advanced fixes to resolve the issue.
The best data recovery software for Windows can be found in the top 9 options listed, which include tools like Disk Drill, Deep Data Recovery, and Recuva. These programs are designed to recover deleted files, restore data from corrupted or formatted drives, and even recover data from external hard drives.
Four Advanced Fixes for Hard Drive Not Detected Error in BIOS
If the above quick fixes don't work, don't be alarmed. You can try the following four troubleshooting steps: enabling BIOS connection yourself, updating the driver, and repairing any hard disk corruption. These steps can often resolve the issue.
Fix 1. Use Windows Repair Services
To fix the hard drive not detected issue in BIOS, you can use manual Windows repair services. This involves seeking professional technical help from a team that can resolve system startup errors, including issues like system failure, blue screen, black screen, BIOS issues, and more.
Consult with Qiling data recovery experts for one-on-one manual recovery service, which includes the following services after a FREE diagnosis:
- Fix Windows boot issues, including BSOD
- Fix Windows error and configure Windows environment
- Restore the system when it fails to boot
- Optimize Windows computer to make it run quickly
Fix 2. Enable Hard Drive in BIOS
To fix the issue of a hard disk drive (HDD) not being detected in the BIOS, you can directly enable the hard disk in the BIOS settings. This involves accessing the BIOS setup, navigating to the section where you can enable or disable hardware components, and specifically enabling the hard disk.
Step 1. To resolve the issue, shut down the PC, restart it, and immediately press the F2, F8, F11, or Delete key to access the BIOS settings. This will allow you to configure the boot order and potentially resolve the issue.
Step 2. To resolve the issue of an undetected hard drive, enter the system setup and verify if the hard drive is turned off within the setup. This can be done by checking the system documentation for specific instructions on how to access and navigate the setup menu.
Step 3. If it's Off, turn it ON in System Setup.
Step 4. Reboot the PC to check out and find your hard drive now.
If the hard drive fails to show up on the PC, update its drivers in Fix 2.
Fix 3. Update Hard Drive Driver to Make Your Disk Detectable
If your hard drive is not being recognized by your computer due to an outdated hard drive driver, you can resolve the issue by updating the driver. You can do this by going to the device manager, finding the hard drive, right-clicking on it, and selecting "Update driver.
You can update hard drive drivers through the Device Manager, using the Windows Update feature, or by downloading and installing the drivers from the manufacturer's website.
You can try updating your hard drive by contacting the manufacturer for assistance. This may involve downloading and installing a firmware update or seeking guidance on how to resolve the issue.
To resolve the issue, you can try downloading and updating the hard drive driver from the manufacturer's website. This can be done by going to the manufacturer's website, searching for the driver for your specific hard drive model, and then following the instructions to download and install the updated driver. This may resolve any issues related to the hard drive not being recognized or not functioning properly.
To manually update hard drive drivers in the Windows system, you can follow these steps: Open the Device Manager by pressing the Windows key + X and selecting Device Manager. In the Device Manager, locate the hard drive you want to update drivers for, right-click on it, and select "Update driver." Then, select "Search automatically for updated driver software" and follow the prompts to complete the update.
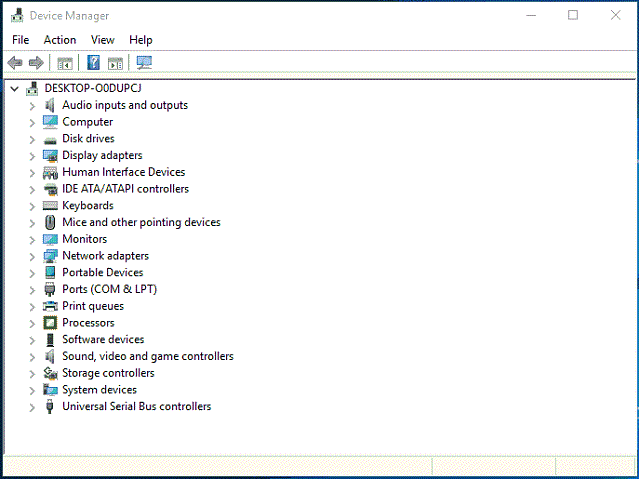
Step 1. Click the Start button, type Device Manager, and hit Enter.
Step 2.To resolve the issue, expand the "Disk drives" section in the File Explorer, find the name of your hard drive, and right-click it.
Step 3. Select "Update Driver Software..." and choose "Search automatically for updated driver software" to update the driver.
If Windows can't find a new driver for your drive, try to find the latest one on the device manufacturer's website.
If the above steps don't work, try reinstalling the drivers: Open Device Manager, right-click on your hard drive, and select Uninstall.
To resolve the issue, simply restart your computer. Windows will automatically reinstall the drivers from the hard drive during the restart process.
Fix 4. Run CHKDSK CMD to Check and Fix Internal Disk Errors that Make Hard Drive Not Recognized
Fix internal errors that cause a hard drive (HDD) or solid state drive (SSD) to not be detected or recognized by a PC or laptop, resulting in the drive not showing up on the device.
If your hard drive is detected in BIOS but still not opening on your PC, you can try running the Command Prompt (CMD) to repair the internal hard drive error. This may resolve issues with the hard drive being undetectable or unreadable by your PC.
This command will erase data while fixing disk errors, so use reliable file recovery software to recover data before running it.
Step 1. To open Command Prompt, press the Windows key + R to open the Run dialog, type "cmd" and press Enter. This will open the Command Prompt window.
Step 2. To run a disk checkup on an undetectable hard drive, type `chkdsk /f x` in the Command Prompt, where `x` is the drive letter of the hard drive you want to check, and press Enter. This will initiate the disk checkup process.
Step 3. Type exit to finish the process when the disk checkup process is finished.
Qiling CleanGenius is a user-Introducing a user-friendly computer fixing tool that's both safe and lightweight. This one-click solution is the perfect alternative to the CHKDSK command, allowing you to easily fix damaged file systems with just a single click.
Step 1. DOWNLOAD Qiling CleanGenius on your computer and complete the installation.
Step 2. Run the software. Click "Optimization", and then choose "File Showing".
Step 3. Select the drive with a corrupted file system. Tick the "Check and fix file system error" option and click "Execute".
Step 4. Wait the tool performs the repairing task. After that, click the "here" button to check the drive.
Related Articles
- How to Fix Inaccessible Boot Device (Stop Code 0x0000007b)
- External Hard Drive Keeps Freezing or Freezes Computer (3 Solutions)
- How to Solve Can't Format SD Card on Android Phone, Camera, and Windows PC
- Fixed: Flash Drive Shows Up as CD Drive
- How to Recover Files from RAW Partition/Disk for Free
If your hard drive is inaccessible and its file system shows as RAW, don't worry - you can still recover your data for free. The article will guide you through the process of recovering data from a RAW disk or partition in Windows 11/10 or Mac. - How to Recover Data from Microsoft Surface Pro 3/4/5
To recover data from a Microsoft Surface Pro, use Deep Data Recovery to scan the hard drive, find deleted files, and select them to restore, making the process simple and easy.