SQL to XML | How to Export Data from SQL Server to XML
XML, or Extensible Markup Language, is a markup language that allows for the encoding of documents in a format readable by both humans and machines. Its plain text format makes it simple, usable, and general, which is why many users want to save SQL query results to XML or export their SQL databases to XML files.
Export SQL Query Result to XML
The FOR XML clause allows you to save the result of a SQL query as XML, which can be used in both top-level queries (SELECT statement) and subqueries (INSERT, UPDATE, and DELETE statements).
When using a FOR XML clause, you need to specify one of four modes: RAW, AUTO, EXPLICIT, or PATH, to define the structure and formatting of the XML output.
- The RAW mode creates a single row element per row in the rowset output by the SELECT statement, making it the simplest of the four modes.
- The AUTO mode creates nesting in the resulting XML based on the specified SELECT statement.
- The EXPLICIT mode allows for a high degree of customization in XML generation, enabling users to mix attributes and elements, create wrappers, and more, giving them greater control over the shape of the XML output.
- The PATH mode allows for the flexibility of the EXPLICIT mode in a more user-friendly way, and can be combined with the nested FOR XML query capability.
The example of exporting a SQL Server query as XML:
USE [Database Name] GO SELECT [the information you want to export] INNER JOIN [Table Name] [information] On [limits] For XML AUTO;
Export SQL Database to XML
To export a SQL Server database to an XML file, you can first use SQL Server Management Studio to export the database to a CSV file, and then convert the CSV file to XML using an online converter. Alternatively, you can output the database to Excel and then convert the Excel file to XML.
To Export SQL database to XML:
Procedure 1. Export the SQL Database to XLS (Excel), CSV or HTML
Step 1.Open SQL Server Management Studio and connect to the database.
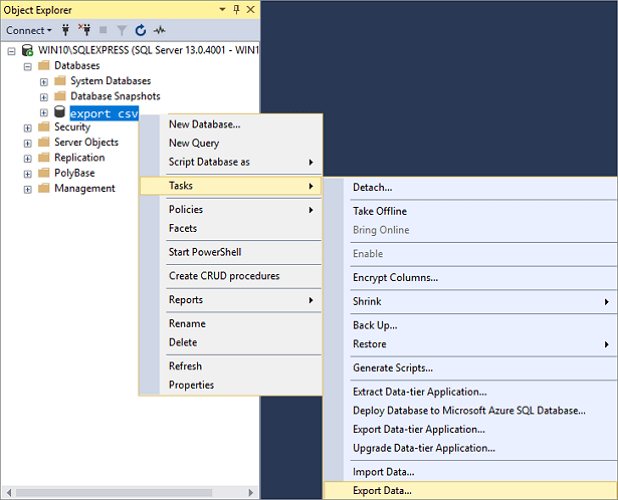
Step 2. To export a database from SQL Server to CSV, go to the Object Explorer, find the server and database you want to export, right-click, and select Tasks > Export Data. This will open the SQL Server Import and Export Wizard, which will guide you through the export process.
Step 3. To copy data from a SQL Server database, click the Data source drop-down button, select "SQL Server Native Client 11.0", choose a SQL Server instance, authentication method, and database, then press the "Next" button.

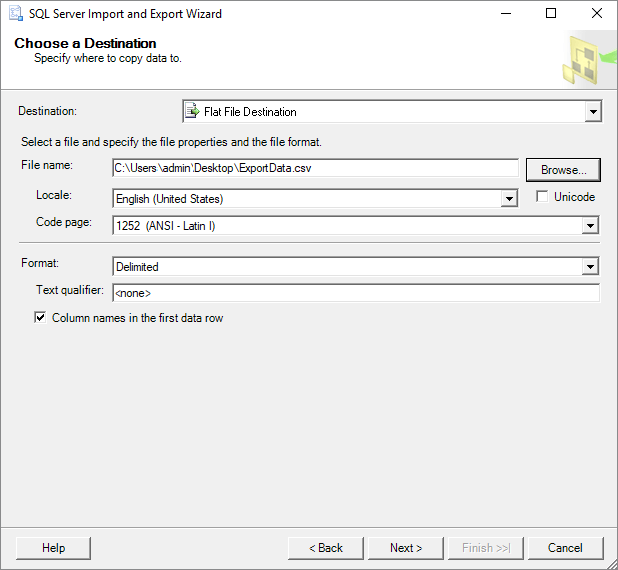
Step 4. On the "Choose a Destination" window, select "Flat File Destination" to export data from SQL Server to a CSV file, specifying the file name and clicking "Next".
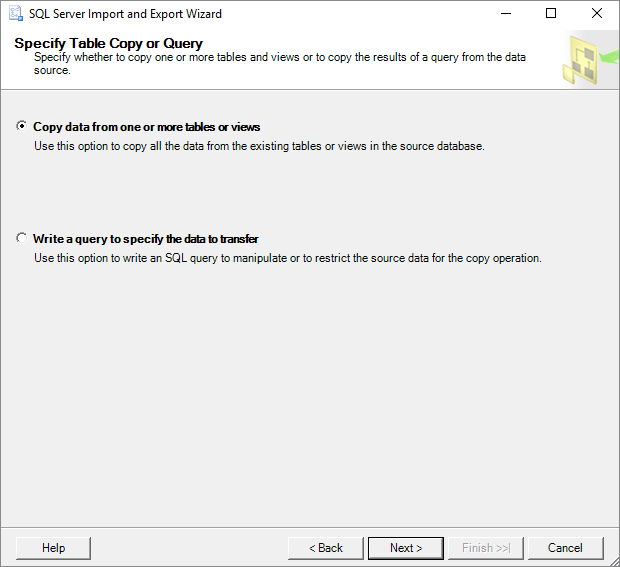
Step 5. On the Specify Table Copy or Query screen, you can choose to export the SQL database into CSV format either by "Copy data from one or more tables or views" or "Write a query to specify the data to transfer". Click Next to proceed.
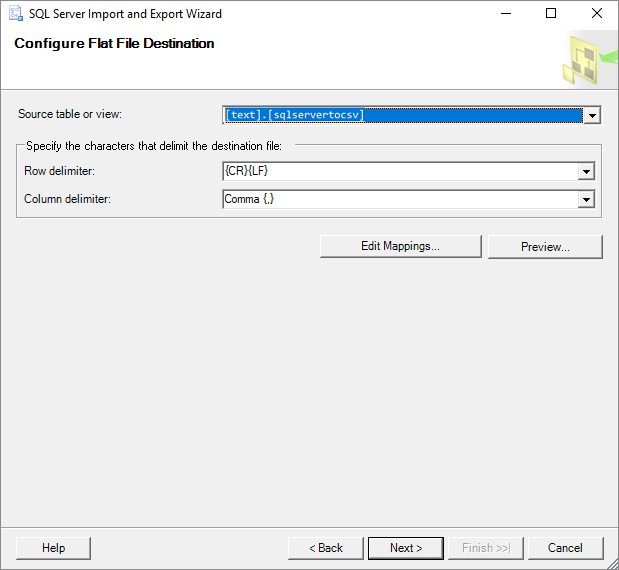
Step 6. In the "Configure Flat File Destination" screen, select the table to export from using the "Source table or view" option, and adjust the row and column delimiter settings as needed. You can also preview the data to be exported to the CSV file by clicking the "Preview" button, before proceeding with the next step.
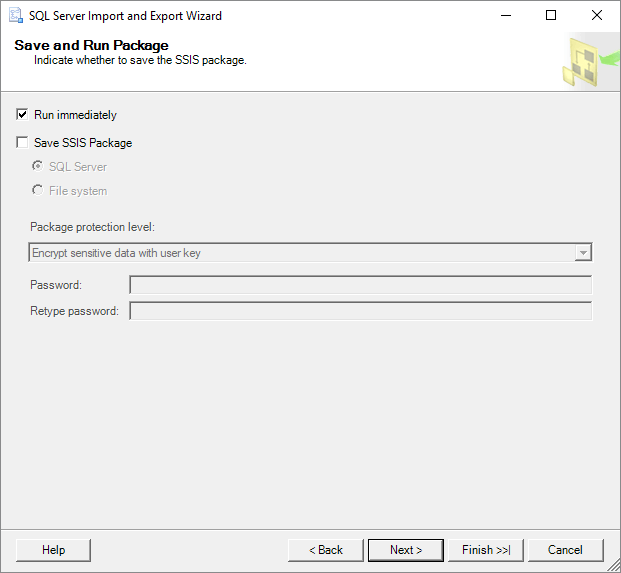
Step 7. On the "Save and Run Package" window, no changes are needed. Click the "Next" button to proceed.
Step 8. On the "Complete" Wizard window, you can review all settings made during the exporting process. If everything looks correct, click "Finish" to initiate the export of the SQL database to a CSV file.

Step 9. You can view the exporting process in this step. When it completes, click on the "Report" drop-down button.

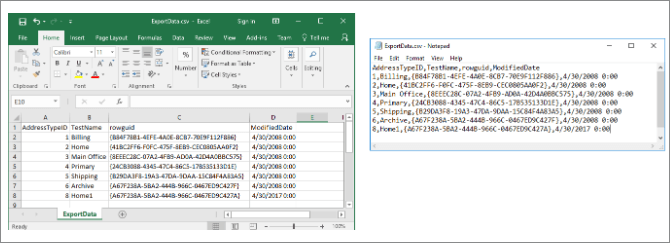
Step 10. The report generated by the SQL database to CSV conversion process can be saved to a file of your choice, including Excel and Notepad, allowing you to preserve the details of the conversion for future reference or further analysis. This report contains comprehensive information about the entire conversion process.
Procedure 2. Convert Excel/CSV/HTML to XML
To convert a database exported from CSV, XLS or HTML to XML, you can use an online converter. Simply find a converter that suits your needs and apply it to transform your database into an XML file.
The Bottom Line
You can use the FOR XML clause to return a query result to XML or export a whole SQL database to an XML file, depending on your needs. When using FOR XML in a query, specify the correct mode. If exporting the SQL database to XML, save it in a supportable format and then convert it to XML. This should be helpful.
Related Articles
- Easy Ways to Fix Recovery Pending State in SQL Server 2014/2016/2017
- How to Export Data from SQL Server to Excel Automatically
- Fix MS SQL Database Corruption (823/824/825) Errors
- 3 Ways to Open MS SQL Sever Backup .BAK File in Excel
- SnowRunner Lost Save Files on Steam/PS/Xbox | SnowRunner Recovery
How to Fix SnowRunner lost save files on PC, PS, Xbox, or Switch. We will introduce detailed methods to help you find lost game files, and you can use Deep Data Recovery to recover lost game files quickly. - How to Fix Starfield Save Games Missing and Restore Progress
If your Starfield save games are missing on Steam and Xbox, You can recover lost game data using Qiling data recovery software, which we recommend to help you restore your lost game data on your computer.