[Solved] There Are No Previous Versions Available Windows 10/8/7
When you've accidentally lost or deleted important files or folders, restoring files from previous versions is a common solution. This feature allows you to recover files from File History or from restore points, covering backups of files in folders like Documents, Music, Pictures, Videos, Desktop, and others on a local hard drive.
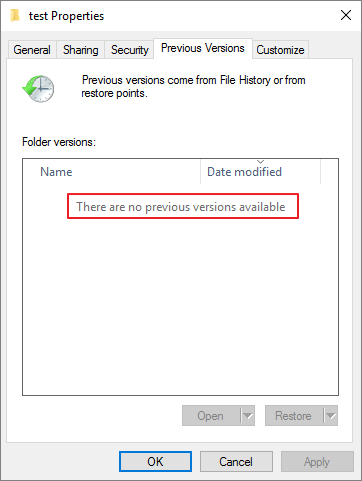
Users who right-click a folder or file, select "Restore previous versions", but get an error message "There are no previous versions available" may experience this issue, as shown in the screenshot below.
Why Are There Are No Previous Versions Available Windows 10
The reason behind this is that Windows 10 no longer supports the ability to create a System Restore Point prior to installing a new version of the operating system. This means that any restore points created after the installation will not include the previous version of Windows. As a result, when you try to restore your system to a previous point, it will only restore to the point where the current version of Windows was installed, and not to a previous version.
The "Restore previous version" feature on Windows 10 only works if File History or Windows Backup is enabled beforehand, as it doesn't create previous versions as part of a restore point.
The deleted or lost files are still on the hard drive, but can't be recovered using the Restore previous version option. To recover them, you can do a complete system restore or use a third-party data recovery tool.
After understanding the reasons behind the "there are no previous versions available" issue, we can attempt to solve the problem. The most effective solutions to fix this issue on Windows 10 involve trying the following approaches.
Fix 1. Recover Deleted Files with Data Recovery Software When There Are No Previous Versions Available
When data loss occurs, it's crucial to stop using the affected hard drive immediately to prevent further data overwriting. Then, utilize a data recovery tool to recover the lost data as quickly as possible.
Deep Data Recovery is a powerful tool that can recover a wide range of files, including documents, spreadsheets, presentations, PDFs, photos, videos, audio files, and emails, using advanced algorithms.
Qiling Photo Recovery Tool
- Recover files from formatted hard drive, emptied recycle bin, memory card, flash drive, digital camera, and camcorders with our expert assistance. We can help you retrieve deleted files, even after a factory reset or accidental formatting, and recover data from devices that have been emptied or lost due to various reasons.
- Data recovery support is available for sudden deletion, formatting, hard drive corruption, virus attacks, and system crashes under various circumstances.
- Repair corrupted photos, videos, and documents automatically
You can now download a renowned file recovery tool for free to restore files when there are no previous versions available on your computer.
Step 1. Run Deep Data Recovery. Select file types and click "Next" to start the recovery process.

Step 2. Please specify the file location and click the "Scan" button to proceed.

Step 3. After the process, select the "Deleted Files" and "Other Lost Files" folders in the left panel. You can then apply the "Filter" feature or click the "Search files or folders" button to find the deleted files.

Step 4. Once you've clicked the "Recover" button, save the restored files, ideally in a location different from the original one to avoid any potential data loss.
Fix 2. Restore Previous Versions from Restore Points with Shadow Explorer on Windows 10
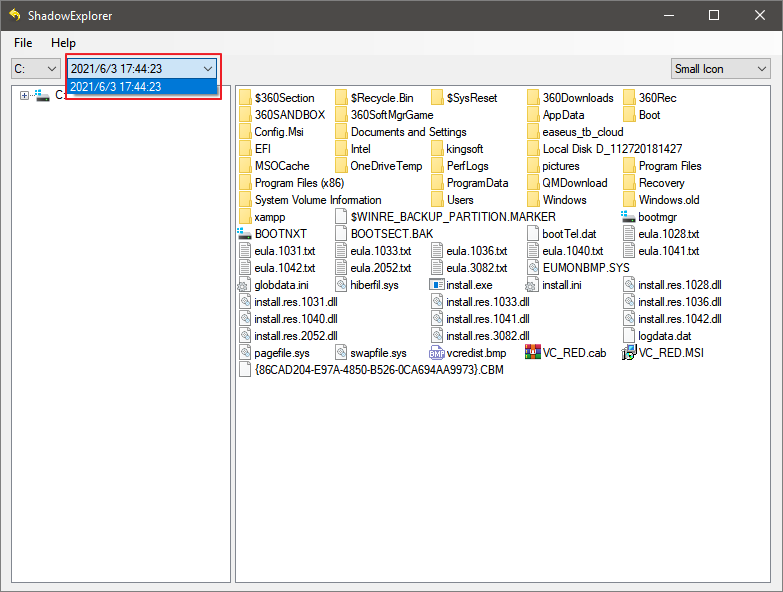
ShadowExplorer is a free tool that allows users to restore lost or damaged files from Shadow Copies, serving as a replacement for the Previous Versions feature on Windows 10.
Step 1. Download the latest portable version of ShadowExplorer on the webpage: https://www.shadowexplorer.com/downloads.html.
Step 2. Unzip the ShadowExplorer-0.9-portable.zip file and click the "ShadowExplorerPortable.exe" file to run.
Step 3. Select a specific restore point based on the date.
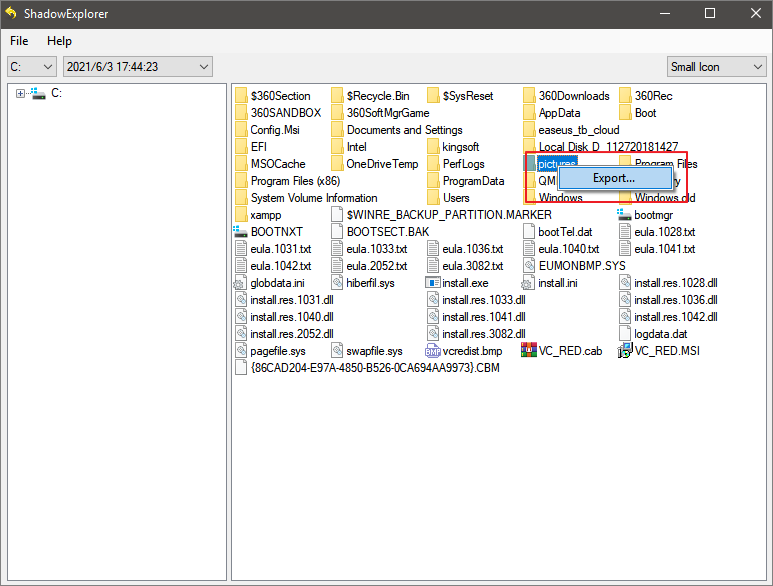
Step 4. Find the folder or file you want to restore, right-click it and select "Export".
Step 5. After restoring the file/folder, choose a secure location to save the restored file/folder, and press "OK". Do not save the recovered files/folders in the same location where they were lost.

Step 6. After the recovery is finished, go to the location to check files.
Fix 3. Enable File History to Fix There Are No Previous Versions Available
To turn on File History, go to Control Panel > System and Security > File History, then select a drive to save your backups and set up a schedule. You can also add or remove folders to include in the backup. Once set up, File History will automatically back up your files to the selected drive, keeping previous versions in case you need to restore them.
Step 1.To access the Update & Security settings on your computer, click the Start button, then navigate to "Settings > Update & Security".
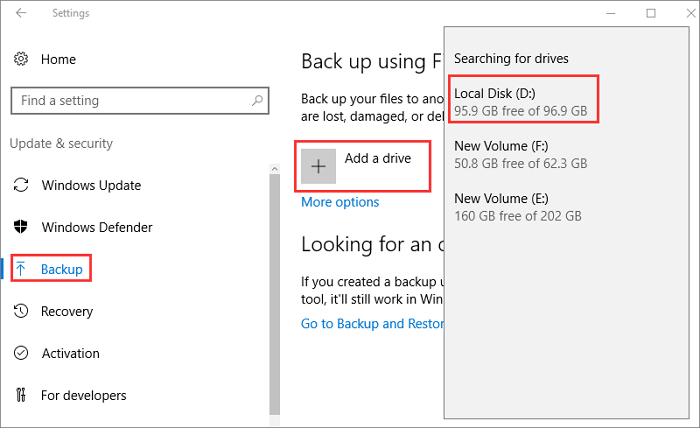
Step 2.To backup your files using File History, click "Backup" on the left pane, then select "Add a drive" under the "Back up using File History" section. From there, choose the target hard drive you want to back up your files to.
Step 3. To configure File History settings, click the "More options" button and customize the backup frequency.
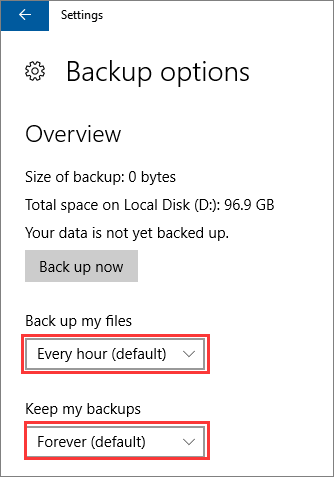
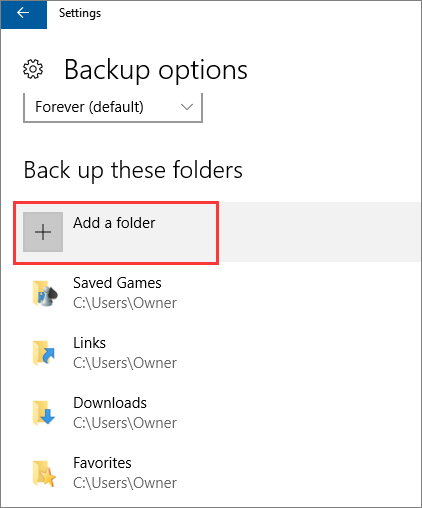
Step 4.You can also select or exclude specific folders for backup flexibility. Once the setup is complete, Windows will automatically start backing up.
Fix 4. Set Up on Windows Backup to Solve No Previous Versions Issue
To configure Windows backup on Windows 10, use these steps:
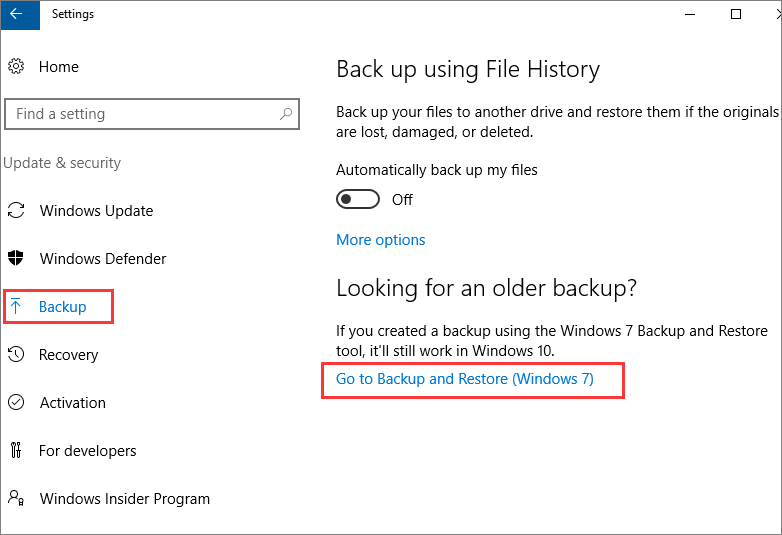
Step 1. Click the "Start button > Settings > Update & Security".
Step 2. Click "Backup". Under the "Looking for an older backup" section, click the "Go to Backup and Restore".
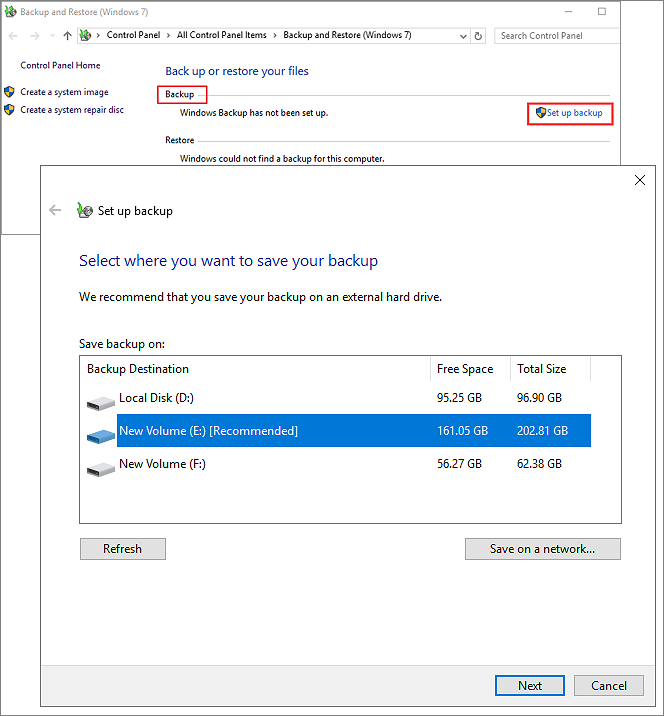
Step 3. To set up a backup, go to the "Backup" section, click "Set up backup", select a hard drive (preferably an external one) and click "Next".
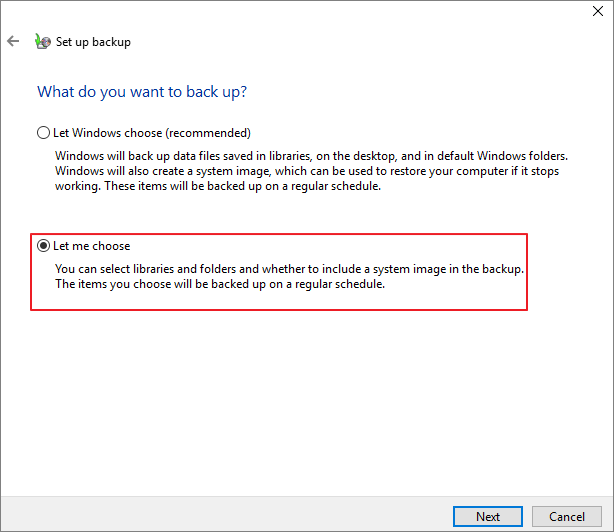
Step 4. You can choose to back up specific files or folders by selecting "Let me choose" under the "What do you want to backup?" section.
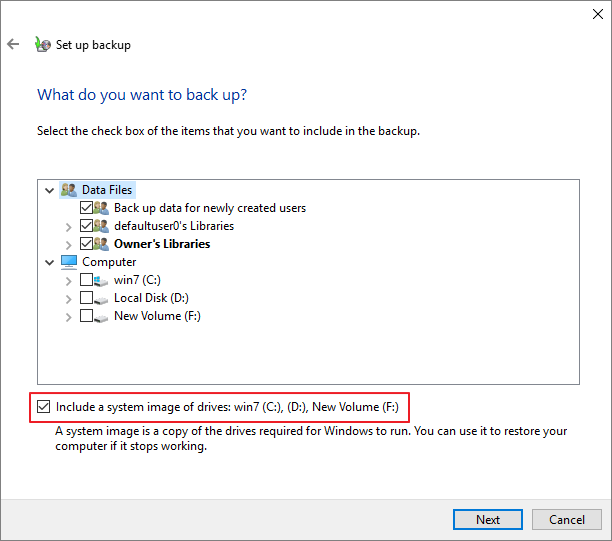
Step 5. Select the items and drives you want to back up, and check the box to include a system image of the drives. Click "Next" to proceed.
Step 6. To set the backup schedule, click on "Change schedule" on the Backup settings window, then click "OK" and select "Save settings and run backup".
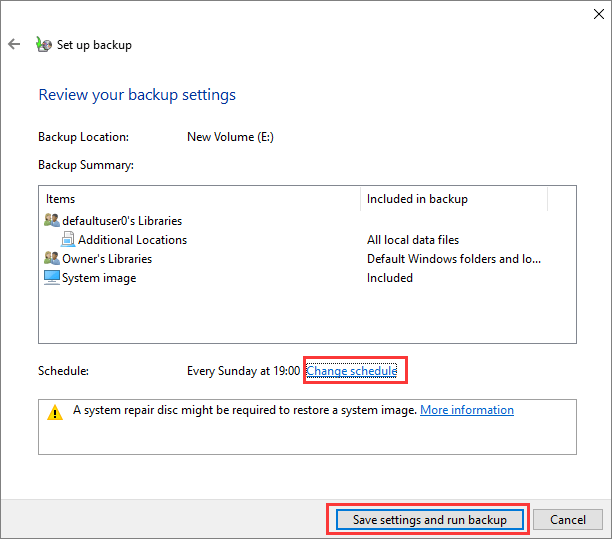
Once you complete the steps, Windows will begin to back up data and allow you to restore files from backup.
To Sum Up
The best way to prevent data loss is to back up ahead of time, which is more effective than any data recovery method. To do this, you can follow steps 3 and 4 to enable File History and backup on Windows 10/8/7. Once enabled, you can use the Restore previous version utility when data loss occurs.
If you've deleted files without a backup, Qiling data recovery software can help you recover them with ease. This file recovery tool can restore permanently deleted files on Windows 10/8/7 and macOS computers, allowing you to get back your lost data without much effort.
Related Articles
- How to Recover Deleted TikTok Videos in Android/iPhone/PC
- HDD Unallocated Space Data Recovery
- Fix 'Photos Cannot Preview or Open' Error in Windows 10/8/7
- How to Repair/Recover Corrupted Files Using Command Prompt
- How to Recover Lost Apple Music Files in iOS Devices?
If you've lost your Apple Music library due to a deletion or other issue, you can recover your lost music songs. This article will guide you through an effective method for Apple Music file recovery, allowing you to easily retrieve your lost files on your iOS device. - How to Recover Formatted USB Flash Drive Mac
You can recover data from a formatted USB flash drive using Qiling USB flash drive data recovery software, even after a quick format using Disk Utility or other disk formatting tools. Simply download Deep Data Recovery to retrieve your lost data.