[Error 5] Unable To Execute Files In The Temporary Directory
Here are four fixes to resolve the "unable to execute file in the temporary directory" issue in one paragraph:
| Workable Solutions | Step-by-step Troubleshooting |
|---|---|
| Fix 1. Run File as Administrator | Right-click on installer file > Select "Run as Administrator"...Full steps |
| Fix 2. Check Security Right | Navigate to C:\Users\[Username]\AppData\Local > Right-click Temp folder and select "Properties"...Full steps |
| Fix 3. Create New Temp Folder | Navigate to C: and create a new folder named Temp > Right-click PC and select "Properties"...Full steps |
| Fix 4. Disable Firewall | Disable your anti-virus, anti-spyware, and firewall applications...Full steps |
Unable to Execute File in the Temporary Directory
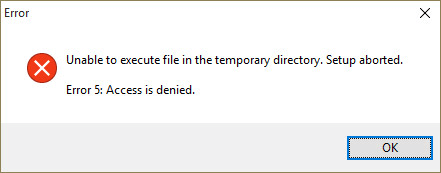
When running a setup file to install a program, you may encounter an error message indicating that the file cannot be executed in the temporary directory due to access being denied, resulting in the setup being aborted. This issue is not caused by the software itself, but rather by system problems or software-protection utilities, preventing modifications to a folder that you don't have access to.
To complete the installation, resolve any issues that have caused the installation to pause, and then proceed with the software installation.
4 Fixes to Unable to Execute File in the Temporary Directory
To fix the "unable to execute file" error, try the following four tips: install the software again, check for corrupted files, run a virus scan, and ensure the software is compatible with your operating system. After trying any of these tips, reinstall the software and see if the error persists.
Solution 1. Run the File as Administrator
When you don't use a computer as an administrator, you may encounter the error "You'll need to provide administrator permission to copy this file/folder". However, many people who have struggled with software installation due to this issue have found a solution by running the file as administrator.
Step 1. Right-click on the installer file.
Step 2. Choose "Run as Administrator". Then the software may be installed successfully.
Solution 2. Check the Security Right
If the first solution fails, check if the issue is caused by security right issues. If so, try the following steps:
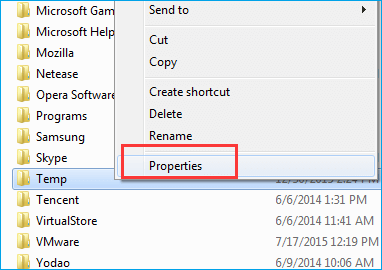
Step 1. Navigate to C:\Users\[Username]\AppData\Local.
Step 2. Right-click on the Temp folder and select "Properties".
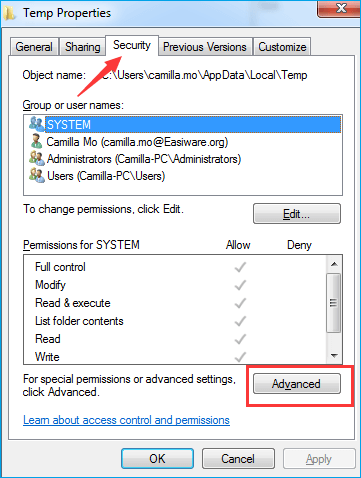
Step 3. Select "Security" and click "Advanced".
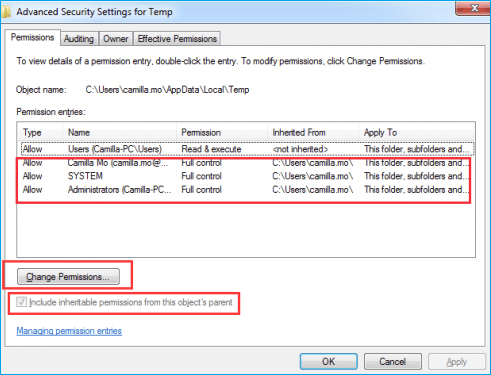
Step 4. On the "Permissions", you should see three options:
- The system has full control over "This folder, subfolders and files", granting it complete authority and access to all contents within the specified directory and its subdirectories.
- To grant full control to administrators on a specific folder, including its subfolders and files, you would set permissions to "Administrators" with Full control, which applies to 'This folder, subfolders and files'.
- "You are granting 'Your Username' full control over 'This folder, subfolders and files', allowing them to read, write, modify and delete any content within this directory and all its subdirectories."
The permissions in the C:\Users\[Username]\ folder are inherited by the folder you're looking at, but you need to manually include them if the "Include inheritable permissions from this object's parent" option isn't selected. To do this, click on "Change Permissions".
Step 5. Select the "Include inheritable permissions from this object's parent" option, click "Apply", and "OK". If any issues arise, click "Continue" to proceed. Then, eliminate the non-inherited permissions.
After following the steps above, you can attempt to upgrade your software or reinstall it to see if that resolves the issue.
Solution 3. Create a New Temp Folder
Step 1. Navigate to the C: drive and create a new folder named Temp.
Step 2. After that, right-click on This PC (or My Computer) and select "Properties".
Step 3. Find the "Advanced System Settings" link on the left pane and click on it.
Step 4. Click the "Advanced" tab and select "Environment Variables".
Step 5. Double click on the "TMP".
Step 6. Change the value %USERPROFILE%\AppData\Local\Temp to C:\Temp.
Step 7. Close the window and try to install the software that you've preferred.
Solution 4. Disable the Firewall
It may be HIPS (Host-Try fully disabling your anti-virus, anti-spyware and firewall applications to see if any of these (specifically a Host-based Intrusion Prevention System (HIPS)) are causing this false positive. Try fully disabling your anti-virus, anti-spyware and firewall applications to see if any of these (specifically a Host-based Intrusion Prevention System (HIPS)) are causing this false positive. Try fully disabling your anti-virus, anti-spyware and firewall applications to see if any of these (specifically a Host-based Intrusion Prevention System (HIPS)) are causing this false positive.
Extra Tip: How to Keep Data Safe
Data loss occurs daily, making it essential to have a data recovery software tool to rescue your data. A free data recovery software like Deep Data Recovery can help recover deleted, formatted, or inaccessible files, and Qiling data recovery software can restore lost files with simple steps.
Deep Data Recovery
- Recover lost or deleted files, documents, photos, audio, music, and emails with ease, using effective methods that ensure their safe retrieval.
- You can recover files from a formatted hard drive, emptied recycle bin, memory card, flash drive, digital camera, and camcorder using data recovery software. This software scans the device for deleted files and can often recover them even after a format or emptying the recycle bin.
- Our data recovery services provide support for various situations where data loss occurs suddenly, including accidental deletion, formatting, hard drive corruption, virus attacks, and system crashes. We can help recover lost data under these circumstances, giving you peace of mind and minimizing the impact of data loss on your business or personal life.
Step 1. Select file types
Launch Deep Data Recovery. Select file types and click "Next" to begin the recovery process.

Step 2. Select a drive and start scanning
Hover over the partition where you lost data, click "Scan".

Step 3. Check and preview scanned files
To find the specific files you're looking for, use the file format filter to narrow down the scan results. Once you've filtered the results, you can click the "Preview" button or double-click a file to view its content. This allows you to quickly scan through the files and find the ones you need.

Step 4. Recover lost data to a secure location
To recover lost data, select the file, check the box next to it, and click "Recover". The recovered data should be stored in a secure location, not on the same disk where it was lost.
Related Articles
- Fix a Broken USB Stick and Recover Data
- JPG Recovery: How to Recover Deleted or Lost JPG/JPEG Files
- How to Fix Windows 10 Error Code 0xc00000e Without Data Loss
- CR2 Photos Not Opening, How Do I Fix and Open CR2? Your Guide Is Here
- Resolved: Restore Lost/Disappeared Contacts after iOS 12 Update on iPhone X/8
If your iPhone contacts have gone missing after an iOS 12 update, don't worry, practical methods are available to help you restore them. You can follow these steps to recover your lost contacts on your iPhone X or iPhone 8. - VSCO Recovery | How to Retrieve VSCO Deleted Photos
VSCO recovery tutorial is available to help both iPhone and Android users recover deleted photos, pictures, and images from VSCO, VSCOcam, and the VSCO library.