Fixed: System Image Restore Failed, Windows Cannot Restore a System Image in Windows 10/8/7
If you're getting an error message when trying to restore a system image to a computer, this is a common issue. The error message "Windows cannot restore a system image to a computer that has different firmware" typically occurs when the system image was created on a computer with one type of firmware (EFI/BIOS) and you're trying to restore it to a computer with a different type of firmware (BIOS/EFI).
System image restore failed? On this page, we'll explain why system image restore failed and provide a step-by-step guide on how to fix this error and successfully restore the system image to a target computer.
Applies to: To fix the "System image restore failed. Windows cannot restore a system image to a computer that has different firmware" error in Windows, you can try creating a new system image with the correct firmware version, or use a different method to restore the system, such as using a USB drive or a CD/DVD. You can also try using a third-party tool to create a system image, or use a different version of Windows to create the system image. If none of these methods work, you may need to reinstall Windows.
Overview of System Image Restore Failed Error
In this part, you'll learn:
- 1. What is system image recovery
- 2. System image restore may fail due to various reasons, including corrupted system files, incorrect BIOS settings, or issues with the system image itself. Other causes of the "Windows cannot restore a system image" error include insufficient disk space, incompatible hardware, or problems with the Windows Recovery Environment.
- 3. When a system image cannot be restored to a different computer, the issue may be due to hardware or software incompatibilities. To resolve this, try updating the BIOS or UEFI firmware on the target computer to match the version of the original system.
System Image Recovery is a process of restoring a Windows computer to a previous state using a system backup image. This process can be used to restore a Windows 7 system image to a different computer.
System restore failed on your new PC due to two basic reasons. Firstly, system restore may fail if the system files are corrupted or missing, which can prevent the restore process from completing successfully. Secondly, system restore may also fail if there are any issues with the system restore points that were created, such as if they are corrupted or incomplete, which can prevent the restore process from working properly.
- #1. System Restore did not complete successfully.
- #2. System Image Restore failed because of EFI/BIOS error.
You're experiencing two separate issues with your computer. The first issue is related to system files and settings, while the second issue is more complex and likely caused by the first one.
- The system image was created on a computer using BIOS, but the target computer is using EFI, which is a different firmware interface. This incompatibility may cause issues when trying to boot the system image on the target computer.
- The system image was created on a computer using EFI, which is different from the current PC that uses BIOS. This discrepancy could be the reason for the issue.
- The source system disk is MBR, the target disk is GPT, or the source disk is GPT, while the target disk is MBR. In this case, the system will not be able to boot normally.
Fix 'System Image Restore Failed. Windows Can't Restore System Image' Error
If you're experiencing a system image restore failure due to an EFI/BIOS error, you're not alone. Many users have encountered this issue, but there are some troubleshooting methods that can help you fix the problem with ease.
- #1. Use System Restore Alternative Tool - Easiest
- #2. Perform System Restore via Windows Installation Media
- #2. Configure Boot Mode in New PC
- #3. Convert Target Disk to the Same Partition Style as Source Disk: MBR - MBR; GPT - GPT
Note If you're a Windows beginner, Method 1 is the best way to create and restore a system image to a different computer efficiently. If you're familiar with Windows and looking for a free method, you can try Method 2, 3, or 4.
Method 1. Use System Restore Alternative to Restore System Image to A Different Drive/PC
Best for: All levels of Windows users.
Difficulty Level: The easiest way to fix system image restore fails because of EFI/BIOS error.
Applies to: To fix the "System Restore failed" or "Windows cannot restore a system image to a different computer" error on Windows 10/8/7, try running the System File Checker tool (SFC) to scan and replace any corrupted system files. If that doesn't work, try using the DISM tool to repair any corrupted system components.
Windows users often struggle to restore system images to different hardware, but specialized backup software can overcome this limitation, making it possible to transfer the image to a new computer with different firmware.
Qiling Backup allows Windows users to easily restore system images to a dissimilar hard drive or computer, making it a user-friendly solution for all levels of users.
The tool allows you to migrate a system image created on a BIOS-based computer (MBR disk) to a UEFI computer (GPT disk) and vice versa, enabling the restoration of system images between different types of systems.
- Notice:
- To restore a system image from a GPT disk to an MBR disk without encountering boot issues, ensure that the system supports UEFI boot mode. This allows for a seamless transition between the two disk types.
Tutorial: Restore a System Image to a Computer with Different Firmware
Step 1. Create an Emergency Disk to USB
1. Connect an empty USB flash drive or external hard drive (with over 100GB space) to your PC.
Note: Initialize the USB or external hard drive as MBR, and create two partitions: set the first partition as FAT32 and the second partition as NTFS.
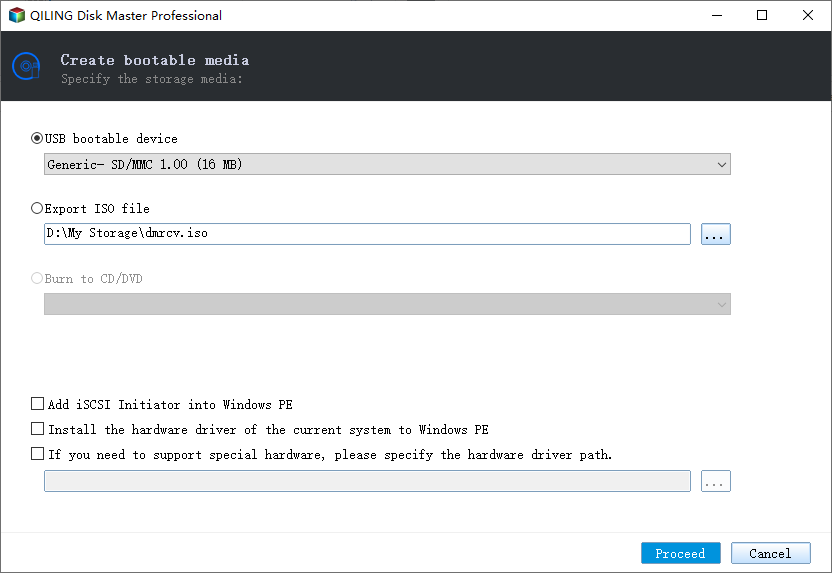
2. Run Qiling Backup and click "Tools" > "Create Bootable Disk".
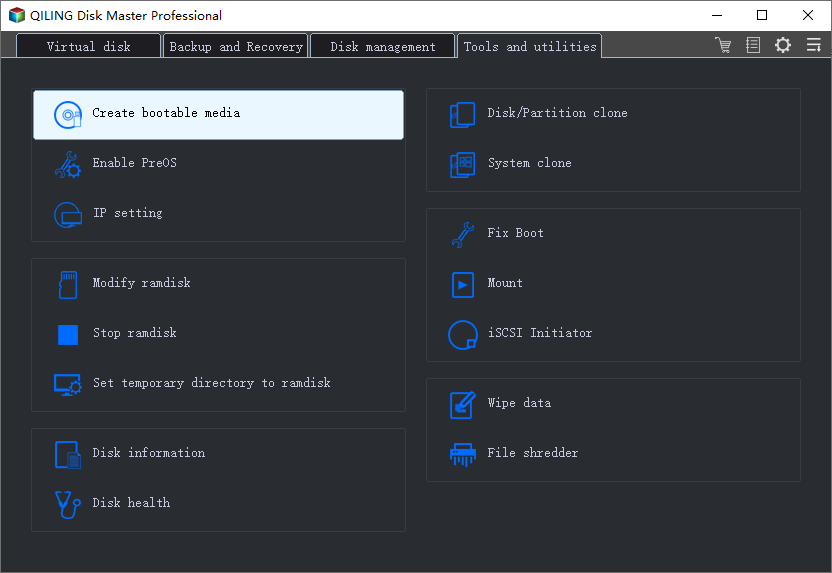
3. Choose USB as the disk location to create the emergency disk and click "Proceed".
The bootable disk allows you to boot a computer and transfer a system image to a new PC.
Step 2. Create System Backup Image on Source Computer
1. To create a system backup, click on "System backup" on the "Backup and recovery" page, where Windows OS is selected by default.
2. To save a system image, choose the second partition of the USB drive which contains the emergency disk.
You can save the system backup image to another empty external disk that is equal to or larger than the size of the system C drive.

3. The system backup image will be created to the target device, which will allow you to restore your system and all its settings to this device in case of a system failure or other issues.
Step 3. Boot Target Computer from Qiling Backup Emergency Disk
1. Eject Qiling emergency disk and system backup image USB and connect it to the new computer.
2. Restart PC and press "DEL/F2/F10/F12" to boot into BIOS.
3. To resolve the issue, go to the boot menu and set the computer to boot from the Qiling Backup emergency disk.
If you want to restore the system image to a GPT disk, you'll need to switch the boot mode to EUFI in the BIOS, which will allow your computer to enter the Qiling Backup main interface.
Step 4. Transfer System to the New Computer
Note: When restoring a system image to a new computer, the process will erase the data on the target disk. To avoid data loss, it's essential to back up any important files beforehand or use an empty disk for the system image restore. This precaution ensures that your data remains safe during the restoration process.
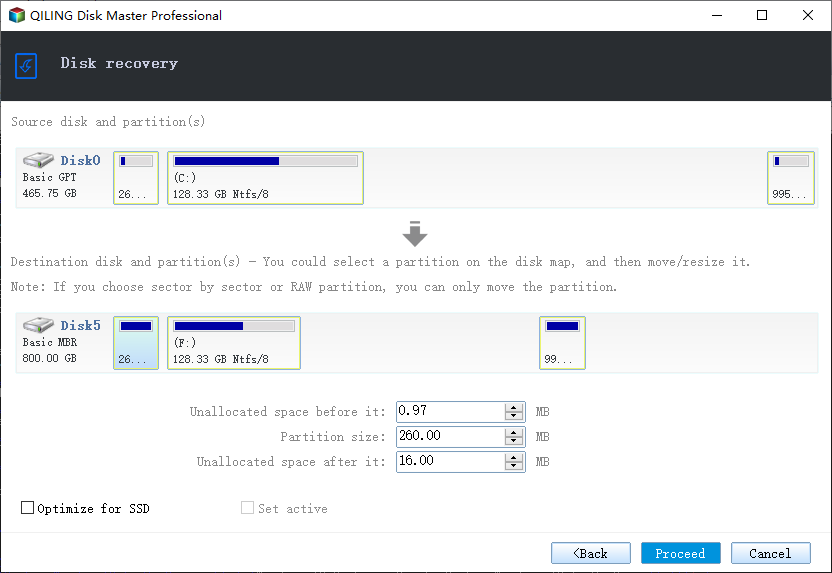
1. On the main Qiling Backup interface, click "Browse for Recovery" under the "Backup and recovery" page.

2. Select the system image on your USB external drive and click "OK" to continue.

3. Then click "Proceed" to start transferring the system to a new computer.
Step 5. Restart PC with transferred system
1. Enter the BIOS and set the computer to boot up from the drive with the transferred system, allowing the computer to recognize and load the new operating system.
2. Save all changes and restart your computer.
3. To ensure a smooth transition to the new computer, update all drive drivers and programs to their latest versions. This will guarantee that everything works properly and efficiently on the new device.
Once you've completed the steps, your new computer should be able to boot up with the transferred operating system, allowing you to start using it.
Method 2. Perform System Restore on New Computer via Windows Installation Media (By Microsoft Forum)
Best for: Experienced Windows users, Windows 7 users recommended.
Difficulty Level: Medium, complex for Windows beginners.
Applies to: To fix the "Windows cannot restore a system image to a different computer" error with Windows installation media, you can follow these steps: Insert the Windows installation media (CD, DVD, or USB) into the computer. Restart the computer and boot from the installation media.
Important: Make sure to create a backup of important data on the target disk before the process to avoid file loss on the new PC.
If you are a Windows 10 or Windows 8 user, the steps to restore a system image to a new computer via Windows installation media may be a bit different. This method is highly praised by many Windows 7 users in the Microsoft forum, follow to have a try:
Insert the external hard drive or USB drive that contains your system backup image into the target PC to restore the system.
Step 1. On the target PC, restart the PC and press F2/F11/Del to enter BIOS.
Step 2. To enable UEFI as the Boot mode, go to the boot menu and select UEFI as the Boot mode. This will allow you to boot from a UEFI-compatible device.
Step 3. To install Windows on a target PC, insert the Windows installation media (such as a USB drive or CD/DVD) into the PC and set the PC to restart from the media. This will allow the PC to boot from the installation media and initiate the Windows installation process.
Step 4. Enter the "Install Now" window, select "I don't have a product key", select the operating system and click "Next".
Step 5. Check "I accept the license terms" and click "Next".
Step 6. Select "Custom", then select the original disk and click "Delete".
Step 7. Select the target disk again and click "New" and "Apply".
Step 8. Then click "X" to close the window.
Step 9. To repair your computer, re-enter the Install Windows window, click "Repair your computer", select "Troubleshoot" and click "System Image Recovery".
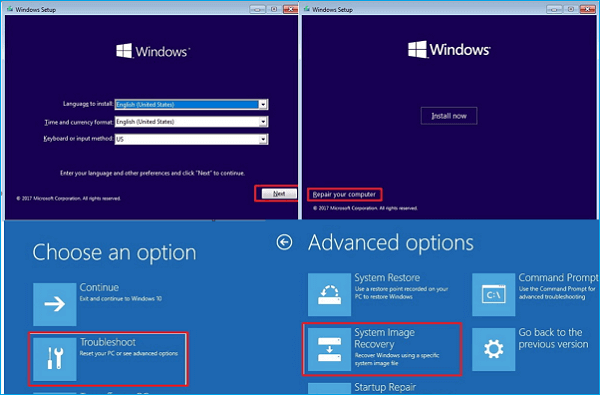
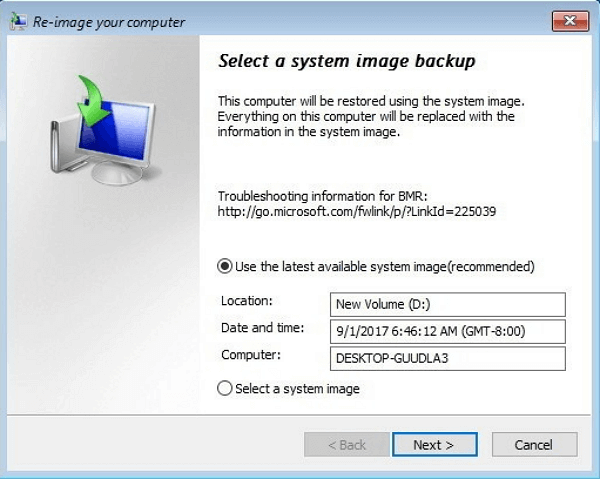
Step 10. Check "Select a system image" and click "Next".
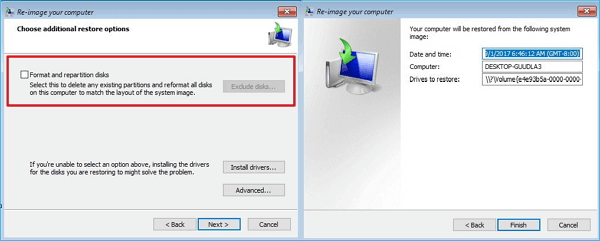
Step 11. Check "Format and repartition disks", click "Next" and "Finish", then click "Yes" to proceed.
To restore a system image to a computer with different firmware, wait for Windows to complete the process. Once it's done, simply reboot the computer, and you'll be able to use your OS on the new computer again.
Note If the process doesn't work on your computer, you're having some issues with the BIOS boot mode or the target disk partition style. To resolve this, check and follow the next two methods: one for BIOS boot mode issues and another for target disk partition style issues.
Method 3. Configure Boot Mode in New PC
Best for: Advanced Windows users.
Difficulty Level: Configuring a computer's boot mode can be a challenging task for ordinary Windows users.
Applies to: Fix "System Restore failed because of EIF/BIOS" error on Windows 10/8/7.
When you try to restore a system from a UEFI-based computer to a BIOS Legacy computer, or vice versa, Windows won't allow it due to the different boot modes used by the source and destination computers in their BIOS settings.
To resolve the issue, ensure that both the source and destination computer are using the same mode, which is likely IPv4. This can be done by checking the network settings on both computers and making sure they are set to use IPv4 instead of IPv6.
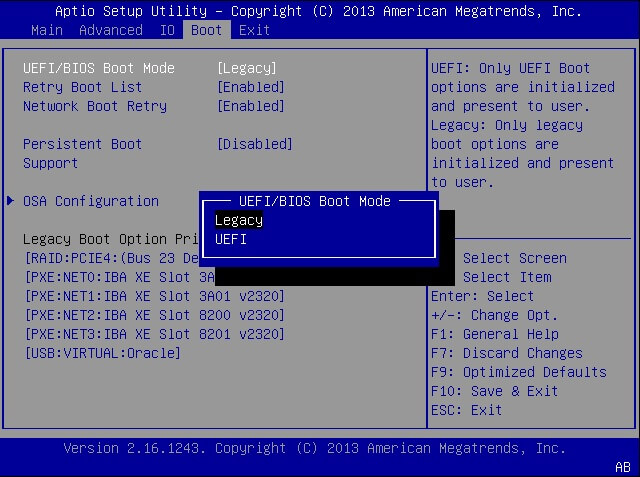
- If the backup was created on a computer using BIOS, you'll need to change the boot mode to Legacy to restore it.
- If the backup was created on a UEFI computer, enable UEFI boot mode to restore the backup.
To configure the firmware boot mode, follow these steps:
Step 1. Check boot mode on the source computer:
To restart the source computer, press the power button. Then, enter the BIOS by pressing F2/F11/F12/Del.
Step 2. On the target computer, restart it and enter the BIOS settings as described in Step 1, and then proceed with the setup and configuration as needed.
Step 3. To ensure a successful migration, go to the Boot Menu on the target PC and select the Boot Mode to match the source PC, i.e.
Step 4. Save the changes and restart the PC.
After this, you may continue to perform system image recovery and restore a system image created on your old PC to the new computer.
Method 4. Convert Target Disk to the Same Partition Style as Source Disk
Best for: Advanced Windows users.
Difficulty Level: Hardcore Windows users should be very careful while following this tutorial or consulting the manufacturer for help. Ordinary Windows users should exercise caution.
Applies to: To fix the issue "Windows cannot restore a system image to a computer that has different firmware" on Windows 10/8/7, you need to ensure that the firmware (BIOS) on the target computer is the same as the one on the source computer from which the system image was created. If the firmware is different, you can try to update the firmware on the target computer to match the source computer's firmware.
If Windows system restores still doesn't work after configuring the boot mode on your target PC, check the disk partition styles on both computers as well.
To fix the system image restore failure error, ensure that the source and destination disk partitions are the same type, as BIOS Legacy mode typically requires a Master Boot Record (MBR) disk, while UEFI mode requires a GUID Partition Table (GPT) disk.
- MBR - MBR
- GPT - GPT
To convert GPT to MBR or MBR to GPT, consider using a reliable partition manager software like Qiling Partition Master. The steps involve: downloading and installing the software, running it to select the disk you want to convert, choosing the conversion option (GPT to MBR or MBR to GPT), and following the prompts to complete the process. This will ensure a smooth and safe conversion process.
Step 1. Download and launch Qiling Partition Master on your Windows computer.
Step 2. Right-click the MBR disk that you want to convert, click the "More..." button and choose "MBR -> GPT".
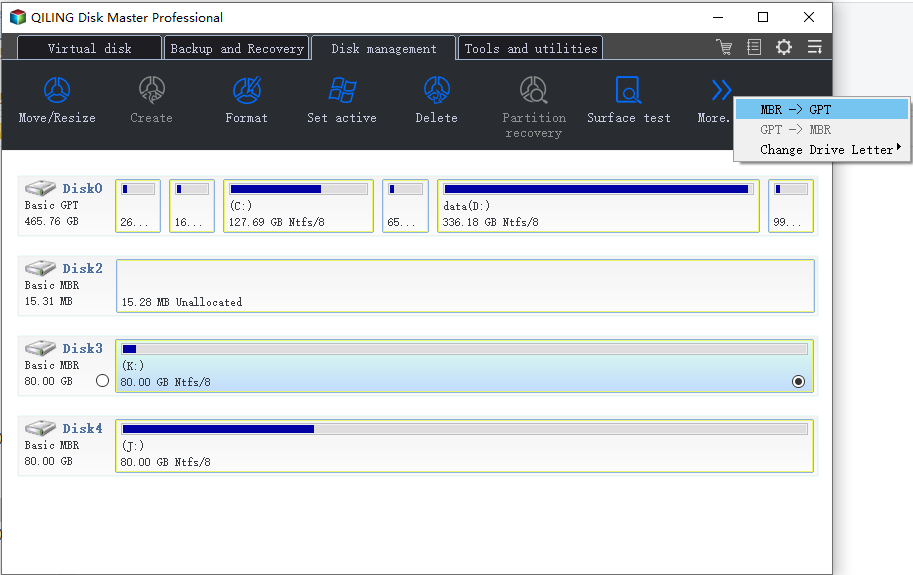
Step 3. After converting the MBR to GPT, the process will be completed once the conversion is finished.
If the source disk is GPT and the target disk is MBR, convert the target disk to GPT by right-clicking it and selecting "Convert to GPT".
After this, you can restart the PC and continue restoring the system image to your new disk or new computer again.
The Bottom Line
The system restore failed on your new computer, and we explored the reasons behind this failure, including the issue of different firmware, which can prevent a system image from being restored successfully. To resolve this issue, you can try fixing the problem with the firmware or using a different method to restore your system.
It's a good idea to back up important files on your target disk in the new PC, so you can avoid losing data if you need to restore a system image.
For most Windows beginners and average users, we suggest trying the system image backup and restore feature provided by Qiling Backup, which is easy and efficient in restoring a system image to a dissimilar hard drive or computer.
Many Windows 7 users highly praise Method 2, which doesn't require any software. If the boot mode and disk partition style on the new computer are different from the source PC, Method 3 and Method 4 can be helpful alternatives.
Related Articles
- Disk Cleanup Not Working Windows 10/8/7? Here Are the Free and Easy Fixes!
- [Too Slow!] How to Fix USB 3.0 Transfer Speed Pretty Slow
- Fix: Scanning and Repairing Drive Stuck at 0, 10, 100... in Windows 10
- 6 Solutions to Fix Unmountable Boot Volume Windows 10/8/7
- SanDisk Unveils 4TB Extreme Portable SSD V2 for Lightning-Fast On-The-Go Storage
If you would like to know about SanDisk 4TB Extreme Portable SSD V2 Review, this post will tell you all you need to know about SanDisk 4TB Extreme Portable SSD V2 with detailed information. - Ultimate Guide to Choosing the Right SD Card for Nintendo Switch
Are you using a Nintendo Switch and running out of space? You need to know what an SD Card for Switch is. Read this post to find the answer and also learn about the best SD Card for Switch.