What Is File Compression and How Does File Compression Work
File compression is a crucial solution for many people, particularly with the rise of high-tech video qualities like 4K and 8K. The large file sizes that come with these resolutions can be a challenge, especially for devices with limited storage like mobile phones. By compressing files without compromising their quality, users can fit more content into smaller storage spaces, making it easier to manage and access their files on the go.
Part 1: What Is File Compression
File compression is the process of reducing the size of data files to save storage space, achieved through various software types that utilize different compression techniques, such as backup programs, file management utilities, media apps, and operating systems.
File compression works by reducing the size of a file or folder, typically by 50% of the original size total, depending on the source file type and algorithms used. This process is useful for media backups, software distribution, and archiving applications.
Part 2: What Are The Types of Compressed Files
The two most common benchmarks for file compression are ZIP and RAR, which are standard formats for compressing files.
· ZIP file- The .zip file extension is a widely used format for archiving multiple files and folders, compatible with both Windows and Apple operating systems, introduced in 1989. It allows users to keep one or multiple directories and files within each ZIP file, and can be easily exported using various software.
· EXE archiveThe EXE file extension is used for executable files, and installers often handle these files, such as install.exe and setup.exe. However, the actual files within these EXE files have different names, and some EXE files are self-extracting, instantly extracting to specific folders after being unzipped from a compressed file.
Part 3: How Does File Compression Work
File compression reduces file size by representing data in a more compact form, allowing for faster data transfer and storage, without altering the original data. The file extension, typically a three-letter code (e.g.
File compression is essential as it improves storage space, allowing users to store more files on a device without taking up too much physical space. This is achieved by reducing the size of files, making them more compact and easier to store.
The process of compression works with a specific algorithm, a mathematical formula that helps with electronic data compression and decompression. To understand the theory, it's essential to consider the two main techniques related to file compression.
· Lossy file compression:
File compression, particularly in the lossy technique, works by removing unnecessary data from audio, image, and video files, resulting in a reduced file size. This process, commonly used in formats like JPEG and MP3, deletes extra information, making the compressed file differ from the original.
· Lossless file compression:
This file compression method ensures that the decompressed file will have the same size as the source file, preserving all data during compression and decompression, allowing for efficient extraction of original files with the same quality and size as before.
Lossless compression efficiently keeps the original file information without redundancy, and is used in file formats such as ZIP, PLAC, and PNG, as well as for saving video files.
Part 4: Benefits of Compression
Here are the advantages of file and folder compression in one paragraph:
· Users can expect a faster data transmission speed.
· You can remove excess elements from storage space and leave room for adding more app data/files.
· The file integrity and backup storage are at optimal levels.
· Keep the data in files safer.
· Share the files easily via email addresses.
· This is a cost-You can save money by not having to invest in multiple extra storage spaces since you can keep your belongings organized and within reach with a well-planned storage solution.
Part 5: Disadvantages of Compression
Here are the main factors that file compression lacks as a solution:
· The decompression process requires higher RAM processing power, which can slow down the PC as it may pause.
· When you compress a file, it can sometimes become smaller in size, but when you decompress it, its size can increase due to the decompression process itself. This is because the compression algorithm may have introduced additional metadata or overhead during the compression process, which is then included in the decompressed file.
· Compressing and decompressing large file sizes can be a time-consuming process.
· The best anti-Virus software can fail to detect malware within compressed files, allowing malicious code to go undetected and potentially infect systems.
Part 6: How to Compress Files
For Windows users, the simplest method to safely and efficiently compress files is to go through File Explorer and directly compress the files.
Step 1: To open File Explorer on your Windows PC, you can either double-click on the File Explorer icon in the Start menu or press the Windows key + E on your keyboard.
Step 2: Open the folder where the files are saved on your computer or external hard drive.
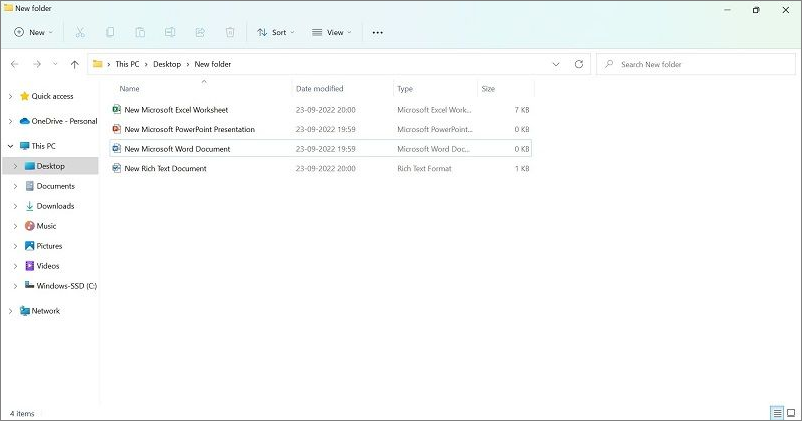
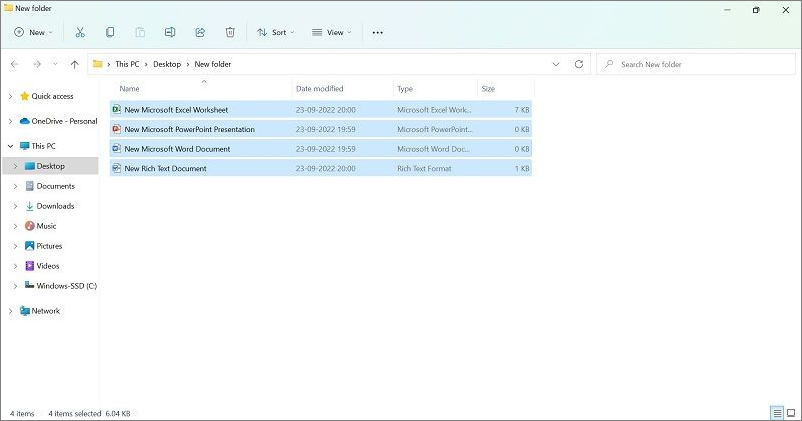
Step 3: To compress files, select them by pressing Ctrl + A on the keyboard, which will choose all the files in the current directory. This will allow you to proceed with the compression process.
To compress files in different locations, press and hold the left-hand mouse button and drag the cursor over the files you want to select, then release the button to open the context menu and choose the compress option.
The selected files will get highlighted in blue.
Step 4: After selecting the file, right-click on it and select "Send to" followed by "Compressed (zipped) folder" from the drop-down menu.
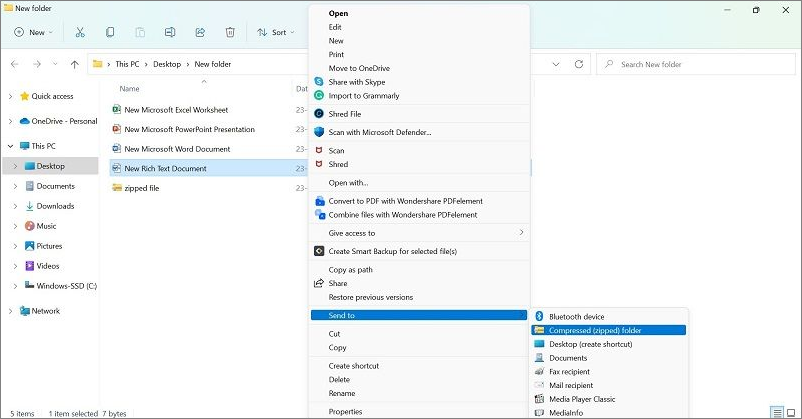
On modern Windows devices, you can directly choose the "Compress to zip file" option from the drop-down menu, which allows for quick and easy compression of files into a zip file.
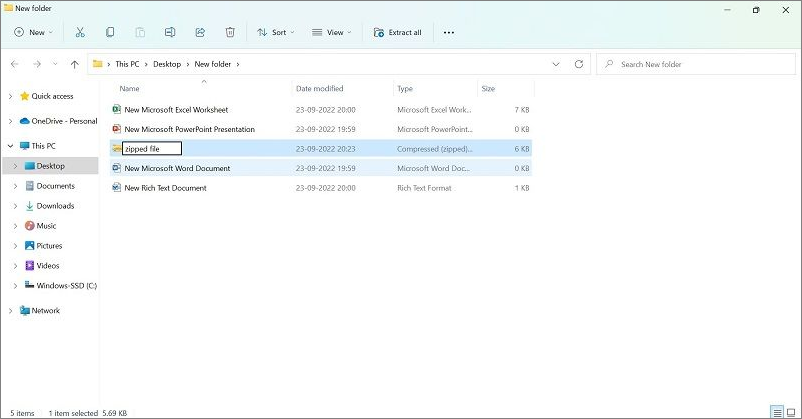
Step 5: After compressing a file, a folder with a zipper mark will appear, containing the compressed file. The name of the compressed file is saved as the last file in the folder, and can be renamed by right-clicking on it.
Part 7: Unzip A File
After learning about file compression and its steps, the next point of concern is unzipping the said file. The decompression process works similarly to the previous method through File Explorer.
Step 1: Open the Windows File Explorer by clicking the Win and E keys, then navigate to the location of your zipped folder.
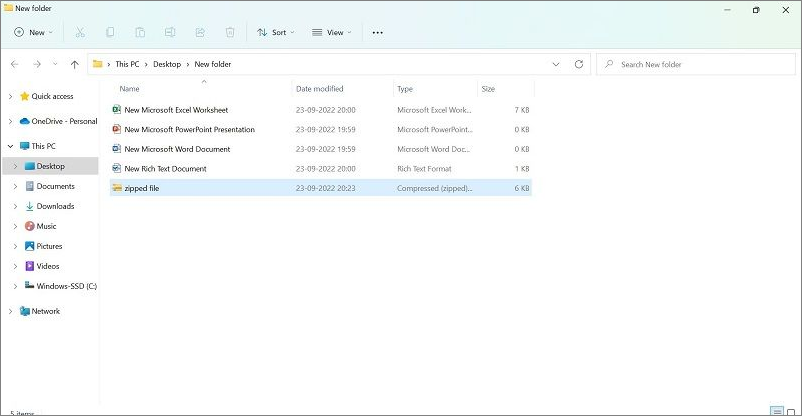
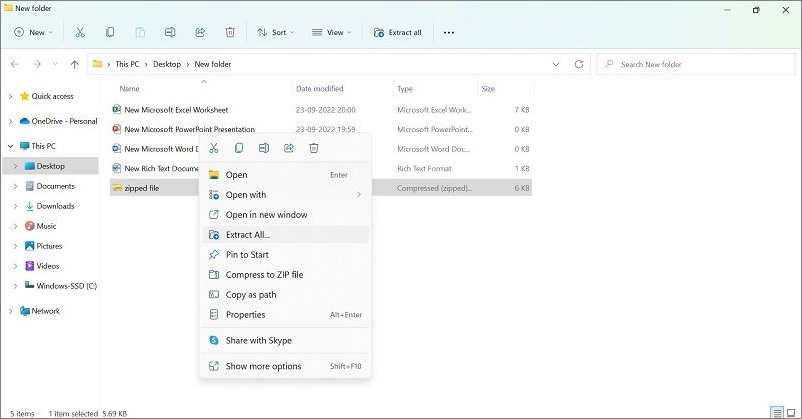
Step 2: Right-click on the top of the zipped file, then select the "Extract All" option from the menu.
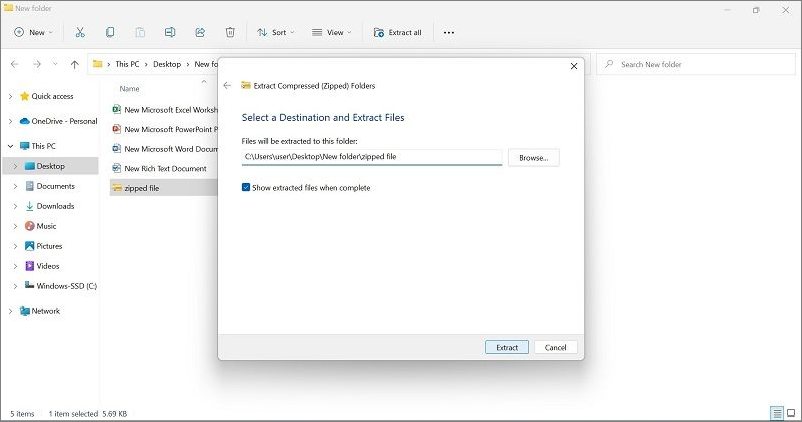
Step 3: Make your choice for the destination folder for the extracted files and click on the Extract button.
Step 4: If you only need to unzip one folder or file, you can simply double-click on the folder to open it, then copy the file or drag it to your desired location.
Part 8: Create Self Extracting Zip File
To create a self-extracting archive or zip file without an installer, you can prepare a .exe file extension that, when run, extracts the archive or zip file. This can be done using tools like 7-Zip or WinRAR, which allow you to create self-extracting archives with a .exe extension.
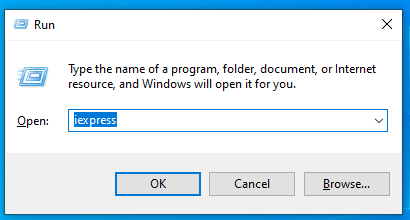
Step 1: To open the Run dialog box, press the Windows key + R keys simultaneously on your keyboard. This will immediately open the Run dialog box, allowing you to quickly access various system functions and utilities.
Step 2: iExpress is a free text editor for Windows, macOS, and Linux. It was created by Igor Moyseyenok and released in 2010. The software is designed to be a simple and lightweight alternative to more complex text editors like Notepad++.
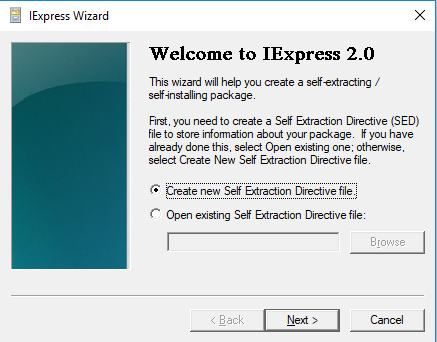
Step 3: In the next window, choose the "Create a new self-extraction directive file" option, then click on Extract files only.
Step 5: Continue pressing the Next button as the wizard shows the following commands for creating an archive. This will create a .exe file. The wizard will show you the path where the .
Part 9: Create A Multi-Volume Self-Extracting Archive
For Windows users, creating a self-extracting archive with multiple files involves similar steps as creating a single self-extracting archive. Users can create the same compressed file type with multiple files, following a straightforward process.
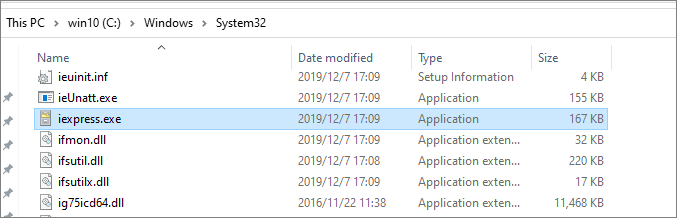
Step 1: You need to open the System32 program on your PC and click on the "iexpress" folder.
To create a shortcut of a file to your desktop or home screen, follow these steps: Right-click on the file and select "Create shortcut" or "Make shortcut" from the context menu. Alternatively, you can also press the keyboard shortcut Ctrl+D (Windows) or Command+D (Mac) while the file is selected.
Step 2: Go to the "iexpress" folder and select the "Create new Self-Extraction Directive file" option.
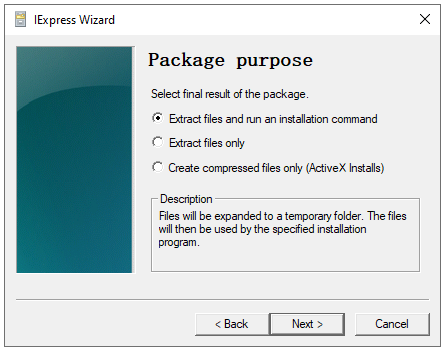
Step 3: On the next window, select the "Extract files only" option and click Next.
Step 4: To install a package in Python, you can use pip, the package installer for Python. First, choose the package you want to install from a repository or a local file. Then, click on the package and select the "Prompt use with:" option.
Are you sure you want to extract these files?
Step 5: The command "Press Do not display a license > Select files > Default" seems to be related to a software or application installation process. It appears to be a series of steps to follow in order to complete the installation.
Step 6: To confirm that the files have been successfully extracted, you can select the "Display Message" option and type in "Your files have been successfully extracted."
Step 7: Choose the saving location and press the "Save Self Directive (SED) file" button if you plan to add more files, or press the "Don't Save" button if you're done.
Step 8: Press Next > Finish. 9 More Images
Part 10: Convert Compression File format
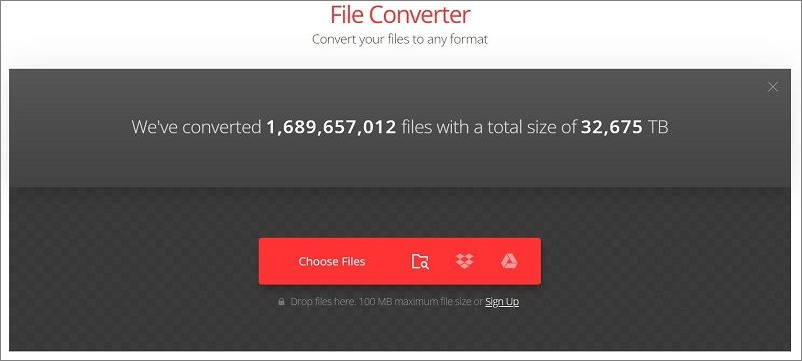
You can convert the compression file format within Windows by using the right steps. To do this, you can use the WinZip tool for a quicker conversion or an online converter tool like Convertio. First, choose the compressed file folder you want to convert as the source file (ZIP) and select the other as the destination file type. This will allow you to convert the file format, making it easier to work with.
Step 1: Open Convertio on your preferred browser.
Step 2: To add a file, press the "Choose Files" option and select the file from your device.
Step 3: To change the file type of the compressed file, click on the three-dot icon that appears after the file loads on the converter. Then, select the other compression file type from the dropdown menu. This will convert the file to the new type.
![]()
Step 4: Then press the Convert button.
Conclusion
Compressing files and folders on your desktop can save storage space and facilitate quick transfers. You can create a zip file using File Explorer, which can be easily unzipped at any time. Alternatively, you can also create a self-extracting archive like an EXE file, following the steps mentioned. This allows for easy compression and decompression of files.
Related Articles
- Network Switch vs. Router: What's the Difference
- Does Wireless Network Switch Exist? Find the Answer
- What is AMD CPU fTPM? Everything You Need to Know
- New Windows 11 Known Issues Keep Coming | How to Fix Known Issues in Windows 11
- Accidentally Formatted Hard Drive? Unformat Hard Drive Right Now!
How to unformat a hard drive or HDD? A solution to unformat hard disk drive provided by Qiling will help you recover lost data from an accidentally formatted hard drive disk. - How to View Saved Passwords Chrome by 3 Easy Fixes
Do you have a problem remembering your login details? This article reveals how to view your saved passwords on Chrome with any of your devices using two alternative methods.