How to Stop Word From Creating Backup Files | Quick Solutions
Enabling automatic backup in Microsoft Word creates a copy of the most recently saved version, protecting against lost or corrupted files, and also preventing data loss scenarios such as accidental deletion or file transfer loss.
Several people have asked how to disable Word from creating backup files, despite the benefits of automatic backup files. They want to turn it off for some reason, which is not specified.
Why Do We Need to Stop Word Files from Backup
Many people still ask how to stop Word from creating backup files because of a common misconception about the purpose of these files. The backup files have a .wbk extension and are automatically created by Word to help you recover unsaved changes in case of a crash or power failure.
- Having multiple backups of every project or file you work on in the original folder can indeed make it more challenging to locate the specific file you're looking for, as the cluttered folder can obscure the target file. This can lead to wasted time searching through the backups to find the desired file, potentially causing frustration and inefficiency.
- The collaborative process of multiple users working on the same project can lead to clutter and disorganization, making it difficult to find specific documents. This is particularly true when files are constantly being updated and renamed, resulting in a proliferation of versions and backups.
- Having too many backups in the original folder can cause Microsoft Word to become stuck, stopped, or shut down abnormally.
To quickly find the document you need and save storage space, it's helpful to stop Microsoft Word from creating backup files. This can be achieved by following detailed solutions that ensure Word works appropriately and keeps your device organized.

How to Disable Word Always Creating Backup Files | Windows and Mac
If you want to stop Word from creating backup files, you can disable the automatic backup feature in Microsoft Word 2021, 2019, or 2016. To do this, follow the steps below.
Method 1: Using Word Options to Turn Automatic Backup Off
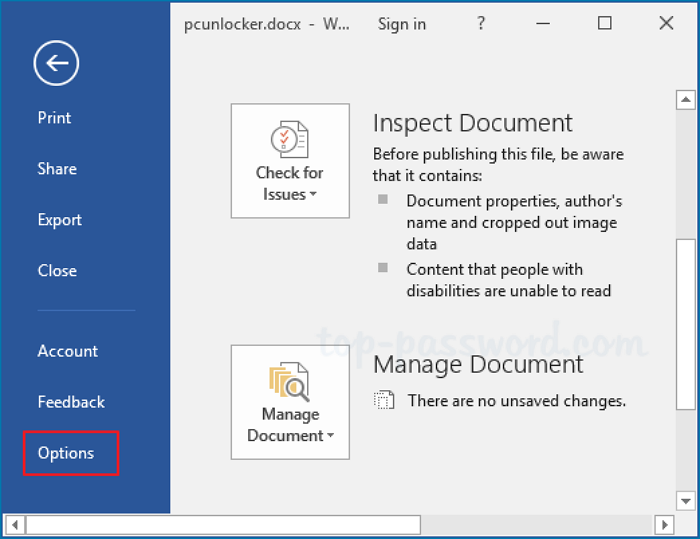
Step 1. Open your word, then click File. Next, click Options.
Step 2. To disable the creation of a backup copy, click Advanced, then uncheck Always create backup copy in the Save section, and finally click OK.
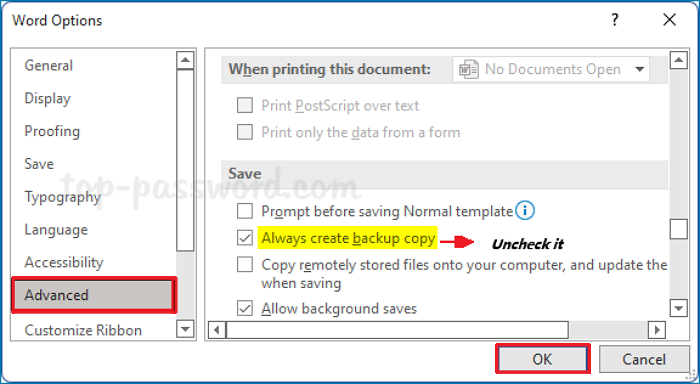
Once you have unchecked the option and clicked OK, Word will no longer create backup files every time you save your documents.
Method 2. Using Registry Editor to Stop From Word Creating Backup Files.
Step 1. Open Registry Editor by pressing Win + R, typing "regedit", and pressing Enter. Then navigate to the following path:
HKEY_CURRENT_USER\Software\Microsoft\Office\16.0\Word\Options

To access the Registry Editor, you can follow the steps shown in the accompanying video, which will guide you through the process of opening this powerful tool.
Step 2. Change the Value data from 1 to 0, then click OK.
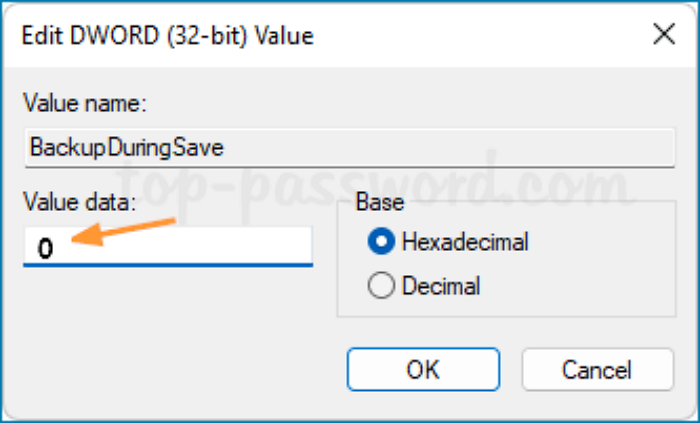
To make Word create automatic backup files again, change the value data back to 1 in the registry.
Step 3. To stop Microsoft Word from backing up all your Word files in the .wbk format, shut down Registry Editor and restart Microsoft Word, which will then stop this automatic backup feature.
Get expert advice on a tailored enterprise backup solution that meets your specific needs. Start a live chat with a Qiling expert to discuss your requirements and get assistance with your backup needs. We're here to help with any questions or concerns you may have.
- Commence a free trial
- Obtain a quotation
- Arrange a free demonstration
A Better Way to Protect Your Essential Word Files
While disabling Microsoft Word's auto-save feature can prevent backup files from cluttering your computer, it also means risking the loss of essential documents. A better approach is to use a professional backup and recovery software like Qiling Disk Master to protect your vital Word files.
This backup software allows you to back up files, disks, partitions, or create a system image in case of unexpected data loss. It offers three backup modes: Full, Differential, and Incremental, which cater to different needs, such as backing up important documents or avoiding clutter in your original files.
With Qiling Disk Master, you can schedule daily, weekly, or monthly backups of your Word files, and even automatically back up a folder to a network drive, saving you time and effort.
The followings are its functions and advantages of it.
Highlight Functions:
- Disk/Partition Backup and Recovery. You can use it to back up the partition or all the data in the partition/disk to get peace of mind when data is corrupted.
- System Backup and Recovery. To recover your system and back up your operating systems, boot partitions, and software files, use Qiling Disk Master for a quick, effective, and safe means.
- Files Backup and Recovery. For complete protection, backup your files in separate partitions on local disks or external storage devices.
- Multi-path, Cloud Storage Provided. The software provides a user-friendly interface for backing up data to multiple destinations, including cloud services, USB drives, and network-shared locations. It also offers cost-effective cloud backup options for those with limited budgets.
- Pros:
- Multiple functions to meet users' needs.
- Applicable to Windows 11/10/8/7
- Offsite Copy
- 100% Safe Zone Backup
Here is the essential step to creating a file backup.
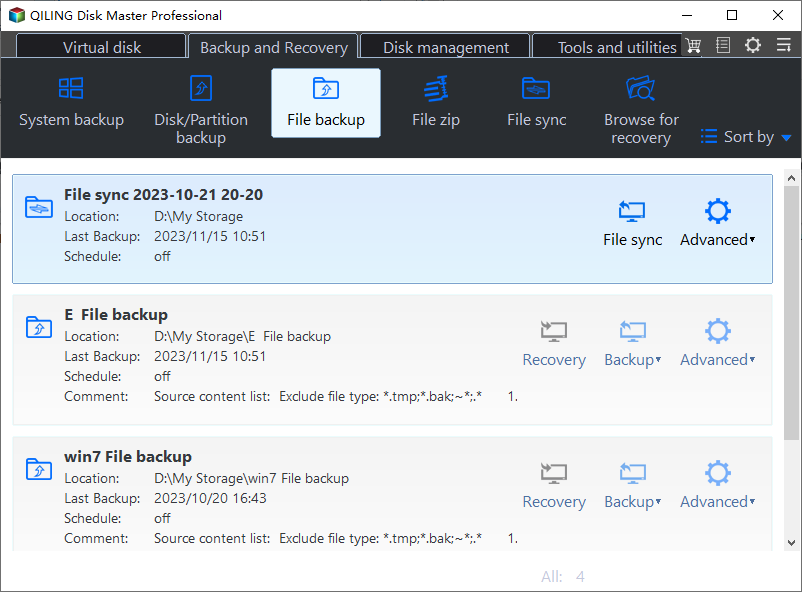
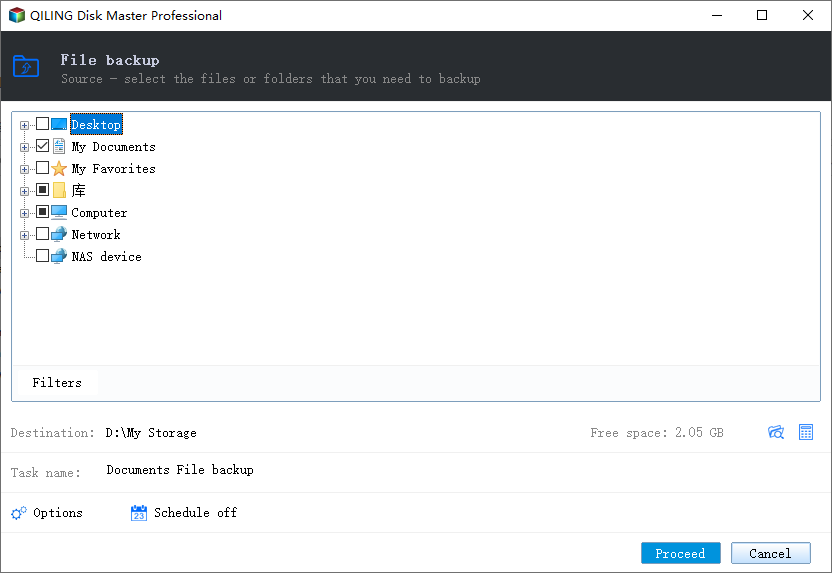
Step 1. When using Qiling Disk Master to back up files for the first time, navigate to the Backup tab page.

Step 2. To back up files and folders on your computer, go with the "File" backup mode, where you can select pictures, videos, documents and all other types of files to back up.
Step 3. To back up your files, folders, or directories, first locate them by following the paths, then select them all.
Step 4. You should choose a secure location to store your backup, such as an external hard drive or a cloud storage service like Google Drive or Dropbox, to ensure that your data is safe and accessible in case of a system failure or other disaster.
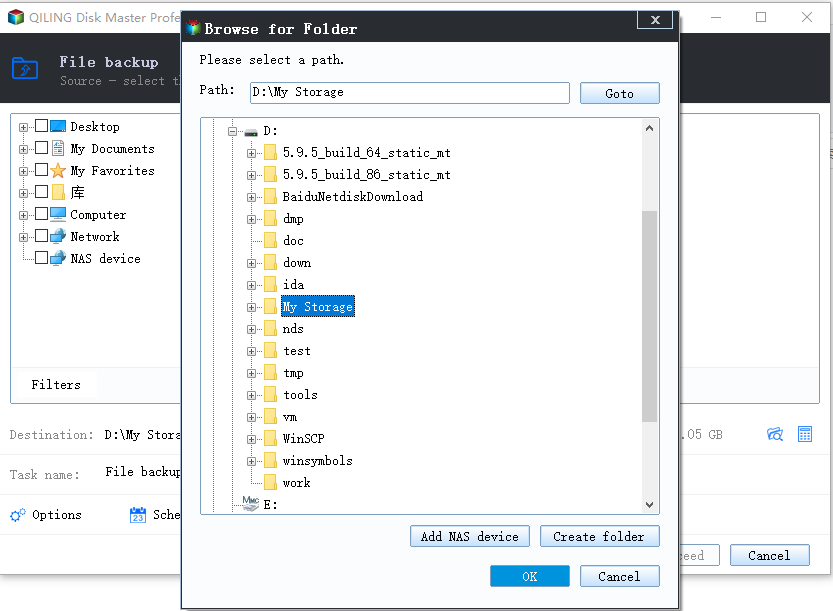
Step 5. Qiling Disk Master enables users to save backup files to various devices, including local hard drives, external USB drives, SD cards, network drives, NAS drives, and even cloud drives from Qiling. We recommend choosing a cloud drive over a physical drive for important backups, as it offers greater accessibility, flexibility, and safety.
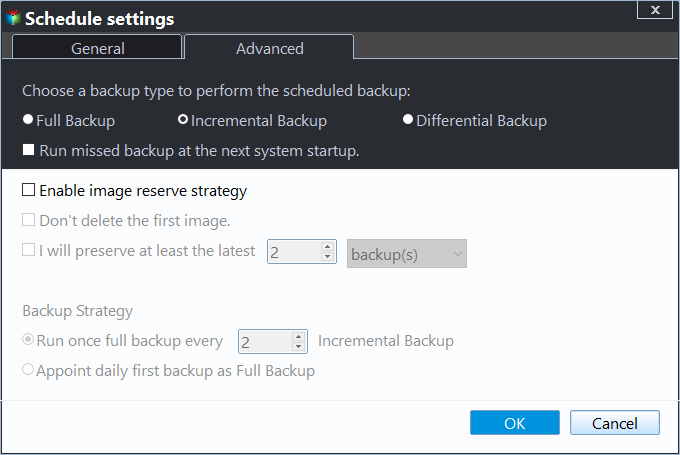
Step 6. If you're looking for an automatic and intelligent backup schedule for your next file backup task, navigate to the "Options" setting. There, you can encrypt confidential files, compress the backup image size, or customize a backup scheme to specify a start time for the next backup.
Customize an advanced and automatic backup task here:
Step 7. Click "Proceed" to start the file backup process, and your completed backup files will be displayed on the left in a card style.
The Bottom Line
To stop Word from creating backup files, follow the instructions in this passage. If you need to turn the feature back on, you'll also find a reference here. If you're concerned about losing important files when disabling this feature, consider using Qiling Disk Master, which offers various data backup and recovery functions to ensure your files are safe.
FAQ
1. What is a Microsoft Word backup document?
Microsoft Word, a widely used word processor for Windows and macOS, creates backup files called WBK files. These files serve as a safety net, allowing users to recover a document if it is accidentally deleted or becomes corrupted, and they contain a backup copy of a Word document, such as a DOCX or DOC file.
2. How do I find my backup files in Word?
By doing the following, you can reveal them:
Step 1. Start Word.
Step 2. Click Open after choosing File.
Step 3. To upload your file, click the "Browse" button and select the file you want to upload from your computer. Then, click the "Upload" button to upload the file to the server.
Step 4. Change The File Type should from All Word documents to All Files.
Step 5. The backup file ought to be accessible.
Step 6. Save the file after opening it.
Related Articles
- [Fixed] Windows 11 Virus Protection Keeps Turning Off
- How to Disable Windows Defender on Windows 11
- Top 5 Best Hard Drive Cloning Software of 2024
- What Is M.2 and NVMe? This Article Will Tell You the Differences
- How to Backup SD Card to Dropbox [PC & Android]🔥
Dropbox is a leading cloud storage service that allows users to save and backup their data. This article provides a convenient guide for users who want to backup their SD card data from Android and PC to Dropbox storage. - How to Backup Windows 10 to QNAP NAS (2 Simple Ways)👍
You can backup Windows 10 to QNAP NAS using two methods. This post will outline these methods for performing a Windows 10 System Backup to QNAP NAS.