How to Disable Windows Defender on Windows 11
Windows Defender, initially released as free anti-spyware software for Windows XP, is now an anti-virus component of Windows OS, merged into the Windows Security app and Powershell in Windows 10 and later, allowing users to access it directly from Settings, and has received security upgrades, including blocking vulnerable drivers in Windows 11.
The Cons of Windows Defender
Despite Windows Defender's growing aggressiveness in defending against viruses and malware, many users are still searching for ways to disable it, indicating that the software has not gained widespread favor among users. The reasons for this are unclear, but it's likely due to a combination of factors, with users possibly finding the software too intrusive or restrictive. Whatever the reasons, the fact remains that many people are looking for ways to turn off Windows Defender, suggesting that the software still has some significant limitations.
1. Conflict with Another Antivirus Software
Windows Defender is a decent antivirus option, but users often prefer third-party software, which may conflict with Windows Defender if not disabled, causing it to flag the new antivirus as a threat and vice versa.
2. Taking Too Much CPU Usage
Windows Defender's continuous monitoring and scanning can be a disadvantage, using up computer resources like CPU, disk space, and RAM. This is a common issue with many antivirus software, not just Windows Defender. If you have other computer protection methods, you can consider disabling Windows Defender to save your device's resources.
The main disadvantages of Windows Defender are that it can be resource-intensive and may interfere with other software, potentially causing system slowdowns and conflicts. Additionally, it might prevent the installation of certain software or cause error codes, although these are minor issues.
How to Disable Windows Defender on Windows 11
Here we will introduce two methods for you to disable Windows Defender on Windows 11. The first method can only temporarily suspend the Windows Defender, but it is an easier way. The second method might be a little complicated, but once applied, you can cease Windows Defender on your computer forever.
1. Temporarily Stop Windows Defender on Windows 11
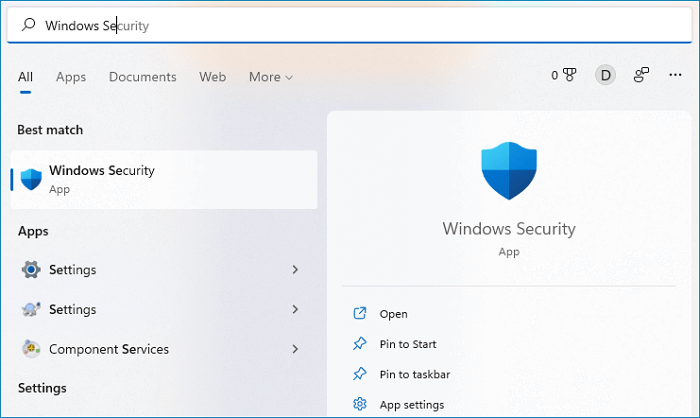
Step 1. Search Windows Security on Start and open the best match.
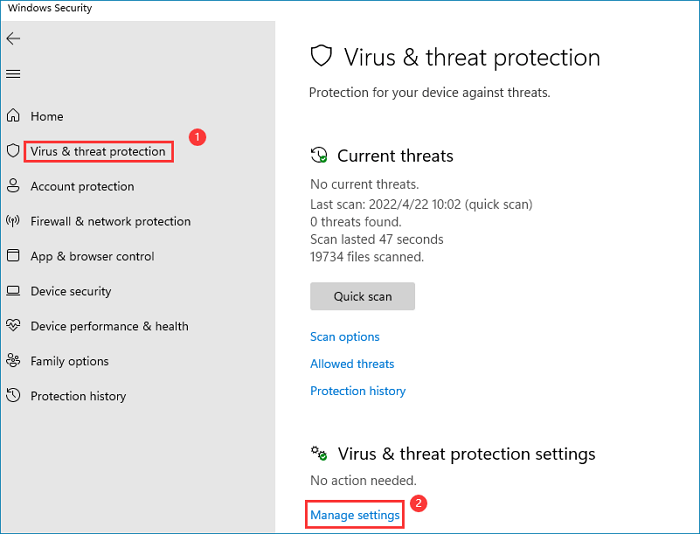
Step 2. In the Windows Security app, click the Virus & Threat protection tab.
Step 3. Under Virus & threat protection settings, click Manage settings.
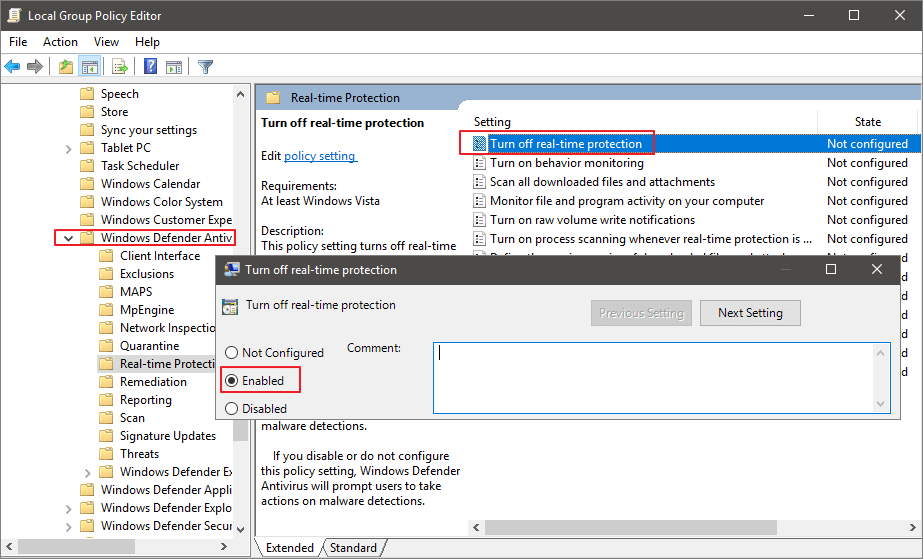
Step 4. To disable Windows Defender's real-time protection, toggle the Real-time protection switch to the "Off" position. This will temporarily disable the real-time scanning and monitoring capabilities of Windows Defender.
In Windows 11, turning off Windows Defender will automatically enable it again upon the next startup.
2. Permanently Disable Windows Defender on Windows 11
To disable Windows Defender permanently, take ownership of the Windows Defender service so you can completely disable it. This method allows you to turn off Windows Defender once and for all.
1. Boot into Safe Mode
Step 1. Press the Windows key + R key to open the Run dialog box, type "msconfig" and press Enter. This will open the System Configuration window, which allows you to manage various system settings, including startup programs, boot options, and services.
Step 2. Select the Boot tab, and tick the Safe boot under Boot options.
Step 3. Click OK and restart your computer, then your computer will boot into safe mode.

2. Run Windows Defender as Administrator
Step 1. Open File Explorer and navigate to this folder: C:\ProgramData\Microsoft\Windows Defender.
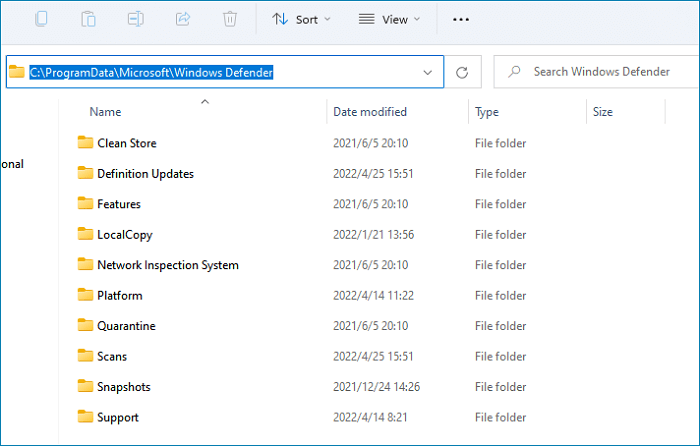
Step 2. Right-click the Platform folder, click Properties, switch to the Security tab, then click Advanced.
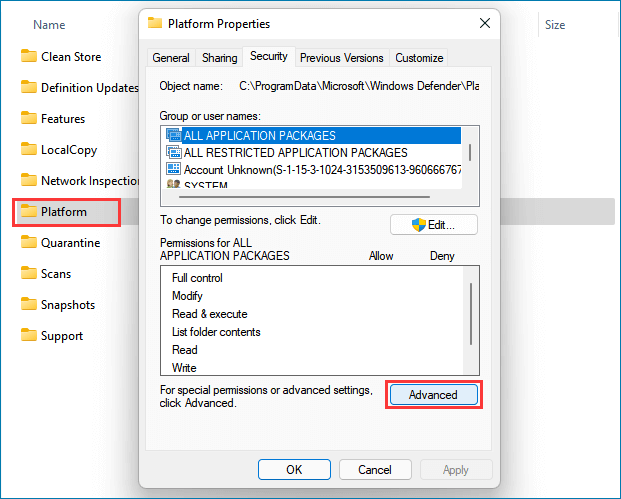
Step 3. Windows Defender is now owned by the SYSTEM user, which is the built-in system account that runs Windows Defender. This means that Windows Defender is now running with elevated privileges, which could potentially increase its effectiveness in detecting and removing malware.
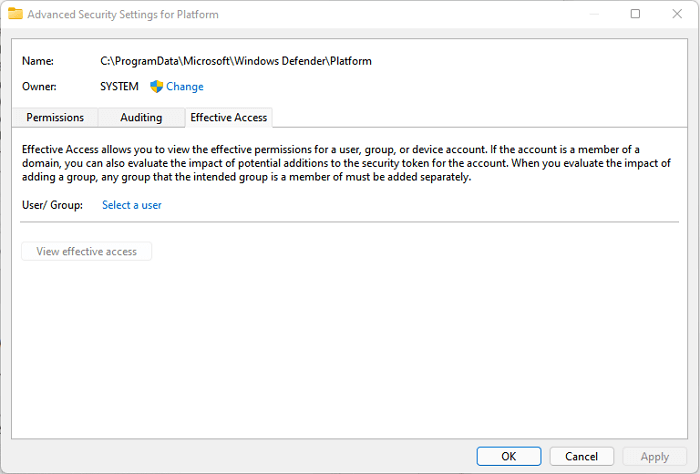
Step 4. Click the Effective Access tab, and click Select a user.
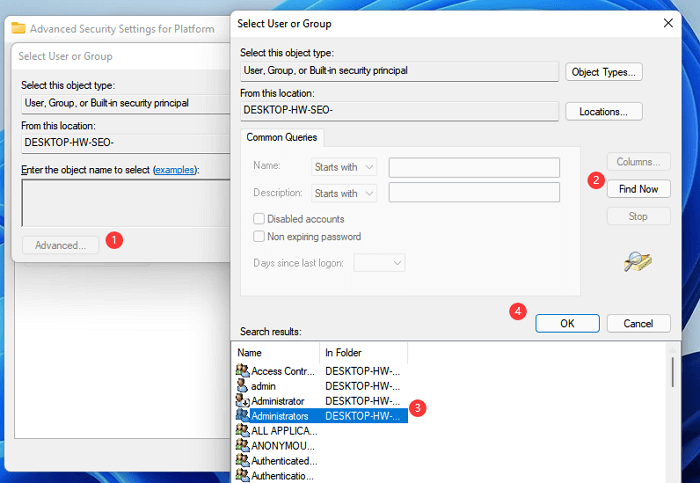
Step 5. To change who has access to the Find feature, go to Advanced > Find Now > Administrators, and click OK twice to confirm the change.
3. Remove Windows Defender Permissions
The owner of Windows Defender has been changed to Administrators, allowing the permission to be removed that previously allowed users to disable Windows Defender.
On the Advanced Security Settings for Platform window, select each permission entry, click Remove, and then tick the options to replace the owner and permissions on subcontainers and objects. This will ensure that all permissions are updated accordingly.
4. Disable Safe Boot and Restart
To permanently disable Windows Defender in Windows 11, follow the steps to enter msconfig, unselect the Safe boot option, and restart your computer. After restarting, you can reopen the Windows Security app, where you'll now see that there is no Virus & Threat Protection.
How to Protect Your Computer from Virus
After disabling Windows Defender on Windows 11, users may consider alternative ways to protect their computers from viruses. Two options are available: using third-party virus protection software for PC, or taking regular backups of important files to ensure data safety.
If you're unsure which antivirus software is best for you, this article can help you find a suitable one that meets your needs.
Expert Picks: Best Virus Protection for PC 2022
Protecting computer data is crucial, but how is often overlooked. Simply making a backup and using antivirus software is not enough - you need both. This article will focus on choosing the best antivirus software for your PC, providing you with the information you need to make an informed decision and keep your computer safe from viruses.

Qiling Backup is a reliable software that enables users to create regular backup plans, offering various backup options and a security zone to protect backup files from malware attacks. In addition to its powerful backup features, Qiling Backup also excels in cloning, allowing users to clone a single disk, partitions, or system without data loss. This makes it a valuable tool for users looking to protect their data and ensure business continuity.
If you prioritize your backup security, you can download Qiling Backup and give it a try.
Step 1.Launch Qiling Backup and choose "System Backup" on the Backup and recovery page.

Step 2. The system partition will be automatically selected, you only need to choose the location.

Step 3.You can save the backup file on your Local Drive, Cloud, or NAS, or even connect an external hard drive to store system backup files.

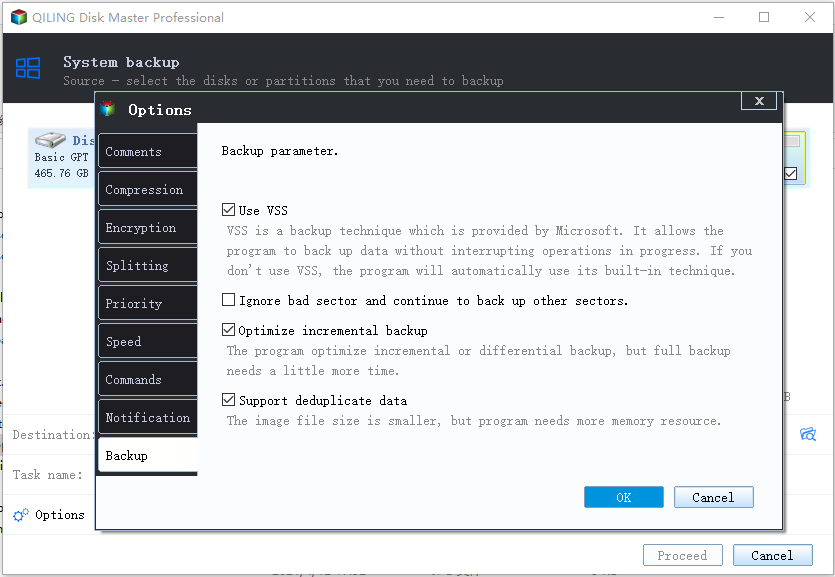
Step 4.To customize the settings, go to the "Options" section at the bottom left, make any desired changes, and then click "Proceed" to initiate the process.
The Bottom Line
To disable Windows Defender on Windows 11, you can follow detailed steps to temporarily or permanently stop it. Additionally, for data protection, consider using Qiling Backup, which offers a unique feature of creating a security zone.
Related Articles
- 5 Ways to Prevent Computer Virus: Elimate Your Fears and Doubts About Virus!
- Change Backup Location Windows 7: Manage Backup File & Space Saving
- Windows 11 Backup Options: Does it Serve your Purpose?
- Free Download PXE Boot Server to Boot Multiple Computers on Network
- Top 10 Backup Software for Windows Free Download [2022 Roundup Review]
What is backup software? And do you know what are the top 10 backup software in 2022 that you can fully trust and rely on for both personal and business users? This page covers a backup tools list for you to follow and pick the most suitable backup software to protect your personal or business data safely. - Toshiba External Hard Drive Backup Software for Windows 11/10/8/7
This guide provides information on two backup software options for backing up a Toshiba external hard drive. The software allows users to create a backup of their Toshiba external hard disk, providing a safe and secure way to protect their data.