How to Move/Clone Windows 10 Hard Drive to A New Computer Easily
PAGE CONTENT:
- Part 1. Why Do You Want to Clone/Move HDD to New Computer
- Part 2. Can You Move a Windows to New Computer
- Part 3. How to Clone/Move HDD to New PC
Part 1. Why Do You Want to Clone/Move HDD to New Computer
After a few years of heavy use, your computer may start to slow down, making it a good time to consider replacing it with a newer model. A real-life example from Cnet Forums illustrates this, where users were wondering if it's worth upgrading their old computer or buying a new one.
To move your old SSD to a new PC without reinstalling Windows 10 and apps, you can try cloning the SSD using software like Qiling Disk Master. This will create an exact copy of your old SSD on the new one, including Windows 10 and all your installed applications. Alternatively, you can also use a USB drive to transfer your Windows 10 license and settings to the new PC, and then use a tool like the Windows 10 Media Creation Tool to install Windows 10 on the new PC and transfer your settings and applications. However, keep in mind that this may not work if your new PC has a different hardware configuration. It's also worth noting that if you're upgrading to a new PC with a different hardware configuration, you may need to reinstall some of your applications or drivers.
Many people give up on reinstalling their operating system, programs, and personal data due to the tedious process. However, there's a perfect solution that allows you to keep the same system configuration, data, programs, and settings on a new computer by cloning your Windows 10 hard drive to the new machine.
Part 2. Can You Move a Windows to New Computer
Cloning or moving a data disk is relatively straightforward, but moving a Windows installation hard drive to another computer can be more complicated due to activation issues and device conflicts.
Windows 7 often introduced driver conflicts, particularly with lower-level hardware like SATA controllers, resulting in a blue screen that prevented system entry. In contrast, Windows 8 and 10 handle these conflicts more effectively. When upgrading an existing Windows installation to a new PC, it performs a first-time setup, grabs drivers for the new hardware, and hopefully resolves any issues. However, the outcome can vary from PC to PC, and underlying driver conflicts or performance issues may still exist, even with seemingly fine setups.
Windows activation can be a problem, especially with OEM licenses, as they're designed to be locked to the original hardware. Retail and volume licenses are more flexible, but even with them, changing a computer's motherboard or other internal hardware can deactivate Windows. However, re-entering the activation key can resolve this. If you have an OEM license and need to move it to another computer, you can ask Microsoft's support team to activate the license for you.
Part 3. How to Clone/Move HDD to New PC
Regardless of whether your computer is running Windows 7, 8, or 10, you can clone or move the HDD to a new computer. When cloning Windows 10 from one computer to another, compatibility and start-up issues are a concern, but using the "System Transfer" function in Qiling Backup can help avoid these problems. This tool allows you to clone Windows 10 from the old computer to the new one with a bootable disk, ensuring a successful system boot-up from the cloned hard drive on the new computer. To get started, simply prepare a proper WinPE emergency disk or USB and begin the cloning process by creating a Windows 10 system backup.
Step 1. Create an Emergency Disk to USB
1. Connect an empty USB flash drive or external hard drive with over 100GB of space to your PC.
To set up the USB or external hard drive, initialize it as MBR and create two partitions. The first partition should be set as FAT32, while the second partition should be set as NTFS.
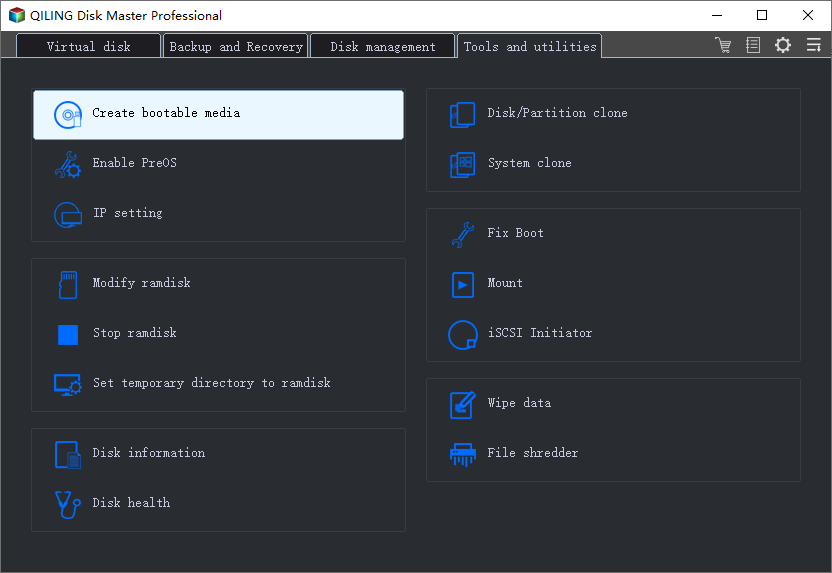
2. Download and Install Qiling Backup on the working computer. Then, click on "Tools" and select "Create bootable media" from the dropdown menu.
3. Choose USB as the disk location to create the emergency disk and click "Proceed".
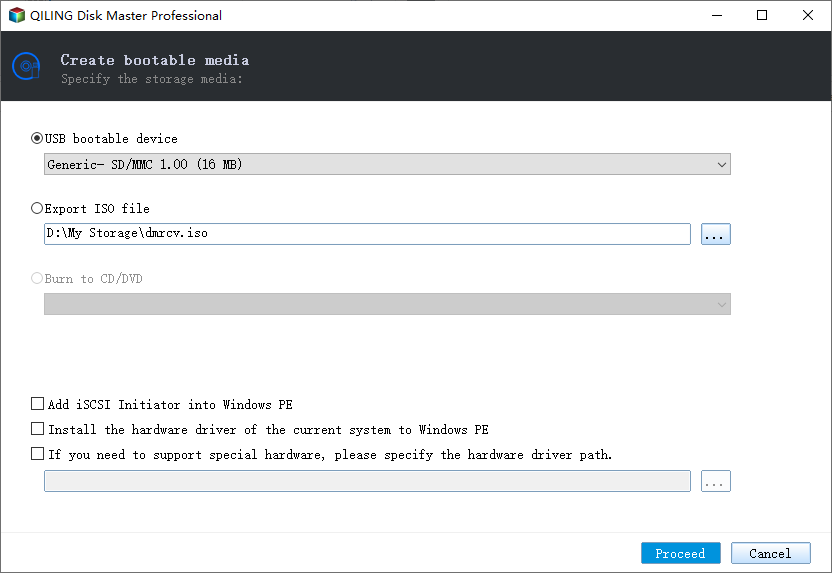
The bootable disk allows you to boot a computer and transfer a system image to a new PC.
Step 2. Create System Backup Image on Source Computer
1. Click "System Backup" on the top pane.
Windows OS will be selected by default.

2. Click "Browse" and select the second partition of the USB drive that contains the emergency disk to save the system image.
You can also save the system backup image to another empty external disk, which must be equal to or larger than the system C drive.

3. Click "Proceed" to start creating a system backup image to the target device.
Step 3. Boot Target Computer from Qiling Backup emergency Disk
1. Eject the Qiling emergency disk and system backup image from the old computer, and then connect the USB drive containing these files to the new computer.
2. Restart PC and press "F2/F8" to boot into BIOS.
3. To resolve the issue, go to the boot menu and set the computer to boot from the Qiling Backup emergency disk.
To restore a system image to a GPT disk, change the boot mode to EUFI in BIOS, which will allow your computer to enter the Qiling Backup main interface.
Step 4. Transfer System to the New Computer
Be aware that restoring a system image to a new computer will erase the data on the target disk, so back up your files first or use an empty disk to avoid data loss.
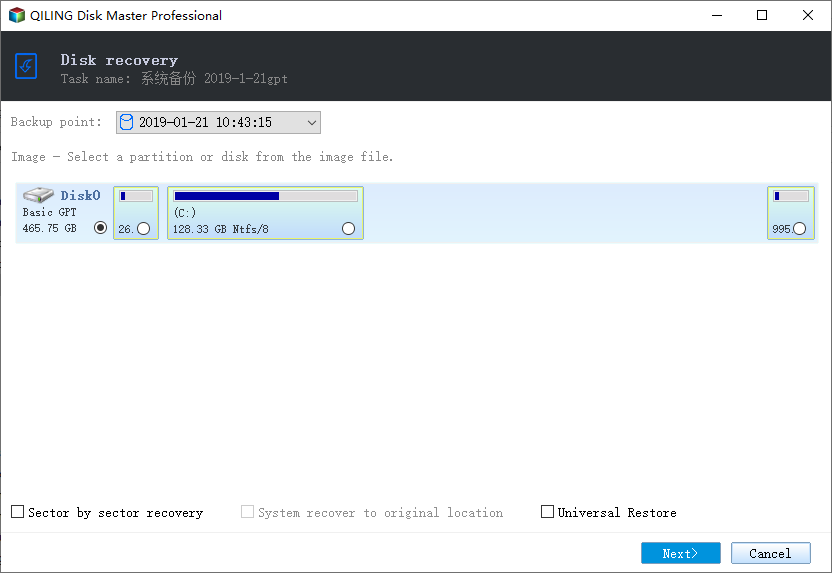
1. On Qiling Backup's main interface, click "Browse for recovery" under the "Backup and recovery" page.

2. Select the system image stored on your USB external drive and click "OK" to proceed with the recovery process.
3. Select the system image disk and check the box next to "Universal Restore" to restore the system image to another computer.
4. Specify the disk to restore system image and select the "Universal Restore" option. Click "Next".

5. Then click "Proceed" to start transferring the system to a new computer.
The Tick Optimize for SSD feature optimizes the performance of a newly installed Solid-State Drive (SSD) by adjusting the tick count, which is a measure of the number of clock cycles per tick. This adjustment can help improve the SSD's performance by allowing it to process more requests per second, resulting in faster overall system performance.

Step 5. Restart PC with transferred system
1. To transfer a system to a new drive, enter the BIOS settings, and set the computer to boot up from the new drive. This will allow the system to load the operating system and programs from the new drive.
2. Save all changes and restart your computer.
3. Update all drive drivers and programs to ensure a smooth transition to the new computer.
Conclusion
This method can be a huge help in transferring a hard drive to a new computer without reinstalling Windows 10. However, if you encounter any issues and aren't sure how to resolve them, you can reach out to our support team or consider doing a fresh install. We're here to assist you and are happy to help.
Related Articles
- How to Create Windows To Go with Non-certified USB Flash Drive
- How to Move Windows 8/8.1 to SSD Without Reinstalling Windows and Applications
- How to Run/Boot Windows 10 from USB Drive
- Create Windows 10 Backup System Image
- Reset Lenovo Laptops with OneKey Recovery Without Data Loss
- Data Backup and Drive Clone Tutorials
Windows File Recovery Tutorials