Hard Disk Drive Imaging Software: Qiling Backup to Protect Your Data
Are you struggling to find a user-friendly hard drive imaging software to create a backup image of your entire hard disk drive? Look no further than Qiling Backup, a powerful tool that allows you to easily backup your entire hard disk or partition to an image, and also enables you to restore or clone your hard disk drive to another. With Qiling Backup, you can take a snapshot of your entire hard drive, making it a reliable solution for data protection and disaster recovery.
When do we need a hard drive imaging software
You may need a reliable hard drive imaging software in cases where you want to transfer data to a new computer, backup all data, or perform a complete format and start fresh. The software can create an image of your hard drive, which can then be stored on an external hard drive or CD/DVD. This image can be restored to a new computer with a built-in "Recover to dissimilar hardware" function, or used to revert your computer to its previous state in case of data loss.
How to image the hard drive with the imaging software
Qiling Disk Master is an award-Qiling Backup is a reliable solution for backing up and restoring your computer, allowing you to quickly and easily safeguard your data in case of a system crash, hardware failure, or other issues such as viruses or hard drive failure. With its user-friendly interface and detailed instruction wizards, you can have your computer in a safe condition within minutes, even without the help of an IT specialist. The software enables you to backup your hard disk drive to an image, and also allows you to restore disk or partition. It has gained a good popularity among its users, and you can download and follow the steps to image your hard drive.
Step 1. To back up an entire hard disk or simply its several partitions, choose the "Disk/Partition" backup mode and proceed.
Step 2. Select the hard drive or partition(s) you're going to back up, and a check symbol will appear after you click on them.
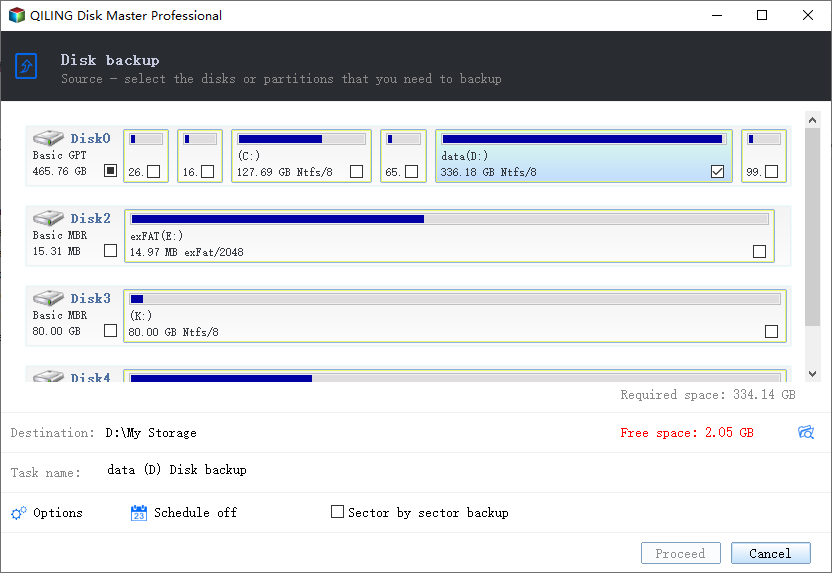
Step 3. To choose a backup location, click the browse icon button in the "Destination" area and select a spot available to you, such as your local hard drive, folders, a network drive, NAS device, or cloud storage like Google Drive, Dropbox, or OneDrive. You can browse through connected drives by clicking the icon in front of each directory.

Step 4. Now edit your disk backup image by adding a "Plan name" and "Description" to it.
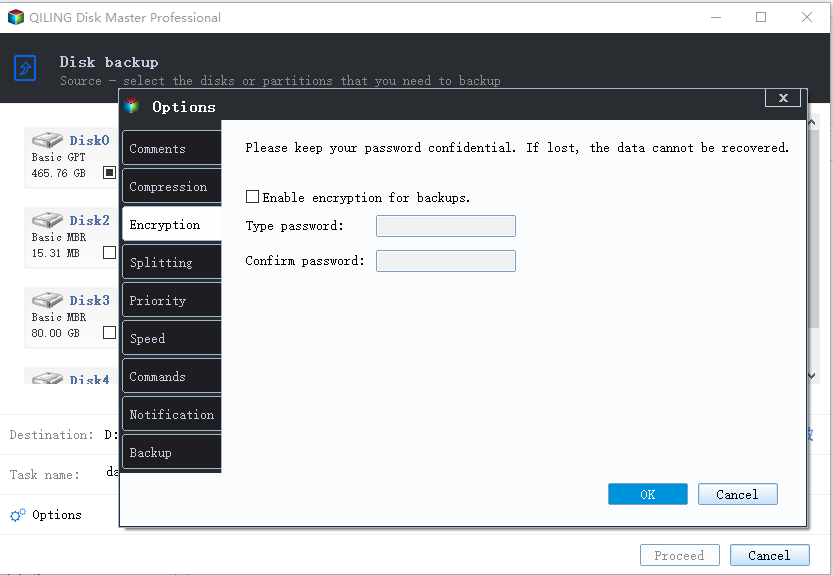
To summarize, the backup process can be customized with advanced options, including compression, encryption, and sector-by-sector backup, which provide additional layers of protection and control over the backup process.
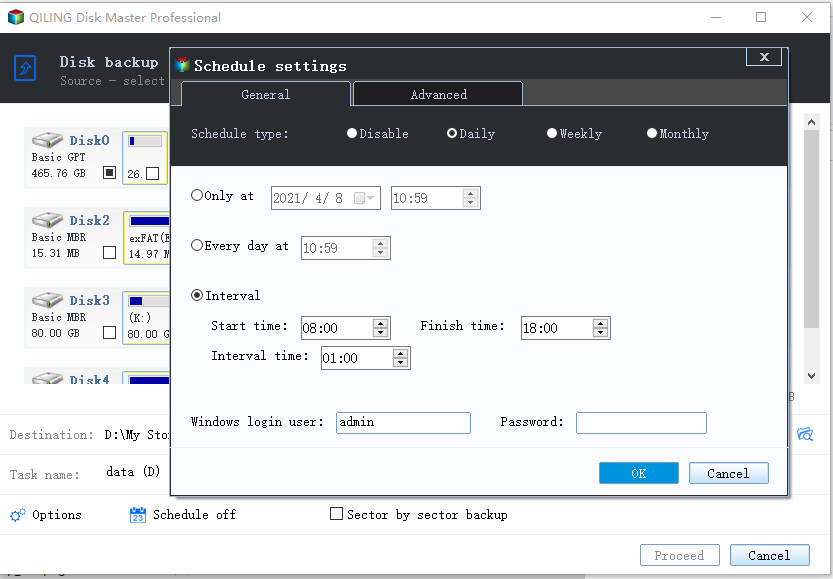
You can set a schedule for automatic backups to run daily, weekly, or monthly, or even trigger them based on specific events.
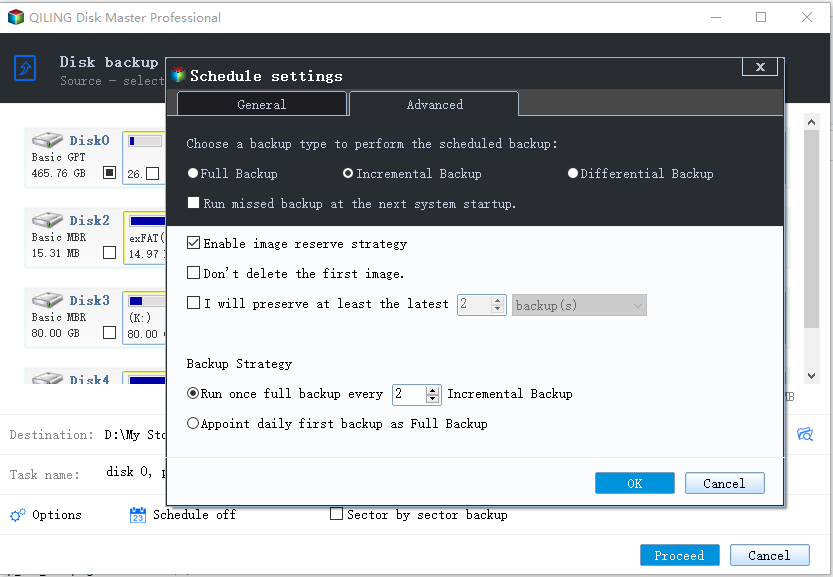
And the "Image-The "reserve strategy" allows for the efficient management of growing backup images, enabling the preservation of backups in either a setup timeframe or quantity.
Step 5. To make the most of customizable hard disk/partition backup solutions, focus on the essential ones and utilize them fully. Once you've done so, you can proceed with the backup process by clicking "Proceed" to initiate it immediately.
To ensure safety, disconnect the physical storage device used as a backup drive after the backup process is completed.
Case 1: Backup system, please see how to backup system.
If the issue occurs on a backup partition or disk, refer to the instructions on how to backup a hard drive and disk for guidance.
In case 3, you would like to backup files or folders. To do this, please refer to the instructions on how to backup files and folders, which can be found at the provided link.
Related Articles
- Auto Backup VMware with Best VMware Backup Software
- Backup Computer to USB Flash Drive in Windows 10/8/7
- How to Install Software on Multiple Computers at the Same Time
- Auto Backup Outlook 2016 with Ease
- Windows Backup Did Not Complete Successfully
- Three SQL Server Backup Types
- Comparison: Should You Backup to Cloud or Hard Drive
The file backup destinations common to most users are cloud drives and external hard drives. This article will compare the two backup methods based on universal access, security, and cost and recommend the best for you. We'll also discuss how you can use Qiling Backup Free to perform all-in-one backup functions.