Install Raspberry Pi Operating System on SD Card
Overview of Raspberry Pi
The Raspberry Pi is a series of small single-board computers developed by the Raspberry Pi Foundation in association with Broadcom. It comes without an operating system, allowing users to customize it with their own OS, typically done by burning a downloaded image file onto an SD card.
Here's the Raspberry Pi operating system list:
- UBUNTU MATE
- NOOBS
- WINDOWS 10 IOT CORE
- SNAPPY UBUNTU CORE
- OSMC
- PINET
- LIBREELEC
- RISC OS
- WEATHER STATION
- Raspbian
Full Guide to Install Raspberry Pi OS on SD Card
To install Raspberry Pi OS on a Windows PC, you'll need an SD card and a card reader. Follow the detailed guide below to install the OS on the SD card, which can be done on your own.
How to Install Raspberry Pi Operating System on PC
Step 1. Download and install the latest version of the Raspberry Pi Imager.
Step 2. Insert your SD card into the computer with a card reader or an adapter.
Step 3. Open Raspberry Pi Imager and choose the required OS from the list presented.
Step 4. In the device box, select the correct SD card.
Step 5. Click "Write" and wait for the writing process to complete.
Step 6. Exit the imager and eject the SD card.
Win32DiskImager is another recommended Imager, you can choose the one you like.
Download source: https://www.raspberrypi.org/downloads/
Format SD Card to FAT16 or FAT32 for Raspberry Pi 1,2,3
To set up a fully compatible SD card for Raspberry Pi, prepare your SD card with a FAT file system, specifically FAT16 or FAT32, as SDHC and SDXC cards with exFAT file system are not compatible. Use the recommended SD card formatting tool to format an SD card larger than 32GB to FAT32, or convert exFAT to FAT32 on Windows 10, 8, 7, XP, or Vista.
Download Qiling, a free partition manager, and follow the guide below to format your SD card.
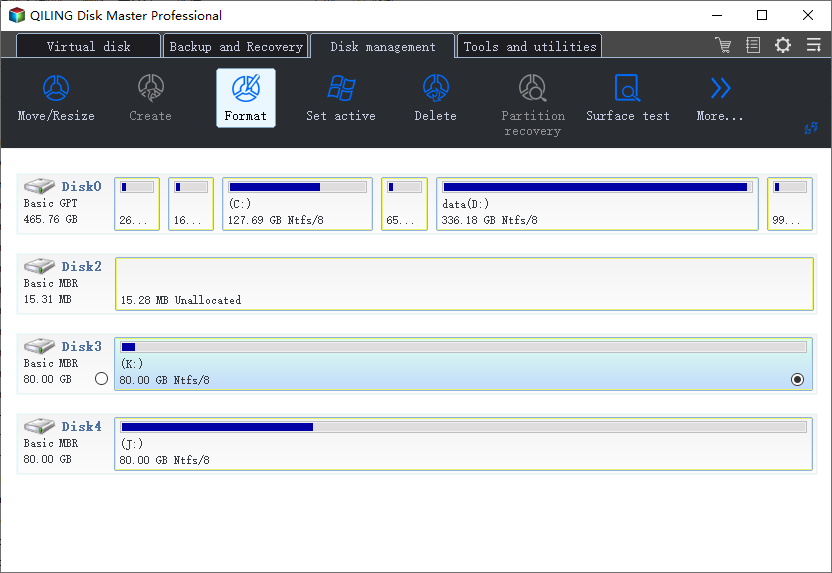
Step 1: Launch Qiling Partition Master. On the Disk management window, select the partition on your SD card and click "Format".
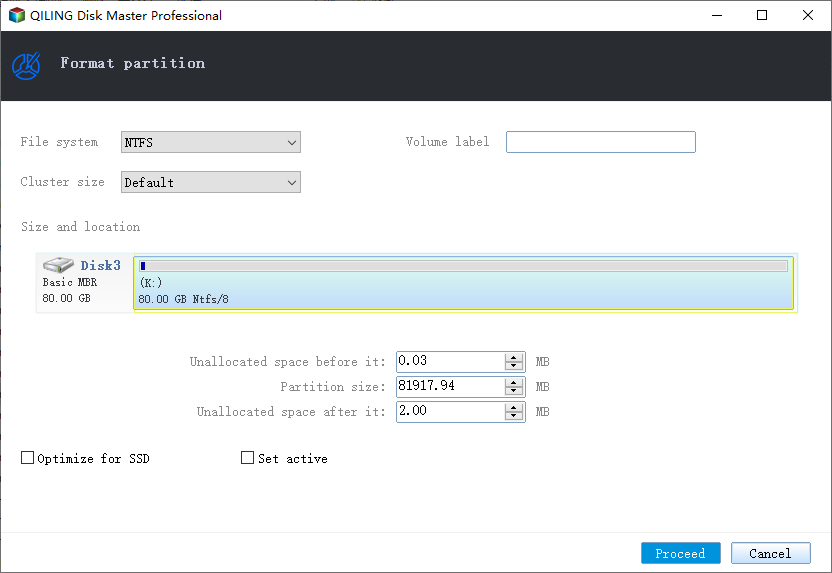
Step 2: Set a new partition label, file system (NTFS/FAT32/EXT2/EXT3), and cluster size to the selected partition, and click "Proceed" to continue.
Format C Drive with Windows Setup or External Storage Media
To format C drive, start by inserting your Windows installation media, such as a USB drive or CD/DVD. Then, restart your computer and enter the BIOS settings. Save the changes and exit the BIOS settings. Next, select the correct boot device and restart your computer.
Step 1. Boot with the Windows Setup Disc. Place the CD in the optical hard drive and follow the instructions.
Step 2. Select the language you want to use and select "Next".
Step 3. Click "Install Now" and wait until it finishes. This process isn't really installing the Windows OS.
Step 4. Accept the terms and conditions and select "Next".
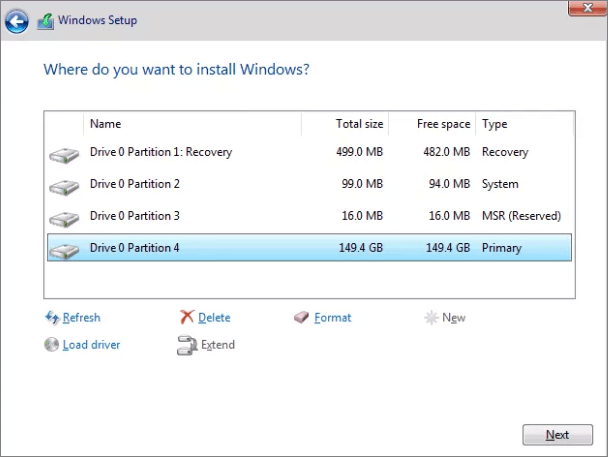
Step 5. Go to the Custom (advanced) option. You will see a list of all the existing drives. Click "Drive options (advanced)".
Step 6. Select "Format". Now, Windows will start the process of formatting your drive.
Related Articles
- How to Expand RAID 5 Array Partitions in 2022 [New]
- How to Merge Non-adjacent Partitions in Windows 11/10
- How to Remove, Delete or Format GPT Disk Partition
- How to Clone A Hard Drive on Windows 11
- How to Ghost a Hard Drive in 3 Steps
- Backup Computer to USB Flash Drive in Windows 10/8/7
- Create SSD Backup Image For Continuous Data Protection
Creating a SSD backup image is a crucial step in protecting your data, and scheduling it as a regular task ensures your information is always safe and secure.