[Full Guide] How to Restore Windows 7 from System Image Backup
A Windows 7 system image backup is a complete copy of your Windows 7 system, including all system files, settings, and installed programs. This type of backup is helpful if you need to restore your system to its original state or if you want to create an identical copy of your system on another computer. You can save it to an external hard drive, DVD, or network location. If you need to restore your system from a system image backup, you can follow the solutions provided to do so.
1 - Restore a System Image Backup in Windows 7 with Built-in Tool
If your computer gets damaged or corrupted, you can restore it to its previous state using a system image, but only if you have an image backup. Otherwise, you'll need to reset Windows 7 with an installation disc.
How to Create a System Image in Windows 7
To create a system image in Windows 7, open the Windows 7 Backup and Restore utility, select the "Create a system image" option, choose a destination drive, and select the drives you want to include in the image. Then, follow the on-screen instructions to complete the process.
Step 1. To access the Backup settings, click on the Start Menu and then type "backup" into the search box. This will bring up the Backup and Restore (Windows Backup) window where you can configure your backup settings.
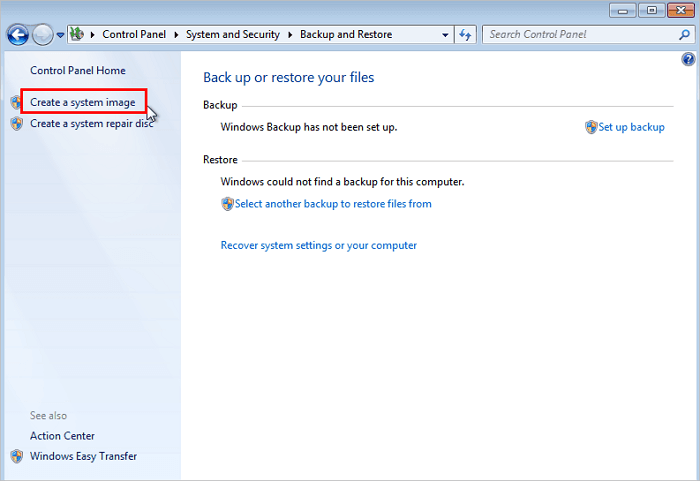
Step 2. To create a system image, click on the "Create a system image" link on the window's left-hand side.
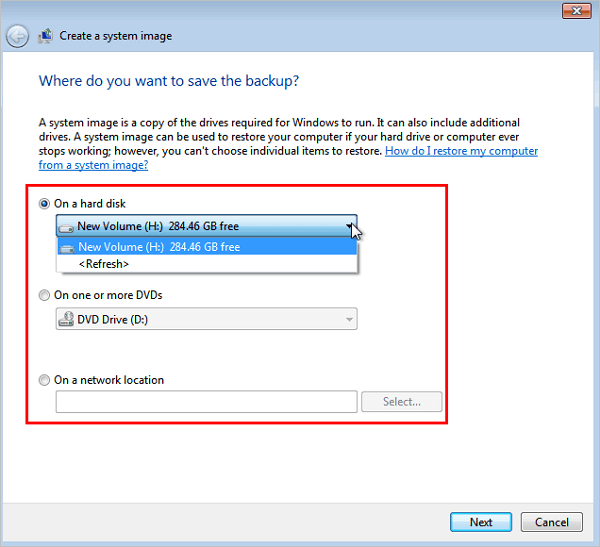
Step 3. Create your system image on a hard drive or DVD media.
Note: We recommend using an external hard drive to restore your system, as it's faster and easier than using DVD media.
Step 4. Once you've chosen your preferred backup location, click the "Next" button and follow the prompts to create your system image.
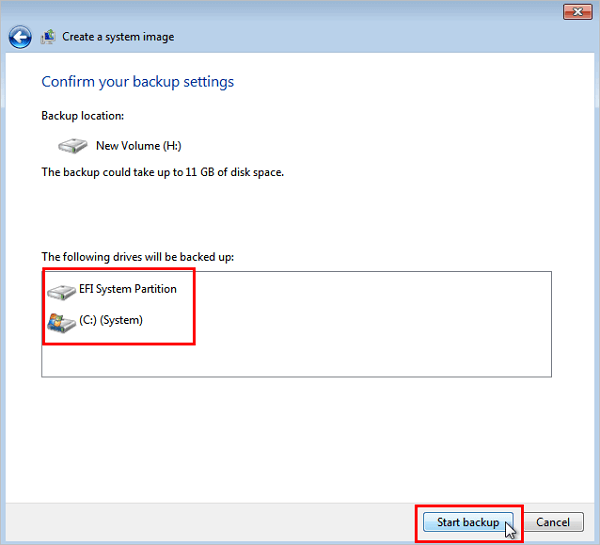
Note: The backup contains the UEFI System Partition and entire C drive, including installed applications and personal files, and can only be made at the latest if the network location is chosen as the backup storage.
How to Restore Windows 7 from System Image Backup
To restore a Windows 7 system image backup from an external hard drive, start by connecting the external drive to the computer. Then, go to the Start menu, type "Backup and Restore," and select the option. In the Backup and Restore window, click on "Restore my files" or "Restore all users' files.
Tip 1. Restore Windows 7 Using a System Image Backup from the Preinstalled Recovery Options
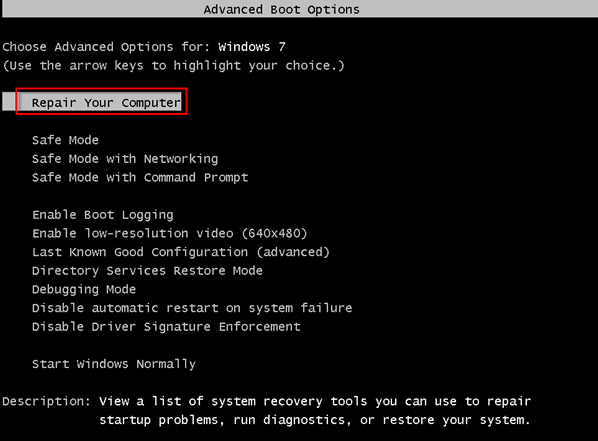
Check if your computer has preinstalled recovery options, and then continually press the F8 key until you get to the Advanced Boot Options screen, select Repair your computer and press Enter.
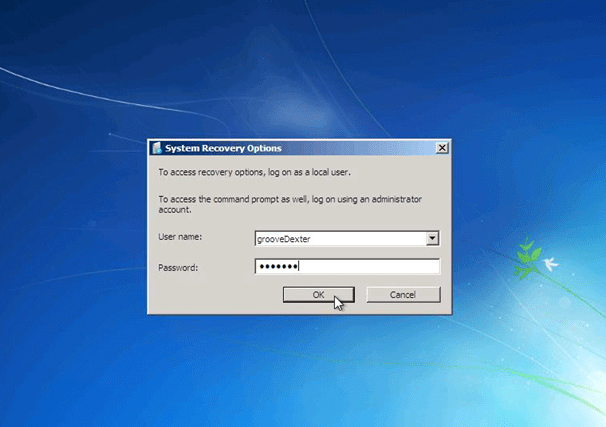
Step 1. Once the repair boot loads, enter your username and password, then click "OK" to proceed.
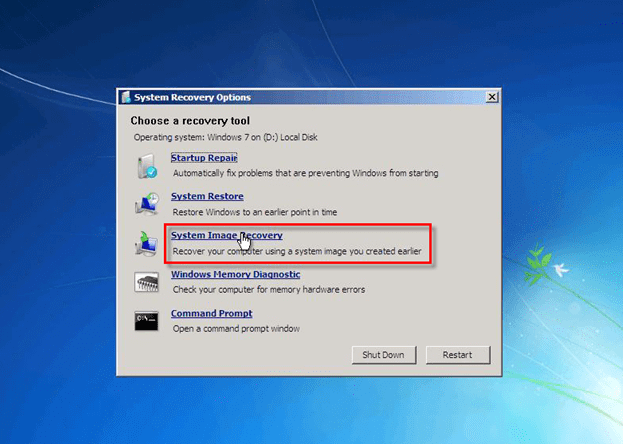
Step 2. Click "System Image Recovery".
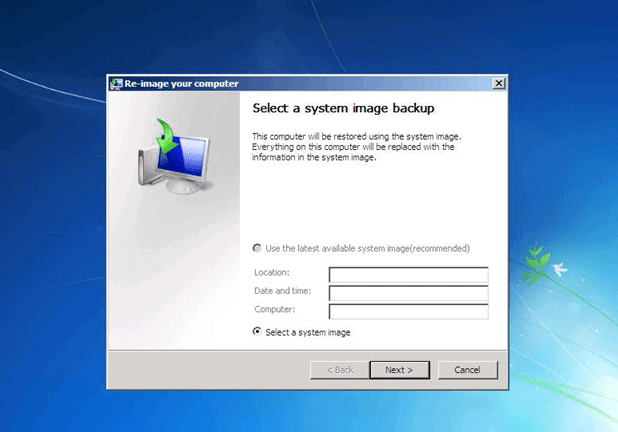
Step 3. The "Use the latest available system image" is the better choice, and if that option doesn't appear, select "Select a system image".
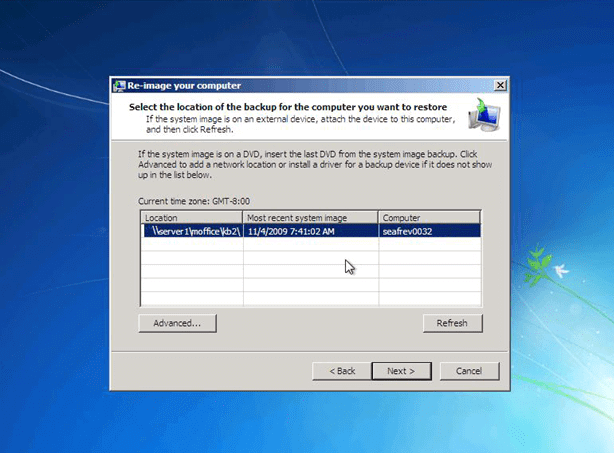
Step 4. If you've saved your backup on the network or external hard drive, you can access it using the "Advanced" tab, then click "Next" to continue.
Follow the on-screen instructions and avoid the temptation to click the stop button or reboot the PC. If everything goes as it should, your system should reboot and restore precisely how it was when you created your system image.
Tip 2. Restore Windows 7 Using a System Image Backup from Windows 7 Installation Disc
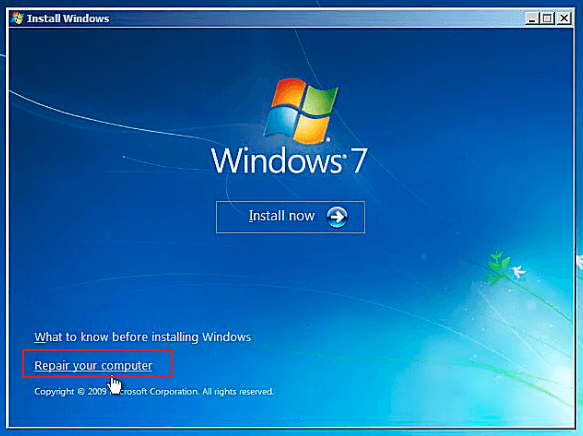
If you can't find the repair option, create a Windows 7 installation disc, change the boot order if necessary, click "Next" in Install Windows, and select to Repair your computer from the lower left corner.
Step 1. If you've created a system image, connect your external hard drive to your computer to store the image, which will allow you to easily restore your system in case of a problem.
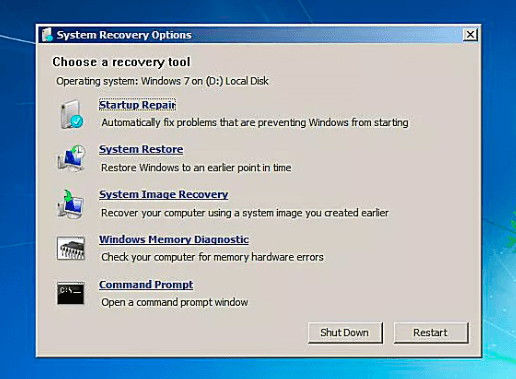
Step 2. Choose "System Image Recovery" in System Recovery Options.
Step 3. It will automatically locate the available system image stores on your device and click "Next" to continue. The system will then search for the system image to restore and display a list of available system images.
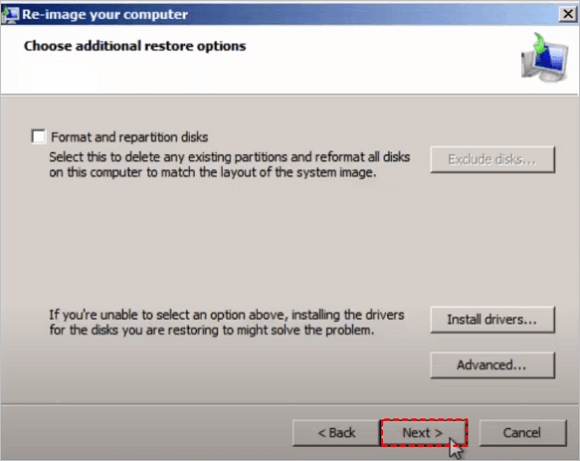
Step 4. Then choose additional restore options, and click "Next".
Step 5. Confirm the information and click "Finish", then "Yes" to continue. It may take hours to restore, and the computer will restart after completion.
You can use the Windows 7 repair tool or a Windows 10 recovery drive to repair your Windows 7 or Windows 10 computer. To do this, you'll need to create a recovery drive which will allow you to enter recovery mode.
2 - Restore Windows 7 from System Image Backup with a Third-party Tool
The Windows 7 system image recovery process can be challenging using the built-in backup tool, making third-party backup and recovery software a better option. Qiling Backup is a user-friendly choice that allows users to create and restore system images, offering full and incremental backup modes and scheduling capabilities.
With this system backup utility, you can create a system image of your entire system, including the operating system, settings, applications, and data, and easily restore the image in Windows 11/10/8/7 by following the tool's steps.
Step 1. On the main page, click "System backup" button to start.

Step 2. Qiling Backup will automatically select your system partition, and you just need to choose a location to save the backup.

Step 3. You can save the backup file to either a local drive on your device or a Network-Attached Storage (NAS) device.

Step 4. After completing the backup process, you can verify the backup status, restore, access, or remove the backup by clicking on the backup task on the left.

If your computer can't boot, you can still back up your data without having to boot into Windows 10/8/7.
Conclusion
System images are a crucial part of any backup strategy, allowing you to restore your PC to its previous state in case of corruption or hardware issues. By using a system image, you can quickly recover your system and have it up and running again after a restore process, rebooting your computer to complete the process.
Restore Windows 7 from System Image Backup FAQs
To create a system image backup in Windows 7, you can use the built-in Backup and Restore tool. This tool allows you to create a complete image of your system, including the operating system, installed programs, and user data.
1. What is a system image backup?
A system image backup is a complete copy of your Windows installation, including files, settings, and programs, allowing you to restore your computer if it stops working.
2. How do I create a system image backup?
To create a system image:
- Prepare an external hard drive or network location with enough space to store the backup.
- To open the Backup and Restore tool, click on the Start button, then type "backup" into the search box.
- To create a system image, click on "Create a system image" in the left sidebar, and follow the prompts to initiate the backup process.
3. Where will my system image backup be stored?
The system image backup is stored in a location you specify, such as an external hard drive or network location, and should be kept in a safe place for future restoration.
4. Is System Image Recovery Bootable?
System Image Recovery in Windows 7 allows you to restore your PC to a previous state by replacing everything with an image file containing all system drives and other necessary drives.
Related Articles
- 10 Best OS Deployment Software [Updated 2022]
- Dell OS Recovery Tool Windows 11/10: Windows Backup and Recovery Option
- How to Backup Google Drive to External Hard Drive [4 Easy Ways]
- Imaging Software Disadvantages VS Advantages, Show I Have It [2022 Thorough Reviews]
- This PC Can't Run Windows 11 | How to Fix or Bypass it
Many users receive "This PC can't run Windows 11" when they try to install it, or check if their computer is compatible. Why does this happen and how to fix it? - 5 Methods to Fix Windows 11 Taskbar Not Working After Update
If you encounter Windows 11 taskbar not working after update, this article can help you easily solve this problem. Remember to back up your computer in advance to prevent unexpected data loss when changing device settings.