Windows 10 Sync Folders to External Drive Solutions
Regular backups of content and data are essential. Users often backup files to cloud drives or copy and paste content to external drives. However, with the growing demand, syncing files and folders directly from a computer to an external drive has become a popular alternative.
Compared to traditional backup methods, synchronous backup is more accurate and convenient, ensuring you don't miss any data adjustments. To sync folders on Windows 10 to an external drive, you can use various methods, which we'll explore in this article. This approach eliminates the need to manually pick up files one by one, making it a more efficient way to keep your files up-to-date.
Windows 10 Sync Folders to External Drive with Qiling Backup
It has a built-Sync Center on Windows 10 allows for data synchronization between your computer storage and a network server, but for syncing folders to an external drive, a third-party backup tool is more suitable. Qiling Backup is a professional file backup software that can protect your data with a few clicks, backing up your system and user settings, and restoring backup files to anywhere such as a hard drive, FTP server, network share, NAS, or cloud drive.
To sync folders to an external drive automatically, download the Qiling Backup and follow the provided guide. This will allow you to set up a seamless process for backing up your important files to an external drive.
Preparations:
- Connect your external hard drive to your computer.
- Download Qiling Backup
Step 1. Launch Qiling backup software and choose the "File backup" option on the main window.
Step 2. Select the files or folders you want to backup and choose the external hard drive as the backup destination.
You can specify the file backup by entering "Plan name" and "Description" for it.

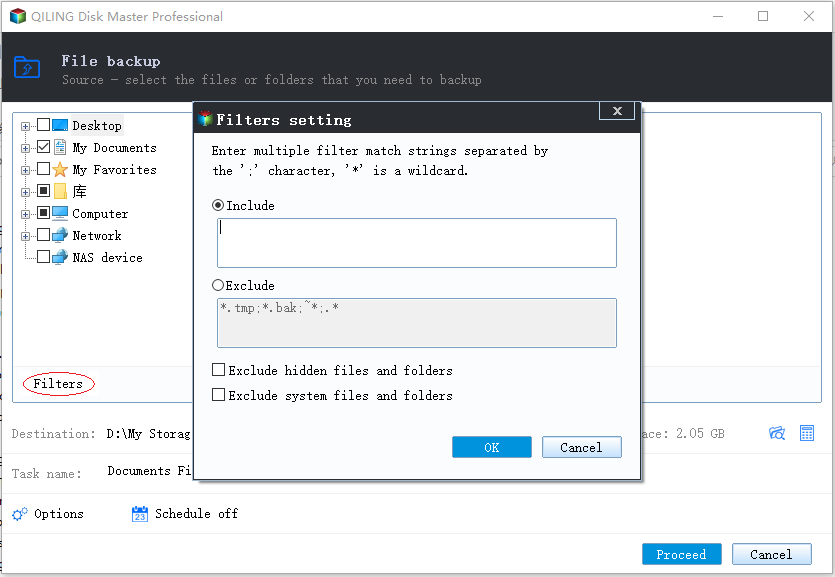
IMPORTANT NOTE:
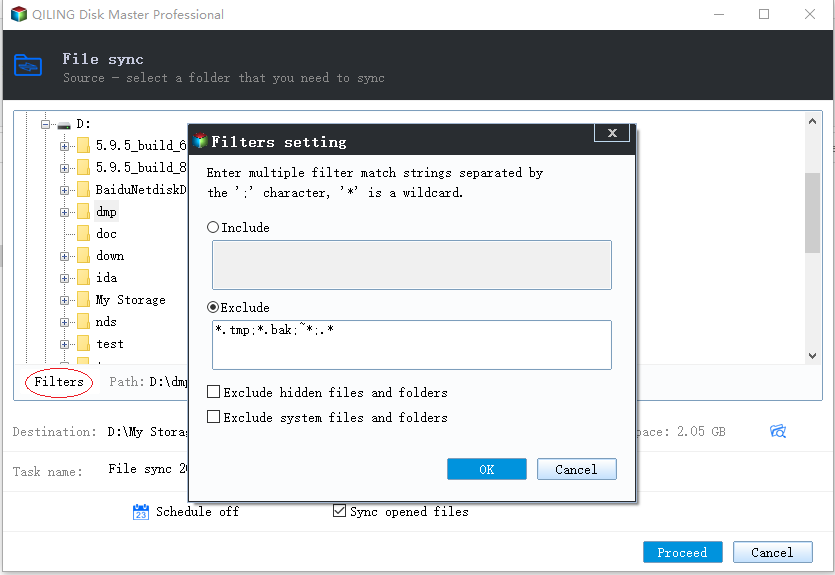
If you want to specify certain types of files to backup, click on "Filers". Here, you can select multiple types of files, such as Documents Files, E-mail, Financial Files, Music Files, Picture Files, and Video Files, among others.
Step 3. To schedule a backup, click on the "Schedule" option, which will open the Backup Scheme window. Here, you can create a plan to backup files at a later time, on a daily, weekly, or monthly basis, or even upon a specific event.

Creating an automatic backup plan is not a prerequisite for backup, but rather a schedule to do so.
Step 4. Click "Proceed" to back up folders or files to the external hard drive.
Windows 10 Sync Data
Method 1. Windows 10 Sync Data with Windows Sync Center
Sync Center can be used to create a network server backup, access shared files and folders on your network, although it cannot back up content to an external drive. To enable this tool, follow these steps.
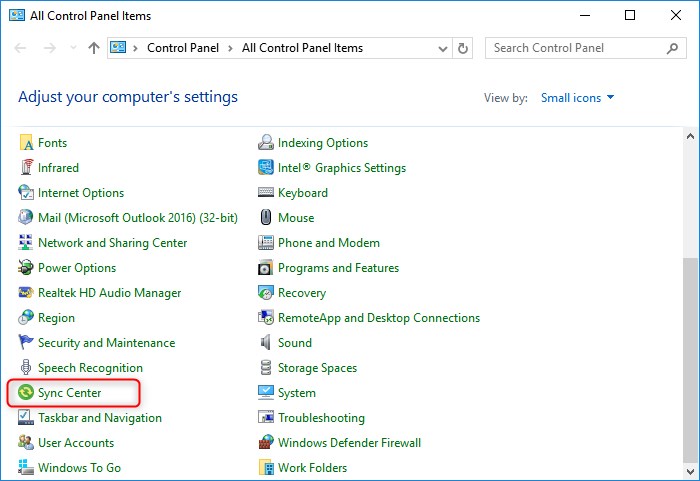
Step 1. Open Control Panel on your computer, find "Sync Center."
To clone a laptop hard drive to a new one, connect the new drive to your laptop using a SATA-to-USB cable or an external hard drive enclosure, then use Disk Copy to follow the above guide.
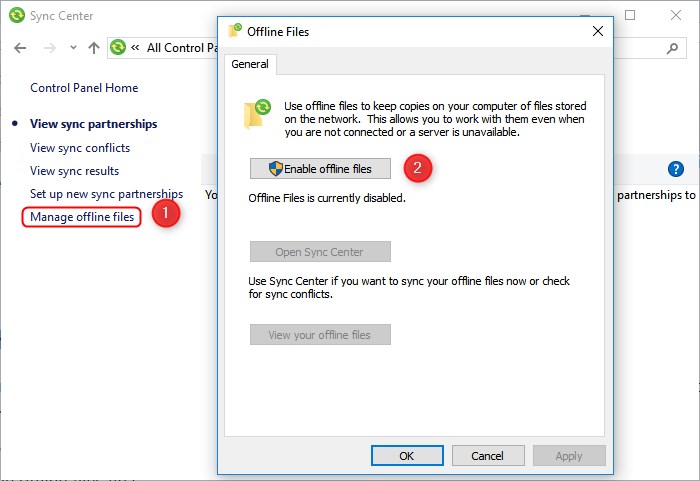
Step 2. Click "Manage offline files" to enable offline files first.
Step 3. When you click the "Enable offline files" button, Sync Center would ask you to restart the computer.
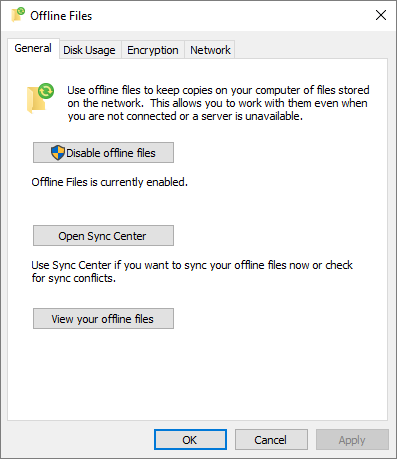
Step 4. Restart the computer and repeat the above steps to manage offline files settings.
Step 5. There are three tabs: Disk Usage, Encryption, and Network.
- To change the disk space that offline files are allowed to use, click on the "Change limit" tab in Disk Usage.
- Encryption helps secure offline files by protecting them with a password, making it harder for unauthorized individuals to access them.
- You can set your preferred time to check for slow connectivity with Network.
Method 2. Windows 10 Sync Data with Qiling Disk Master
To create a file sync task, click the "File sync" button on the Backup and recovery page, which transfers all files on selected volume(s) to another location.
Step 1. Launch Qiling backup software and choose the "File sync" option on the main window.
Step 2. To backup a folder, select the desired folder, then choose the external hard drive as the backup destination.
You can also enter "Plan name" and "Description" for specifying your file backup, and other details.

IMPORTANT NOTE:
Here, multiple types of files including Documents, E-mail, Financial, Music, Picture, and Video files, etc can be selected for backup.
Step 3. To schedule a backup, click on the "Schedule" option, which will open the Backup Scheme window. From here, you can create a plan to automatically backup your files at a later time, such as daily, weekly, or monthly.

The schedule for creating an automatic backup plan is not a prerequisite for actually performing the backup, but rather a separate step that can be done beforehand.
Step 4. Click "Proceed" to sync folders or files to the external hard drive.
The Bottom Line
To sync Windows 10 folders to an external drive, Qiling Backup is a great solution. Once you set the backup schedule, the tool will automatically back up the content to the external drive whenever you plug it in, ensuring your data is regularly backed up and you don't have to worry about loss.
Related Articles
- One-click System Clone to HDD/SSD
- How to Clone Windows 10/8/7 to Another Computer
- How to Create and Restore (Windows 10) System Image to Different Computer
- Hard Disk Drive Imaging Software: Qiling Backup to Protect Your Data
- Restore your hard drive and operating system
- How to Back Up Computer Windows 7 Before Upgrading to Windows 10 (2 Ways)
You can back up a Windows 7 computer before installing Windows 10 using two methods. The first method involves using the Windows backup and restore feature to create a backup of your data, which can be restored later if needed. Alternatively, you can use a backup and restore tool to protect your Windows 7 data before upgrading to Windows 10, providing an added layer of protection for your files and settings.