Can I Use My SD Card as RAM on Android and Windows?
Android and Windows users with low RAM can use their SD card as virtual RAM by setting up a swap memory, allowing them to run idle programs and free up actual RAM.

Using an SD card as a makeshift RAM is a workaround that functions similarly to expanding your RAM, but it's not exactly the same. To use this method, you'll need a high-quality SD card and root your Android device, allowing you to utilize the card as additional RAM. This article will delve into the process of using an SD card as RAM on both Windows and Android operating systems.
Can I Use My SD Card as RAM on Android
Android users frequently question whether they can actually use an SD card as RAM on their phone, but the answer is yes. Certain Android devices have extremely little RAM, making it difficult or even impossible to run specific applications, such as games, but using an SD card as RAM can help alleviate this issue.
To create a virtual RAM space on an Android phone, use a high-class SD card (at least class 4) and a third-party app, along with root access, to load swap memory onto the SD card. This can help smooth the running of applications on the phone.
By creating a swap memory on your SD card, your phone can load idle apps into virtual memory, freeing up native RAM and allowing your phone's processor to run more efficiently. This extra RAM storage, also known as virtual memory, helps reduce the load on your phone's native RAM, enabling your phone to run other applications more smoothly and quickly.
Using a high-quality SD card and rooting your Android smartphone can help boost your phone's RAM, but only if your device supports this feature. This allows you to utilize the SD card's storage capacity to enhance your phone's performance.
Can I Use My SD Card as RAM on Windows 10
Windows 10 allows you to use a portion of your partition space, including an SD card, as virtual RAM to improve performance and run more programs smoothly.
Creating virtual RAM with an SD card on Windows 10 works similarly to how it works on Android devices. When your computer's original RAM is full, the virtual RAM takes over to help store data for your processor, enabling efficient application running.
Windows 10 makes it relatively simple to use an SD card as RAM, but you first need to format the SD card to FAT32. The steps for using an SD card as RAM on a Windows PC will be covered in a later section of this article.
Format SD Card Before Using It As RAM
To format an SD card for use as RAM, you'll need to use a more advanced tool than Windows File Explorer, as it's not suitable for this purpose.
Qiling Disk Master is a tool used for formatting SD cards, among other functions, and it does so in an efficient, simple, and safe manner.
Qiling Disk Master is an all-in-one disc management tool that can be used for simple and complex functions, including formatting an SD card before using it as RAM.
You may format the SD card by following the steps down below:
Step 1. Launch Qiling Disk Master, right-click the partition on your external hard drive/USB/SD card which you want to format and choose the "Format" option.
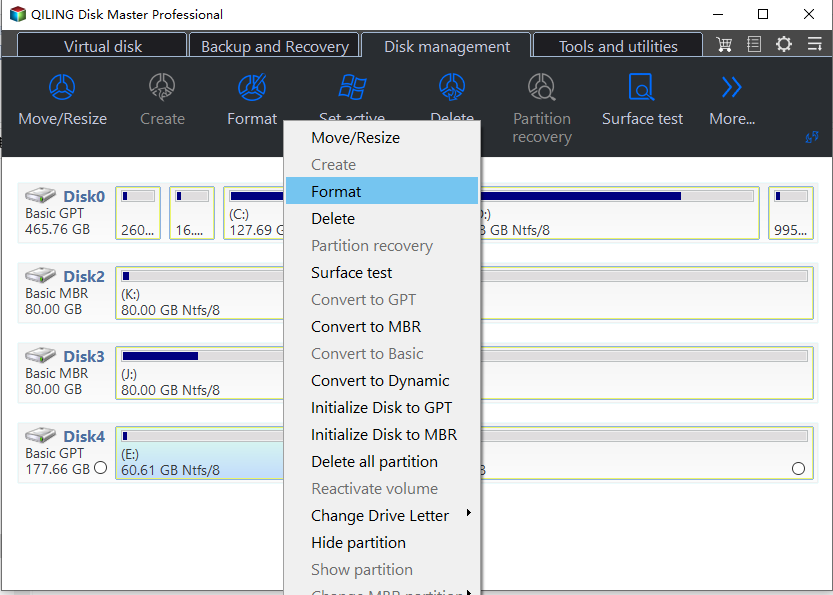
Step 2. Assign a new partition label, file system (NTFS, FAT32, EXT2, EXT3, EXT4, exFAT), and cluster size to the selected partition.
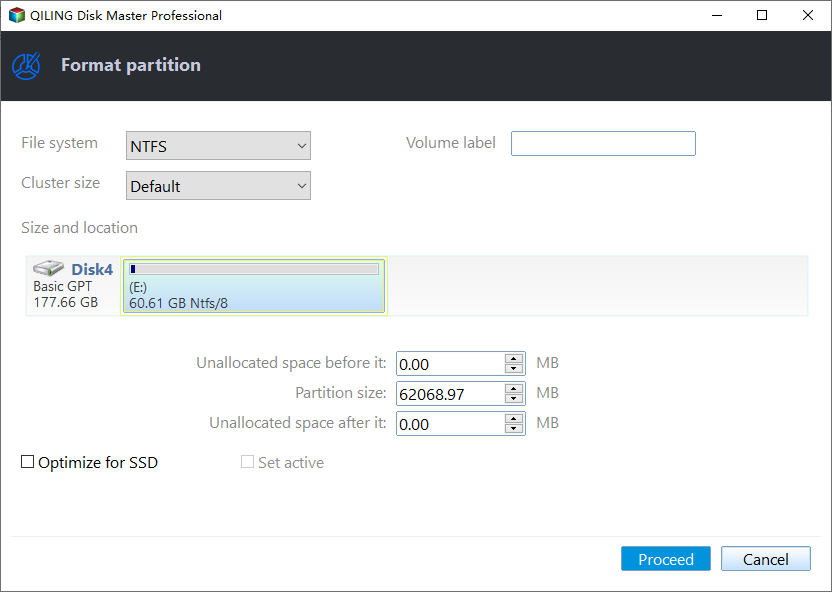
Step 3. Click the "Proceed" button to start formatting your external hard drive, USB, or SD card.
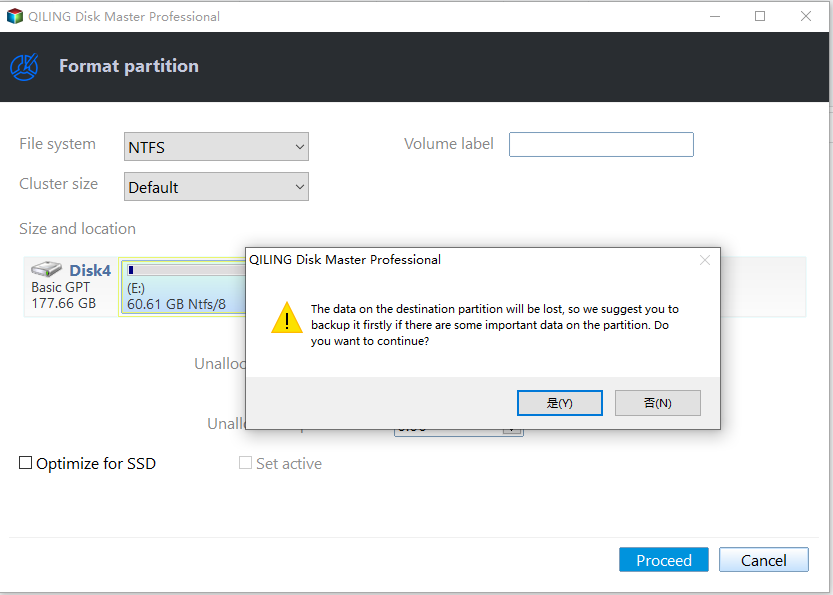
Step 4. In the Warning window, click "Yes" to continue.
You can copy OS data to another HDD or SSD using the Qiling Disk Master, which also allows you to convert FAT32 to NTFS. This free tool can resize, create, delete, or expand partitions, and check for disc, file system types, and bad sector faults.
To use an SD card as RAM in Android and Windows, you can follow a few steps. In Android, you can use apps like SD Maid, DiskDroid, or RAM Expander to expand your RAM using your SD card.
How to Use SD Card as RAM in Android
Here are the top methods to use SD cards as RAM in Android:
- Method 1. Use ROEHSOFT RAM Expander
- Method 2. Use RAM Manager Pro
- Method 3. Manually Partition the SD card
Method 1. Use ROEHSOFT RAM Expander
The ROEHSOFT RAM Expander is a tool that allows users to add swap memory to their SD card, effectively increasing their phone's RAM. This app requires the user's phone to be rooted, and it costs around $5 to download from the Google Play Store.
The tool is not compatible with all Android phones, so users need to test their phone using MemoryInfo & Swapfile Check. To do this, they simply install the software, run it, tap the Start RAMEXPANDER Test Here button, and then choose the swap path.
The app will send a "Congratulations" message if your device successfully runs the test, indicating that it can utilize the swap file, and you can proceed with loading the swap file into your SD card to use it as virtual RAM.
Step 1. Download and install ROEHSOFT RAM Expander.
Step 2. When launching the app, grant it root access and wait for it to fully load.
Step 3. Check the Autorun box so the app will run automatically when your phone boots up.
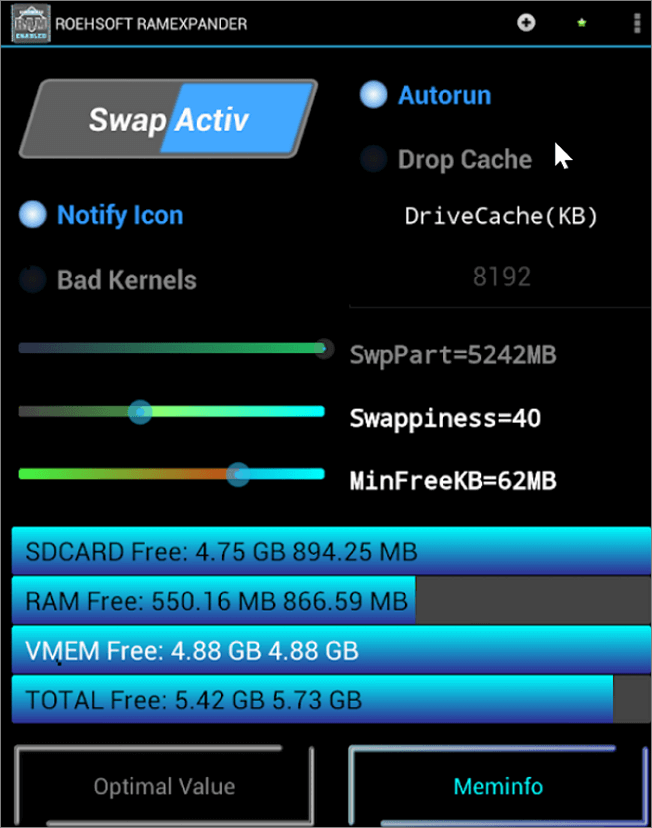
Step 4. To set the paging file to the optimal setting, click on the "Optimal Value" option. Alternatively, you can manually adjust the swap memory by moving the "SwpPart" slider to your desired setting.
Step 5. To activate the swap partition, tap on the Swap Activ button and select the path or partition for the swap.
The process of creating swap memory will start, and once it's finished, you'll likely notice a difference.
Method 2. Use RAM Manager Pro
Another method to make your SD an extra RAM in Android is the RAM Manager Pro. This tool, available in both basic and paid versions, can perform this function, but only the paid version can do so.
To use an SD card as RAM on an Android device using RAM Manager Pro, follow these steps: First, download and install the RAM Manager Pro app from the Google Play Store. Next, insert your SD card into your device and ensure it's properly formatted.
Step 1. Download and install RAM Manager Pro.
Step 2. To set the maximum memory a single app can use on your phone, select "Extra" and click on "VM Heap Size" to limit the amount of RAM consumption by a single app.
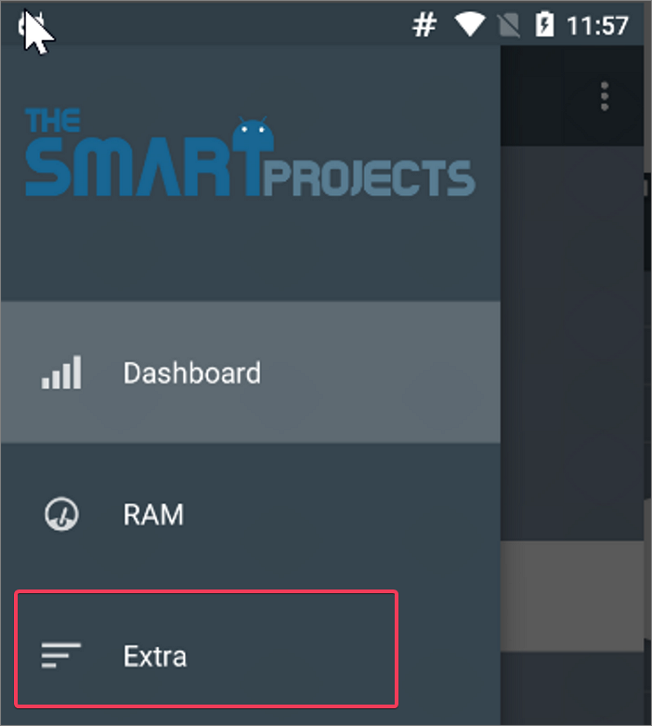
Step 3. To create a swap file on your SD card, click on the "Swap file" option and select your SD card as the location to load the swap file. Additionally, set the desired size of the swap memory by adjusting the swap file slider.
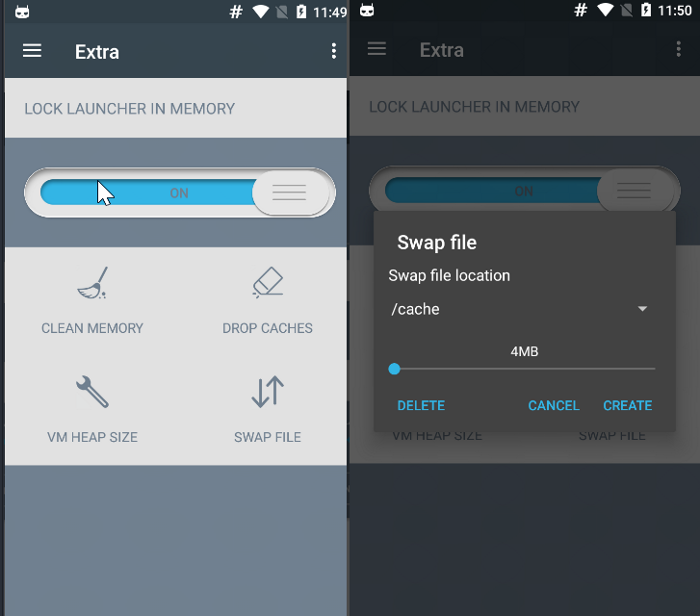
Step 4. Check the Set on boot option so the settings will initiate every time your phone boots up. This will ensure that your phone is configured with the desired settings every time you turn it on.
Method 3. Manually Partition the SD card
You can also perform this function with a tool like Qiling Disk Master, but this method also requires having your Android phone rooted and using a computer to do so.
Step 1. Insert the SD card you want to use as RAM into the computer.
Step 2. Launch Qiling Disk Master or any other partitioning tool and format the SD card as was explained earlier in this article.
Step 3. Create a partition on the SD card and make it a Primary partition as FAT32.
Step 4. To create another partition on the SD card, you can use the command `fdisk /dev/sdb` (assuming the SD card is mounted as `/dev/sdb`) and follow the prompts to create a new partition. You can then format this new partition as either EXT2, EXT3, or EXT4 using the command `mkfs.
Step 5. After creating the partitions on the SD card, insert it into your Android phone. This completes the setup process for using the SD card as a bootable storage device for your Android device.
Step 6. Download and install Link2SD from Play Store.
Step 7. Launch Link2SD, grant it root access, and link the EXT partition created earlier.
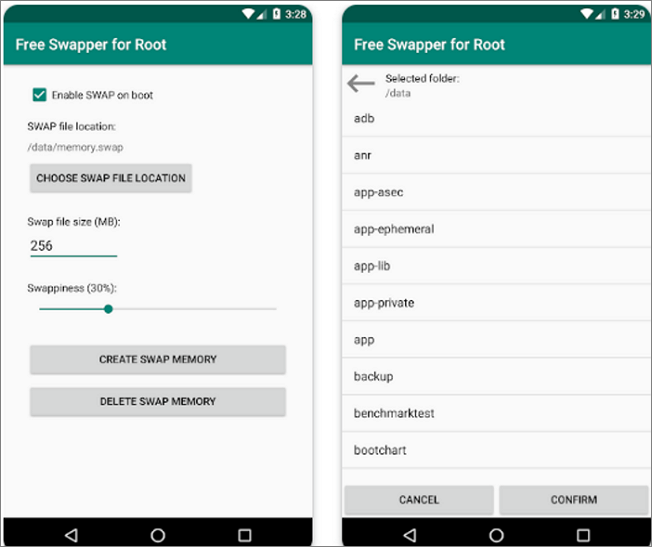
Step 8. The process to increase RAM with Swapper For Root involves downloading the app, launching it, and selecting the desired amount of RAM to be allocated from the SD card. This allows for additional memory to be utilized, enhancing overall system performance.
To increase your phone's RAM, you can create a SWP file, which is a type of file that can be used to increase the RAM of your phone. This method is similar to other methods discussed, but it creates a SWP file that can be used to increase your phone's RAM. This file can be created using various methods, and it can help to free up more space on your phone by allowing you to install more apps and run them simultaneously without any issues.
How to Use SD Card as RAM in Windows
To use an SD card as RAM in Windows, first connect it to your computer via an SD/MicroSD card reader or adapter, and back up all data on the SD card before formatting it using the procedure described earlier.
Here are the steps to use an SD card as RAM in Windows:
Step 1. Insert the SD card into your computer's card reader slot.
Step 2. Format the SD card using the step we discussed earlier.
Step 3. After successfully formatting the SD card, open the File Explorer and go to This PC.
Step 4. Right-click on the SD card and select Properties.
Step 5. On the resulting dialogue box, tap the ReadyBoost tab and select Dedicate this device to ReadyBoost.
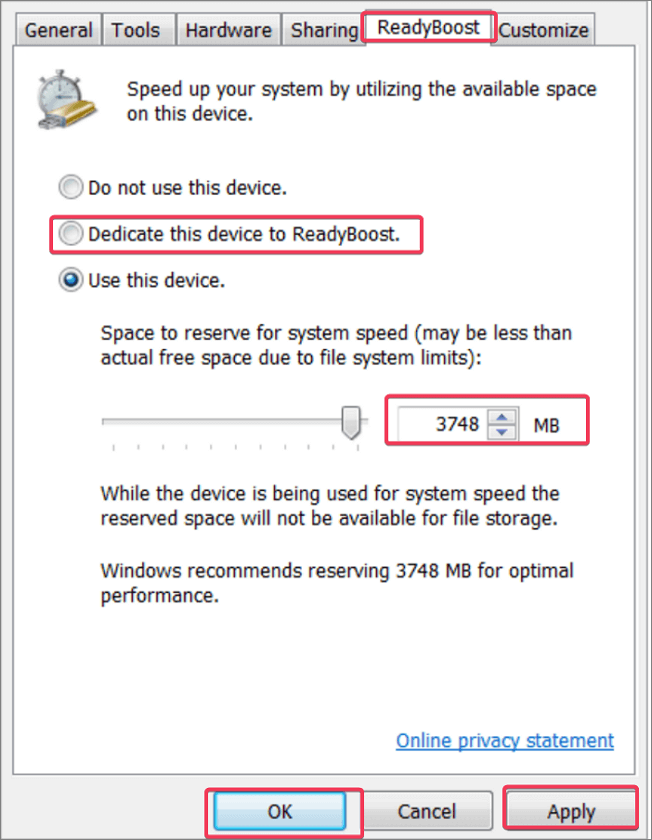
Step 6. Click Apply, then OK to save the changes.
This process allocates space on the SD card as virtual RAM, allowing you to use it as long as it's plugged into your computer.
To remove the SD card from your PC, go to the SD card Properties, click on the ReadyBoost tab, and select "Do not use this device".
Conclusion
Users with low RAM devices can use their SD card as virtual RAM, which is different from native RAM. This virtual memory is used when apps require more RAM to function, and can be set up using techniques described in this article.
FAQs About Using My SD Card as RAM
Here are more questions and answers on using SD card as RAM. Have a look as you wish:
1. How much RAM does an SD card have?
The amount of virtual RAM that can be run on an SD card depends on the free space available on the card and the amount of swap memory loaded onto it.
2. Will SD card make a laptop faster?
SD cards can be used to create swap memory on a laptop, which stores running idle apps and speeds up other programs.
3. Can I use SD card for ReadyBoost?
If your SD card has a fast transfer speed, which is only available in the best class of SD cards, you can use it for ReadyBoost.
Related Articles
- Fix: Blue Yeti Not Recognized on Windows 10/11 [Step by Step]
- What Is Wuauserv and How to Fix Wuauserv High CPU Usage? [Updated 2024]
- Fixed: Chrome Browser Not Open/Working in Windows 10 Creator
- Fixed: File System Check Exit Code Is 8 | Multiple Plans
- Recover Saved Game Data on Xbox Series X [ 5 Proven Ways]
If you've lost your game data on Xbox Series X, there are three effective methods to recover it. You can recover saved game data from an external hard drive, use cloud gaming to access your saved games, or restore from a backup. - Guide on Recovery Partition Not Showing in My Computer | Find Missing Recovery Partition Easily
Fix recovery partition not showing in Windows. Learn why the partition is hidden or missing and how to view, repair, or recreate it safely.